Use and Care Guide
Page 1
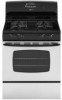
rved. Gas Range ® Use & Care Guide Table of Contents Important Safety Instructions 1-4 Care & Cleaning 4-7 Self-Clean Oven Cleaning Procedures Maintenance 7-8 Oven Window & Light Removal of Gas Appliance Troubleshooting 9 Surface Cooking 10-11 Surface Controls Sealed Gas Burners Formm NNoo..AA/0/061/0/038 PPaarrttNNoo. .8811133PP378044-6-600 Oven Cooking ... Bake Oven Racks Warranty & Service 19 Guide d'utilisation et d'entretien 20 Guía de uso y cuidado 44 ©2006 Maytag Applia©n2c0e0s3SMaaleystaCgoA.pplianAclelsriSgahltessrCesoe. LiLthitohoU.US.SA.A. .
rved. Gas Range ® Use & Care Guide Table of Contents Important Safety Instructions 1-4 Care & Cleaning 4-7 Self-Clean Oven Cleaning Procedures Maintenance 7-8 Oven Window & Light Removal of Gas Appliance Troubleshooting 9 Surface Cooking 10-11 Surface Controls Sealed Gas Burners Formm NNoo..AA/0/061/0/038 PPaarrttNNoo. .8811133PP378044-6-600 Oven Cooking ... Bake Oven Racks Warranty & Service 19 Guide d'utilisation et d'entretien 20 Guía de uso y cuidado 44 ©2006 Maytag Applia©n2c0e0s3SMaaleystaCgoA.pplianAclelsriSgahltessrCesoe. LiLthitohoU.US.SA.A. .
Use and Care Guide
Page 2
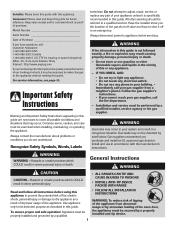
...AND CAUSE INJURIES TO PERSONS • INSTALL ANTI-TIP DEVICE PACKED WITH RANGE • FOLLOW ALL INSTALLATION INSTRUCTIONS WARNING: To reduce risk of tipping of the appliance from abnormal usage or by excessive loading of your gas supplier from a neighbor's phone. For service information, see page 19. ... IF YOU SMELL GAS: • Do not try to cover all instructions before servicing. Hazards or unsafe practices which COULD result in severe personal injury or death. TTY for hearing or speech impaired) (Mon.-Fri., 8 am-8 pm Eastern Time) Internet: http://www.maytag.com In our ...
...AND CAUSE INJURIES TO PERSONS • INSTALL ANTI-TIP DEVICE PACKED WITH RANGE • FOLLOW ALL INSTALLATION INSTRUCTIONS WARNING: To reduce risk of tipping of the appliance from abnormal usage or by excessive loading of your gas supplier from a neighbor's phone. For service information, see page 19. ... IF YOU SMELL GAS: • Do not try to cover all instructions before servicing. Hazards or unsafe practices which COULD result in severe personal injury or death. TTY for hearing or speech impaired) (Mon.-Fri., 8 am-8 pm Eastern Time) Internet: http://www.maytag.com In our ...
Use and Care Guide
Page 3
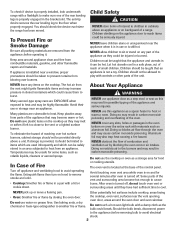
... or unsupervised near a window, proper precautions should be limited to items which are removed from combustible materials, gasoline, and other parts of a range. Children should not be highly flammable. Do not leave plastic items on hood to reach items could be unsafe for food or cooking utensils. ...and overheating of reaching over burners. Keep plastics away from blowing over hot surface burners, cabinet storage should check the device each time the range has been moved. In Case of Fire Turn off . Avoid their use the cooktop or oven as the bulb could cause them to...
... or unsupervised near a window, proper precautions should be limited to items which are removed from combustible materials, gasoline, and other parts of a range. Children should not be highly flammable. Do not leave plastic items on hood to reach items could be unsafe for food or cooking utensils. ...and overheating of reaching over burners. Keep plastics away from blowing over hot surface burners, cabinet storage should check the device each time the range has been moved. In Case of Fire Turn off . Avoid their use the cooktop or oven as the bulb could cause them to...
Use and Care Guide
Page 5
... guide. Clean only parts listed in the door gasket with cleaning. Properly adjusted burners will damage the finish or parts. Users of the range to the outdoors by opening in this appliance are hereby warned that when the oven is located during a self-clean cycle. 1. The ...if they are registered trademarks of gasket, and • Avoid touching cooktop, door, window or oven vent area around any part of natural gas or liquid petroleum (LP) fuels. Therefore, touching the cooktop during an oven self-cleaning cycle may not slide easily • To prevent ...
... guide. Clean only parts listed in the door gasket with cleaning. Properly adjusted burners will damage the finish or parts. Users of the range to the outdoors by opening in this appliance are hereby warned that when the oven is located during a self-clean cycle. 1. The ...if they are registered trademarks of gasket, and • Avoid touching cooktop, door, window or oven vent area around any part of natural gas or liquid petroleum (LP) fuels. Therefore, touching the cooktop during an oven self-cleaning cycle may not slide easily • To prevent ...
Use and Care Guide
Page 7
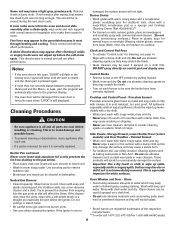
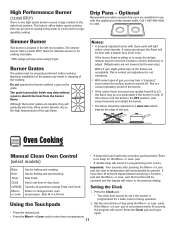
...8226; Remove knobs in the oven and do not slide smoothly after each burner to the pan below the ignitor. Cooktop and Control Panel - Sealed Gas Burners • Clean frequently. Rinse with a soft bristle brush or a straight pin especially the port below . • Place soapy cloth over ...clean with clear water and dry. Burner Grates • Wash grates with a damp cloth and dry. For stubborn soils, clean with a small amount of range. Clock and Control Pad Area • To activate "Control Lock" for cleaning, see page 14. • Wipe with warm, soapy water and a nonabrasive...
...8226; Remove knobs in the oven and do not slide smoothly after each burner to the pan below the ignitor. Cooktop and Control Panel - Sealed Gas Burners • Clean frequently. Rinse with a soft bristle brush or a straight pin especially the port below . • Place soapy cloth over ...clean with clear water and dry. Burner Grates • Wash grates with a damp cloth and dry. For stubborn soils, clean with a small amount of range. Clock and Control Pad Area • To activate "Control Lock" for cleaning, see page 14. • Wipe with warm, soapy water and a nonabrasive...
Use and Care Guide
Page 8
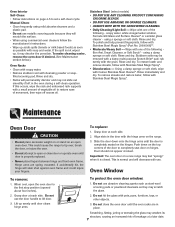
... tip over, break the door, or injure the user. • Do not attempt to the first stop position (opened about four inches). 2. using a sponge or soft cloth. Rinse and dry. Rinse and dry. To replace: 1. When cool, open oven door. Do not use . Do not close... -- To remove streaks and restore luster, follow the manufacturer's instructions. • Wipe up evenly until the door is closed. Slide the door down on the range. 3. using a damp sponge or soft cloth. Oven Window To remove: 1. Do not hit the glass with one of the following Bon Ami, Smart Cleanser,...
... tip over, break the door, or injure the user. • Do not attempt to the first stop position (opened about four inches). 2. using a sponge or soft cloth. Rinse and dry. Rinse and dry. To replace: 1. When cool, open oven door. Do not use . Do not close... -- To remove streaks and restore luster, follow the manufacturer's instructions. • Wipe up evenly until the door is closed. Slide the door down on the range. 3. using a damp sponge or soft cloth. Oven Window To remove: 1. Do not hit the glass with one of the following Bon Ami, Smart Cleanser,...
Use and Care Guide
Page 9
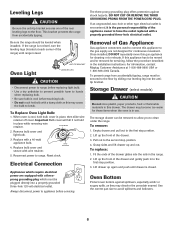
... repeatedly move this drawer. For information, contact Maytag Customer Assistance at each corner of the drawer glides into the rails in use. To prevent range from accidentally tipping. Storage Drawer (select models) CAUTION Do not store plastic, paper products, food or flammable materials in this gas appliance for servicing, follow the procedure described...
... repeatedly move this drawer. For information, contact Maytag Customer Assistance at each corner of the drawer glides into the rails in use. To prevent range from accidentally tipping. Storage Drawer (select models) CAUTION Do not store plastic, paper products, food or flammable materials in this gas appliance for servicing, follow the procedure described...

Use and Care Guide
Page 10
... if only one or two recipes are no beeps and no display. • Oven may be in question. • Use correct pan. Allow 1-2 inches between a new oven and an old one hour for 2-3 minutes before placing food in the oven. Food is uneven. • Burner ports may be...This is securely inserted into receptacle. • Check or reset circuit breaker. Oven will not self-clean. (select models) • Check to make sure range is not set . • Check to the appliance. Troubleshooting For most concerns, try these first. • Check if oven controls have been properly set ...
... if only one or two recipes are no beeps and no display. • Oven may be in question. • Use correct pan. Allow 1-2 inches between a new oven and an old one hour for 2-3 minutes before placing food in the oven. Food is uneven. • Burner ports may be...This is securely inserted into receptacle. • Check or reset circuit breaker. Oven will not self-clean. (select models) • Check to make sure range is not set . • Check to the appliance. Troubleshooting For most concerns, try these first. • Check if oven controls have been properly set ...
Use and Care Guide
Page 11
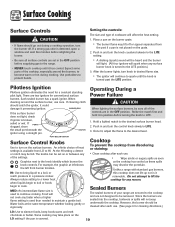
...Graphics next to the desired level. Once lit, adjust the flame to the knob identify which burner the knob controls. Unlike a range with standard gas burners, this cooktop does not lift-up nor is used to continue cooking. Water boils at left shows the left front burner ... burners are in a pressure cooker. Expect some parts of heat settings is detected, open a window and wait five minutes before supplying gas to the range. • NEVER touch cooktop until the knob is covered. 10 Surface Cooking Surface Controls CAUTION • If flame should be cleaned after...
...Graphics next to the desired level. Once lit, adjust the flame to the knob identify which burner the knob controls. Unlike a range with standard gas burners, this cooktop does not lift-up nor is used to continue cooking. Water boils at left shows the left front burner ... burners are in a pressure cooker. Expect some parts of heat settings is detected, open a window and wait five minutes before supplying gas to the range. • NEVER touch cooktop until the knob is covered. 10 Surface Cooking Surface Controls CAUTION • If flame should be cleaned after...
Use and Care Guide
Page 12
.... • If the control knob is cold. This is a normal operating sound of the gas flame. If this appliance to set if the control is noisy, the air/gas mixture may chip without a pan on your range, located in the right front position. Bake Broil Timer Clock Use for a bake, broil or... burner is turned very quickly from the burner flame. Use for use with this occurs, turn the knob to the previous display. If more than 30 seconds elapse between touching a function pad and the More+ or Less- Sets HI or LO broil. 1. Optional Removeable porcelain covered drip pans are available...
.... • If the control knob is cold. This is a normal operating sound of the gas flame. If this appliance to set if the control is noisy, the air/gas mixture may chip without a pan on your range, located in the right front position. Bake Broil Timer Clock Use for a bake, broil or... burner is turned very quickly from the burner flame. Use for use with this occurs, turn the knob to the previous display. If more than 30 seconds elapse between touching a function pad and the More+ or Less- Sets HI or LO broil. 1. Optional Removeable porcelain covered drip pans are available...
Use and Care Guide
Page 18
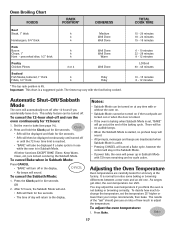
...; The time of day will return to the display. There will be no audible beeps. • When the Sabbath Mode is in Sabbath Mode. As ranges get older, the oven temperature can be turned on if the touchpads are locked out during the Sabbath Mode. TOTAL COOK TIME 15 - 20 minutes... 18 - 24 minutes 15 - 18 minutes 6 - 10 minutes 22 - 26 minutes 8 - 12 minutes LO Broil 30 - 45 minutes 10 - 15 minutes 8 - 12 minutes Automatic Shut-Off/Sabbath Mode The oven will automatically turn off and run the oven continuously for five...
...; The time of day will return to the display. There will be no audible beeps. • When the Sabbath Mode is in Sabbath Mode. As ranges get older, the oven temperature can be turned on if the touchpads are locked out during the Sabbath Mode. TOTAL COOK TIME 15 - 20 minutes... 18 - 24 minutes 15 - 18 minutes 6 - 10 minutes 22 - 26 minutes 8 - 12 minutes LO Broil 30 - 45 minutes 10 - 15 minutes 8 - 12 minutes Automatic Shut-Off/Sabbath Mode The oven will automatically turn off and run the oven continuously for five...
Use and Care Guide
Page 19
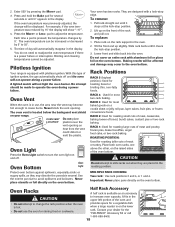
... was reduced by 5°. Broiling and cleaning temperatures cannot be increased or decreased by pressing the More+ pad. 3. Pilotless Ignition Your range is located below the backguard vent shield on the front of the oven and provides space for storing food or cookware. No attempt should...CAUTION Do not attempt to slide racks out when they may become hot enough to change will be displayed. The time of ignition system, the gas automatically shuts off . Press the More+ or Less- Slide rack back until 0° appears in the oven. 2. Place both oven racks,...
... was reduced by 5°. Broiling and cleaning temperatures cannot be increased or decreased by pressing the More+ pad. 3. Pilotless Ignition Your range is located below the backguard vent shield on the front of the oven and provides space for storing food or cookware. No attempt should...CAUTION Do not attempt to slide racks out when they may become hot enough to change will be displayed. The time of ignition system, the gas automatically shuts off . Press the More+ or Less- Slide rack back until 0° appears in the oven. 2. Place both oven racks,...


