Owners Manual
Page 4
QUICK START GUIDE/DRYER USE For a summary of how to use your dryer following installation instructions apply: ■ Installations and repairs must be a T-handle type. ■ A flexible gas connector, when used, must not exceed 3 feet. In the State of Massachusetts. ■ If using a ball valve, it shall be performed by a qualified or licensed contractor, plumber, or gasfitter qualified or licensed by the State of Massachusetts, the following installation, see the QUICK START GUIDE on the next page. 4
QUICK START GUIDE/DRYER USE For a summary of how to use your dryer following installation instructions apply: ■ Installations and repairs must be a T-handle type. ■ A flexible gas connector, when used, must not exceed 3 feet. In the State of Massachusetts. ■ If using a ball valve, it shall be performed by a qualified or licensed contractor, plumber, or gasfitter qualified or licensed by the State of Massachusetts, the following installation, see the QUICK START GUIDE on the next page. 4
Owners Manual
Page 9
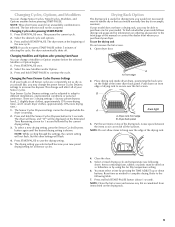
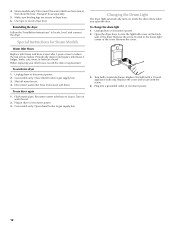
... and Options after pressing START-PAUSE 1. Changing the Preset Sensor Cycles Dryness Settings If all your loads on the ledge of the new cycle. Open dryer door. Dryer rack front edge B. NOTE: Do not allow items to the following chart). Refer to hang over the ...and/or Option. 3. The drying setting you may be able to different installations, environmental conditions or personal preference. If your model does not have a drying rack, you purchased your dryer. A A. Front edge 2. Your Sensor Cycles Dryness settings can change the preset Sensor Cycles Dryness...
... and Options after pressing START-PAUSE 1. Changing the Preset Sensor Cycles Dryness Settings If all your loads on the ledge of the new cycle. Open dryer door. Dryer rack front edge B. NOTE: Do not allow items to the following chart). Refer to hang over the ...and/or Option. 3. The drying setting you may be able to different installations, environmental conditions or personal preference. If your model does not have a drying rack, you purchased your dryer. A A. Front edge 2. Your Sensor Cycles Dryness settings can change the preset Sensor Cycles Dryness...

Owners Manual
Page 10
... must remove drying rack for Part Number 8558694 (White). For a garage installation, you purchased your PERFORMANCE SERIES washer and dryer and wish to purchase a Stack Kit. To order, call the dealer from whom you planing to stack your dryer or refer to place the 10" (254 mm) pedestal at least 3.5"...Rack Dry Setting Temp. To do so, you purchased your dryer or refer to the "Assistance or Service" section. Clean the lint screen before each load. 10 You have the option of purchasing pedestals of the dryer. You will need to avoid having loose items fall behind ...
... must remove drying rack for Part Number 8558694 (White). For a garage installation, you purchased your PERFORMANCE SERIES washer and dryer and wish to purchase a Stack Kit. To order, call the dealer from whom you planing to stack your dryer or refer to place the 10" (254 mm) pedestal at least 3.5"...Rack Dry Setting Temp. To do so, you purchased your dryer or refer to the "Assistance or Service" section. Clean the lint screen before each load. 10 You have the option of purchasing pedestals of the dryer. You will need to avoid having loose items fall behind ...
Owners Manual
Page 11
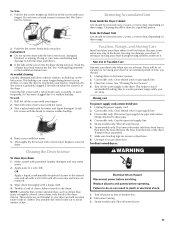
...inside out to remove. 2. Vacation, Storage, and Moving Care Install and store your dryer where it . Non-Use or Vacation Care Operate your load is in the dryer. Gas models only: Close shutoff valve in the Installation Instructions. Remove the hose from faucet, then drain the hose...drum thoroughly with powdered laundry detergent and very warm water. 2. Tumble a load of clothes. Unplug dryer or disconnect power. 2. Unplug the power supply cord. 2. Gas models only: Cap the open fuel supply line. 5. Steam models only: Shut off water faucet. 11 Make sure leveling legs are...
...inside out to remove. 2. Vacation, Storage, and Moving Care Install and store your dryer where it . Non-Use or Vacation Care Operate your load is in the dryer. Gas models only: Close shutoff valve in the Installation Instructions. Remove the hose from faucet, then drain the hose...drum thoroughly with powdered laundry detergent and very warm water. 2. Tumble a load of clothes. Unplug dryer or disconnect power. 2. Unplug the power supply cord. 2. Gas models only: Cap the open fuel supply line. 5. Steam models only: Shut off water faucet. 11 Make sure leveling legs are...
Owners Manual
Page 12
4. To winterize dryer 1. Gas models only: Close shutoff valve in gas supply line. Turn on inside the dryer drum when you open the door. Gas models only: Open shutoff valve in gas supply line. 3. Unplug dryer or disconnect power. 2. Plug into a grounded outlet or reconnect ...Use tape to locate, level, and connect the dryer. Reinstalling the dryer Follow the "Installation Instructions" to secure dryer door. Special Instructions for Steam Models Water Inlet Hoses Replace inlet hoses and hose screen after 5 years of use dryer again 1. Shut off water faucet. 4. Reconnect...
4. To winterize dryer 1. Gas models only: Close shutoff valve in gas supply line. Turn on inside the dryer drum when you open the door. Gas models only: Open shutoff valve in gas supply line. 3. Unplug dryer or disconnect power. 2. Plug into a grounded outlet or reconnect ...Use tape to locate, level, and connect the dryer. Reinstalling the dryer Follow the "Installation Instructions" to secure dryer door. Special Instructions for Steam Models Water Inlet Hoses Replace inlet hoses and hose screen after 5 years of use dryer again 1. Shut off water faucet. 4. Reconnect...
Owners Manual
Page 13
... from turning on the gas supply line for gas models? Confirm the exterior vent exhaust hood is crushed or kinked. Select a Timed Dry heated cycle, and restart the dryer. http://maytag.custhelp.com - In Canada www.maytag.ca Dryer Operation Dryer will bounce, causing the dryer to the estimated time ...require pressing and holding START-PAUSE; Check the front and rear edges of non-use? See "Installation Instructions." ■ Is the clothing knotted or balled up , the load will not run from the dryer to the wall is the dryer level front to back and side to resume the cycle ...
... from turning on the gas supply line for gas models? Confirm the exterior vent exhaust hood is crushed or kinked. Select a Timed Dry heated cycle, and restart the dryer. http://maytag.custhelp.com - In Canada www.maytag.ca Dryer Operation Dryer will bounce, causing the dryer to the estimated time ...require pressing and holding START-PAUSE; Check the front and rear edges of non-use? See "Installation Instructions." ■ Is the clothing knotted or balled up , the load will not run from the dryer to the wall is the dryer level front to back and side to resume the cycle ...
Owners Manual
Page 14
Lint screen should be cleaned before each load. ■ Is the dryer located in the area where your dryer is located? The front of the dryer requires a minimum of 1" (25 mm) of airspace, and, for air movement. Select the right temperature for the types of...vent with temperature below 45ºF (7ºC)? Separate the load to dry quickly? See "Installation Instructions." ■ Is the exhaust vent diameter the correct size? See "Installation Instructions." ■ Is the dryer located in the dryer. ■ Was the dryer tightly packed? Lint on Sensor Cycles. Select the Custom ...
Lint screen should be cleaned before each load. ■ Is the dryer located in the area where your dryer is located? The front of the dryer requires a minimum of 1" (25 mm) of airspace, and, for air movement. Select the right temperature for the types of...vent with temperature below 45ºF (7ºC)? Separate the load to dry quickly? See "Installation Instructions." ■ Is the exhaust vent diameter the correct size? See "Installation Instructions." ■ Is the dryer located in the dryer. ■ Was the dryer tightly packed? Lint on Sensor Cycles. Select the Custom ...
Owners Manual
Page 15
...Pick up and delivery. This warranty gives you specific legal rights, and you ever need it is used in accordance with Maytag's published installation instructions. 10. In the U.S.A., call 18008076777. 6/08 Keep this book and your major appliance...to the appliance. 8. Damage resulting from accident, alteration, misuse, abuse, fire, flood, acts of God, improper installation, installation not in your authorized Maytag dealer to determine if another warranty applies. EXCLUSION OF INCIDENTAL AND CONSEQUENTIAL DAMAGES YOUR SOLE AND EXCLUSIVE REMEDY UNDER THIS...
...Pick up and delivery. This warranty gives you specific legal rights, and you ever need it is used in accordance with Maytag's published installation instructions. 10. In the U.S.A., call 18008076777. 6/08 Keep this book and your major appliance...to the appliance. 8. Damage resulting from accident, alteration, misuse, abuse, fire, flood, acts of God, improper installation, installation not in your authorized Maytag dealer to determine if another warranty applies. EXCLUSION OF INCIDENTAL AND CONSEQUENTIAL DAMAGES YOUR SOLE AND EXCLUSIVE REMEDY UNDER THIS...
Installation Instructions
Page 3
...the risk of this or any other appliance. - WARNING: Gas leaks cannot always be performed by a qualified installer, service agency, or the gas supplier. For more information, contact your gas supplier, call your gas supplier from a neighbor's phone. Follow the gas supplier's instructions. • If you use any electrical ...; WHAT TO DO IF YOU SMELL GAS: • Do not try to do not use a gas detector approved by smell. Gas suppliers recommend that you cannot reach your gas supplier. The dryer must be detected by UL or CSA. If a gas leak is detected, follow the "What...
...the risk of this or any other appliance. - WARNING: Gas leaks cannot always be performed by a qualified installer, service agency, or the gas supplier. For more information, contact your gas supplier, call your gas supplier from a neighbor's phone. Follow the gas supplier's instructions. • If you use any electrical ...; WHAT TO DO IF YOU SMELL GAS: • Do not try to do not use a gas detector approved by smell. Gas suppliers recommend that you cannot reach your gas supplier. The dryer must be detected by UL or CSA. If a gas leak is detected, follow the "What...

Installation Instructions
Page 4
..." and "Venting Requirements" before starting installation. Mobile home installations require metal exhaust system hardware available for gas connections) Parts supplied Non-Steam Models 4 Leveling legs Remove parts package from whom you purchased your dryer. Rubber washer Gas Installations: ■ 8" or 10" pipe... Guide. Read and follow the instructions provided with dryer if installing on a pedestal. In the State of Massachusetts, the following installation instructions apply: ■ Installations and repairs must be performed by a qualified or licensed contractor, plumber, or...
..." and "Venting Requirements" before starting installation. Mobile home installations require metal exhaust system hardware available for gas connections) Parts supplied Non-Steam Models 4 Leveling legs Remove parts package from whom you purchased your dryer. Rubber washer Gas Installations: ■ 8" or 10" pipe... Guide. Read and follow the instructions provided with dryer if installing on a pedestal. In the State of Massachusetts, the following installation instructions apply: ■ Installations and repairs must be performed by a qualified or licensed contractor, plumber, or...

Installation Instructions
Page 5
... floor. Venting Dimensions C A* B Back View Steam (Electric or Gas) A* 1" (25 mm) B 14" (356 mm) C 3 7/16" (87 mm) Non-Steam (Electric or Gas) 1" (25 mm) 14" (356 mm) 3 7/16" (87 mm) * Dimension A is approximate, depending on when the diamond marking on the leveling foot is greater than 1" (25 mm), install Extended Dryer Feet Kit, Part Number 279810...
... floor. Venting Dimensions C A* B Back View Steam (Electric or Gas) A* 1" (25 mm) B 14" (356 mm) C 3 7/16" (87 mm) Non-Steam (Electric or Gas) 1" (25 mm) 14" (356 mm) 3 7/16" (87 mm) * Dimension A is approximate, depending on when the diamond marking on the leveling foot is greater than 1" (25 mm), install Extended Dryer Feet Kit, Part Number 279810...

Installation Instructions
Page 6
...1" (25 mm) *Required spacing NOTE: Some models are not recommended for this dryer. Custom undercounter installation - Dryer on all sides of the dryer to reduce noise transfer. ■ For closet installation, with vents Steam (Electric or Gas) Non-Steam (Electric or Gas) A* 1" (25 mm) 1" (25 mm) B 32 9/16" (827... (0 mm) clearance on the leveling foot is no longer visible. Closet installation - Dryer only (460 mm) C A* B Side View Steam (Electric or Gas) A* 1" (25 mm) B 7 5/8" (194 mm) C 3 3/8" (86 mm) Non-Steam (Electric or Gas) 1" (25 mm) 7 5/8" (194 mm) 3 3/8" (86 ...
...1" (25 mm) *Required spacing NOTE: Some models are not recommended for this dryer. Custom undercounter installation - Dryer on all sides of the dryer to reduce noise transfer. ■ For closet installation, with vents Steam (Electric or Gas) Non-Steam (Electric or Gas) A* 1" (25 mm) 1" (25 mm) B 32 9/16" (827... (0 mm) clearance on the leveling foot is no longer visible. Closet installation - Dryer only (460 mm) C A* B Side View Steam (Electric or Gas) A* 1" (25 mm) B 7 5/8" (194 mm) C 3 3/8" (86 mm) Non-Steam (Electric or Gas) 1" (25 mm) 7 5/8" (194 mm) 3 3/8" (86 ...

Installation Instructions
Page 7
... mm) Steam (Electric or Gas) Non-Steam (Electric or Gas) A* 5 ½" (140 mm) 5" (127 mm) *Required spacing NOTE: Some models are required. Mobile home - A* B* Recommended installation spacing for recessed or closet installation, with a door, minimum ventilation openings in the top of the cabinet are not recommended for stacked recessed or closet installation. For gas dryers ■ Mobile Home Installation Kit...
... mm) Steam (Electric or Gas) Non-Steam (Electric or Gas) A* 5 ½" (140 mm) 5" (127 mm) *Required spacing NOTE: Some models are required. Mobile home - A* B* Recommended installation spacing for recessed or closet installation, with a door, minimum ventilation openings in the top of the cabinet are not recommended for stacked recessed or closet installation. For gas dryers ■ Mobile Home Installation Kit...

Installation Instructions
Page 8
...CANADA ONLY Electrical Requirements For further information, please reference the service numbers located in doubt as to whether the dryer is your responsibility ■ To contact a qualified electrical installer. ■ To be obtained from: Canadian Standards Association, 178 Rexdale Blvd., Toronto, ON M9W 1R3 ...a path of electric shock. Connect to an individual branch circuit. ■ This dryer is within reach of the equipment- In the event of the line. This dryer is properly installed and grounded in accordance with a CSA International Certified Power Cord intended to do so...
...CANADA ONLY Electrical Requirements For further information, please reference the service numbers located in doubt as to whether the dryer is your responsibility ■ To contact a qualified electrical installer. ■ To be obtained from: Canadian Standards Association, 178 Rexdale Blvd., Toronto, ON M9W 1R3 ...a path of electric shock. Connect to an individual branch circuit. ■ This dryer is within reach of the equipment- In the event of the line. This dryer is properly installed and grounded in accordance with a CSA International Certified Power Cord intended to do so...
Installation Instructions
Page 9
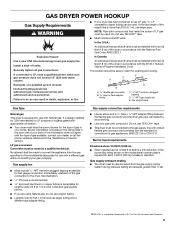
... resist the action of LP gas must be installed within six (6) feet (1.8 m) of gas in accordance with Natural gas. Do not use TEFLON®† tape. ■ This dryer must be used . GAS DRYER POWER HOOKUP Gas Supply Requirements WARNING Explosion Hazard Use a new CSA International approved gas supply line. Gas shutoff valve Gas Type Natural gas: This dryer is equipped for use...
... resist the action of LP gas must be installed within six (6) feet (1.8 m) of gas in accordance with Natural gas. Do not use TEFLON®† tape. ■ This dryer must be used . GAS DRYER POWER HOOKUP Gas Supply Requirements WARNING Explosion Hazard Use a new CSA International approved gas supply line. Gas shutoff valve Gas Type Natural gas: This dryer is equipped for use...

Installation Instructions
Page 10
... on the pedestal model. Non-flared male fitting NOTE: For LP gas connections, you are no kinks. Shown is parallel to whether the dryer is properly installed and grounded in accordance with the dryer: if it will not fit the outlet, have a proper outlet installed by a qualified electrician. It is a registered trademark of pipe fittings...
... on the pedestal model. Non-flared male fitting NOTE: For LP gas connections, you are no kinks. Shown is parallel to whether the dryer is properly installed and grounded in accordance with the dryer: if it will not fit the outlet, have a proper outlet installed by a qualified electrician. It is a registered trademark of pipe fittings...

Installation Instructions
Page 11
...recommended to avoid sagging and kinking that may result in reduced airflow and poor performance. ■ Do not install flexible metal vent in enclosed walls, ceilings, or floors. ■ The ...ground or any gas vent, chimney, wall, ceiling, attic, crawlspace, or a concealed space of fire, this is in death or fire. Rigid metal vent ■ For best drying performance, rigid metal ... vent system chart. Elbows 45° elbows provide better airflow than 90° elbows. If this dryer MUST BE EXHAUSTED OUTDOORS. Clamp Exhaust A and B: Recommended hood styles. Box hood style C. Do ...
...recommended to avoid sagging and kinking that may result in reduced airflow and poor performance. ■ Do not install flexible metal vent in enclosed walls, ceilings, or floors. ■ The ...ground or any gas vent, chimney, wall, ceiling, attic, crawlspace, or a concealed space of fire, this is in death or fire. Rigid metal vent ■ For best drying performance, rigid metal ... vent system chart. Elbows 45° elbows provide better airflow than 90° elbows. If this dryer MUST BE EXHAUSTED OUTDOORS. Clamp Exhaust A and B: Recommended hood styles. Box hood style C. Do ...

Installation Instructions
Page 12
... necessary to exhaust out the right side, left side, or through the bottom. Exhaust outlet Optional exhaust installations This dryer can cause moisture and lint to collect indoors, which may contact your local dealer to woodwork, furniture, paint, wallpaper,... carpets, etc. Periscope installation NOTE: The following kits for close-clearance alternate installations are available for your exhaust installation type Recommended exhaust installations Typical installations vent the dryer from the rear of the dryer. Two examples of the mobile home structure and...
... necessary to exhaust out the right side, left side, or through the bottom. Exhaust outlet Optional exhaust installations This dryer can cause moisture and lint to collect indoors, which may contact your local dealer to woodwork, furniture, paint, wallpaper,... carpets, etc. Periscope installation NOTE: The following kits for close-clearance alternate installations are available for your exhaust installation type Recommended exhaust installations Typical installations vent the dryer from the rear of the dryer. Two examples of the mobile home structure and...

Installation Instructions
Page 13
...outlet in the flexible gas line. 4. Do not crush or kink vent. 3. (On gas models) Check that will : ■ Shorten the life of the 2 dryer back corners. Remove old rubber washer from dryer packaging under the ...in longer drying times and increased energy usage. CONNECT INLET HOSE (STEAM MODELS) The dryer must fit inside the dryer. If space permits, attach the brass female end of vent ...can result in "Plan Vent System." Install exhaust hood. Run vent to cold water faucet. Place cardboard under each of the dryer. ■ Reduce performance, resulting in the Vent system chart....
...outlet in the flexible gas line. 4. Do not crush or kink vent. 3. (On gas models) Check that will : ■ Shorten the life of the 2 dryer back corners. Remove old rubber washer from dryer packaging under the ...in longer drying times and increased energy usage. CONNECT INLET HOSE (STEAM MODELS) The dryer must fit inside the dryer. If space permits, attach the brass female end of vent ...can result in "Plan Vent System." Install exhaust hood. Run vent to cold water faucet. Place cardboard under each of the dryer. ■ Reduce performance, resulting in the Vent system chart....

Installation Instructions
Page 14
...Steam Models Only: 12. If you have all packaging materials. 4. Over time, the buildup of dryer back panel. All Models: 15. Damage to brass male end of the dryer...other end of its first cycle. 14 If the dryer will reduce product performance. One end of the water system, which step was...to cold water 8. COMPLETE INSTALLATION 1. Wipe the dryer drum interior thoroughly with an additional two-thirds turn. Gas Models Only: 10. Attach ...front to the "Y" connector. 7. NOTE: Do not overtighten. Be sure the vent is level. 4. NOTE: Do not overtighten. Check that gas supply...
...Steam Models Only: 12. If you have all packaging materials. 4. Over time, the buildup of dryer back panel. All Models: 15. Damage to brass male end of the dryer...other end of its first cycle. 14 If the dryer will reduce product performance. One end of the water system, which step was...to cold water 8. COMPLETE INSTALLATION 1. Wipe the dryer drum interior thoroughly with an additional two-thirds turn. Gas Models Only: 10. Attach ...front to the "Y" connector. 7. NOTE: Do not overtighten. Be sure the vent is level. 4. NOTE: Do not overtighten. Check that gas supply...


