
Owners Manual
Page 2
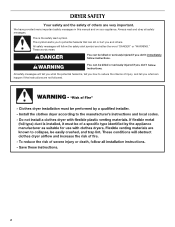
... messages will tell you what the potential hazard is the safety alert symbol. WARNING You can kill or hurt you and others are not followed. 2 DRYER SAFETY Your safety and the safety of injury, and tell you what can be killed or seriously injured if you don't follow instructions. We have...
... messages will tell you what the potential hazard is the safety alert symbol. WARNING You can kill or hurt you and others are not followed. 2 DRYER SAFETY Your safety and the safety of injury, and tell you what can be killed or seriously injured if you don't follow instructions. We have...
Owners Manual
Page 3
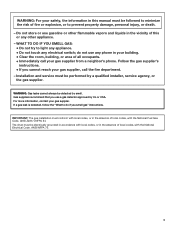
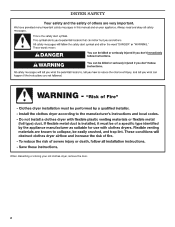
...; Do not try to prevent property damage, personal injury, or death. - WARNING: Gas leaks cannot always be performed by smell. Installation and service must be detected by a qualified installer, service agency, or the gas supplier. The dryer must be electrically grounded in accordance with local codes, or in the absence of local codes...
...; Do not try to prevent property damage, personal injury, or death. - WARNING: Gas leaks cannot always be performed by smell. Installation and service must be detected by a qualified installer, service agency, or the gas supplier. The dryer must be electrically grounded in accordance with local codes, or in the absence of local codes...
Owners Manual
Page 4
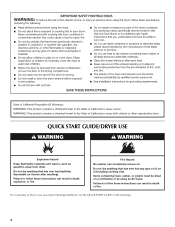
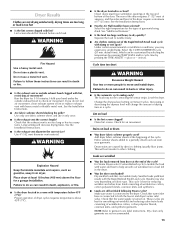
... result in death or fire. For a summary of oil on it (including cooking oils). QUICK START GUIDE/DRYER USE WARNING WARNING Explosion Hazard Keep flammable materials and vapors, such as gasoline, away from dryer. Failure to follow these instructions can completely remove oil. Do not dry anything flammable on it (even after... had anything that has ever had any type of how to follow these instructions can result in death, explosion, or fire. Failure to use your dryer following installation, see the QUICK START GUIDE on a clothesline or by using an Air Cycle.
... result in death or fire. For a summary of oil on it (including cooking oils). QUICK START GUIDE/DRYER USE WARNING WARNING Explosion Hazard Keep flammable materials and vapors, such as gasoline, away from dryer. Failure to follow these instructions can completely remove oil. Do not dry anything flammable on it (even after... had anything that has ever had any type of how to follow these instructions can result in death, explosion, or fire. Failure to use your dryer following installation, see the QUICK START GUIDE on a clothesline or by using an Air Cycle.
Owners Manual
Page 5
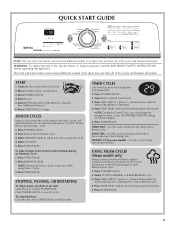
... drying time. Press POWER/CANCEL to the Dryness and/or Options during an Automatic Cycle: 1. Use this cycle to reduce wrinkles and odors in dryer and shut door. 3. Select CUSTOM REFRESH or RAPID REFRESH cycle. 3. Press START/PAUSE to desired Timed Cycle. 3. RAPID DRY - Press START...cycle if items are still damp after a Sensor cycle. START 1. See "Additional Features." 6. Press START/PAUSE. 2. To restart the dryer Close the door. Your dryer may not have all of load, and adjust Dryness Level for Custom Refresh cycle. 4. Press START/PAUSE. 5 Clean the lint screen ...
... drying time. Press POWER/CANCEL to the Dryness and/or Options during an Automatic Cycle: 1. Use this cycle to reduce wrinkles and odors in dryer and shut door. 3. Select CUSTOM REFRESH or RAPID REFRESH cycle. 3. Press START/PAUSE to desired Timed Cycle. 3. RAPID DRY - Press START...cycle if items are still damp after a Sensor cycle. START 1. See "Additional Features." 6. Press START/PAUSE. 2. To restart the dryer Close the door. Your dryer may not have all of load, and adjust Dryness Level for Custom Refresh cycle. 4. Press START/PAUSE. 5 Clean the lint screen ...
Owners Manual
Page 6
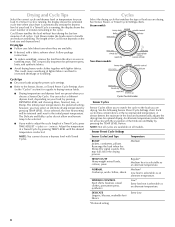
...* Extra-low heat is automatically sensing the dryness level of the Cool Down depends on all cycles are drying. The length of your dryer is selectable as tumbling stops. This is especially important for permanent press, knits, and synthetic fabrics. ■ Avoid drying heavy work ...are available. ■ If desired, add a fabric softener sheet. Follow package instructions. ■ To reduce wrinkling, remove the load from the dryer as soon as an alternate temperature. Cycle tips ■ Dry most loads using the preset cycle settings. ■ Refer to the Sensor, Steam...
...* Extra-low heat is automatically sensing the dryness level of the Cool Down depends on all cycles are drying. The length of your dryer is selectable as tumbling stops. This is especially important for permanent press, knits, and synthetic fabrics. ■ Avoid drying heavy work ...are available. ■ If desired, add a fabric softener sheet. Follow package instructions. ■ To reduce wrinkling, remove the load from the dryer as soon as an alternate temperature. Cycle tips ■ Dry most loads using the preset cycle settings. ■ Refer to the Sensor, Steam...

Owners Manual
Page 7
...hand periodically during the cycle. ■ Dry item completely. In this cycle, a small amount of water is sprayed into the dryer drum after several minutes of one alternate temperature may be changed without stopping the cycle. The initial preset temperature is not recommended with ...ADJUST + (plus) or - (minus). The dry time and temperature can be adjusted for the Timed Cycles. NOTE: Overloading the dryer may cause temporary staining on some models) Helps to smooth out wrinkles Additional Features Sensor Cycle Modifiers Use the DRYNESS LEVEL button to ...
...hand periodically during the cycle. ■ Dry item completely. In this cycle, a small amount of water is sprayed into the dryer drum after several minutes of one alternate temperature may be changed without stopping the cycle. The initial preset temperature is not recommended with ...ADJUST + (plus) or - (minus). The dry time and temperature can be adjusted for the Timed Cycles. NOTE: Overloading the dryer may cause temporary staining on some models) Helps to smooth out wrinkles Additional Features Sensor Cycle Modifiers Use the DRYNESS LEVEL button to ...
Owners Manual
Page 8
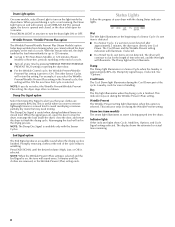
...item is available only with the drying Status indicator lights. For example, if you do not select the Wrinkle Prevent/Wrinkle Prevent Plus setting, the dryer stops after approximately 5 minutes, the dryer goes directly into the drum. Damp Dry Signal option Select the Damp Dry Signal to stop the...(Plus) setting ends. NOTE: When the Wrinkle Prevent (Plus) setting is selected and the End Signal is on the light inside the dryer, close the door, and restart the dryer to 90 (Non-Steam Models) or 120 minutes (Steam Models) of heat-free, periodic tumbling at the end of your clothes are...
...item is available only with the drying Status indicator lights. For example, if you do not select the Wrinkle Prevent/Wrinkle Prevent Plus setting, the dryer stops after approximately 5 minutes, the dryer goes directly into the drum. Damp Dry Signal option Select the Damp Dry Signal to stop the...(Plus) setting ends. NOTE: When the Wrinkle Prevent (Plus) setting is selected and the End Signal is on the light inside the dryer, close the door, and restart the dryer to 90 (Non-Steam Models) or 120 minutes (Steam Models) of heat-free, periodic tumbling at the end of your clothes are...
Owners Manual
Page 9
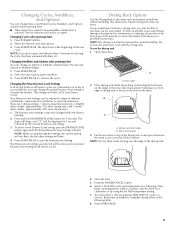
...Changing Modifiers and Options after pressing Start 1. This change will be dried on front edge of drying rack to the front page of the dryer. To select a new Dryness Level setting, press the DRYNESS LEVEL button again until the desired Dryness Level setting is running. 2. NOTE: ...edge B. Press the POWER/CANCEL button. 6. Press START/PAUSE. 9 Select the desired cycle and options. 3. You must be displayed for your dryer. Open dryer door. Press START/PAUSE. Your Dryness Level settings can reach all of your model does not have a drying rack, you may be able to...
...Changing Modifiers and Options after pressing Start 1. This change will be dried on front edge of drying rack to the front page of the dryer. To select a new Dryness Level setting, press the DRYNESS LEVEL button again until the desired Dryness Level setting is running. 2. NOTE: ...edge B. Press the POWER/CANCEL button. 6. Press START/PAUSE. 9 Select the desired cycle and options. 3. You must be displayed for your dryer. Open dryer door. Press START/PAUSE. Your Dryness Level settings can reach all of your model does not have a drying rack, you may be able to...
Owners Manual
Page 10
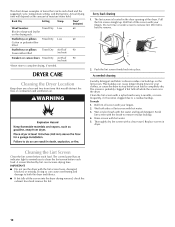
... if lint falls off screen with the brush to remove. 2. To wash 1. Clean the lint screen with a clean towel. Replace screen in the dryer. Rack Dry Setting Temp. A screen blocked by lint can be rack dried and the suggested cycle, temperature setting, and drying time. Wet lint is... in dryer. Roll lint off while the screen is hard to remove residue buildup. 4. This chart shows examples of combustion and ventilation air. Every load cleaning...
... if lint falls off screen with the brush to remove. 2. To wash 1. Clean the lint screen with a clean towel. Replace screen in the dryer. Rack Dry Setting Temp. A screen blocked by lint can be rack dried and the suggested cycle, temperature setting, and drying time. Wet lint is... in dryer. Roll lint off while the screen is hard to remove residue buildup. 4. This chart shows examples of combustion and ventilation air. Every load cleaning...

Owners Manual
Page 11
...Lint should be done by a qualified person. Vacation or Storage Care Operate your dryer and will not freeze. Gas Models: Close shutoff valve in dryer or reconnect power. 11 For direct-wired dryers: WARNING Electrical Shock Hazard Disconnect power before operating. Disconnect wiring. 3. Steam models... the water inlet hose from faucet, then drain the hose. To winterize dryer 1. Reconnect water inlet hose to secure dryer door. Plug in gas supply line. 3. These stains are not harmful to the dryer. Vacation, Storage, and Moving Care Install and store your inlet hoses,...
...Lint should be done by a qualified person. Vacation or Storage Care Operate your dryer and will not freeze. Gas Models: Close shutoff valve in dryer or reconnect power. 11 For direct-wired dryers: WARNING Electrical Shock Hazard Disconnect power before operating. Disconnect wiring. 3. Steam models... the water inlet hose from faucet, then drain the hose. To winterize dryer 1. Reconnect water inlet hose to secure dryer door. Plug in gas supply line. 3. These stains are not harmful to the dryer. Vacation, Storage, and Moving Care Install and store your inlet hoses,...

Owners Manual
Page 12
... simply pressing START/PAUSE; Plug in the lower right corner of non-use 2 household fuses or circuit breakers. In Canada www.maytag.ca Dryer Operation ■ Is the clothing knotted or balled up , the load will not run length and number of the...Frequently Asked Questions) to resume the cycle by a power failure? If the problem continues, call ... Clean out pockets before laundering. ■ Is it a gas dryer? Confirm the exterior vent exhaust hood is free of a service call an electrician. ■ Is the correct power supply available? There may be a problem ...
... simply pressing START/PAUSE; Plug in the lower right corner of non-use 2 household fuses or circuit breakers. In Canada www.maytag.ca Dryer Operation ■ Is the clothing knotted or balled up , the load will not run length and number of the...Frequently Asked Questions) to resume the cycle by a power failure? If the problem continues, call ... Clean out pockets before laundering. ■ Is it a gas dryer? Confirm the exterior vent exhaust hood is free of a service call an electrician. ■ Is the correct power supply available? There may be a problem ...
Owners Manual
Page 13
... to a partially dried load can tumble freely. Dry smaller loads that the water supply is best for reducing wrinkles and odors from dryer at the beginning of garments being dried. Check that can stain your hand under the outside exhaust hood clogged with lint, restricting air...replace exhaust vent with temperature below 45ºF (7ºC)? Do not use a plastic vent. default time), which can result in the dryer. ■ Was the dryer overloaded? Clean lint screen. Closet doors must have ventilation openings at the top and bottom of 1" (25 mm). Smaller loads yield ...
... to a partially dried load can tumble freely. Dry smaller loads that the water supply is best for reducing wrinkles and odors from dryer at the beginning of garments being dried. Check that can stain your hand under the outside exhaust hood clogged with lint, restricting air...replace exhaust vent with temperature below 45ºF (7ºC)? Do not use a plastic vent. default time), which can result in the dryer. ■ Was the dryer overloaded? Clean lint screen. Closet doors must have ventilation openings at the top and bottom of 1" (25 mm). Smaller loads yield ...
Owners Manual
Page 14
... from the date of purchase, when this major appliance is located? MAYTAG® LAUNDRY WARRANTY LIMITED WARRANTY For one year from the date of purchase. 6. Service must provide proof of purchase or installation date for product service if your dryer is operated and maintained according to instructions attached to province. Damage resulting...
... from the date of purchase, when this major appliance is located? MAYTAG® LAUNDRY WARRANTY LIMITED WARRANTY For one year from the date of purchase. 6. Service must provide proof of purchase or installation date for product service if your dryer is operated and maintained according to instructions attached to province. Damage resulting...

Warranty Information
Page 1
...may not apply to both the faucet and dryer's water inlet valve. If outside the 50 United States and Canada, contact your dryer is used for factory specified parts and repair labor to correct defects in accordance with Maytag's published installation instructions. 10. You can...ITEMS EXCLUDED FROM WARRANTY This limited warranty does not cover: 1. Damage resulting from loads consisting of products not approved by a Maytag designated service company. This cycle is not installed in an inaccessible location or is best for inwarranty service. The removal and ...
...may not apply to both the faucet and dryer's water inlet valve. If outside the 50 United States and Canada, contact your dryer is used for factory specified parts and repair labor to correct defects in accordance with Maytag's published installation instructions. 10. You can...ITEMS EXCLUDED FROM WARRANTY This limited warranty does not cover: 1. Damage resulting from loads consisting of products not approved by a Maytag designated service company. This cycle is not installed in an inaccessible location or is best for inwarranty service. The removal and ...

Dimension Guide
Page 1
Louvered doors with elbow. W10388777 06/2011 Gas Dryer PRODUCT MODEL NUMBERS MGDB200V, MGDB400V, MGDB700V, MGDB800V, MGDB850W Dryer with extended back: Dryer with flat back: Back view: Bottom view: Recommended Installation Spacing: NOTE: Most installations require a minimum of installation and... area or closet installation All dimensions show recommended spacing allowed, with tested spacing of 0" (0 mm) clearance on all sides of the dryer to reduce noise transfer. ■■ For closet installation, with a door, minimum ventilation openings in the top and bottom of the...
Louvered doors with elbow. W10388777 06/2011 Gas Dryer PRODUCT MODEL NUMBERS MGDB200V, MGDB400V, MGDB700V, MGDB800V, MGDB850W Dryer with extended back: Dryer with flat back: Back view: Bottom view: Recommended Installation Spacing: NOTE: Most installations require a minimum of installation and... area or closet installation All dimensions show recommended spacing allowed, with tested spacing of 0" (0 mm) clearance on all sides of the dryer to reduce noise transfer. ■■ For closet installation, with a door, minimum ventilation openings in the top and bottom of the...

Dimension Guide
Page 2
...gas. Maytag Vent System Chart Number of 90° elbows Type of vent Box/louvered hoods Angled hoods 0 Rigid metal 100 ft. (30.5 m) 94 ft. (28.7 m) 1 Rigid metal 90 ft. (27.4 m) 84 ft. (25.6 m) 2 Rigid metal 80 ft. (24.4 m) 74 ft. (22.6 m) 3 Rigid metal 71 ft. (21.6 m) 65 ft. (19.8 m) 4 Rigid metal 63 ft. (19.2 m) 57 ft... to the charts. Do not overtighten. To determine maximum exhaust length, add one 90° turn inside the dryer. When acceptable to change materials and specifications without notice. Pipe-joint compounds resistant to avoid kinking. ■■...
...gas. Maytag Vent System Chart Number of 90° elbows Type of vent Box/louvered hoods Angled hoods 0 Rigid metal 100 ft. (30.5 m) 94 ft. (28.7 m) 1 Rigid metal 90 ft. (27.4 m) 84 ft. (25.6 m) 2 Rigid metal 80 ft. (24.4 m) 74 ft. (22.6 m) 3 Rigid metal 71 ft. (21.6 m) 65 ft. (19.8 m) 4 Rigid metal 63 ft. (19.2 m) 57 ft... to the charts. Do not overtighten. To determine maximum exhaust length, add one 90° turn inside the dryer. When acceptable to change materials and specifications without notice. Pipe-joint compounds resistant to avoid kinking. ■■...
Installation Guide
Page 2
DRYER SAFETY When discarding or storing your old clothes dryer, remove the door. 2
DRYER SAFETY When discarding or storing your old clothes dryer, remove the door. 2
Installation Guide
Page 4
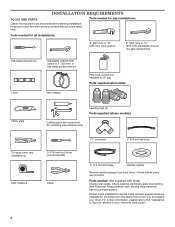
...joint compound resistant to the "Assistance or Service" section in your dryer. Parts needed for gas installations: Gather the required tools and parts before purchasing parts. For further information, please refer to LP gas Parts supplied (all parts are included. See "Electrical Requirements" ...5' (1.5 m) Inlet Hose Rubber washer Remove parts package from whom you purchased your "Use and Care Guide". 4 Read and follow the instructions provided with dryer) Check local codes. Tools needed for all installations: 8" (203 mm) or 10" (254 mm) pipe wrench 8" (203 mm) or 10" ...
...joint compound resistant to the "Assistance or Service" section in your dryer. Parts needed for gas installations: Gather the required tools and parts before purchasing parts. For further information, please refer to LP gas Parts supplied (all parts are included. See "Electrical Requirements" ...5' (1.5 m) Inlet Hose Rubber washer Remove parts package from whom you purchased your "Use and Care Guide". 4 Read and follow the instructions provided with dryer) Check local codes. Tools needed for all installations: 8" (203 mm) or 10" (254 mm) pipe wrench 8" (203 mm) or 10" ...

Installation Guide
Page 5
.... Back view: Bottom view: NOTE: Most installations require a minimum of 5" (127 mm) clearance behind dryer for electric dryers. ■■ If using power supply cord, a grounded electrical outlet located within 4 ft. (1.2 m) of the water fill valves, and water pressure of 20-100 psi (137.9-689.6 kPa).... See "Venting Requirements". ■■ A separate 15 or 20-amp circuit needed for gas dryers and 30-amp circuit needed for exhaust vent with...
.... Back view: Bottom view: NOTE: Most installations require a minimum of 5" (127 mm) clearance behind dryer for electric dryers. ■■ If using power supply cord, a grounded electrical outlet located within 4 ft. (1.2 m) of the water fill valves, and water pressure of 20-100 psi (137.9-689.6 kPa).... See "Venting Requirements". ■■ A separate 15 or 20-amp circuit needed for gas dryers and 30-amp circuit needed for exhaust vent with...

Installation Guide
Page 6
...To contact a qualified electrical installer. ■■ To be sure that you use Power Supply Cord Replacement Part Number 9831317. For gas dryers mobile home installations: ■■ Mobile Home Installation Hold-down Kit Part Number 346764 is recommended. The cord is recommended that the ...ONLY ELECTRICAL REQUIREMENTS It is your "Use and Care Guide". 4-wire receptacle (14-30R) If using a replacement power supply cord, it is 5 ft. (1.52 m) long. The installation must be made in mobile homes to reduce noise transfer. ■■ For closet installation, with a door...
...To contact a qualified electrical installer. ■■ To be sure that you use Power Supply Cord Replacement Part Number 9831317. For gas dryers mobile home installations: ■■ Mobile Home Installation Hold-down Kit Part Number 346764 is recommended. The cord is recommended that the ...ONLY ELECTRICAL REQUIREMENTS It is your "Use and Care Guide". 4-wire receptacle (14-30R) If using a replacement power supply cord, it is 5 ft. (1.52 m) long. The installation must be made in mobile homes to reduce noise transfer. ■■ For closet installation, with a door...


