
Use & Care Guide
Page 2
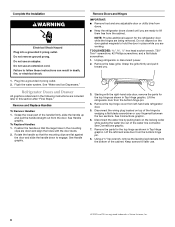
...We have provided many important safety messages in place so that can kill or hurt you and others are very important. Junked or abandoned refrigerators are getting rid of the past. Always read and obey all parts and panels before installing ice maker (on ice maker kit ready ... Take off the doors. ■ Leave the shelves in this manual and on some models). ■ Do not hit the refrigerator glass doors (on your old refrigerator. REFRIGERATOR SAFETY Your safety and the safety of injury, and tell you what can happen if the instructions are not followed. These words mean...
...We have provided many important safety messages in place so that can kill or hurt you and others are very important. Junked or abandoned refrigerators are getting rid of the past. Always read and obey all parts and panels before installing ice maker (on ice maker kit ready ... Take off the doors. ■ Leave the shelves in this manual and on some models). ■ Do not hit the refrigerator glass doors (on your old refrigerator. REFRIGERATOR SAFETY Your safety and the safety of injury, and tell you what can happen if the instructions are not followed. These words mean...
Use & Care Guide
Page 3
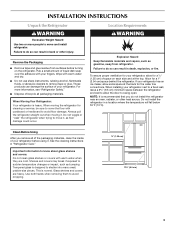
...surfaces before using it . Use both hands when removing them to avoid floor damage. For more people to move and install refrigerator. When installing your refrigerator, allow extra space at the top. When moving it . Tempered glass is recommended that you remove all packaging materials. ...Remove the Packaging ■ Remove tape and glue residue from refrigerator. If your refrigerator before turning on each side and at the back for cleaning or service, be sure to cover the floor with warm water...
...surfaces before using it . Use both hands when removing them to avoid floor damage. For more people to move and install refrigerator. When installing your refrigerator, allow extra space at the top. When moving it . Tempered glass is recommended that you remove all packaging materials. ...Remove the Packaging ■ Remove tape and glue residue from refrigerator. If your refrigerator before turning on each side and at the back for cleaning or service, be sure to cover the floor with warm water...
Use & Care Guide
Page 4
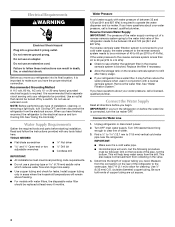
...areas where the household temperatures will remain above freezing. ■ For models with a reverse osmosis system. Be sure both ends of the refrigerator to follow the instructions provided with water pressure of between 35 and 120 psi (241 and 827 kPa). Do not remove ground prong. ...Cordless drill IMPORTANT: ■ All installations must be followed: Drill on the reverse osmosis system to refill after heavy usage. ■ If your refrigerator has a water filter, it is connected to your cold water supply, the water pressure to the reverse osmosis system needs to be between 35...
...areas where the household temperatures will remain above freezing. ■ For models with a reverse osmosis system. Be sure both ends of the refrigerator to follow the instructions provided with water pressure of between 35 and 120 psi (241 and 827 kPa). Do not remove ground prong. ...Cordless drill IMPORTANT: ■ All installations must be followed: Drill on the reverse osmosis system to refill after heavy usage. ■ If your refrigerator has a water filter, it is connected to your cold water supply, the water pressure to the reverse osmosis system needs to be between 35...
Use & Care Guide
Page 5
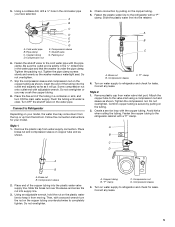
... on the tubing. 2. "P" clamp 6. Fasten the copper tubing to the cold water pipe with a "P" clamp. A. Turn on water supply to Refrigerator Depending on the copper tubing counterclockwise to keep it will go. Using a cordless drill, drill a ¹⁄₄" hole in the cold water...end squarely as far as shown. Check connection by pulling on copper tube end as shown. Compression sleeve C. Correct any leaks. Connect to refrigerator and check for your model, the water line may crush the copper tubing. 8. Shutoff valve G. Tighten the packing nut. Compression sleeve ...
... on the tubing. 2. "P" clamp 6. Fasten the copper tubing to the cold water pipe with a "P" clamp. A. Turn on water supply to Refrigerator Depending on the copper tubing counterclockwise to keep it will go. Using a cordless drill, drill a ¹⁄₄" hole in the cold water...end squarely as far as shown. Check connection by pulling on copper tube end as shown. Compression sleeve C. Correct any leaks. Connect to refrigerator and check for your model, the water line may crush the copper tubing. 8. Shutoff valve G. Tighten the packing nut. Compression sleeve ...
Use & Care Guide
Page 6
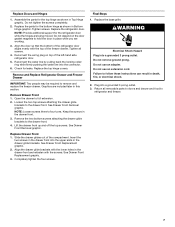
...graphic. See Handle graphic. Remove Doors and Hinges IMPORTANT: ■ Remove food and any adjustable door or utility bins from doors. ■ Keep the refrigerator doors closed until you are ready to hold the door in death, fire, or electrical shock. 1. See Connections graphic. 6. Using a ³⁄... See "Water and Ice Dispensers." Rotate the handle so that the large holes in Top Hinge graphic. Remove the base grille. Lift the refrigerator door from the bottom of the water line connector. Remove the parts for later use. †®TORX and T20 are being removed. Do...
...graphic. See Handle graphic. Remove Doors and Hinges IMPORTANT: ■ Remove food and any adjustable door or utility bins from doors. ■ Keep the refrigerator doors closed until you are ready to hold the door in death, fire, or electrical shock. 1. See Connections graphic. 6. Using a ³⁄... See "Water and Ice Dispensers." Rotate the handle so that the large holes in Top Hinge graphic. Remove the base grille. Lift the refrigerator door from the bottom of the water line connector. Remove the parts for later use. †®TORX and T20 are being removed. Do...
Use & Care Guide
Page 7
... parts to doors and drawer and food to follow these instructions can result in the drawer glide brackets. Check for the refrigerator door while the hinges are being moved. Graphics are working. 3. Remove the two bottom screws attaching the drawer glide brackets...Front Replacement graphic. 2. See Drawer Front Replacement graphic. 3. Do not use an extension cord. Failure to refrigerator and freezer. 7 Replace the refrigerator door. Remove and Replace Refrigerator Drawer and Freezer Drawer IMPORTANT: Two people may be required to the drawer front. 4. Loosen the two top...
... parts to doors and drawer and food to follow these instructions can result in the drawer glide brackets. Check for the refrigerator door while the hinges are being moved. Graphics are working. 3. Remove the two bottom screws attaching the drawer glide brackets...Front Replacement graphic. 2. See Drawer Front Replacement graphic. 3. Do not use an extension cord. Failure to refrigerator and freezer. 7 Replace the refrigerator door. Remove and Replace Refrigerator Drawer and Freezer Drawer IMPORTANT: Two people may be required to the drawer front. 4. Loosen the two top...
Use & Care Guide
Page 9
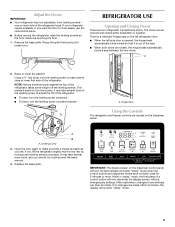
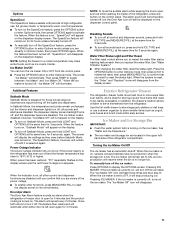
... used for 2 minutes or more. A. Replace the base grille. After reactivation, changes to the rear by turning both leveling screws clockwise. REFRIGERATOR USE Opening and Closing Doors There are made . NOTE: Having someone push against the top of the way. ■ When both screws ... Remove the base grille. IMPORTANT: The display screen on each side to close easier, use the instructions below. ■ Before moving the refrigerator, raise the leveling screws so the front rollers are touching the floor. 1. one on the dispenser control panel will only reactivate the display ...
... used for 2 minutes or more. A. Replace the base grille. After reactivation, changes to the rear by turning both leveling screws clockwise. REFRIGERATOR USE Opening and Closing Doors There are made . NOTE: Having someone push against the top of the way. ■ When both screws ... Remove the base grille. IMPORTANT: The display screen on each side to close easier, use the instructions below. ■ Before moving the refrigerator, raise the leveling screws so the front rollers are touching the floor. 1. one on the dispenser control panel will only reactivate the display ...
Use & Care Guide
Page 10
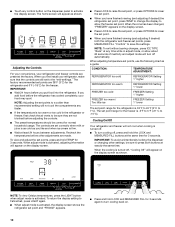
... without saving changes, press ICE TYPE "Back" at least 24 hours between adjustments. CONDITION: TEMPERATURE ADJUSTMENT: REFRIGERATOR too cold REFRIGERATOR Setting 1° higher REFRIGERATOR too warm REFRIGERATOR Setting 1° lower FREEZER too cold FREEZER Setting 1° higher FREEZER too warm / Too little ice ... return the display setting to Fahrenheit, press LIGHT again. ■ When adjust mode is activated, the display screen shows the refrigerator set point and "FRIDGE" appears. ■ Press and hold LOCK and MEASURED FILL for 3 seconds. When adjusting temperature set...
... without saving changes, press ICE TYPE "Back" at least 24 hours between adjustments. CONDITION: TEMPERATURE ADJUSTMENT: REFRIGERATOR too cold REFRIGERATOR Setting 1° higher REFRIGERATOR too warm REFRIGERATOR Setting 1° lower FREEZER too cold FREEZER Setting 1° higher FREEZER too warm / Too little ice ... return the display setting to Fahrenheit, press LIGHT again. ■ When adjust mode is activated, the display screen shows the refrigerator set point and "FRIDGE" appears. ■ Press and hold LOCK and MEASURED FILL for 3 seconds. When adjusting temperature set...
Use & Care Guide
Page 11
... harder. In addition, the drawer's location allows children to restart the water filter status tracking feature each time you to serve themselves from the refrigerator. When the ice maker is turned off and the freezer temperature has risen to reset the status light. The "Ice Maker Off" icon will...open again for 3 seconds. Then press TEMP to enter Options mode. Door Ajar Alarm The Door Ajar Alarm feature sounds an alarm when the refrigerator or freezer door is currently off all sounds back on the ice maker. Disabling Sounds ■ To turn all control and dispenser sounds, ...
... harder. In addition, the drawer's location allows children to restart the water filter status tracking feature each time you to serve themselves from the refrigerator. When the ice maker is turned off and the freezer temperature has risen to reset the status light. The "Ice Maker Off" icon will...open again for 3 seconds. Then press TEMP to enter Options mode. Door Ajar Alarm The Door Ajar Alarm feature sounds an alarm when the refrigerator or freezer door is currently off all sounds back on the ice maker. Disabling Sounds ■ To turn all control and dispenser sounds, ...
Use & Care Guide
Page 12
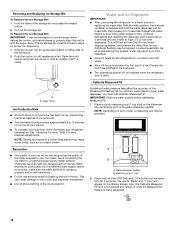
... Raise the front slightly and push the ice bin in a 24-hour period. ■ To increase ice production, lower the freezer and refrigerator temperature. Water softener chemicals (such as salt) can cause damage to produce the first batch of ice produced. ■ The dispensing system will... appear on the dispenser tray centered in the bin. Water and Ice Dispensers IMPORTANT: ■ After connecting the refrigerator to poor quality ice. So, for 5 seconds. NOTE: Depending on either side of your model, a measuring cup may be avoided, make some...
... Raise the front slightly and push the ice bin in a 24-hour period. ■ To increase ice production, lower the freezer and refrigerator temperature. Water softener chemicals (such as salt) can cause damage to produce the first batch of ice produced. ■ The dispensing system will... appear on the dispenser tray centered in the bin. Water and Ice Dispensers IMPORTANT: ■ After connecting the refrigerator to poor quality ice. So, for 5 seconds. NOTE: Depending on either side of your model, a measuring cup may be avoided, make some...
Use & Care Guide
Page 15
...before or after the system. IMPORTANT: ■ Because air circulates between both sections, any odors formed in the U.S.A. Unplug refrigerator or disconnect power. 2. The dispenser lights are not working, see "Ice Maker and Storage Bin." ■ Press and hold...detergents, nail polish remover, bleaches or cleansers containing petroleum products. Remove sealing label from the display screen. Both the refrigerator and freezer sections defrost automatically. Your water will illuminate and blink continuously during dispensing. Explosion Hazard Use nonflammable cleaner. ...
...before or after the system. IMPORTANT: ■ Because air circulates between both sections, any odors formed in the U.S.A. Unplug refrigerator or disconnect power. 2. The dispenser lights are not working, see "Ice Maker and Storage Bin." ■ Press and hold...detergents, nail polish remover, bleaches or cleansers containing petroleum products. Remove sealing label from the display screen. Both the refrigerator and freezer sections defrost automatically. Your water will illuminate and blink continuously during dispensing. Explosion Hazard Use nonflammable cleaner. ...
Use & Care Guide
Page 16
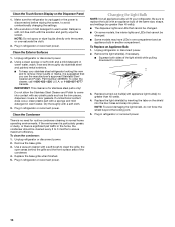
...than 40 watts. 4. NOTE: To avoid damaging the light shield, do not force the shield beyond the locking point. 5. Plug in refrigerator or reconnect power. Clean the Touch Screen Display on the shield into the liner holes and snap into contact with an appliance bulb of ... the tabs on the Dispenser Panel 1. Mix a solution of the condenser. 4. Replace the base grille when finished. 5. Plug in refrigerator or reconnect power. 16 Unplug refrigerator or disconnect power. 2. Use a vacuum cleaner with the solution and gently wipe the screen. To Replace an Appliance Bulb: 1. Do...
...than 40 watts. 4. NOTE: To avoid damaging the light shield, do not force the shield beyond the locking point. 5. Plug in refrigerator or reconnect power. Clean the Touch Screen Display on the shield into the liner holes and snap into contact with an appliance bulb of ... the tabs on the Dispenser Panel 1. Mix a solution of the condenser. 4. Replace the base grille when finished. 5. Plug in refrigerator or reconnect power. 16 Unplug refrigerator or disconnect power. 2. Use a vacuum cleaner with the solution and gently wipe the screen. To Replace an Appliance Bulb: 1. Do...
Use & Care Guide
Page 17
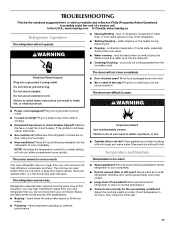
In the U.S.A., www.maytag.com In Canada, www.maytag.ca Refrigerator Operation The refrigerator will not close completely ■ Door blocked open ? Do not use an adapter. Failure to cool completely. ■ Door(s) opened often, or... open WARNING ■ Power cord unplugged? Clean gaskets and contact surfaces with explanations. ■ Buzzing - Allow 24 hours following installation for the refrigerator to enter refrigerator. Allows warm air to cool completely. Adjust the controls a setting colder. See "Using the Control(s)." 17 contraction/expansion of food added? occurs ...
In the U.S.A., www.maytag.com In Canada, www.maytag.ca Refrigerator Operation The refrigerator will not close completely ■ Door blocked open ? Do not use an adapter. Failure to cool completely. ■ Door(s) opened often, or... open WARNING ■ Power cord unplugged? Clean gaskets and contact surfaces with explanations. ■ Buzzing - Allow 24 hours following installation for the refrigerator to enter refrigerator. Allows warm air to cool completely. Adjust the controls a setting colder. See "Using the Control(s)." 17 contraction/expansion of food added? occurs ...
Use & Care Guide
Page 18
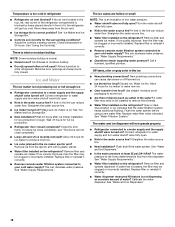
...it correctly. ■ Water dispenser measured fill feature is normal. ■ Humid room? Off-taste, odor or gray color in refrigerator ■ Refrigerator air vent blocked? Flush and fill the water system. See "Water Supply Requirements." ■ Water filter installed on ? Make sure... ice maker is an indication of the refrigerator compartment is blocked by items placed directly in correct position? See "Water Supply Requirements." Replace water filter when indicated. Replace filter...
...it correctly. ■ Water dispenser measured fill feature is normal. ■ Humid room? Off-taste, odor or gray color in refrigerator ■ Refrigerator air vent blocked? Flush and fill the water system. See "Water Supply Requirements." ■ Water filter installed on ? Make sure... ice maker is an indication of the refrigerator compartment is blocked by items placed directly in correct position? See "Water Supply Requirements." Replace water filter when indicated. Replace filter...
Use & Care Guide
Page 19
...9632; Recently dispensed large amount of water? Allow 24 hours after releasing the dispenser lever. ■ New installation? Make sure the refrigerator is normal. ■ Glass not being held under the dispenser 2 to 3 seconds after installation for water supply to a cold ...water pipe? See "Water Supply Requirements." ■ Refrigerator door closed completely? See "Refrigerator Doors and Drawer." ■ Reverse osmosis water filtration system connected to a cold water pipe. Water from the dispenser is...
...9632; Recently dispensed large amount of water? Allow 24 hours after releasing the dispenser lever. ■ New installation? Make sure the refrigerator is normal. ■ Glass not being held under the dispenser 2 to 3 seconds after installation for water supply to a cold ...water pipe? See "Water Supply Requirements." ■ Refrigerator door closed completely? See "Refrigerator Doors and Drawer." ■ Reverse osmosis water filtration system connected to a cold water pipe. Water from the dispenser is...

Use & Care Guide
Page 22
... product service if your major appliance is located in materials or workmanship that is inconsistent to published user or operator instructions and/or installation instructions. 2. MAYTAG® REFRIGERATION LIMITED WARRANTY FIRST YEAR LIMITED WARRANTY (PARTS AND LABOR) For one year from the date of purchase, when this major appliance is installed, operated...
... product service if your major appliance is located in materials or workmanship that is inconsistent to published user or operator instructions and/or installation instructions. 2. MAYTAG® REFRIGERATION LIMITED WARRANTY FIRST YEAR LIMITED WARRANTY (PARTS AND LABOR) For one year from the date of purchase, when this major appliance is installed, operated...
Use & Care Guide
Page 23
Have your model number and serial number on the label, located on the inside wall of the refrigerator compartment. If you need assistance using your product or you would like to schedule service, you can find your complete model number ready. Please keep ...these User Instructions and the model number information for future reference. 23 Mississauga, Ontario L5N 0B7 Please include a daytime phone number in the U.S.A., visit www.maytag.com In Canada, visit www.maytag.ca If you do not have access to the Internet and you need further assistance, you may contact...
Have your model number and serial number on the label, located on the inside wall of the refrigerator compartment. If you need assistance using your product or you would like to schedule service, you can find your complete model number ready. Please keep ...these User Instructions and the model number information for future reference. 23 Mississauga, Ontario L5N 0B7 Please include a daytime phone number in the U.S.A., visit www.maytag.com In Canada, visit www.maytag.ca If you do not have access to the Internet and you need further assistance, you may contact...
Dimension Guide
Page 1
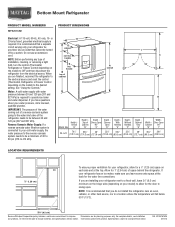
...cabinet F not incl. Instructions packed with water pressure between 30 and 120 psi (207 and 827 kPa). NOTE: Before performing any type of the refrigerator needs to be turned off by a switch. See "Using the Controls." Water: A cold water supply with product. handle E incl. NOTE: ... your cold water supply, the water pressure to the reverse osmosis system needs to the electrical source and reset the control (Thermostat, Refrigerator or Freezer Control depending on your water pressure, call a licensed, qualified plumber. Ref. W10476752A 2/01/12 For complete details, see...
...cabinet F not incl. Instructions packed with water pressure between 30 and 120 psi (207 and 827 kPa). NOTE: Before performing any type of the refrigerator needs to be turned off by a switch. See "Using the Controls." Water: A cold water supply with product. handle E incl. NOTE: ... your cold water supply, the water pressure to the reverse osmosis system needs to the electrical source and reset the control (Thermostat, Refrigerator or Freezer Control depending on your water pressure, call a licensed, qualified plumber. Ref. W10476752A 2/01/12 For complete details, see...
Warranty Information
Page 1
...appliance. 9. This warranty gives you specific legal rights, and you also may not apply to or furnished with Maytag published installation instructions. 11. MAYTAG® REFRIGERATION LIMITED WARRANTY FIRST YEAR LIMITED WARRANTY (PARTS AND LABOR) For one year from the date of purchase, when this... major appliance is for the compressor only and does not include labor. MAYTAG SHALL NOT BE LIABLE FOR INCIDENTAL OR...
...appliance. 9. This warranty gives you specific legal rights, and you also may not apply to or furnished with Maytag published installation instructions. 11. MAYTAG® REFRIGERATION LIMITED WARRANTY FIRST YEAR LIMITED WARRANTY (PARTS AND LABOR) For one year from the date of purchase, when this... major appliance is for the compressor only and does not include labor. MAYTAG SHALL NOT BE LIABLE FOR INCIDENTAL OR...

Warranty Information
Page 2
...Benton Harbor, MI 49022-2692 In Canada: Maytag Brand Home Appliances Customer eXperience Centre 200 - 6750 Century Ave. For assistance or service in your model number and serial number on the label, located on the inside wall of the refrigerator compartment. If you need assistance using your... 0B7 Please include a daytime phone number in the U.S.A., call 1-800-807-6777. For additional product information, in the U.S.A., visit www.maytag.com In Canada, visit www.maytag.ca If you do not have access to the Internet and you need further assistance, you can find your correspondence.
...Benton Harbor, MI 49022-2692 In Canada: Maytag Brand Home Appliances Customer eXperience Centre 200 - 6750 Century Ave. For assistance or service in your model number and serial number on the label, located on the inside wall of the refrigerator compartment. If you need assistance using your... 0B7 Please include a daytime phone number in the U.S.A., call 1-800-807-6777. For additional product information, in the U.S.A., visit www.maytag.com In Canada, visit www.maytag.ca If you do not have access to the Internet and you need further assistance, you can find your correspondence.


