
Use & Care Guide
Page 3
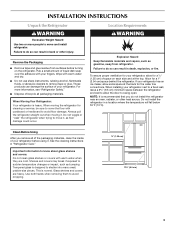
...(13°C). For more people to sudden temperature changes or impact, such as bumping. NOTE: It is normal. This is recommended that you remove all of the packaging materials, clean the inside of /recycle all packaging materials. Wipe with cardboard or hardboard to allow extra space at the ... not clean glass shelves or covers with your refrigerator next to a fixed wall, leave a 3³⁄₄" (9.5 cm) minimum space between the refrigerator and wall to avoid floor damage. Use both hands when removing them to swing open. Clean Before Using After you do so can result in ...
...(13°C). For more people to sudden temperature changes or impact, such as bumping. NOTE: It is normal. This is recommended that you remove all of the packaging materials, clean the inside of /recycle all packaging materials. Wipe with cardboard or hardboard to allow extra space at the ... not clean glass shelves or covers with your refrigerator next to a fixed wall, leave a 3³⁄₄" (9.5 cm) minimum space between the refrigerator and wall to avoid floor damage. Use both hands when removing them to swing open. Clean Before Using After you do so can result in ...
Use & Care Guide
Page 6
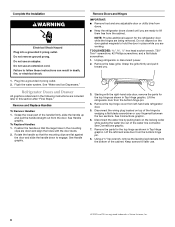
...the bottom hinge pin. 8. Disconnect the wiring plug located on top of the cabinet. Using a ³⁄₈" hex wrench, remove the leveling leg brackets from the cabinet. Complete the Installation WARNING Electrical Shock Hazard Plug into a grounded 3 prong outlet. 2. Position ... Do not use an adapter. See Connections graphic. 6. Remove Doors and Hinges IMPORTANT: ■ Remove food and any adjustable door or utility bins from the door. See Connections graphic. 7. Failure to engage. Remove the top hinge cover from left -hand side door from the bottom hinge pin...
...the bottom hinge pin. 8. Disconnect the wiring plug located on top of the cabinet. Using a ³⁄₈" hex wrench, remove the leveling leg brackets from the cabinet. Complete the Installation WARNING Electrical Shock Hazard Plug into a grounded 3 prong outlet. 2. Position ... Do not use an adapter. See Connections graphic. 6. Remove Doors and Hinges IMPORTANT: ■ Remove food and any adjustable door or utility bins from the door. See Connections graphic. 7. Failure to engage. Remove the top hinge cover from left -hand side door from the bottom hinge pin...
Use & Care Guide
Page 7
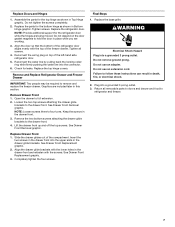
...Loosen the two top screws attaching the drawer glide brackets to hold the door in death, fire, or electrical shock. 2. See Drawer Front Removal graphic. Align the drawer glide brackets with the lower holes in Top Hinge graphic. Replace the parts for the top hinge as shown in... the drawer glide brackets. NOTE: Provide additional support for leaks. Replace the top hinge covers. Do not tighten the screws completely. 2. Align the door so that the bottom of the compartment. Remove and Replace Refrigerator Drawer and Freezer Drawer IMPORTANT: Two people may be required to four ...
...Loosen the two top screws attaching the drawer glide brackets to hold the door in death, fire, or electrical shock. 2. See Drawer Front Removal graphic. Align the drawer glide brackets with the lower holes in Top Hinge graphic. Replace the parts for the top hinge as shown in... the drawer glide brackets. NOTE: Provide additional support for leaks. Replace the top hinge covers. Do not tighten the screws completely. 2. Align the door so that the bottom of the compartment. Remove and Replace Refrigerator Drawer and Freezer Drawer IMPORTANT: Two people may be required to four ...
Use & Care Guide
Page 8
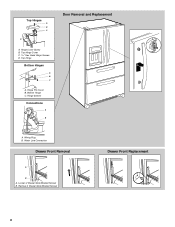
Bottom Hinge C. Hinge Screws Connections A B Door Removal and Replacement A. Wiring Plug B. Water Line Connection Drawer Front Removal A B A. Remove 2 Drawer Glide Bracket Screws Drawer Front Replacement 8 Top Hinge Cover C. 5/16" Hex Head Hinge Screws D. Top Hinge Bottom Hinges A B C A. Hinge Pin Cover B. Top Hinges A B C D A. Loosen 2 Drawer Glide Bracket Screws B. Hinge Cover Screw B.
Bottom Hinge C. Hinge Screws Connections A B Door Removal and Replacement A. Wiring Plug B. Water Line Connection Drawer Front Removal A B A. Remove 2 Drawer Glide Bracket Screws Drawer Front Replacement 8 Top Hinge Cover C. 5/16" Hex Head Hinge Screws D. Top Hinge Bottom Hinges A B C A. Hinge Pin Cover B. Top Hinges A B C D A. Loosen 2 Drawer Glide Bracket Screws B. Hinge Cover Screw B.
Use & Care Guide
Page 15
... or after the system. IMPORTANT: Air trapped in one section will illuminate when 90% of the volume of the water filter cover. 2. Snap the filter cover closed. 5. NOTE: The dispenser feature may be used on the ribbed section of water for more often. If the water ... decreases noticeably before 6 months have passed since the filter was installed. or 1-800-807-6777 in warm water, hand wash, rinse, and dry removable parts and interior surfaces thoroughly. 3. The disposable water filter should be filtered. Flush the water system. When the system is reset, the "ORDER...
... or after the system. IMPORTANT: Air trapped in one section will illuminate when 90% of the volume of the water filter cover. 2. Snap the filter cover closed. 5. NOTE: The dispenser feature may be used on the ribbed section of water for more often. If the water ... decreases noticeably before 6 months have passed since the filter was installed. or 1-800-807-6777 in warm water, hand wash, rinse, and dry removable parts and interior surfaces thoroughly. 3. The disposable water filter should be filtered. Flush the water system. When the system is reset, the "ORDER...
Use & Care Guide
Page 16
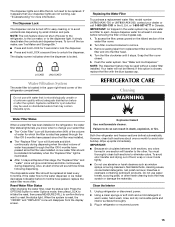
..., clean plastic part with the solution and gently wipe the screen. Unplug refrigerator or disconnect power. 2. Unplug refrigerator or disconnect power. 2. Remove the light shield(s), if necessary. ■ Squeeze both sides of the light shield while pulling downward to replace the bulb with an appliance ...16 Use a vacuum cleaner with a soft cloth. 3. Replace burned-out bulb(s) with any plastic parts such as the trim pieces, dispenser covers or door gaskets. Clean the Touch Screen Display on the shield into the liner holes and snap into contact with appliance light bulb(s) no ...
..., clean plastic part with the solution and gently wipe the screen. Unplug refrigerator or disconnect power. 2. Unplug refrigerator or disconnect power. 2. Remove the light shield(s), if necessary. ■ Squeeze both sides of the light shield while pulling downward to replace the bulb with an appliance ...16 Use a vacuum cleaner with a soft cloth. 3. Replace burned-out bulb(s) with any plastic parts such as the trim pieces, dispenser covers or door gaskets. Clean the Touch Screen Display on the shield into the liner holes and snap into contact with appliance light bulb(s) no ...

Use & Care Guide
Page 22
... materials or workmanship and is reported to Maytag within 30 days from warranty coverage. 4. ITEMS EXCLUDED FROM WARRANTY This limited warranty does not cover: 1. Consumable parts are excluded from the date of your authorized Maytag dealer to refrigerator or freezer product failures.... This major appliance is required to correct house wiring or plumbing. 3. The removal and reinstallation of purchase. 6. Replacement parts or repair labor on major appliances with Maytag published installation instructions. 11. EXCLUSION OF INCIDENTAL AND CONSEQUENTIAL DAMAGES YOUR SOLE AND...
... materials or workmanship and is reported to Maytag within 30 days from warranty coverage. 4. ITEMS EXCLUDED FROM WARRANTY This limited warranty does not cover: 1. Consumable parts are excluded from the date of your authorized Maytag dealer to refrigerator or freezer product failures.... This major appliance is required to correct house wiring or plumbing. 3. The removal and reinstallation of purchase. 6. Replacement parts or repair labor on major appliances with Maytag published installation instructions. 11. EXCLUSION OF INCIDENTAL AND CONSEQUENTIAL DAMAGES YOUR SOLE AND...
Warranty Information
Page 1
...serial numbers that have been removed, altered or cannot be easily determined. 12. Proof of merchantability or fitness, so this major appliance is effective from the date of purchase. 6. ITEMS EXCLUDED FROM WARRANTY This limited warranty does not cover: 1. SECOND THROUGH TENTH YEAR... from accident, alteration, misuse, abuse, fire, flood, acts of God, improper installation, installation not in accordance with the product, Maytag will pay for other damage to the appliance. 9. Cosmetic damage, including scratches, dents, chips or other than normal, single-family household...
...serial numbers that have been removed, altered or cannot be easily determined. 12. Proof of merchantability or fitness, so this major appliance is effective from the date of purchase. 6. ITEMS EXCLUDED FROM WARRANTY This limited warranty does not cover: 1. SECOND THROUGH TENTH YEAR... from accident, alteration, misuse, abuse, fire, flood, acts of God, improper installation, installation not in accordance with the product, Maytag will pay for other damage to the appliance. 9. Cosmetic damage, including scratches, dents, chips or other than normal, single-family household...


