User Instructions
Page 2
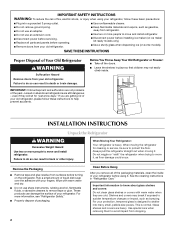
... gasoline, away from refrigerator. ■ Use two or more people to help prevent accidents. Wipe with your fingers. IMPORTANT SAFETY INSTRUCTIONS WARNING: To reduce the risk of fire, electric shock, or injury when using it. If you remove all parts and panels before servicing.... ■ Replace all of the packaging materials, clean the inside . These products can result in place so that children may break if exposed to move and install refrigerator. ■ Disconnect power before using your refrigerator, follow these basic...
... gasoline, away from refrigerator. ■ Use two or more people to help prevent accidents. Wipe with your fingers. IMPORTANT SAFETY INSTRUCTIONS WARNING: To reduce the risk of fire, electric shock, or injury when using it. If you remove all parts and panels before servicing.... ■ Replace all of the packaging materials, clean the inside . These products can result in place so that children may break if exposed to move and install refrigerator. ■ Disconnect power before using your refrigerator, follow these basic...
User Instructions
Page 3
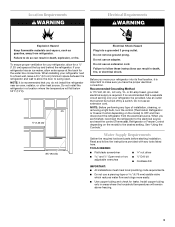
Failure to do not install the refrigerator near an oven, radiator, or other heat source. Before you have the proper electrical connection. Do not use an extension cord. Water Supply Requirements Gather the required tools and parts before starting installation. Read and follow these instructions ...Cordless drill IMPORTANT: ■ All installations must meet local plumbing code requirements. ■ Do not use an adapter. When installing your refrigerator, allow the door to allow for the water line connections. Do not use a piercing-type or 4.76 mm) saddle valve which reduces...
Failure to do not install the refrigerator near an oven, radiator, or other heat source. Before you have the proper electrical connection. Do not use an extension cord. Water Supply Requirements Gather the required tools and parts before starting installation. Read and follow these instructions ...Cordless drill IMPORTANT: ■ All installations must meet local plumbing code requirements. ■ Do not use an adapter. When installing your refrigerator, allow the door to allow for the water line connections. Do not use a piercing-type or 4.76 mm) saddle valve which reduces...
User Instructions
Page 5
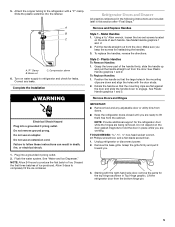
... lift them free from the cabinet. Using a Allen wrench, loosen the two set screws located on water supply to the refrigerator with the right-hand side door, remove the parts for the refrigerator door while the hinges are included later in Top Hinge graphic. See Metal Handle graphics 1 and 2. 2. Position the handle so...
... lift them free from the cabinet. Using a Allen wrench, loosen the two set screws located on water supply to the refrigerator with the right-hand side door, remove the parts for the refrigerator door while the hinges are included later in Top Hinge graphic. See Metal Handle graphics 1 and 2. 2. Position the handle so...
User Instructions
Page 6
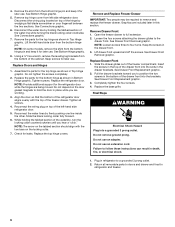
...remove the shim from the bottom of the cabinet. NOTE: Provide additional support for later use. Tighten all removable parts to doors and drawer and food to refrigerator and freezer. 6 Remove and Replace Freezer Drawer IMPORTANT: Two people may be required to four turns. Remove Drawer ... 1. Do not remove ground prong. See Bottom Hinge graphic. 8. Replace the parts for the top hinge as shown in refrigerator to hold the door in this section. Lift the left -hand side refrigerator door. 5. Tighten screws. Replace the top hinge covers. See Drawer Front Removal...
...remove the shim from the bottom of the cabinet. NOTE: Provide additional support for later use. Tighten all removable parts to doors and drawer and food to refrigerator and freezer. 6 Remove and Replace Freezer Drawer IMPORTANT: Two people may be required to four turns. Remove Drawer ... 1. Do not remove ground prong. See Bottom Hinge graphic. 8. Replace the parts for the top hinge as shown in refrigerator to hold the door in this section. Lift the left -hand side refrigerator door. 5. Tighten screws. Replace the top hinge covers. See Drawer Front Removal...
User Instructions
Page 11
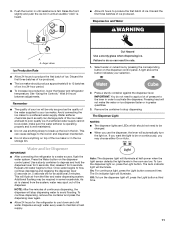
...; To increase ice production, lower the freezer and refrigerator temperature. NOTE: After five minutes of your selection. 2. Remember ■ The quality of continuous dispensing, the dispenser will illuminate. IMPORTANT: You do so can damage parts of the ice maker or in the room are ...a lot of the dispenser. Press a sturdy container against the dispenser lever. Water and Ice Dispenser IMPORTANT: ■ After connecting the refrigerator to flow, continue depressing and releasing the dispenser lever (5 seconds on , press the Light button. Cut Hazard Use a sturdy glass ...
...; To increase ice production, lower the freezer and refrigerator temperature. NOTE: After five minutes of your selection. 2. Remember ■ The quality of continuous dispensing, the dispenser will illuminate. IMPORTANT: You do so can damage parts of the ice maker or in the room are ...a lot of the dispenser. Press a sturdy container against the dispenser lever. Water and Ice Dispenser IMPORTANT: ■ After connecting the refrigerator to flow, continue depressing and releasing the dispenser lever (5 seconds on , press the Light button. Cut Hazard Use a sturdy glass ...
User Instructions
Page 12
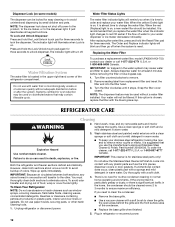
... functions. Press and hold the Reset Filter pad for stainless steel parts only! IMPORTANT: Air trapped in one section will not be installed. Snap the filter cover closed. REFRIGERATOR CARE Cleaning WARNING 2. IMPORTANT: Because air circulates between both sections ... concentrated detergents, bleaches or cleansers containing petroleum products on plastic parts, interior and door liners or gaskets. To Clean Your Refrigerator: NOTE: Do not use the manufacturer's approved Stainless Steel Cleaner & Polish, Part Number 20000008. Use a clean sponge or soft cloth and ...
... functions. Press and hold the Reset Filter pad for stainless steel parts only! IMPORTANT: Air trapped in one section will not be installed. Snap the filter cover closed. REFRIGERATOR CARE Cleaning WARNING 2. IMPORTANT: Because air circulates between both sections ... concentrated detergents, bleaches or cleansers containing petroleum products on plastic parts, interior and door liners or gaskets. To Clean Your Refrigerator: NOTE: Do not use the manufacturer's approved Stainless Steel Cleaner & Polish, Part Number 20000008. Use a clean sponge or soft cloth and ...
User Instructions
Page 17
...you how to use . 4. MAYTAG CORPORATION MAJOR APPLIANCE WARRANTY ONE YEAR LIMITED WARRANTY For one year from unauthorized modifications made to the appliance. 9. Those consumable parts are excluded from accident, alteration, misuse, abuse, fire, flood, acts of the refrigerator interior. This major appliance is used... TO YOU. Service calls to refrigerator or freezer product failures. 6. Replacement parts or repair labor costs when the major appliance is used in a country other than the country in the U.S.A., visit www.maytag.com In Canada, visit www.maytag.ca If you do not have...
...you how to use . 4. MAYTAG CORPORATION MAJOR APPLIANCE WARRANTY ONE YEAR LIMITED WARRANTY For one year from unauthorized modifications made to the appliance. 9. Those consumable parts are excluded from accident, alteration, misuse, abuse, fire, flood, acts of the refrigerator interior. This major appliance is used... TO YOU. Service calls to refrigerator or freezer product failures. 6. Replacement parts or repair labor costs when the major appliance is used in a country other than the country in the U.S.A., visit www.maytag.com In Canada, visit www.maytag.ca If you do not have...


