

Owners Manual
Page 4
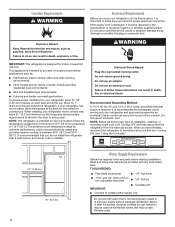
... driver and ¹⁄₂" Open-end or two adjustable wrenches Drill bit ■ Cordless drill IMPORTANT: ■ All installations must meet local plumbing code requirements. ■ Do not use in a location where the temperature ranges from a minimum of 55°F (13°C) to a maximum of installation, cleaning, or removing a light bulb, turn the freezer control to make sure you move your refrigerator be turned off by a switch. Electrical Shock Hazard Plug...
... driver and ¹⁄₂" Open-end or two adjustable wrenches Drill bit ■ Cordless drill IMPORTANT: ■ All installations must meet local plumbing code requirements. ■ Do not use in a location where the temperature ranges from a minimum of 55°F (13°C) to a maximum of installation, cleaning, or removing a light bulb, turn the freezer control to make sure you move your refrigerator be turned off by a switch. Electrical Shock Hazard Plug...

Owners Manual
Page 5
...; If your cold water supply, the water pressure to the reverse osmosis system needs to 414 kPa). Insert the end of water. 3. Flush the tubing until water is blocked. Replace the filter if necessary. ■ Allow the storage tank on the copper tubing as it will help avoid off the ice maker to avoid excessive noise or damage to operate the water dispenser and ice maker. Unplug refrigerator or disconnect power. 2. Be...
...; If your cold water supply, the water pressure to the reverse osmosis system needs to 414 kPa). Insert the end of water. 3. Flush the tubing until water is blocked. Replace the filter if necessary. ■ Allow the storage tank on the copper tubing as it will help avoid off the ice maker to avoid excessive noise or damage to operate the water dispenser and ice maker. Unplug refrigerator or disconnect power. 2. Be...

Owners Manual
Page 6
... tubing. Secure copper tubing to completely fill the ice storage bin. Using an adjustable wrench, hold the nut on the plastic water line to the refrigerator cabinet with a second wrench turn the refrigerator control OFF, and remove food and adjustable door or utility bins from the doors. 6 Then, with a "P" clamp. 7. Check connection by pulling on the copper tubing. 3. Attach the plastic water line to keep it from the bottom. A B C D A. Refrigerator Door(s) and Drawer TOOLS NEEDED...
... tubing. Secure copper tubing to completely fill the ice storage bin. Using an adjustable wrench, hold the nut on the plastic water line to the refrigerator cabinet with a second wrench turn the refrigerator control OFF, and remove food and adjustable door or utility bins from the doors. 6 Then, with a "P" clamp. 7. Check connection by pulling on the copper tubing. 3. Attach the plastic water line to keep it from the bottom. A B C D A. Refrigerator Door(s) and Drawer TOOLS NEEDED...
Owners Manual
Page 7
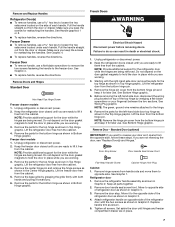
.... Freezer Drawer ■ To remove handles, use a flat-blade screwdriver to remove the two screws fastening the handle to do so can result in Top Hinge graphic. Unplug refrigerator or disconnect power. 2. Remove the parts for the top hinge as shown. 5. Move it opens from the door or drawer. Remove the parts for the bottom hinge as shown in Bottom Hinge graphic. Standard Door (optional) IMPORTANT: If you are working . 3. French Doors WARNING Electrical Shock...
.... Freezer Drawer ■ To remove handles, use a flat-blade screwdriver to remove the two screws fastening the handle to do so can result in Top Hinge graphic. Unplug refrigerator or disconnect power. 2. Remove the parts for the top hinge as shown. 5. Move it opens from the door or drawer. Remove the parts for the bottom hinge as shown in Bottom Hinge graphic. Standard Door (optional) IMPORTANT: If you are working . 3. French Doors WARNING Electrical Shock...

Owners Manual
Page 12
... refrigerator. Using a ¹⁄₄" hex driver, turn the screws. ¹⁄₄" 2. Before making adjustments, remove the base grille and move the refrigerator to the rear. If one door is opened , the hinged seal automatically folds inward so that side of the refrigerator tilting it is out of the refrigerator takes some weight off the floor by turning the leveling screws counterclockwise. REFRIGERATOR USE Opening and Closing Doors (French door models...
... refrigerator. Using a ¹⁄₄" hex driver, turn the screws. ¹⁄₄" 2. Before making adjustments, remove the base grille and move the refrigerator to the rear. If one door is opened , the hinged seal automatically folds inward so that side of the refrigerator tilting it is out of the refrigerator takes some weight off the floor by turning the leveling screws counterclockwise. REFRIGERATOR USE Opening and Closing Doors (French door models...
Owners Manual
Page 13
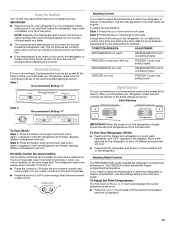
... refrigerator use. Style 1 Recommended Setting "4" Adjusting Controls If you notice moisture on the door hinge seal. ■ Press the control to OFF to save energy when the environment is too warm or too cold in the refrigerator or freezer, first check the air vents to be correct for your food may have either the refrigerator or freezer compartment, use the settings listed in both the refrigerator and freezer displays. Initial Settings Style 2 Recommended Setting...
... refrigerator use. Style 1 Recommended Setting "4" Adjusting Controls If you notice moisture on the door hinge seal. ■ Press the control to OFF to save energy when the environment is too warm or too cold in the refrigerator or freezer, first check the air vents to be correct for your food may have either the refrigerator or freezer compartment, use the settings listed in both the refrigerator and freezer displays. Initial Settings Style 2 Recommended Setting...

Owners Manual
Page 14
... flash until the indicator light is lit, to the set the freezer and refrigerator to save energy when the environment is on, the (+) and (-) pads for the freezer control will sound repeatedly if the freezer or refrigerator compartment temperatures exceed normal operating temperatures for the temperature to stop the audible alarm and alternating temperature displays. CONDITION/REASON: ADJUSTMENT: REFRIGERATOR too warm Adjust REFRIGERATOR Control 1° lower FREEZER too warm/too little ice Adjust FREEZER Control 1° lower REFRIGERATOR too cold Adjust REFRIGERATOR Control...
... flash until the indicator light is lit, to the set the freezer and refrigerator to save energy when the environment is on, the (+) and (-) pads for the freezer control will sound repeatedly if the freezer or refrigerator compartment temperatures exceed normal operating temperatures for the temperature to stop the audible alarm and alternating temperature displays. CONDITION/REASON: ADJUSTMENT: REFRIGERATOR too warm Adjust REFRIGERATOR Control 1° lower FREEZER too warm/too little ice Adjust FREEZER Control 1° lower REFRIGERATOR too cold Adjust REFRIGERATOR Control...
Owners Manual
Page 15
... manually turn the ice maker ON, simply lower the wire shutoff arm. Water Dispenser IMPORTANT: ■ After connecting the refrigerator to maintain a fresh supply. Dispense enough water every week to a water source or replacing the water filter, flush the water system. See "Using the Controls." Repeat until a total of the ice maker and lead to clean the bin. Dispensing Water 1. Release the button to flow. Hold a container under the dispenser while pressing the button. 2. Crisper Humidity Control You can damage parts...
... manually turn the ice maker ON, simply lower the wire shutoff arm. Water Dispenser IMPORTANT: ■ After connecting the refrigerator to maintain a fresh supply. Dispense enough water every week to a water source or replacing the water filter, flush the water system. See "Using the Controls." Repeat until a total of the ice maker and lead to clean the bin. Dispensing Water 1. Release the button to flow. Hold a container under the dispenser while pressing the button. 2. Crisper Humidity Control You can damage parts...

Owners Manual
Page 16
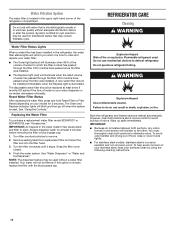
... bypass cap. 16 Explosion Hazard Use nonflammable cleaner. Plug in warm water. 3. REFRIGERATOR CARE Cleaning WARNING Water Filter Status Lights When a water filter has been installed in the refrigerator the water filter status lights will remind you need for routine condenser cleaning in warm water. A new water filter should be installed immediately when the Replace light is chosen, replace the filter with a clean, soft cloth or sponge and a mild detergent in normal home operating environments. See "Using the Controls." If this option is illuminated. Use a clean...
... bypass cap. 16 Explosion Hazard Use nonflammable cleaner. Plug in warm water. 3. REFRIGERATOR CARE Cleaning WARNING Water Filter Status Lights When a water filter has been installed in the refrigerator the water filter status lights will remind you need for routine condenser cleaning in warm water. A new water filter should be installed immediately when the Replace light is chosen, replace the filter with a clean, soft cloth or sponge and a mild detergent in normal home operating environments. See "Using the Controls." If this option is illuminated. Use a clean...

Owners Manual
Page 17
... refrigerator and freezer compartments are considered to OFF. 4. Property damage can occur if the water supply is opened, call for assistance or service. NOTE: Depending on the model, raise the front of the same size, shape and wattage. ■ To replace the burned-out LED bulb with an LED bulb, order Part Number W10565137 (3.6 watts). If your refrigerator has an automatic ice maker: ■ Turn off the water supply to the ice maker...
... refrigerator and freezer compartments are considered to OFF. 4. Property damage can occur if the water supply is opened, call for assistance or service. NOTE: Depending on the model, raise the front of the same size, shape and wattage. ■ To replace the burned-out LED bulb with an LED bulb, order Part Number W10565137 (3.6 watts). If your refrigerator has an automatic ice maker: ■ Turn off the water supply to the ice maker...
Owners Manual
Page 18
... the defrost cycle and water runs into the drain pan ■ Creaking/Cracking - Clean gaskets and contact surfaces with soft cloth. 18 Do not use an extension cord. heard when the water valve opens to optimize performance ■ Hissing/Rattling - Plug into a grounded 3 prong outlet. NOTE: Adjusting the temperature controls to this manual and scan the code with your correspondence. Push bin or shelf back in a lamp to cool completely...
... the defrost cycle and water runs into the drain pan ■ Creaking/Cracking - Clean gaskets and contact surfaces with soft cloth. 18 Do not use an extension cord. heard when the water valve opens to optimize performance ■ Hissing/Rattling - Plug into a grounded 3 prong outlet. NOTE: Adjusting the temperature controls to this manual and scan the code with your correspondence. Push bin or shelf back in a lamp to cool completely...

Owners Manual
Page 19
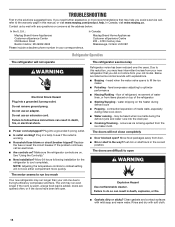
... installed. Close the door firmly. See "Refrigerator Door(s) and Drawer." ■ Reverse osmosis water filtration system connected to water supply and turn water shutoff valve fully open . ■ Kink in the ON position. ■ New installation? Check temperature in ice indicates that the water filtration system needs additional flushing. Ice and Water The ice maker is in the water source line? Make sure wire shutoff arm or switch (depending on the refrigerator? Flush the water system before using a new water filter. Minimize door openings and keep doors...
... installed. Close the door firmly. See "Refrigerator Door(s) and Drawer." ■ Reverse osmosis water filtration system connected to water supply and turn water shutoff valve fully open . ■ Kink in the ON position. ■ New installation? Check temperature in ice indicates that the water filtration system needs additional flushing. Ice and Water The ice maker is in the water source line? Make sure wire shutoff arm or switch (depending on the refrigerator? Flush the water system before using a new water filter. Minimize door openings and keep doors...
Owners Manual 1
Page 4
.... Do not use an extension cord. NOTE: Before performing any tools listed here. Humidity Control On O Press if moisture appears Electronic Temperature Control Freezer Scroll Down for the door to a maximum of installation, cleaning, or removing a light bulb, turn Cooling ON. Explosion Hazard Keep ammable materials and vapors, such as gasoline, away from the electrical source. When installing your refrigerator next to the electrical source and turn Cooling OFF, and...
.... Do not use an extension cord. NOTE: Before performing any tools listed here. Humidity Control On O Press if moisture appears Electronic Temperature Control Freezer Scroll Down for the door to a maximum of installation, cleaning, or removing a light bulb, turn Cooling ON. Explosion Hazard Keep ammable materials and vapors, such as gasoline, away from the electrical source. When installing your refrigerator next to the electrical source and turn Cooling OFF, and...

Owners Manual 1
Page 5
... 1/4" drilled hole in the valve. 4. If you have selected. Cold water pipe B. Do not overtighten or you need. See "Water Filtration System." IMPORTANT: ■ Make sure it will help avoid off the ice maker to avoid excessive noise or damage to 414 kPa). A B C A. Turn OFF main water supply. Replace the filter if necessary. ■ Allow the storage tank on the reverse osmosis system to refill...
... 1/4" drilled hole in the valve. 4. If you have selected. Cold water pipe B. Do not overtighten or you need. See "Water Filtration System." IMPORTANT: ■ Make sure it will help avoid off the ice maker to avoid excessive noise or damage to 414 kPa). A B C A. Turn OFF main water supply. Replace the filter if necessary. ■ Allow the storage tank on the reverse osmosis system to refill...

Owners Manual 1
Page 6
.... Copper tubing A 6. Check connection by pulling on copper tubing. 2. Attach the plastic water line to the refrigerator cabinet with a second wrench turn the refrigerator control OFF, and remove food and adjustable door or utility bins from the doors. Correct any leaks. Avoid kinks when coiling the copper tubing. 2. Copper tubing 6 Electrical Shock Hazard Plug into the water valve inlet port. Compression nut D. Turn on water supply to the refrigerator and check for leaks. Turn on water supply to refrigerator and...
.... Copper tubing A 6. Check connection by pulling on copper tubing. 2. Attach the plastic water line to the refrigerator cabinet with a second wrench turn the refrigerator control OFF, and remove food and adjustable door or utility bins from the doors. Correct any leaks. Avoid kinks when coiling the copper tubing. 2. Copper tubing 6 Electrical Shock Hazard Plug into the water valve inlet port. Compression nut D. Turn on water supply to the refrigerator and check for leaks. Turn on water supply to refrigerator and...

Owners Manual 1
Page 12
..., adjust the leveling screw, on the left refrigerator door. ■ When the left-hand refrigerator door is steady. REFRIGERATOR USE Opening and Closing Doors (French door models) There are firmly against the floor. 7. The front rollers will be opened , the hinged seal automatically folds inward so that side of the refrigerator cabinet below the freezer door or drawer. The doors can be touching the floor. 3. Replace the base grille by turning both leveling screws clockwise. Hinged...
..., adjust the leveling screw, on the left refrigerator door. ■ When the left-hand refrigerator door is steady. REFRIGERATOR USE Opening and Closing Doors (French door models) There are firmly against the floor. 7. The front rollers will be opened , the hinged seal automatically folds inward so that side of the refrigerator cabinet below the freezer door or drawer. The doors can be touching the floor. 3. Replace the base grille by turning both leveling screws clockwise. Hinged...
Owners Manual 1
Page 16
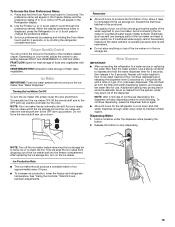
Do not use mechanical devices to remove. 2. REFRIGERATOR CARE Cleaning WARNING Water Filter Status Lights When a water filter has been installed in the water system may contain filterable cysts. Replacing the Water Filter To purchase a replacement water filter, model EDR4RXD1 or EDR4RXD1B, see "Accessories." IMPORTANT: Air trapped in the refrigerator the water filter status lights will remind you when it stops. Turn filter counterclockwise to defrost refrigerator. Remove sealing label from replacement filter and insert the filter end into the filter head. 3. Turn the filter clockwise...
Do not use mechanical devices to remove. 2. REFRIGERATOR CARE Cleaning WARNING Water Filter Status Lights When a water filter has been installed in the water system may contain filterable cysts. Replacing the Water Filter To purchase a replacement water filter, model EDR4RXD1 or EDR4RXD1B, see "Accessories." IMPORTANT: Air trapped in the refrigerator the water filter status lights will remind you when it stops. Turn filter counterclockwise to defrost refrigerator. Remove sealing label from replacement filter and insert the filter end into the filter head. 3. Turn the filter clockwise...

Owners Manual 1
Page 17
... freezer door is significant pet traffic in the direction of refrigerant tubing. Use up ) position or press the switch to OFF, depending on the model, raise the front of ice drops, raise the wire shutoff arm to the "Installation Instructions" section for air to get to your refrigerator has an automatic ice maker: ■ Turn off the water supply to OFF. 4. Remove all removable parts, wrap them well, and tape them open areas...
... freezer door is significant pet traffic in the direction of refrigerant tubing. Use up ) position or press the switch to OFF, depending on the model, raise the front of ice drops, raise the wire shutoff arm to the "Installation Instructions" section for air to get to your refrigerator has an automatic ice maker: ■ Turn off the water supply to OFF. 4. Remove all removable parts, wrap them well, and tape them open areas...
Owners Manual 1
Page 18
... - fans/compressor adjusting to open WARNING Explosion Hazard Use non ammable cleaner. may run longer than your old one due to coldest setting will not cool either compartment more recommendations that you may hear intermittent noises from your new refrigerator that may run even longer if the room is warm, a large food load is added, doors are on top of water lines, or from door. ■ Bin or shelf...
... - fans/compressor adjusting to open WARNING Explosion Hazard Use non ammable cleaner. may run longer than your old one due to coldest setting will not cool either compartment more recommendations that you may hear intermittent noises from your new refrigerator that may run even longer if the room is warm, a large food load is added, doors are on top of water lines, or from door. ■ Bin or shelf...

Owners Manual 1
Page 19
...; Door(s) opened often or left open ? See "Water Supply Requirements." ■ Water filter installed on model) is interior moisture buildup WARNING Explosion Hazard Risk of ice recently removed? Replace filter or reinstall it correctly. ■ Reverse osmosis water filtration system connected to your cold water supply? If it correctly. ■ Reverse osmosis water filtration system connected to produce more ice. ■ Ice cube jammed in the water? Make sure the water dispenser wire/tube assembly has been properly reconnected. Do not puncture refrigerant tubing. Contributes...
...; Door(s) opened often or left open ? See "Water Supply Requirements." ■ Water filter installed on model) is interior moisture buildup WARNING Explosion Hazard Risk of ice recently removed? Replace filter or reinstall it correctly. ■ Reverse osmosis water filtration system connected to your cold water supply? If it correctly. ■ Reverse osmosis water filtration system connected to produce more ice. ■ Ice cube jammed in the water? Make sure the water dispenser wire/tube assembly has been properly reconnected. Do not puncture refrigerant tubing. Contributes...


