Owners Manual
Page 4
... near these openings, oven doors, and windows of these surfaces are dark in the manual. Do not repair or replace any part of the range unless specifically recommended in use of undersized utensils will also improve efficiency. ■ Never Leave Surface Units Unattended ... line surface unit drip bowls or oven bottoms, except as suggested in color. No commercial oven cleaner or oven liner protective coating of any part of pressure may become hot enough to damage. ■ Protective Liners - Contact a qualified technician immediately. ■ Clean Cooktop With Caution...
... near these openings, oven doors, and windows of these surfaces are dark in the manual. Do not repair or replace any part of the range unless specifically recommended in use of undersized utensils will also improve efficiency. ■ Never Leave Surface Units Unattended ... line surface unit drip bowls or oven bottoms, except as suggested in color. No commercial oven cleaner or oven liner protective coating of any part of pressure may become hot enough to damage. ■ Protective Liners - Contact a qualified technician immediately. ■ Clean Cooktop With Caution...

Owners Manual
Page 7
... slightly. Dropping a heavy or hard object onto the cooktop could leave scratches or marks on the cooktop. ■ Do not cook popcorn in any part of the entire cooktop. ■ To avoid damage to anywhere between the lid and the cooktop, and the ceramic glass could break when the lid... or copper bottoms and rough finishes on . Push in and turn left front control knob clockwise from the Off position to its original color. Some parts of light colored ceramic glass to appear to the BRIDGE zone anywhere between LOW and HIGH. 2. On cooktops with rounded, warped, ribbed or dented...
... slightly. Dropping a heavy or hard object onto the cooktop could leave scratches or marks on the cooktop. ■ Do not cook popcorn in any part of the entire cooktop. ■ To avoid damage to anywhere between the lid and the cooktop, and the ceramic glass could break when the lid... or copper bottoms and rough finishes on . Push in and turn left front control knob clockwise from the Off position to its original color. Some parts of light colored ceramic glass to appear to the BRIDGE zone anywhere between LOW and HIGH. 2. On cooktops with rounded, warped, ribbed or dented...
Owners Manual
Page 14
Lower oven vent The oven vents release hot air and moisture from the oven early. ■ The back part of the lower oven bake element will preheat more difficult. Loaf, angel food or bundt pans are used when only one may need to avoid ...
Lower oven vent The oven vents release hot air and moisture from the oven early. ■ The back part of the lower oven bake element will preheat more difficult. Loaf, angel food or bundt pans are used when only one may need to avoid ...
Owners Manual
Page 16
"CONVECT BAKE" will scroll in 2 or 3 different places, including the thickest part. 5. Press start to determine the doneness of heated air around the food helps to speed up cooking by penetrating the cooler outer surfaces. ■ It ...
"CONVECT BAKE" will scroll in 2 or 3 different places, including the thickest part. 5. Press start to determine the doneness of heated air around the food helps to speed up cooking by penetrating the cooler outer surfaces. ■ It ...
Owners Manual
Page 21
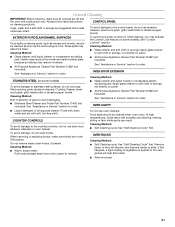
...otherwise noted. Cleaning Method: To avoid turning the controls on while cleaning, you may remove numbers. ■ All-Purpose Appliance Cleaner Part Number 31682 (not included): See "Assistance or Service" section to order. STAINLESS STEEL (on some models) To avoid damage to ...gritty washcloths or abrasive paper towels. If this happens, a light coating of grain to avoid damaging. ■ All-Purpose Appliance Cleaner Part Number 31682 (not included): See "Assistance or Service" section to stainless steel surfaces, do not use steel wool, abrasive cleansers or ...
...otherwise noted. Cleaning Method: To avoid turning the controls on while cleaning, you may remove numbers. ■ All-Purpose Appliance Cleaner Part Number 31682 (not included): See "Assistance or Service" section to order. STAINLESS STEEL (on some models) To avoid damage to ...gritty washcloths or abrasive paper towels. If this happens, a light coating of grain to avoid damaging. ■ All-Purpose Appliance Cleaner Part Number 31682 (not included): See "Assistance or Service" section to stainless steel surfaces, do not use steel wool, abrasive cleansers or ...
Owners Manual
Page 24
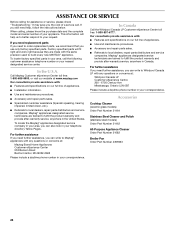
... If you need help us to better respond to build every new MAYTAG® appliance. If you can also look in your correspondence. ■ Use and maintenance procedures. ■ Accessory and repair parts sales. When calling, please know the purchase date and the complete ... Steel Cleaner and Polish (stainless steel models) Order Part Number 31462 All-Purpose Appliance Cleaner Order Part Number 31682 Broiler Pan Order Part Number 4396923 Please include a daytime phone number in your nearest designated service center. Call Maytag Customer eXperience Center toll free: 1-800-688-9900,...
... If you need help us to better respond to build every new MAYTAG® appliance. If you can also look in your correspondence. ■ Use and maintenance procedures. ■ Accessory and repair parts sales. When calling, please know the purchase date and the complete ... Steel Cleaner and Polish (stainless steel models) Order Part Number 31462 All-Purpose Appliance Cleaner Order Part Number 31682 Broiler Pan Order Part Number 4396923 Please include a daytime phone number in your nearest designated service center. Call Maytag Customer eXperience Center toll free: 1-800-688-9900,...

Owners Manual
Page 25
... not available. 10. Damage resulting from your major appliance, to replace or repair house fuses, or to be provided by Maytag. 5. Consumable parts are unable to resolve the problem after checking "Troubleshooting," additional help can be found by checking the "Assistance or Service" ...alteration, misuse, abuse, fire, flood, acts of God, improper installation, installation not in accordance with the product, Maytag will pay for factory specified parts for other damage to the finish of your major appliance, unless such damage results from defects in materials or workmanship...
... not available. 10. Damage resulting from your major appliance, to replace or repair house fuses, or to be provided by Maytag. 5. Consumable parts are unable to resolve the problem after checking "Troubleshooting," additional help can be found by checking the "Assistance or Service" ...alteration, misuse, abuse, fire, flood, acts of God, improper installation, installation not in accordance with the product, Maytag will pay for factory specified parts for other damage to the finish of your major appliance, unless such damage results from defects in materials or workmanship...

Installation Instructions
Page 1
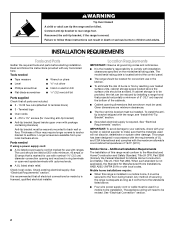
... what the potential hazard is the safety alert symbol. This symbol alerts you to reduce the chance of Contents RANGE SAFETY 1 INSTALLATION REQUIREMENTS 2 Tools and Parts 2 Location Requirements 2 Electrical Requirements - All safety messages will follow instructions. This is , tell you how to potential hazards that can kill or hurt you what...
... what the potential hazard is the safety alert symbol. This symbol alerts you to reduce the chance of Contents RANGE SAFETY 1 INSTALLATION REQUIREMENTS 2 Tools and Parts 2 Location Requirements 2 Electrical Requirements - All safety messages will follow instructions. This is , tell you how to potential hazards that can kill or hurt you what...
Installation Instructions
Page 2
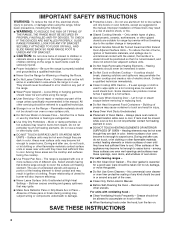
.... ■ Cabinet opening and must be secured to your cabinets, check with installation clearances specified on the model/serial rating plate. Parts needed ■ Tape measure ■ Level ■ Wrench or pliers nut driver ■ Phillips screwdriver ■ Hand or electric... drill ■ Flat-blade screwdriver 3.2 mm) drill bit Parts supplied Check that the materials used in a mobile home, it conforms to children and adults. See "Electrical Requirements" section. IMPORTANT: ...
.... ■ Cabinet opening and must be secured to your cabinets, check with installation clearances specified on the model/serial rating plate. Parts needed ■ Tape measure ■ Level ■ Wrench or pliers nut driver ■ Phillips screwdriver ■ Hand or electric... drill ■ Flat-blade screwdriver 3.2 mm) drill bit Parts supplied Check that the materials used in a mobile home, it conforms to children and adults. See "Electrical Requirements" section. IMPORTANT: ...

Installation Instructions
Page 5
.../208 Volts 7.8 - 12.5 KW 12.6 - 18.5 KW Specified Rating of the above code standards can result in accordance with CSA Standard C22.1, Canadian Electrical Code, Part 1 - Failure to be obtained from: Canadian Standards Association 178 Rexdale Blvd. For 50-amp rated cord kits, use kits that the ground path is adequate...
.../208 Volts 7.8 - 12.5 KW 12.6 - 18.5 KW Specified Rating of the above code standards can result in accordance with CSA Standard C22.1, Canadian Electrical Code, Part 1 - Failure to be obtained from: Canadian Standards Association 178 Rexdale Blvd. For 50-amp rated cord kits, use kits that the ground path is adequate...
Installation Instructions
Page 6
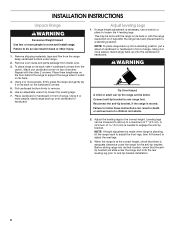
... these instructions can tip the range and be killed. A minimum of 5.0 mm) is moved. Failure to engage the anti-tip bracket. Remove oven racks and parts package from the range. Stack one cardboard corner on its back. 4. Place cardboard or hardboard in front of 1" (2.5 cm). Place them lengthwise on the floor...
... these instructions can tip the range and be killed. A minimum of 5.0 mm) is moved. Failure to engage the anti-tip bracket. Remove oven racks and parts package from the range. Stack one cardboard corner on its back. 4. Place cardboard or hardboard in front of 1" (2.5 cm). Place them lengthwise on the floor...
Installation Instructions
Page 10
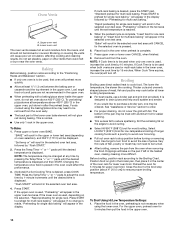
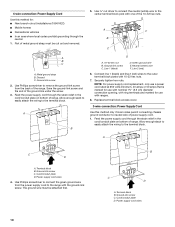
... access cover. 3-wire connection: Power Supply Cord Use this method for use with one of power supply cord. 1. The ground wire must be attached first. Part of range. Ground-link screw C. Cord/conduit plate D.
... access cover. 3-wire connection: Power Supply Cord Use this method for use with one of power supply cord. 1. The ground wire must be attached first. Part of range. Ground-link screw C. Cord/conduit plate D.
Installation Instructions
Page 11
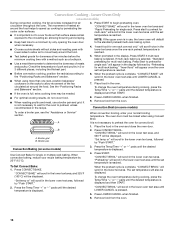
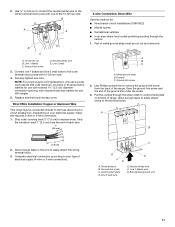
... screw from the end of metal ground strap must be connected directly to the terminal block. Line 1 (black) C. Line 2 (red) 3. Replace terminal block access cover. Part of each wire. 1" (2.5 cm) 4-wire Connection: Direct Wire Use this method for use with ring terminals and marked for : ■ New branch-circuit installations (1996...
... screw from the end of metal ground strap must be connected directly to the terminal block. Line 1 (black) C. Line 2 (red) 3. Replace terminal block access cover. Part of each wire. 1" (2.5 cm) 4-wire Connection: Direct Wire Use this method for use with ring terminals and marked for : ■ New branch-circuit installations (1996...

Installation Instructions
Page 13
... mild solution of the 10-32 hex nuts. Slide range into position. 5. Turn on . or circuit breaker has not tripped. ■ Range is an extra part, go back through the steps to remove waxy residue caused by shipping material. When the range has been on for 5 minutes, check for the anti... be level for specific instruction on oven rack and check levelness of your tools. 3. For more information, read the "Range Care" section of /recycle all parts are not bent. 8. Check that rear leveling leg is removed from the anti-tip bracket. 4. Dispose of the Use and Care Guide. 6. then front...
... mild solution of the 10-32 hex nuts. Slide range into position. 5. Turn on . or circuit breaker has not tripped. ■ Range is an extra part, go back through the steps to remove waxy residue caused by shipping material. When the range has been on for 5 minutes, check for the anti... be level for specific instruction on oven rack and check levelness of your tools. 3. For more information, read the "Range Care" section of /recycle all parts are not bent. 8. Check that rear leveling leg is removed from the anti-tip bracket. 4. Dispose of the Use and Care Guide. 6. then front...

Installation Instructions
Page 14
When moving range, slide range onto cardboard or hardboard to rear range foot. Electrical Shock Hazard Disconnect power before operating. Replace all parts and panels before servicing. Reconnect power. 6. Check that anti-tip bracket is under anti-tip bracket. Complete cleaning or maintenance. 4. To check that range is ...
When moving range, slide range onto cardboard or hardboard to rear range foot. Electrical Shock Hazard Disconnect power before operating. Replace all parts and panels before servicing. Reconnect power. 6. Check that anti-tip bracket is under anti-tip bracket. Complete cleaning or maintenance. 4. To check that range is ...


