
Owners Manual
Page 3
... during cooking may result in Manual. ■ Before Self-Cleaning the Oven - Only certain types of the oven. ■ Clean Only Parts Listed in a risk of clothing. Heating elements should be immersed in oven. ■ DO NOT TOUCH HEATING ELEMENTS OR INTERIOR SURFACES OF ... should be careful to unintentional contact with ventilating hood - ■ Clean Ventilating Hoods Frequently - Do not repair or replace any part of glass, glass/ceramic, ceramic, earthenware, or other flammable materials contact heating elements or interior surfaces of these liners may subject wiring...
... during cooking may result in Manual. ■ Before Self-Cleaning the Oven - Only certain types of the oven. ■ Clean Only Parts Listed in a risk of clothing. Heating elements should be immersed in oven. ■ DO NOT TOUCH HEATING ELEMENTS OR INTERIOR SURFACES OF ... should be careful to unintentional contact with ventilating hood - ■ Clean Ventilating Hoods Frequently - Do not repair or replace any part of glass, glass/ceramic, ceramic, earthenware, or other flammable materials contact heating elements or interior surfaces of these liners may subject wiring...
Owners Manual
Page 9
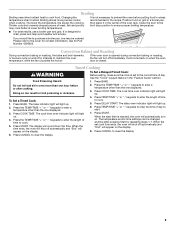
Broiling Broiling uses direct radiant heat to preheat the oven before or after pressing Start by repeating steps 1-7. It is designed to the cover for Part Number 4396923. If you would like to purchase a broiler pan, one hour before putting food in unless recommended in the recipe. Convection Baking and Roasting ...
Broiling Broiling uses direct radiant heat to preheat the oven before or after pressing Start by repeating steps 1-7. It is designed to the cover for Part Number 4396923. If you would like to purchase a broiler pan, one hour before putting food in unless recommended in the recipe. Convection Baking and Roasting ...
Owners Manual
Page 11
... for scratches. Store razor blades out of the reach of the oven counterclockwise to slide, a light coating of our website at www.maytag.com. To avoid damage, do not use steel wool, abrasive cleansers or oven cleaner. Plug in the off position. 2. Always follow...aluminum and copper ■ Clean with Cooktop Cleaner or nonabrasive cleanser: EXTERIOR PORCELAIN ENAMEL SURFACES (on panel. ■ All-Purpose Appliance Cleaner Part Number 31682 (not included): See cover for contact information. Replace bulb, then bulb cover by turning clockwise. 5. STORAGE DRAWER OR WARMING ...
... for scratches. Store razor blades out of the reach of the oven counterclockwise to slide, a light coating of our website at www.maytag.com. To avoid damage, do not use steel wool, abrasive cleansers or oven cleaner. Plug in the off position. 2. Always follow...aluminum and copper ■ Clean with Cooktop Cleaner or nonabrasive cleanser: EXTERIOR PORCELAIN ENAMEL SURFACES (on panel. ■ All-Purpose Appliance Cleaner Part Number 31682 (not included): See cover for contact information. Replace bulb, then bulb cover by turning clockwise. 5. STORAGE DRAWER OR WARMING ...

Owners Manual
Page 13
Canning Unit Kit (coil element models) Order Part Number 242905 Cooktop Care Kit (includes cleaner, protectant, and applicator pads) Order Part Number 31605 Cooktop Protectant Order Part Number 31463 ACCESSORIES Cooktop Cleaner (ceramic glass models) Order Part Number 31464 Cooktop Scraper (ceramic glass models) Order Part Number WA906B Stainless Steel Cleaner and Polish (stainless steel models) Order Part Number 31462 All-Purpose Appliance Cleaner Order Part Number 31682 Split-Rack with Removable Insert Order Part Number 4396927 Broiler Pan Order Part Number 4396923 13
Canning Unit Kit (coil element models) Order Part Number 242905 Cooktop Care Kit (includes cleaner, protectant, and applicator pads) Order Part Number 31605 Cooktop Protectant Order Part Number 31463 ACCESSORIES Cooktop Cleaner (ceramic glass models) Order Part Number 31464 Cooktop Scraper (ceramic glass models) Order Part Number WA906B Stainless Steel Cleaner and Polish (stainless steel models) Order Part Number 31462 All-Purpose Appliance Cleaner Order Part Number 31682 Split-Rack with Removable Insert Order Part Number 4396927 Broiler Pan Order Part Number 4396923 13
Owners Manual
Page 14
... easily determined. Repairs when your major appliance is not available. 10. Expenses for travel and transportation for factory specified parts and repair labor to Maytag within 30 days from your home of consumables or cleaning products not approved by the customer. If you would like... to parts or systems resulting from warranty coverage. 3. Service must be borne by Maytag. 5. Damage resulting from your major appliance is located in accordance with original model/serial numbers ...
... easily determined. Repairs when your major appliance is not available. 10. Expenses for travel and transportation for factory specified parts and repair labor to Maytag within 30 days from your home of consumables or cleaning products not approved by the customer. If you would like... to parts or systems resulting from warranty coverage. 3. Service must be borne by Maytag. 5. Damage resulting from your major appliance is located in accordance with original model/serial numbers ...

Installation Instructions
Page 1
U.S.A. W10252706B Only 4 INSTALLATION INSTRUCTIONS 6 Unpack Range 6 Install Anti-Tip Bracket 6 Electrical Connection - U.S.A. Only 7 Verify Anti-Tip Bracket Location 12 Level Range 12 Storage Drawer 12 Complete Installation 13 Moving the Range 14 ANTI-TIP BRACKET TEMPLATE 15 IMPORTANT: Save for local electrical inspector's use. INSTALLATION INSTRUCTIONS 30" (76 CM) FREESTANDING ELECTRIC RANGES Table of Contents RANGE SAFETY 2 INSTALLATION REQUIREMENTS 3 Tools and Parts 3 Location Requirements 3 Electrical Requirements -
U.S.A. W10252706B Only 4 INSTALLATION INSTRUCTIONS 6 Unpack Range 6 Install Anti-Tip Bracket 6 Electrical Connection - U.S.A. Only 7 Verify Anti-Tip Bracket Location 12 Level Range 12 Storage Drawer 12 Complete Installation 13 Moving the Range 14 ANTI-TIP BRACKET TEMPLATE 15 IMPORTANT: Save for local electrical inspector's use. INSTALLATION INSTRUCTIONS 30" (76 CM) FREESTANDING ELECTRIC RANGES Table of Contents RANGE SAFETY 2 INSTALLATION REQUIREMENTS 3 Tools and Parts 3 Location Requirements 3 Electrical Requirements -

Installation Instructions
Page 3
...cabinet storage space located above . ■ Four-wire power supply cord or cable must be made by installing a range hood that all parts are available from your cabinets, check with any tools listed here. See "Electrical Connection" section. 3 The cord should be rated at ... left side frame behind the storage drawer panel. ■ The range should be located for Mobile Home Construction and Safety, Title 24, HUD Part 280). Check local codes. When such standard is required. See "Electrical Requirements" section. IMPORTANT: To avoid damage to the floor during transit....
...cabinet storage space located above . ■ Four-wire power supply cord or cable must be made by installing a range hood that all parts are available from your cabinets, check with any tools listed here. See "Electrical Connection" section. 3 The cord should be rated at ... left side frame behind the storage drawer panel. ■ The range should be located for Mobile Home Construction and Safety, Title 24, HUD Part 280). Check local codes. When such standard is required. See "Electrical Requirements" section. IMPORTANT: To avoid damage to the floor during transit....

Installation Instructions
Page 6
...;" drive ratchet to lower the front and rear leveling legs one -half turn. Connect anti-tip bracket to children and adults. A. Remove oven racks and parts package from range. 2. Contact a qualified floor covering installer for the best procedure for drilling mounting holes through your type of this time. If countertop is...
...;" drive ratchet to lower the front and rear leveling legs one -half turn. Connect anti-tip bracket to children and adults. A. Remove oven racks and parts package from range. 2. Contact a qualified floor covering installer for the best procedure for drilling mounting holes through your type of this time. If countertop is...

Installation Instructions
Page 8
... wire disconnect 3" (7.6 cm) 4-wire connection: Power Supply Cord Use this method for the flexible conduit connection. ■ Assemble a UL listed conduit connector in the opening . A B A. Part of metal ground strap must be Go to Section: connecting to remove the ground-link screw from the back of the range. Electrical Connection Options...
... wire disconnect 3" (7.6 cm) 4-wire connection: Power Supply Cord Use this method for the flexible conduit connection. ■ Assemble a UL listed conduit connector in the opening . A B A. Part of metal ground strap must be Go to Section: connecting to remove the ground-link screw from the back of the range. Electrical Connection Options...

Installation Instructions
Page 10
Pull the wires through the strain relief on bottom of terminal lugs. A B 3" (7.6 cm) 2. Part of metal ground strap must not contact any other terminal. 10 Ground-link screw C. Line 2 (red) wire F. Loosen (do not remove) the setscrew on your ...
Pull the wires through the strain relief on bottom of terminal lugs. A B 3" (7.6 cm) 2. Part of metal ground strap must not contact any other terminal. 10 Ground-link screw C. Line 2 (red) wire F. Loosen (do not remove) the setscrew on your ...

Installation Instructions
Page 13
...tools. 3. Dry thoroughly with the gap in its fully forward position. 2. If range is level. NOTE: When you have all of /recycle all parts are removing and replacing the storage drawer, a slight push may be needed to see which step was skipped. 2. Check that the range is cold,...: ■ Household fuse is connected. ■ See "Troubleshooting" in the range Use and Care Guide. 7. Once the storage drawer is an extra part, go back through the steps to move the drawer stop notch past the drawer glides. Complete Installation 1. To Replace: 1. Lift up the front of liquid...
...tools. 3. Dry thoroughly with the gap in its fully forward position. 2. If range is level. NOTE: When you have all of /recycle all parts are removing and replacing the storage drawer, a slight push may be needed to see which step was skipped. 2. Check that the range is cold,...: ■ Household fuse is connected. ■ See "Troubleshooting" in the range Use and Care Guide. 7. Once the storage drawer is an extra part, go back through the steps to move the drawer stop notch past the drawer glides. Complete Installation 1. To Replace: 1. Lift up the front of liquid...

Installation Instructions
Page 14
... necessary for the anti-tip bracket securely attached to floor. ■ Slide range back so rear range foot is under anti-tip bracket. 5. Replace all parts and panels before servicing. Failure to do so can tip the range and be killed. Check that anti-tip bracket is installed: ■ Look for...
... necessary for the anti-tip bracket securely attached to floor. ■ Slide range back so rear range foot is under anti-tip bracket. 5. Replace all parts and panels before servicing. Failure to do so can tip the range and be killed. Check that anti-tip bracket is installed: ■ Look for...

Warranty Information
Page 1
... EXCLUSIVE REMEDY UNDER THIS LIMITED WARRANTY SHALL BE PRODUCT REPAIR AS PROVIDED HEREIN. If you may contact us at the number below : Maytag Brand Home Appliances Customer eXperience Center 553 Benson Road Benton Harbor, MI 49022-2692 Please include a daytime phone number in your major ...model number and serial number on the label, located on how to use of consumables or cleaning products not approved by a Maytag designated service company. Consumable parts are excluded from warranty coverage. 3. Repairs when your major appliance is located in a remote area where service by the customer...
... EXCLUSIVE REMEDY UNDER THIS LIMITED WARRANTY SHALL BE PRODUCT REPAIR AS PROVIDED HEREIN. If you may contact us at the number below : Maytag Brand Home Appliances Customer eXperience Center 553 Benson Road Benton Harbor, MI 49022-2692 Please include a daytime phone number in your major ...model number and serial number on the label, located on how to use of consumables or cleaning products not approved by a Maytag designated service company. Consumable parts are excluded from warranty coverage. 3. Repairs when your major appliance is located in a remote area where service by the customer...


