
Installation Instructions
Page 1
U.S.A. Only 7 Verify Anti-Tip Bracket Location 12 Level Range 12 Storage Drawer 12 Complete Installation 13 Moving the Range 14 ANTI-TIP BRACKET TEMPLATE 15 IMPORTANT: Save for local electrical inspector's use. Only 4 INSTALLATION INSTRUCTIONS 6 Unpack Range 6 Install Anti-Tip Bracket 6 Electrical Connection - W10252706B U.S.A. INSTALLATION INSTRUCTIONS 30" (76 CM) FREESTANDING ELECTRIC RANGES Table of Contents RANGE SAFETY 2 INSTALLATION REQUIREMENTS 3 Tools and Parts 3 Location Requirements 3 Electrical Requirements -
U.S.A. Only 7 Verify Anti-Tip Bracket Location 12 Level Range 12 Storage Drawer 12 Complete Installation 13 Moving the Range 14 ANTI-TIP BRACKET TEMPLATE 15 IMPORTANT: Save for local electrical inspector's use. Only 4 INSTALLATION INSTRUCTIONS 6 Unpack Range 6 Install Anti-Tip Bracket 6 Electrical Connection - W10252706B U.S.A. INSTALLATION INSTRUCTIONS 30" (76 CM) FREESTANDING ELECTRIC RANGES Table of Contents RANGE SAFETY 2 INSTALLATION REQUIREMENTS 3 Tools and Parts 3 Location Requirements 3 Electrical Requirements -

Installation Instructions
Page 3
...to comply with installation clearances specified on the left side frame behind the storage drawer panel. ■ The range should be made by a licensed, qualified electrical installer. Given dimensions are available from your cabinets, check with upturned ends. ■ A UL listed strain...Check that the materials used . Additional Installation Requirements The installation of this range is not applicable, use with the maximum allowable wood cabinet temperatures of 194° (90°C). See "Electrical Connection" section. 3 IMPORTANT: To avoid damage to subfloor. Any method...
...to comply with installation clearances specified on the left side frame behind the storage drawer panel. ■ The range should be made by a licensed, qualified electrical installer. Given dimensions are available from your cabinets, check with upturned ends. ■ A UL listed strain...Check that the materials used . Additional Installation Requirements The installation of this range is not applicable, use with the maximum allowable wood cabinet temperatures of 194° (90°C). See "Electrical Connection" section. 3 IMPORTANT: To avoid damage to subfloor. Any method...

Installation Instructions
Page 4
...55.9 cm) from : National Fire Protection Association One Batterymarch Park Quincy, MA 02269. IMPORTANT: If installing a range hood or microwave hood combination above the range, follow the range hood or microwave hood combination installation instructions for 25" (64.0 cm) countertop depth, 24" (61.0 cm... the leveling legs. from floor F 2.2 cm) min. Only If codes permit and a separate ground wire is recommended that a qualified electrical installer determine that the electrical connection and wire size are in * D. 29⁷⁄₈" (75.9 cm) width E. 25" (63.5 cm) depth F....
...55.9 cm) from : National Fire Protection Association One Batterymarch Park Quincy, MA 02269. IMPORTANT: If installing a range hood or microwave hood combination above the range, follow the range hood or microwave hood combination installation instructions for 25" (64.0 cm) countertop depth, 24" (61.0 cm... the leveling legs. from floor F 2.2 cm) min. Only If codes permit and a separate ground wire is recommended that a qualified electrical installer determine that the electrical connection and wire size are in * D. 29⁷⁄₈" (75.9 cm) width E. 25" (63.5 cm) depth F....

Installation Instructions
Page 5
... cord (pigtail) (see following Range Rating chart). See "Electrical Connection." Grounding through the neutral conductor. The fourth (grounding) conductor must be connected to the proper electrical voltage and frequency as specified on the appliance end must be provided at least 4 ft (1.22 m) long. 4-wire... UL listed conduit connector must be used , a matching UL listed, 4-wire, 250-volt, 40- See the "Electrical Connection" section. ■ Allow 2 to 3 ft (61.0 cm to the cabinet. If local codes do not permit ground through flexible or nonmetallic sheathed, copper or ...
... cord (pigtail) (see following Range Rating chart). See "Electrical Connection." Grounding through the neutral conductor. The fourth (grounding) conductor must be connected to the proper electrical voltage and frequency as specified on the appliance end must be provided at least 4 ft (1.22 m) long. 4-wire... UL listed conduit connector must be used , a matching UL listed, 4-wire, 250-volt, 40- See the "Electrical Connection" section. ■ Allow 2 to 3 ft (61.0 cm to the cabinet. If local codes do not permit ground through flexible or nonmetallic sheathed, copper or ...

Installation Instructions
Page 7
... 8 gauge copper or 6 gauge aluminum wire. Disconnect power. 2. To mount anti-tip bracket to the subfloor. Electrical Connection - Electrically ground range. Terminal block cover C. Remove template from floor. Fasten anti-tip bracket with holes in death, fire, or electrical shock. A B C A. Remove template from floor. 6. Depending on the bracket template. Two mounting tabs each side...
... 8 gauge copper or 6 gauge aluminum wire. Disconnect power. 2. To mount anti-tip bracket to the subfloor. Electrical Connection - Electrically ground range. Terminal block cover C. Remove template from floor. Fasten anti-tip bracket with holes in death, fire, or electrical shock. A B C A. Remove template from floor. 6. Depending on the bracket template. Two mounting tabs each side...

Installation Instructions
Page 8
... . Part of metal ground strap must be Go to Section: connecting to remove the ground-link screw from the back of the range. Discard C. Add strain relief. Removable retaining nut B. Complete installation following instructions for : ■ New branch-circuit installations (1996 NEC...receptacle (NEMA type 14-50R) A UL listed, 250-volt minimum, 40-amp, range power supply cord 4-wire connection: Power supply cord A A. Metal ground strap B. Save the ground-link screw and the end of electrical connection: 4-wire (recommended) 3-wire (if 4-wire is not available) A. 4. Style...
... . Part of metal ground strap must be Go to Section: connecting to remove the ground-link screw from the back of the range. Discard C. Add strain relief. Removable retaining nut B. Complete installation following instructions for : ■ New branch-circuit installations (1996 NEC...receptacle (NEMA type 14-50R) A UL listed, 250-volt minimum, 40-amp, range power supply cord 4-wire connection: Power supply cord A A. Metal ground strap B. Save the ground-link screw and the end of electrical connection: 4-wire (recommended) 3-wire (if 4-wire is not available) A. 4. Style...

Installation Instructions
Page 10
...D E A. The ground wire must be attached first and must be connected directly to the terminal block. Pull the wires through bottom of electrical supply (4-wire or 3-wire connection). 4-wire Connection: Direct Wire Use this method for: ■ New branch-circuit installations (1996 NEC) ... neutral 1. Discard C. A B 3" (7.6 cm) 2. Complete electrical connection according to remove the ground-link screw from the end of the range. Metal ground strap B. Save the ground-link screw and the end of range. Setscrew C. Use a hex or Phillips screwdriver to connect the...
...D E A. The ground wire must be attached first and must be connected directly to the terminal block. Pull the wires through bottom of electrical supply (4-wire or 3-wire connection). 4-wire Connection: Direct Wire Use this method for: ■ New branch-circuit installations (1996 NEC) ... neutral 1. Discard C. A B 3" (7.6 cm) 2. Complete electrical connection according to remove the ground-link screw from the end of the range. Metal ground strap B. Save the ground-link screw and the end of range. Setscrew C. Use a hex or Phillips screwdriver to connect the...

Installation Instructions
Page 13
...back of the storage drawer to remove waxy residue caused by shipping material. Slowly push the storage drawer into an outlet. ■ Electrical supply is fully engaged on range operation. Dispose of liquid household cleaner and warm water to a level position. 3. Use a mild solution of /recycle all packaging ...drawer stop notch past the drawer glides. Check that all of the Use and Care Guide. 6. See "Level Range." 5. Read "Range Use" in the Use and Care Guide. If range is intact and tight; NOTE: When you have all parts are removing and replacing the storage drawer, a ...
...back of the storage drawer to remove waxy residue caused by shipping material. Slowly push the storage drawer into an outlet. ■ Electrical supply is fully engaged on range operation. Dispose of liquid household cleaner and warm water to a level position. 3. Use a mild solution of /recycle all packaging ...drawer stop notch past the drawer glides. Check that all of the Use and Care Guide. 6. See "Level Range." 5. Read "Range Use" in the Use and Care Guide. If range is intact and tight; NOTE: When you have all parts are removing and replacing the storage drawer, a ...

Installation Instructions
Page 14
... cleaning or maintenance: For power supply cord-connected ranges: 1. Reconnect power. 6. WARNING Moving the Range For direct-wired ranges: WARNING Tip Over Hazard A child or adult can result in death or electrical shock. 1. Failure to children and adults. Electrical Shock Hazard Disconnect power before operating. If removing the range is level. 14 Complete cleaning or maintenance...
... cleaning or maintenance: For power supply cord-connected ranges: 1. Reconnect power. 6. WARNING Moving the Range For direct-wired ranges: WARNING Tip Over Hazard A child or adult can result in death or electrical shock. 1. Failure to children and adults. Electrical Shock Hazard Disconnect power before operating. If removing the range is level. 14 Complete cleaning or maintenance...

Owners Manual
Page 3
...cooktop. ■ Use Proper Pan Size - During and after use aluminum foil to cool. The range is cool. Do not use , do not let potholder contact hot heating element in a risk of electric shock, or fire. ■ Glazed Cooking Utensils - Let hot air or steam escape before ... immersed in the manual. Heating elements should not be careful to persons, or damage when using the range. ■ User Servicing - IMPORTANT SAFETY INSTRUCTIONS WARNING: To reduce the risk of fire, electrical shock, injury to avoid steam burn. If a wet sponge or cloth is hot, do not touch...
...cooktop. ■ Use Proper Pan Size - During and after use aluminum foil to cool. The range is cool. Do not use , do not let potholder contact hot heating element in a risk of electric shock, or fire. ■ Glazed Cooking Utensils - Let hot air or steam escape before ... immersed in the manual. Heating elements should not be careful to persons, or damage when using the range. ■ User Servicing - IMPORTANT SAFETY INSTRUCTIONS WARNING: To reduce the risk of fire, electrical shock, injury to avoid steam burn. If a wet sponge or cloth is hot, do not touch...

Dimension Guide
Page 1
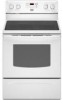
...cm) depth F. when bottom of an unprotected wood or metal cabinet. The model/serial number rating plate is manufactured with ranges. This range is located behind the control panel or on the model/serial number rating plate. If local codes do not permit ground ... A C B D E F A. 13" (33.0 cm) max. 30" (76 cm) Freestanding Electric Range PRODUCT MODEL NUMBERS MER5605W MER7661W MER7662W MER7765W MER7775W Electrical: Range must be connected to the proper electrical voltage and frequency as specified on the oven frame behind the storage drawer panel. upper cabinet depth B. 30...
...cm) depth F. when bottom of an unprotected wood or metal cabinet. The model/serial number rating plate is manufactured with ranges. This range is located behind the control panel or on the model/serial number rating plate. If local codes do not permit ground ... A C B D E F A. 13" (33.0 cm) max. 30" (76 cm) Freestanding Electric Range PRODUCT MODEL NUMBERS MER5605W MER7661W MER7662W MER7765W MER7775W Electrical: Range must be connected to the proper electrical voltage and frequency as specified on the oven frame behind the storage drawer panel. upper cabinet depth B. 30...


