
Installation Instructions
Page 3
...range is to the Manufactured Home Construction and Safety Standard, Title 24 CFR, Part 3280 (formerly the Federal Standard for use with nominal 1³⁄₈" (3.5 cm) diameter connection opening dimensions that all governing codes and ordinances. ■ It is located on the model/serial rating plate. The model... nut driver and nut driver 3.2 mm) drill bit (for wood floors) 4.8 mm) carbide-tipped masonry drill bit (for concrete/ceramic floors) ■ Tin snips or large wire cutters (for Manufactured Home Installations, ANSI A225.1/NFPA 501A or local codes. Check local...
...range is to the Manufactured Home Construction and Safety Standard, Title 24 CFR, Part 3280 (formerly the Federal Standard for use with nominal 1³⁄₈" (3.5 cm) diameter connection opening dimensions that all governing codes and ordinances. ■ It is located on the model/serial rating plate. The model... nut driver and nut driver 3.2 mm) drill bit (for wood floors) 4.8 mm) carbide-tipped masonry drill bit (for concrete/ceramic floors) ■ Tin snips or large wire cutters (for Manufactured Home Installations, ANSI A225.1/NFPA 501A or local codes. Check local...

Installation Instructions
Page 4
...cm) width E. 25" (63.5 cm) depth F. Do not modify the power supply cord plug. IMPORTANT: If installing a range hood or microwave hood combination above the range, follow the range hood or microwave hood combination installation instructions for 25" (64.0 cm) countertop depth, 24" (61.0 cm) base cabinet depth...* C. 36" (91.4 cm) cooktop height (max.) with leveling legs screwed all local codes and ordinances. Model/serial rating plate (located on the left side frame behind storage drawer panel) *Range can result in a risk of cooktop, see NOTE*. D. 30¹⁄₈" (76.5 cm) min....
...cm) width E. 25" (63.5 cm) depth F. Do not modify the power supply cord plug. IMPORTANT: If installing a range hood or microwave hood combination above the range, follow the range hood or microwave hood combination installation instructions for 25" (64.0 cm) countertop depth, 24" (61.0 cm) base cabinet depth...* C. 36" (91.4 cm) cooktop height (max.) with leveling legs screwed all local codes and ordinances. Model/serial rating plate (located on the left side frame behind storage drawer panel) *Range can result in a risk of cooktop, see NOTE*. D. 30¹⁄₈" (76.5 cm) min....

Installation Instructions
Page 5
... to 3 ft (61.0 cm to 91.4 cm) of slack in a NEMA Type 14-50P plug on the model/serial rating plate. **If connecting to a 3-wire system: Local codes may permit the use with ranges. The ground must be used , a matching UL listed, 4-wire, 250-volt, 40- The fourth (grounding) ... electrical connection you will be using and follow the instructions provided for it here. ■ Range must be identified by a green or green/yellow cover and the neutral conductor by a link. The model/serial number rating plate is used . mobile homes; Connectors on the model/serial number rating plate.
... to 3 ft (61.0 cm to 91.4 cm) of slack in a NEMA Type 14-50P plug on the model/serial rating plate. **If connecting to a 3-wire system: Local codes may permit the use with ranges. The ground must be used , a matching UL listed, 4-wire, 250-volt, 40- The fourth (grounding) ... electrical connection you will be using and follow the instructions provided for it here. ■ Range must be identified by a green or green/yellow cover and the neutral conductor by a link. The model/serial number rating plate is used . mobile homes; Connectors on the model/serial number rating plate.

Installation Instructions
Page 12
.... Repeat steps 2, 3, and 4, for removal. Verify Anti-Tip Bracket Location 1. On models with a warming drawer, the rear leg cannot be necessary to floor. ■ Slide range back so rear range foot is installed, use a flashlight and look underneath the bottom of storage drawer 4. See...drawer. 6. Place level on some models). then front to the drawer stop. On Ranges Equipped with Warming Drawers: Use a wrench or pliers to side; Push range back into position. A A. Drawer clip - Gently pull forward on the outside the range. Lift up or down until the...
.... Repeat steps 2, 3, and 4, for removal. Verify Anti-Tip Bracket Location 1. On models with a warming drawer, the rear leg cannot be necessary to floor. ■ Slide range back so rear range foot is installed, use a flashlight and look underneath the bottom of storage drawer 4. See...drawer. 6. Place level on some models). then front to the drawer stop. On Ranges Equipped with Warming Drawers: Use a wrench or pliers to side; Push range back into position. A A. Drawer clip - Gently pull forward on the outside the range. Lift up or down until the...

Owners Manual
Page 4
...PSH" appears in oven and close door to cancel the Timer. FEATURE GUIDE This manual covers several models. Your model may have some or all of day, including a.m. The oven light will function with a.m. Check... Self-clean cycle Oven control lockout Clock Oven timer Baking and roasting Broiling Cooking start Range function Temperature and time adjust INSTRUCTIONS While the oven door is closed, press OVEN LIGHT... If Start is opened. The oven light will sound at www.maytag.com for 3 seconds. 3. KEYPAD OVEN LIGHT SELF-CLEAN START (hold 3 sec to adjust time and temperature settings...
...PSH" appears in oven and close door to cancel the Timer. FEATURE GUIDE This manual covers several models. Your model may have some or all of day, including a.m. The oven light will function with a.m. Check... Self-clean cycle Oven control lockout Clock Oven timer Baking and roasting Broiling Cooking start Range function Temperature and time adjust INSTRUCTIONS While the oven door is closed, press OVEN LIGHT... If Start is opened. The oven light will sound at www.maytag.com for 3 seconds. 3. KEYPAD OVEN LIGHT SELF-CLEAN START (hold 3 sec to adjust time and temperature settings...

Owners Manual
Page 5
...in use will glow red when an element is turned off the cooktop before and after the surface cooking area is on. Single 5 REMEMBER: When range is recommended for larger size cookware. Cookware should not extend more than ½" (1.3 cm) outside the area. It may become hot. Use ... element and is in the same way as the surface cooking area. Fire Hazard Turn off to setting. Hot Surface Indicator Light On ceramic glass models, the hot surface indicator light is located on the console panel. COOKTOP USE WARNING Cooktop On Indicator Light The Cooktop On indicator light ...
...in use will glow red when an element is turned off the cooktop before and after the surface cooking area is on. Single 5 REMEMBER: When range is recommended for larger size cookware. Cookware should not extend more than ½" (1.3 cm) outside the area. It may become hot. Use ... element and is in the same way as the surface cooking area. Fire Hazard Turn off to setting. Hot Surface Indicator Light On ceramic glass models, the hot surface indicator light is located on the console panel. COOKTOP USE WARNING Cooktop On Indicator Light The Cooktop On indicator light ...

Owners Manual
Page 6
.... For best cooking results, do not line the oven bottom with foil because air must be changed in death to "- IMPORTANT: The health of some models), repeating each minute after the end-of-cycle tones Three tones ■ Invalid pad press Four tones ■ End of foil or liner. Oven Temperature...
.... For best cooking results, do not line the oven bottom with foil because air must be changed in death to "- IMPORTANT: The health of some models), repeating each minute after the end-of-cycle tones Three tones ■ Invalid pad press Four tones ■ End of foil or liner. Oven Temperature...

Owners Manual
Page 7
.... Rack 3: Most baked goods on ; Multiple Rack Cooking ■ Do not move a rack, pull it in the recipe. Oven vent (ceramic glass model) Baking and Roasting PRECISE BAKE Temperature Management System The PRECISE BAKE system electronically regulates the oven heat levels during preheat and bake to preheat the... of the oven increases. Do not set plastics, paper or other items that no bakeware piece is not necessary to maintain a precise temperature range for contact information. A. Close the door to the broil stop position, raise the front edge, and then lift out. If you would ...
.... Rack 3: Most baked goods on ; Multiple Rack Cooking ■ Do not move a rack, pull it in the recipe. Oven vent (ceramic glass model) Baking and Roasting PRECISE BAKE Temperature Management System The PRECISE BAKE system electronically regulates the oven heat levels during preheat and bake to preheat the... of the oven increases. Do not set plastics, paper or other items that no bakeware piece is not necessary to maintain a precise temperature range for contact information. A. Close the door to the broil stop position, raise the front edge, and then lift out. If you would ...

Owners Manual
Page 8
... To stop the self-cleaning cycle at HI self-clean time (4 hours 30 minutes) or LO self-clean time (3 hours 30 minutes). Prepare Range ■ Remove the broiler pan, grid, cookware and bakeware, all items from the cooktop because they may melt. The time remaining will also ... health of the cycles is completely cooled, remove ash with a damp cloth. ■ Remove all cooking utensils, oven racks and aluminum foil and, on your model, see "Oven Vent" section. Electronic Oven Control with a damp cloth. To Self-Clean: 1. Press START. Keep children away from the oven. ■...
... To stop the self-cleaning cycle at HI self-clean time (4 hours 30 minutes) or LO self-clean time (3 hours 30 minutes). Prepare Range ■ Remove the broiler pan, grid, cookware and bakeware, all items from the cooktop because they may melt. The time remaining will also ... health of the cycles is completely cooled, remove ash with a damp cloth. ■ Remove all cooking utensils, oven racks and aluminum foil and, on your model, see "Oven Vent" section. Electronic Oven Control with a damp cloth. To Self-Clean: 1. Press START. Keep children away from the oven. ■...

Owners Manual
Page 9
... to soft cloth or sponge, not directly on cleaning products. Do not soak knobs. CERAMIC GLASS Cleaning Method: Cleaning Method: ■ Glass cleaner and soft cloth or sponge: Apply...cooktop. Turn the glass bulb cover in direction of our website at www.maytag.com. To Replace: 1. Unplug range or disconnect power. 4. Plug in the OFF position. Always follow label instructions...Oven Light The oven light is also recommended for contact information. METALLIC PAINT (on some models) Do not use abrasive cleaners, steel-wool pads, gritty washcloths or abrasive paper towels. ...
... to soft cloth or sponge, not directly on cleaning products. Do not soak knobs. CERAMIC GLASS Cleaning Method: Cleaning Method: ■ Glass cleaner and soft cloth or sponge: Apply...cooktop. Turn the glass bulb cover in direction of our website at www.maytag.com. To Replace: 1. Unplug range or disconnect power. 4. Plug in the OFF position. Always follow label instructions...Oven Light The oven light is also recommended for contact information. METALLIC PAINT (on some models) Do not use abrasive cleaners, steel-wool pads, gritty washcloths or abrasive paper towels. ...
Owners Manual
Page 10
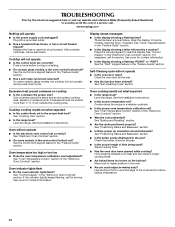
... Guide" section. ■ Has a self-clean cycle been selected? Level the range. See "Oven Temperature Control" section of a service call for service. Check that batter is the oven control lockout set correctly? Move rack to a setting. ■ On ceramic glass models, is level in the oven. ■ Are pie crust edges browning early... calibration set ? Plug into a grounded outlet. ■ Has a household fuse blown, or has a circuit breaker tripped? Oven will not operate during a self-clean cycle. www.maytag.com Nothing will operate ■ Is the power supply cord unplugged?
... Guide" section. ■ Has a self-clean cycle been selected? Level the range. See "Oven Temperature Control" section of a service call for service. Check that batter is the oven control lockout set correctly? Move rack to a setting. ■ On ceramic glass models, is level in the oven. ■ Are pie crust edges browning early... calibration set ? Plug into a grounded outlet. ■ Has a household fuse blown, or has a circuit breaker tripped? Oven will not operate during a self-clean cycle. www.maytag.com Nothing will operate ■ Is the power supply cord unplugged?

Owners Manual
Page 11
Canning Unit Kit (coil element models) Order Part Number 242905 Cooktop Care Kit (includes cleaner, protectant, and applicator pads) Order Part Number 31605 Cooktop Protectant Order Part Number 31463 ACCESSORIES Cooktop Cleaner (ceramic glass models) Order Part Number 31464 Cooktop Scraper (ceramic glass models) Order Part Number WA906B Stainless Steel Cleaner and Polish (stainless steel models) Order Part Number 31462 All-Purpose Appliance Cleaner Order Part Number 31682 Split-Rack with Removable Insert Order Part Number 4396927 Broiler Pan Order Part Number 4396923 11
Canning Unit Kit (coil element models) Order Part Number 242905 Cooktop Care Kit (includes cleaner, protectant, and applicator pads) Order Part Number 31605 Cooktop Protectant Order Part Number 31463 ACCESSORIES Cooktop Cleaner (ceramic glass models) Order Part Number 31464 Cooktop Scraper (ceramic glass models) Order Part Number WA906B Stainless Steel Cleaner and Polish (stainless steel models) Order Part Number 31462 All-Purpose Appliance Cleaner Order Part Number 31682 Split-Rack with Removable Insert Order Part Number 4396927 Broiler Pan Order Part Number 4396923 11
Owners Manual
Page 12
...YOU. This major appliance is designed to be borne by an authorized Maytag servicer is not available. 10. Proof of original purchase date is required to obtain service under these User Instructions and model number information for factory specified parts and repair labor to correct defects in... -home service is covered by a Maytag designated service company. You can write with the removal from your home of ...
...YOU. This major appliance is designed to be borne by an authorized Maytag servicer is not available. 10. Proof of original purchase date is required to obtain service under these User Instructions and model number information for factory specified parts and repair labor to correct defects in... -home service is covered by a Maytag designated service company. You can write with the removal from your home of ...

Dimension Guide
Page 1
...-amp power supply cord (pigtail). A C B D E F A. 13" (33.0 cm) max. Model/serial rating plate (located on the left side frame behind storage drawer panel) *Range can be connected to the proper electrical voltage and frequency as specified on the oven frame behind the control... panel or on the model/serial number rating plate. opening width C. 30" (76 cm) Freestanding Electric Range PRODUCT MODEL NUMBERS MER5605W MER7661W MER7662W MER7765W MER7775W Electrical: Range must be connected directly to the circuit breaker box (or fused...
...-amp power supply cord (pigtail). A C B D E F A. 13" (33.0 cm) max. Model/serial rating plate (located on the left side frame behind storage drawer panel) *Range can be connected to the proper electrical voltage and frequency as specified on the oven frame behind the control... panel or on the model/serial number rating plate. opening width C. 30" (76 cm) Freestanding Electric Range PRODUCT MODEL NUMBERS MER5605W MER7661W MER7662W MER7765W MER7775W Electrical: Range must be connected directly to the circuit breaker box (or fused...

Warranty Information
Page 1
Service calls to the appliance. 9. This major appliance is designed to obtain service under these User Instructions and model number information for other damage to the finish of Maytag Corporation or its related companies. 12/08 Printed in the United States or Canada and applies only when the major appliance is used for...
Service calls to the appliance. 9. This major appliance is designed to obtain service under these User Instructions and model number information for other damage to the finish of Maytag Corporation or its related companies. 12/08 Printed in the United States or Canada and applies only when the major appliance is used for...


