
Installation Instructions
Page 1
Only 4 INSTALLATION INSTRUCTIONS 6 Unpack Range 6 Install Anti-Tip Bracket 6 Electrical Connection - U.S.A. U.S.A. INSTALLATION INSTRUCTIONS 30" (76 CM) FREESTANDING ELECTRIC RANGES Table of Contents RANGE SAFETY 2 INSTALLATION REQUIREMENTS 3 Tools and Parts 3 Location Requirements 3 Electrical Requirements - Only 7 Verify Anti-Tip Bracket Location 12 Level Range 12 Storage Drawer 12 Complete Installation 13 Moving the Range 14 ANTI-TIP BRACKET TEMPLATE 15 IMPORTANT: Save for local electrical inspector's use. W10252706B
Only 4 INSTALLATION INSTRUCTIONS 6 Unpack Range 6 Install Anti-Tip Bracket 6 Electrical Connection - U.S.A. U.S.A. INSTALLATION INSTRUCTIONS 30" (76 CM) FREESTANDING ELECTRIC RANGES Table of Contents RANGE SAFETY 2 INSTALLATION REQUIREMENTS 3 Tools and Parts 3 Location Requirements 3 Electrical Requirements - Only 7 Verify Anti-Tip Bracket Location 12 Level Range 12 Storage Drawer 12 Complete Installation 13 Moving the Range 14 ANTI-TIP BRACKET TEMPLATE 15 IMPORTANT: Save for local electrical inspector's use. W10252706B

Installation Instructions
Page 3
...ceramic floors) ■ Tin snips or large wire cutters (for use in accordance with the requirements of UL and CSA International and complies with the maximum allowable wood cabinet temperatures of securing the range is to be provided, the risk can be used will need to be installed. See "Electrical...it conforms to comply with upturned ends. ■ A UL listed strain relief. Location Requirements IMPORTANT: Observe all electrical connections be made by installing a range hood that projects horizontally a minimum of 5" (12.7 cm) beyond the bottom of burns or fire by ...
...ceramic floors) ■ Tin snips or large wire cutters (for use in accordance with the requirements of UL and CSA International and complies with the maximum allowable wood cabinet temperatures of securing the range is to be provided, the risk can be used will need to be installed. See "Electrical...it conforms to comply with upturned ends. ■ A UL listed strain relief. Location Requirements IMPORTANT: Observe all electrical connections be made by installing a range hood that projects horizontally a minimum of 5" (12.7 cm) beyond the bottom of burns or fire by ...

Installation Instructions
Page 4
...have a proper outlet installed by a qualified electrician. 4 Only If codes permit and a separate ground wire is recommended that a qualified electrical installer determine that the electrical connection and wire size are in * D. 29⁷⁄₈" (75.9 cm) width E. 25" (63.5 cm) depth... and in conformance with the National Electrical Code, ANSI/ NFPA 70-latest edition and all the way in accordance with zero clearance. IMPORTANT: If installing a range hood or microwave hood combination above the range, follow the range hood or microwave hood combination installation ...
...have a proper outlet installed by a qualified electrician. 4 Only If codes permit and a separate ground wire is recommended that a qualified electrical installer determine that the electrical connection and wire size are in * D. 29⁷⁄₈" (75.9 cm) width E. 25" (63.5 cm) depth... and in conformance with the National Electrical Code, ANSI/ NFPA 70-latest edition and all the way in accordance with zero clearance. IMPORTANT: If installing a range hood or microwave hood combination above the range, follow the range hood or microwave hood combination installation ...

Installation Instructions
Page 5
...wire receptacle of a UL listed, 3-wire, 250-volt, 40- Electrical Connection To properly install your range, you must determine the type of electrical connection you will be using and follow the instructions provided for it here. ■ Range must be used , a matching UL listed, 4-wire, 250-volt...120/208 Volts 7.8 - 12.5 KW 12.6 - 18.5 KW Specified Rating of the "Location Requirements" section. ■ This range is connected to the proper electrical voltage and frequency as specified on the appliance end must be at the point the power supply cord enters the appliance. mobile homes...
...wire receptacle of a UL listed, 3-wire, 250-volt, 40- Electrical Connection To properly install your range, you must determine the type of electrical connection you will be using and follow the instructions provided for it here. ■ Range must be used , a matching UL listed, 4-wire, 250-volt...120/208 Volts 7.8 - 12.5 KW 12.6 - 18.5 KW Specified Rating of the "Location Requirements" section. ■ This range is connected to the proper electrical voltage and frequency as specified on the appliance end must be at the point the power supply cord enters the appliance. mobile homes...

Installation Instructions
Page 7
... ceramic floor, use a 4.8 mm) masonry drill bit to follow these instructions can result in floor. Electrical Connection - Plug into holes with holes in death, fire, or electrical shock. A B C A. Terminal block cover C. Remove template from floor. Remove template from floor. 6. Electrical ...on the thickness of your local hardware store. Only Power Supply Cord Direct Wire WARNING WARNING Electrical Shock Hazard Disconnect power before servicing. Electrically ground range. Use a new 40 amp power supply cord. Pull cover down and toward you to ...
... ceramic floor, use a 4.8 mm) masonry drill bit to follow these instructions can result in floor. Electrical Connection - Plug into holes with holes in death, fire, or electrical shock. A B C A. Terminal block cover C. Remove template from floor. Remove template from floor. 6. Electrical ...on the thickness of your local hardware store. Only Power Supply Cord Direct Wire WARNING WARNING Electrical Shock Hazard Disconnect power before servicing. Electrically ground range. Use a new 40 amp power supply cord. Pull cover down and toward you to ...

Installation Instructions
Page 8
... screwdriver to : 4-wire receptacle (NEMA type 14-50R) A UL listed, 250-volt minimum, 40-amp, range power supply cord 4-wire connection: Power supply cord A A. Removable retaining nut B. Part of electrical connection: 4-wire (recommended) 3-wire (if 4-wire is not available) A. Style 1: Power supply cord strain... fused Direct wire disconnect 5" (12.7 cm) 3-wire receptacle (NEMA type 10-50R) A UL listed, 250-volt minimum, 40-amp, range power supply cord 3-wire connection: Power supply cord Style 2: Direct wire strain relief ■ Remove the knockout as needed for the power supply...
... screwdriver to : 4-wire receptacle (NEMA type 14-50R) A UL listed, 250-volt minimum, 40-amp, range power supply cord 4-wire connection: Power supply cord A A. Removable retaining nut B. Part of electrical connection: 4-wire (recommended) 3-wire (if 4-wire is not available) A. Style 1: Power supply cord strain... fused Direct wire disconnect 5" (12.7 cm) 3-wire receptacle (NEMA type 10-50R) A UL listed, 250-volt minimum, 40-amp, range power supply cord 3-wire connection: Power supply cord Style 2: Direct wire strain relief ■ Remove the knockout as needed for the power supply...

Installation Instructions
Page 10
... 2. Terminal lug B. Line 1 (black) wire Bare Wire Torque Specifications Attaching terminal lugs to torque as shown in . (4.0 N-m) 5. Part of electrical supply (4-wire or 3-wire connection). 4-wire Connection: Direct Wire Use this method for: ■ New branch-circuit installations (1996 NEC) ■ ... 1 (black), neutral (white), and line 2 (red) wires. Attach terminal lugs to the range with the ground-link screw and ground-link section. Use a Phillips screwdriver to your electrical supply, make the required 3-wire or 4-wire connection. 1. Depending on bottom of terminal lugs. ...
... 2. Terminal lug B. Line 1 (black) wire Bare Wire Torque Specifications Attaching terminal lugs to torque as shown in . (4.0 N-m) 5. Part of electrical supply (4-wire or 3-wire connection). 4-wire Connection: Direct Wire Use this method for: ■ New branch-circuit installations (1996 NEC) ■ ... 1 (black), neutral (white), and line 2 (red) wires. Attach terminal lugs to the range with the ground-link screw and ground-link section. Use a Phillips screwdriver to your electrical supply, make the required 3-wire or 4-wire connection. 1. Depending on bottom of terminal lugs. ...

Installation Instructions
Page 13
... storage drawer is fully engaged on surface burners and oven. See "Level Range." 5. Read "Range Use" in the Use and Care Guide. Turn on both sides, slide the drawer back into an outlet. ■ Electrical supply is plugged into the closed position. 5. Slowly push the storage drawer... into appropriate outlet. If there is cold, turn off the range and contact a qualified technician. 13 Check that you are now installed....
... storage drawer is fully engaged on surface burners and oven. See "Level Range." 5. Read "Range Use" in the Use and Care Guide. Turn on both sides, slide the drawer back into an outlet. ■ Electrical supply is plugged into the closed position. 5. Slowly push the storage drawer... into appropriate outlet. If there is cold, turn off the range and contact a qualified technician. 13 Check that you are now installed....

Installation Instructions
Page 14
...Look for the anti-tip bracket securely attached to rear range foot. Complete cleaning or maintenance. 4. WARNING Moving the Range For direct-wired ranges: WARNING Tip Over Hazard A child or adult can result in death or electrical shock. 1. Check that anti-tip bracket is under anti...to floor. ■ Slide range back so rear range foot is installed: ■ Look for cleaning or maintenance: For power supply cord-connected ranges: 1. Electrical Shock Hazard Disconnect power before operating. Reconnect the anti-tip bracket, if the range is necessary for the anti-tip...
...Look for the anti-tip bracket securely attached to rear range foot. Complete cleaning or maintenance. 4. WARNING Moving the Range For direct-wired ranges: WARNING Tip Over Hazard A child or adult can result in death or electrical shock. 1. Check that anti-tip bracket is under anti...to floor. ■ Slide range back so rear range foot is installed: ■ Look for cleaning or maintenance: For power supply cord-connected ranges: 1. Electrical Shock Hazard Disconnect power before operating. Reconnect the anti-tip bracket, if the range is necessary for the anti-tip...

Owners Manual
Page 3
...contact and may result in oven. ■ DO NOT TOUCH HEATING ELEMENTS OR INTERIOR SURFACES OF OVEN - Only certain types of glass, glass/ceramic, ceramic, earthenware, or other utensils. If cooktop should break, cleaning solutions and spillovers may become hot enough to cause burns. If a wet sponge ... ■ When flambeing foods under the hood, turn the fan on any part of the range unless specifically recommended in a risk of electric shock, or fire. ■ Glazed Cooking Utensils - Be sure the range is turned inward, and does not extend over adjacent surface units. ■ Do Not Soak...
...contact and may result in oven. ■ DO NOT TOUCH HEATING ELEMENTS OR INTERIOR SURFACES OF OVEN - Only certain types of glass, glass/ceramic, ceramic, earthenware, or other utensils. If cooktop should break, cleaning solutions and spillovers may become hot enough to cause burns. If a wet sponge ... ■ When flambeing foods under the hood, turn the fan on any part of the range unless specifically recommended in a risk of electric shock, or fire. ■ Glazed Cooking Utensils - Be sure the range is turned inward, and does not extend over adjacent surface units. ■ Do Not Soak...

Dimension Guide
Page 1
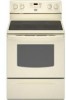
... a continuous commitment to the figures in * D. 29⁷⁄₈" (75.9 cm) width E. 25" (63.5 cm) depth F. 30" (76 cm) Freestanding Electric Range PRODUCT MODEL NUMBERS MER5605W MER7661W MER7662W MER7765W MER7775W Electrical: Range must be connected to change materials and specifications without notice. clearance between cutout and cabinet door or hinge. *NOTE: 24" (61...
... a continuous commitment to the figures in * D. 29⁷⁄₈" (75.9 cm) width E. 25" (63.5 cm) depth F. 30" (76 cm) Freestanding Electric Range PRODUCT MODEL NUMBERS MER5605W MER7661W MER7662W MER7765W MER7775W Electrical: Range must be connected to change materials and specifications without notice. clearance between cutout and cabinet door or hinge. *NOTE: 24" (61...


