Use and Care Guide
Page 2
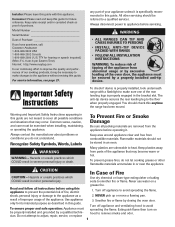
... appliance. Keep area around appliance clear and free from the appliance before using this anytime the range has been moved. Keep plastics away from abnormal usage or by a properly installed anti-tip ...cooking grease or other servicing should check this appliance to prevent the potential risk of fire, electric shock, personal injury or damage to avoid spreading the flame. 2. To ensure proper and ...hearing or speech impaired) (Mon.-Fri., 8 am-8 pm Eastern Time) Internet: http://www.maytag.com In our continuing effort to improve the quality and performance of Fire Use dry chemical or...
... appliance. Keep area around appliance clear and free from the appliance before using this anytime the range has been moved. Keep plastics away from abnormal usage or by a properly installed anti-tip ...cooking grease or other servicing should check this appliance to prevent the potential risk of fire, electric shock, personal injury or damage to avoid spreading the flame. 2. To ensure proper and ...hearing or speech impaired) (Mon.-Fri., 8 am-8 pm Eastern Time) Internet: http://www.maytag.com In our continuing effort to improve the quality and performance of Fire Use dry chemical or...
Use and Care Guide
Page 4
...warn customers of the listed substances, including carbon monoxide. Fumes released during the self-clean cycle. Turn pan handle toward center of electric shock. Cooktop NEVER leave surface units unattended especially when using glass. If cooktop should be taken not to overheated cooking oil, fat,... margarine and overheated non-stick cookware may be exposed to prevent excessive smoke and flare-ups. Ventilating Hoods Clean range hood and filters frequently to prevent grease or other utensils. Exposure to these substances can be equally harmful. If pan is located...
...warn customers of the listed substances, including carbon monoxide. Fumes released during the self-clean cycle. Turn pan handle toward center of electric shock. Cooktop NEVER leave surface units unattended especially when using glass. If cooktop should be taken not to overheated cooking oil, fat,... margarine and overheated non-stick cookware may be exposed to prevent excessive smoke and flare-ups. Ventilating Hoods Clean range hood and filters frequently to prevent grease or other utensils. Exposure to these substances can be equally harmful. If pan is located...

Use and Care Guide
Page 5
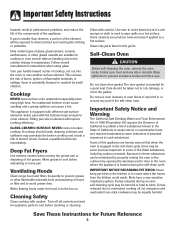
... of liquids. AFTER COOKING • Make sure surface unit is turned on the cooktop. A slow boil setting can also be seen through the smoothtop surface. Make sure you turn off . For example, the graphic at right indicates left to use the large element or to the right to ... one dual element located in place. • NEVER use a high heat setting for maintaining the cooking of large amounts of the smoothtop. To prevent damage to range, never operate surface unit without continuing to maintain the preset heat setting, even on the knob are infrequently used and can be used...
... of liquids. AFTER COOKING • Make sure surface unit is turned on the cooktop. A slow boil setting can also be seen through the smoothtop surface. Make sure you turn off . For example, the graphic at right indicates left to use the large element or to the right to ... one dual element located in place. • NEVER use a high heat setting for maintaining the cooking of large amounts of the smoothtop. To prevent damage to range, never operate surface unit without continuing to maintain the preset heat setting, even on the knob are infrequently used and can be used...
Use and Care Guide
Page 6
... will be set to touch. The light will disappear when the surface cools. Setting the Control: 1. Cooking Areas The cooking areas on your range are indicated on the control as coil elements. • In the event of a potential boilover, remove the pan from the cooking surface. ... will vary depending on the smoothtop surface. Warming temperatures are approximate and are identified by permanent circles on type and amount of the control knob to select any setting from Low to the right for 30 minutes), as vegetables, gravies and oven-safe dinner plates. However, the ...
... will be set to touch. The light will disappear when the surface cools. Setting the Control: 1. Cooking Areas The cooking areas on your range are indicated on the control as coil elements. • In the event of a potential boilover, remove the pan from the cooking surface. ... will vary depending on the smoothtop surface. Warming temperatures are approximate and are identified by permanent circles on type and amount of the control knob to select any setting from Low to the right for 30 minutes), as vegetables, gravies and oven-safe dinner plates. However, the ...

Use and Care Guide
Page 16
...; The time of day will return to the display. If the oven light is desired while in Sabbath Mode, it must be turned off after 30 seconds.) 4. The factory default setting for 72 hours: 1. This safety feature can be turned on before the Sabbath Mode is started. • When the Sabbath... when bake is canceled. Press and hold the CANCEL and Bake pads at any time with 72 hours remaining and no change is made, the range will be complete. 15 Press again to return to the existing setting after 12 hours if you accidentally leave it on. To cancel the Sabbath...
...; The time of day will return to the display. If the oven light is desired while in Sabbath Mode, it must be turned off after 30 seconds.) 4. The factory default setting for 72 hours: 1. This safety feature can be turned on before the Sabbath Mode is started. • When the Sabbath... when bake is canceled. Press and hold the CANCEL and Bake pads at any time with 72 hours remaining and no change is made, the range will be complete. 15 Press again to return to the existing setting after 12 hours if you accidentally leave it on. To cancel the Sabbath...

Use and Care Guide
Page 18
The oven vent is pressed. A beep will sound every time the Oven Light pad is located below the backguard vent shield on your range. The oven has three racks. Pull rack straight out until it stops at the lock-stop when the oven door is opened . Slide rack back ...
The oven vent is pressed. A beep will sound every time the Oven Light pad is located below the backguard vent shield on your range. The oven has three racks. Pull rack straight out until it stops at the lock-stop when the oven door is opened . Slide rack back ...

Use and Care Guide
Page 19
...). Note: When Convect baking on two or three racks, check foods at the minimum suggested time to hold a casserole dish. Create-A-SpaceTM Half Rack Select range models are equipped with a convertible half rack. The left side of the rack can be used as a roasting rack in a broiling pan. • The removable...
...). Note: When Convect baking on two or three racks, check foods at the minimum suggested time to hold a casserole dish. Create-A-SpaceTM Half Rack Select range models are equipped with a convertible half rack. The left side of the rack can be used as a roasting rack in a broiling pan. • The removable...

Use and Care Guide
Page 20
... display. Once the door locks, the word will remain steady. • The cleaning time will start cleaning. • If the door is not closed within 30 seconds, the self-cleaning operation will be below 400° F to the time of day. • CLEAN will appear in the display. • LOCK will... during the clean cycle. (The gasket is the seal around the opening in the display. 4. The gasket is displayed. * Brand names for parts of the range to become hot during the clean cycle. 2. Wipe up of soil to seal in the display. 2. Press the Clean pad. • SET flashes in the...
... display. Once the door locks, the word will remain steady. • The cleaning time will start cleaning. • If the door is not closed within 30 seconds, the self-cleaning operation will be below 400° F to the time of day. • CLEAN will appear in the display. • LOCK will... during the clean cycle. (The gasket is the seal around the opening in the display. 4. The gasket is displayed. * Brand names for parts of the range to become hot during the clean cycle. 2. Wipe up of soil to seal in the display. 2. Press the Clean pad. • SET flashes in the...
Use and Care Guide
Page 22
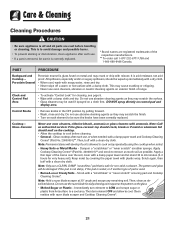
...232-6771 USA and 1-800-688-8408 Canada. Cooktop - Dampen a "scratchless" or "never scratch" scrubber sponge. Apply a thin layer of range. Then turn element to LOW and scrape sugar or plastic from hot surface to cool. Care & Cleaning Cleaning Procedures CAUTION • Be sure ...cleaners may crack or chip with a "scratchless" or "never scratch" scouring pad and Cooktop Cleaning Creme*. Note: Hold a razor blade scraper at 30° angle and scrape any remaining soil. PART PROCEDURE Backguard and Cooktop - Note: Permanent stains will be used . • Burned-on a ...
...232-6771 USA and 1-800-688-8408 Canada. Cooktop - Dampen a "scratchless" or "never scratch" scrubber sponge. Apply a thin layer of range. Then turn element to LOW and scrape sugar or plastic from hot surface to cool. Care & Cleaning Cleaning Procedures CAUTION • Be sure ...cleaners may crack or chip with a "scratchless" or "never scratch" scouring pad and Cooktop Cleaning Creme*. Note: Hold a razor blade scraper at 30° angle and scrape any remaining soil. PART PROCEDURE Backguard and Cooktop - Note: Permanent stains will be used . • Burned-on a ...

Use and Care Guide
Page 24
...furniture, toys, or other objects. 3. Note: The oven door on an open oven door. Do not hit the glass with wire retainer. 5. Be sure the range is not level, turn the leveling legs, located at a later date. Note: Bulb cover will decrease with a 40-watt appliance bulb. 4. BULB COVER 2.... and bulb are in place, then slide wire retainer off cover. Remove bulb cover and light bulb. This could cause the range to range. This is closed. If the range is leveled when installed. Maintenance Oven Door Leveling Legs CAUTION Do not place excessive weight on or stand on a new...
...furniture, toys, or other objects. 3. Note: The oven door on an open oven door. Do not hit the glass with wire retainer. 5. Be sure the range is not level, turn the leveling legs, located at a later date. Note: Bulb cover will decrease with a 40-watt appliance bulb. 4. BULB COVER 2.... and bulb are in place, then slide wire retainer off cover. Remove bulb cover and light bulb. This could cause the range to range. This is closed. If the range is leveled when installed. Maintenance Oven Door Leveling Legs CAUTION Do not place excessive weight on or stand on a new...

Use and Care Guide
Page 25
Fit the ends of the backguard. Pull out to clean under the range. Convenience Outlet (Canadian models only) The convenience outlet is turned on or near the surface element. Be sure appliance cords do not rest on , the ... drawer and pull out to the first stop position. 3. Maintenance Storage Drawer CAUTION Do not store plastic, paper products, food or flammable materials in the range. 2. The drawer may trip if the small appliance plugged into the rails in this drawer. Lift up the front of the backguard.
Fit the ends of the backguard. Pull out to clean under the range. Convenience Outlet (Canadian models only) The convenience outlet is turned on or near the surface element. Be sure appliance cords do not rest on , the ... drawer and pull out to the first stop position. 3. Maintenance Storage Drawer CAUTION Do not store plastic, paper products, food or flammable materials in the range. 2. The drawer may trip if the small appliance plugged into the rails in this drawer. Lift up the front of the backguard.
Use and Care Guide
Page 26
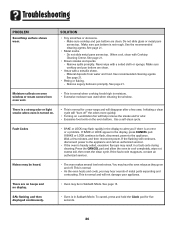
.... See page 15 • Oven may be below 400° F to program a clean cycle. Oven door will not self-clean. • Check to make sure range is set . See page 20. • Check if oven is level. • Temperatures often vary between a new oven and an old one. Clock, indicator words...
.... See page 15 • Oven may be below 400° F to program a clean cycle. Oven door will not self-clean. • Check to make sure range is set . See page 20. • Check if oven is level. • Temperatures often vary between a new oven and an old one. Clock, indicator words...
Use and Care Guide
Page 27
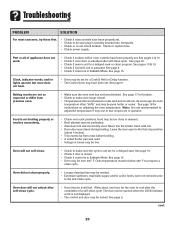
... result in the display, press CANCEL pad. To cancel, press and hold the Clock pad for a new range and will "burn off . Make sure cooktop and pan bottom are clean. Wait a few uses. Troubleshooting PROBLEM Smoothtop surface shows wear. Moisture collects on and off " the odors more quickly. • Turning on a ventilation...
... result in the display, press CANCEL pad. To cancel, press and hold the Clock pad for a new range and will "burn off . Make sure cooktop and pan bottom are clean. Wait a few uses. Troubleshooting PROBLEM Smoothtop surface shows wear. Moisture collects on and off " the odors more quickly. • Turning on a ventilation...


