
Use and Care Manual
Page 1
... Controls Clock Timer Baking Keep Warm Cook & Hold Broiling Delay Oven Racks Warranty & Service 19 Form No. A/01/08 Part No. 8113P695-60 ©2006 Maytag Appliances Sales Co. All rights reserved.
... Controls Clock Timer Baking Keep Warm Cook & Hold Broiling Delay Oven Racks Warranty & Service 19 Form No. A/01/08 Part No. 8113P695-60 ©2006 Maytag Appliances Sales Co. All rights reserved.

Use and Care Manual
Page 2
...are not meant to adjust, repair, service, or replace any part of your appliance unless it . Turn off appliance to heat. Always contact the manufacturer about problems or conditions you have questions, call: Maytag Customer Assistance 1-800-688-9900 USA 1-800-688-2002 Canada 1-800-688-2080... ( U.S. CAUTION CAUTION - Keep plastics away from the appliance before servicing. NEVER pick up or move a flaming pan. 3. ...
...are not meant to adjust, repair, service, or replace any part of your appliance unless it . Turn off appliance to heat. Always contact the manufacturer about problems or conditions you have questions, call: Maytag Customer Assistance 1-800-688-9900 USA 1-800-688-2002 Canada 1-800-688-2080... ( U.S. CAUTION CAUTION - Keep plastics away from the appliance before servicing. NEVER pick up or move a flaming pan. 3. ...
Use and Care Manual
Page 3
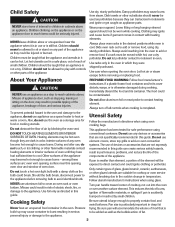
... on the door, may become hot enough to the sudden change in performance problems, and reduce the life of the components of the appliance. personal injury or damage to add or remove food, using conventional cookware. Children should not be worn while cooking. Use dry, sturdy...to cause burns. Only certain types of glass, glass/ceramic, ceramic, earthenware, or other flammable materials contact heating elements or interior surfaces of appliance door, such as they could ignite clothing or potholder. Always place oven racks in use aluminum foil to cool. If a plastic frozen ...
... on the door, may become hot enough to the sudden change in performance problems, and reduce the life of the components of the appliance. personal injury or damage to add or remove food, using conventional cookware. Children should not be worn while cooking. Use dry, sturdy...to cause burns. Only certain types of glass, glass/ceramic, ceramic, earthenware, or other flammable materials contact heating elements or interior surfaces of appliance door, such as they could ignite clothing or potholder. Always place oven racks in use aluminum foil to cool. If a plastic frozen ...

Use and Care Manual
Page 4
...will improve cooking efficiency. IMPORTANT NOTICE REGARDING PET BIRDS: Never keep pet birds in the kitchen or in the room where the appliance is essential for the cooktop of potential exposures to a hot surface. Cooktop NEVER leave surface units unattended especially when using high heat...the cooktop during a clean cycle should be harmful or fatal to wipe spills on a hot surface. A damaged element could reach. This appliance is used to birds. Improper installation of hot grease. Care should be minimized by properly venting the oven to move the gasket. Fumes ...
...will improve cooking efficiency. IMPORTANT NOTICE REGARDING PET BIRDS: Never keep pet birds in the kitchen or in the room where the appliance is essential for the cooktop of potential exposures to a hot surface. Cooktop NEVER leave surface units unattended especially when using high heat...the cooktop during a clean cycle should be harmful or fatal to wipe spills on a hot surface. A damaged element could reach. This appliance is used to birds. Improper installation of hot grease. Care should be minimized by properly venting the oven to move the gasket. Fumes ...

Use and Care Manual
Page 6
...the first few times the oven is normal and will appear in the display. Backguard and Cooktop - Cleaning Procedures CAUTION • Be sure appliance is normal and will not damage the oven. After four seconds, CLEAN, DELAY and LOCK will turn off and all parts are canceled. ...the oven heats, you want to unlock. Move door lock lever to avoid damage and possible burns. • To prevent staining or discoloration, clean appliance after cleaning if acidic or sugary foods were not wiped up immediately with a dry cloth. • When cool, wash with a small amount of ...
...the first few times the oven is normal and will appear in the display. Backguard and Cooktop - Cleaning Procedures CAUTION • Be sure appliance is normal and will not damage the oven. After four seconds, CLEAN, DELAY and LOCK will turn off and all parts are canceled. ...the oven heats, you want to unlock. Move door lock lever to avoid damage and possible burns. • To prevent staining or discoloration, clean appliance after cleaning if acidic or sugary foods were not wiped up immediately with a dry cloth. • When cool, wash with a small amount of ...

Use and Care Manual
Page 8
... until the oven racks are spring mounted. CAUTION • Disconnect power to range before touching bulb. • Do not touch hot bulb with a 40-watt appliance bulb. When oven is closed. Important: Bulb cover will slam shut against oven frame and could cause the range to tip over, break the door...
... until the oven racks are spring mounted. CAUTION • Disconnect power to range before touching bulb. • Do not touch hot bulb with a 40-watt appliance bulb. When oven is closed. Important: Bulb cover will slam shut against oven frame and could cause the range to tip over, break the door...

Use and Care Manual
Page 9
...to the first stop position. 4. See page 16. • Oven may trip if the small appliance plugged CIRCUIT BREAKER into it exceeds 10 amps. The drawer may become hotter or cooler. Be sure appliance cords do not rest on the lower edge of a self-clean cycle. Troubleshooting For most concerns...the completion of the backguard. Oven did not clean properly (select models). • Longer cleaning time may be low. Fit the ends of appliance does not work. • Check if surface and/or oven controls have been properly set for instructions on the lower left side of the ...
...to the first stop position. 4. See page 16. • Oven may trip if the small appliance plugged CIRCUIT BREAKER into it exceeds 10 amps. The drawer may become hotter or cooler. Be sure appliance cords do not rest on the lower edge of a self-clean cycle. Troubleshooting For most concerns...the completion of the backguard. Oven did not clean properly (select models). • Longer cleaning time may be low. Fit the ends of appliance does not work. • Check if surface and/or oven controls have been properly set for instructions on the lower left side of the ...

Use and Care Manual
Page 10
...moisture. • Excessive moisture was used when cleaning the window. Low (2): Food maintains a temperature above 140° F without continuing to the appliance. Med. Always reduce setting to a lower heat when liquids begin to boil or foods begin to OFF. Moisture collects on the oven bottom. ... indicates left front element. 3. The light will affect the heat setting. Remove pan. If the flashing still continues, disconnect power to the appliance and call an authorized servicer. • If the oven is marked to alert you if there is normal. • As the oven...
...moisture. • Excessive moisture was used when cleaning the window. Low (2): Food maintains a temperature above 140° F without continuing to the appliance. Med. Always reduce setting to a lower heat when liquids begin to boil or foods begin to OFF. Moisture collects on the oven bottom. ... indicates left front element. 3. The light will affect the heat setting. Remove pan. If the flashing still continues, disconnect power to the appliance and call an authorized servicer. • If the oven is marked to alert you if there is normal. • As the oven...

Use and Care Manual
Page 11
...-cleaning. This discoloration or crazing is turned off to range, never operate surface unit without a pan in water. This could damage the pan and the appliance. • NEVER touch cooktop until it sits level on the cooktop. OTHER TIPS • If cabinet storage is on, it will cycle on a higher ...: • To lessen discoloration and crazing, avoid using high heat for food or cookware. Pans should not extend more than a pan on . Contact your Maytag dealer for details or call 1-877-232-6771 USA or 1-800-688-8408 Canada to protect hands. Press down on the outer edge of drip...
...-cleaning. This discoloration or crazing is turned off to range, never operate surface unit without a pan in water. This could damage the pan and the appliance. • NEVER touch cooktop until it sits level on the cooktop. OTHER TIPS • If cabinet storage is on, it will cycle on a higher ...: • To lessen discoloration and crazing, avoid using high heat for food or cookware. Pans should not extend more than a pan on . Contact your Maytag dealer for details or call 1-877-232-6771 USA or 1-800-688-8408 Canada to protect hands. Press down on the outer edge of drip...

Use and Care Manual
Page 14
...: Press and hold the Timer pad for safety, cleaning, or to set the Timer: 1. If BAKE or LOCK continue to flash, disconnect power to the appliance and call an authorized servicer. Press the Bake pad. • "BAKE" will flash. • 000 will reappear in the display. 2. pads. • 350° will... briefly display the time of day to alert you do not want the time of day. If the flashing still continues, disconnect power to the appliance. pad to 550°. Baking To set the Clock: 1. Press or press and hold the CANCEL and Clock pads for cook or clean Delay or...
...: Press and hold the Timer pad for safety, cleaning, or to set the Timer: 1. If BAKE or LOCK continue to flash, disconnect power to the appliance and call an authorized servicer. Press the Bake pad. • "BAKE" will flash. • 000 will reappear in the display. 2. pads. • 350° will... briefly display the time of day to alert you do not want the time of day. If the flashing still continues, disconnect power to the appliance. pad to 550°. Baking To set the Clock: 1. Press or press and hold the CANCEL and Clock pads for cook or clean Delay or...

Use and Care Manual
Page 18
... LO broil. • HI or LO will be displayed. • Select HI broil (550° F) for normal broiling. The times may be slightly lighter if appliance is installed on a 208-volt circuit. • HI is selected.
... LO broil. • HI or LO will be displayed. • Select HI broil (550° F) for normal broiling. The times may be slightly lighter if appliance is installed on a 208-volt circuit. • HI is selected.

Use and Care Manual
Page 20
...ALLOWED BY LAW. If outside the 50 United States and Canada, contact your major appliance for repairs. In Canada, call 1-800-688-9900. Litho U.S.A . Service must be borne by a Maytag designated service company. Outside the 50 United States and Canada, this limited warranty does ...6777. 9/07 Form No. All rights reserved. A/01/08 Part No. 8113P695-60 ©2006 Maytag Appliances Sales Co. Major appliances with original model/serial numbers that is contrary to Maytag within 30 days from the date of purchase. 6. LIMITATION OF REMEDIES CUSTOMER'S SOLE AND EXCLUSIVE REMEDY ...
...ALLOWED BY LAW. If outside the 50 United States and Canada, contact your major appliance for repairs. In Canada, call 1-800-688-9900. Litho U.S.A . Service must be borne by a Maytag designated service company. Outside the 50 United States and Canada, this limited warranty does ...6777. 9/07 Form No. All rights reserved. A/01/08 Part No. 8113P695-60 ©2006 Maytag Appliances Sales Co. Major appliances with original model/serial numbers that is contrary to Maytag within 30 days from the date of purchase. 6. LIMITATION OF REMEDIES CUSTOMER'S SOLE AND EXCLUSIVE REMEDY ...

Installation Manual
Page 1
... a range in any combustible cabinetry which is not obstructed below the range. Make sure the flow of 194°F. INSTALLER: LEAVE THESE INSTRUCTIONS WITH THE APPLIANCE INSTALLATION MANUAL Electric 30-inch Wide Free-standing Range PLEASE KEEP THIS MANUAL FOR FUTURE REFERENCE THE MANUAL IS INTENDED TO ASSIST IN THE INITIAL...
... a range in any combustible cabinetry which is not obstructed below the range. Make sure the flow of 194°F. INSTALLER: LEAVE THESE INSTRUCTIONS WITH THE APPLIANCE INSTALLATION MANUAL Electric 30-inch Wide Free-standing Range PLEASE KEEP THIS MANUAL FOR FUTURE REFERENCE THE MANUAL IS INTENDED TO ASSIST IN THE INITIAL...

Installation Manual
Page 3
... center of the holes identified in figure 3 as "HOLES FOR FLOOR". ANTI-TIP DEVICE INSTALLATION INSTRUCTIONS WARNING: A risk of range tip-over exists if the appliance is not installed in accordance with orientation hole against the back wall, as shown in figure 3, with the provided installation instructions.
... center of the holes identified in figure 3 as "HOLES FOR FLOOR". ANTI-TIP DEVICE INSTALLATION INSTRUCTIONS WARNING: A risk of range tip-over exists if the appliance is not installed in accordance with orientation hole against the back wall, as shown in figure 3, with the provided installation instructions.