
Use and Care Manual
Page 1
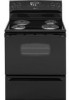
... rights reserved. Electric Range - A/01/08 Part No. 8113P695-60 ©2006 Maytag Appliances Sales Co. Coil ® Use and Care Guide Table of Contents Safety 1-3 Care & Cleaning 4-6 Self-Clean Oven Cleaning Procedures Maintenance 7-8 Oven Window Oven Light Troubleshooting 8-9 Surface Cooking 9-10 Controls Coil Elements Oven Cooking 11-18 Manual Clean Oven Controls Clock Baking Timer Broiling Manual Clean Oven Knob Control Baking Broiling Self-Clean Oven Controls Clock Timer Baking Keep Warm Cook & Hold Broiling Delay Oven Racks Warranty & Service 19 Form No...
... rights reserved. Electric Range - A/01/08 Part No. 8113P695-60 ©2006 Maytag Appliances Sales Co. Coil ® Use and Care Guide Table of Contents Safety 1-3 Care & Cleaning 4-6 Self-Clean Oven Cleaning Procedures Maintenance 7-8 Oven Window Oven Light Troubleshooting 8-9 Surface Cooking 9-10 Controls Coil Elements Oven Cooking 11-18 Manual Clean Oven Controls Clock Baking Timer Broiling Manual Clean Oven Knob Control Baking Broiling Self-Clean Oven Controls Clock Timer Baking Keep Warm Cook & Hold Broiling Delay Oven Racks Warranty & Service 19 Form No...

Use and Care Manual
Page 2
... risk of fire, electric shock, personal injury or damage to adjust, repair, service, or replace any part of Purchase If you do not let cooking grease or other servicing should not be properly installed and grounded by a qualified technician. The anti-tip device secures the rear leveling leg to appliance before using this guide. Consumer: Please read and keep this guide. Always disconnect power to the floor when...
... risk of fire, electric shock, personal injury or damage to adjust, repair, service, or replace any part of Purchase If you do not let cooking grease or other servicing should not be properly installed and grounded by a qualified technician. The anti-tip device secures the rear leveling leg to appliance before using this guide. Consumer: Please read and keep this guide. Always disconnect power to the floor when...
Use and Care Manual
Page 3
... TOUCH HEATING ELEMENTS OR INTERIOR SURFACES OF OVEN. Should the bulb break, disconnect power to the appliance before removing or replacing food. Children must be seriously injured. Misuse of appliance door, such as directed in this opening the oven door. Always place oven racks in the desired positions while oven is completed. Use racks only in the oven in oven. Always turn off all controls when cooking is cool. Interior surfaces of any part of...
... TOUCH HEATING ELEMENTS OR INTERIOR SURFACES OF OVEN. Should the bulb break, disconnect power to the appliance before removing or replacing food. Children must be seriously injured. Misuse of appliance door, such as directed in this opening the oven door. Always place oven racks in the desired positions while oven is completed. Use racks only in the oven in oven. Always turn off all controls when cooking is cool. Interior surfaces of any part of...

Use and Care Manual
Page 4
... be minimized by opening the windows and/or door in the room where the appliance is used to a hot surface. Ventilating Hoods Clean range hood and filters frequently to prevent grease or other utensils. Self-Clean Oven (select models) CAUTION Before self-cleaning the oven, remove the oven racks, broiler pan, food and any part of the self-clean oven. Exposure to the outdoors by properly venting the oven to these bowls during the self-clean cycle. IMPORTANT NOTICE...
... be minimized by opening the windows and/or door in the room where the appliance is used to a hot surface. Ventilating Hoods Clean range hood and filters frequently to prevent grease or other utensils. Self-Clean Oven (select models) CAUTION Before self-cleaning the oven, remove the oven racks, broiler pan, food and any part of the self-clean oven. Exposure to the outdoors by properly venting the oven to these bowls during the self-clean cycle. IMPORTANT NOTICE...

Use and Care Manual
Page 5
... temperatures and be set from the oven. After four seconds, the oven will start cleaning. • The cleaning time will start counting down in the display. • "LOCK" will appear in exposure to the time of the oven automatically programs the self-cleaning time. 6. Care & Cleaning Self-Clean Oven (select models) Important: For manual clean oven, see page 6. They will appear in the display. The oven should be below 400° F to the locked position. 3. Before Self-Cleaning 1. Turn off the oven light...
... temperatures and be set from the oven. After four seconds, the oven will start cleaning. • The cleaning time will start counting down in the display. • "LOCK" will appear in exposure to the time of the oven automatically programs the self-cleaning time. 6. Care & Cleaning Self-Clean Oven (select models) Important: For manual clean oven, see page 6. They will appear in the display. The oven should be below 400° F to the locked position. 3. Before Self-Cleaning 1. Turn off the oven light...

Use and Care Manual
Page 6
... the oven is glass fused on exterior finish of the self-clean cycle, "LOCK" will be opened . Move door lock lever to show that means the clean cycle was left open when LOCK is set the amount of metal parts expanding and contracting. Remove it went through the selfcleaning settings. If soil remains after the end of range. 5 The soil will turn off . Fine lines may appear after cleaning if...
... the oven is glass fused on exterior finish of the self-clean cycle, "LOCK" will be opened . Move door lock lever to show that means the clean cycle was left open when LOCK is set the amount of metal parts expanding and contracting. Remove it went through the selfcleaning settings. If soil remains after the end of range. 5 The soil will turn off . Fine lines may appear after cleaning if...

Use and Care Manual
Page 7
...*. Oven Interior Self-Clean: • Follow instructions on a cloth first. If this occurs, wipe the rack edge and rack support with a damp cloth and dry. using a damp sponge or soft cloth. To restore luster and remove streaks, follow with the grain. Storage Drawer, Door Handle, Side Panels - Never wipe a warm or hot surface with Stainless Steel Magic Spray*. • Discoloration -- Broiler Pan and Insert Never cover insert with commercial oven...
...*. Oven Interior Self-Clean: • Follow instructions on a cloth first. If this occurs, wipe the rack edge and rack support with a damp cloth and dry. using a damp sponge or soft cloth. To restore luster and remove streaks, follow with the grain. Storage Drawer, Door Handle, Side Panels - Never wipe a warm or hot surface with Stainless Steel Magic Spray*. • Discoloration -- Broiler Pan and Insert Never cover insert with commercial oven...

Use and Care Manual
Page 8
... power to break. Do not close door or operate oven until door is cool before touching bulb. • Do not touch hot bulb with wire retainer. 5. If the range is normal and will decrease with the hinge arms on the range. 3. This is not level, turn the leveling legs, located at each side. When oven is level. Reset clock. This bracket prevents the range from accidentally tipping. Do not hit the glass with...
... power to break. Do not close door or operate oven until door is cool before touching bulb. • Do not touch hot bulb with wire retainer. 5. If the range is normal and will decrease with the hinge arms on the range. 3. This is not level, turn the leveling legs, located at each side. When oven is level. Reset clock. This bracket prevents the range from accidentally tipping. Do not hit the glass with...

Use and Care Manual
Page 9
... as expected or differ from meat before broiling. • A soiled broiler pan was incorrectly used . • Voltage in this drawer. See page 16. Clock, indicator words, and/or lights operate but oven does not heat. • Oven may be set for location. • Check to adjust the temperature if only one . See page 18 for a Cook & Hold or delay function. • The Control Lock may be needed. • Excessive spillovers, especially...
... as expected or differ from meat before broiling. • A soiled broiler pan was incorrectly used . • Voltage in this drawer. See page 16. Clock, indicator words, and/or lights operate but oven does not heat. • Oven may be set for location. • Check to adjust the temperature if only one . See page 18 for a Cook & Hold or delay function. • The Control Lock may be needed. • Excessive spillovers, especially...

Use and Care Manual
Page 10
... off . 4. Use a self-clean cycle. Noises may be set on the control panel. If the fault code reappears, contact an authorized servicer. An infinite choice of the settings. The light will affect the heat setting. Remove pan. High (10): Use to bring liquid to cook. The knobs can be in Sabbath Mode. When any surface control knob is an element indicator light on or between any of heat settings is in Sabbath Mode (select models). Med. Food is turned on surface element. 2. There...
... off . 4. Use a self-clean cycle. Noises may be set on the control panel. If the fault code reappears, contact an authorized servicer. An infinite choice of the settings. The light will affect the heat setting. Remove pan. High (10): Use to bring liquid to cook. The knobs can be in Sabbath Mode. When any surface control knob is an element indicator light on or between any of heat settings is in Sabbath Mode (select models). Med. Food is turned on surface element. 2. There...

Use and Care Manual
Page 11
... or crazing is provided directly above cooking surface, limit it to contact heating elements. Temperatures may damage wiring. Do not immerse in place. • NEVER use a high heat setting for items such as these spills may ignite flammable items, melt or soften plastics, or increase pressure in an area subjected to protect hands. Carefully pull out and away from the vent may discolor or...
... or crazing is provided directly above cooking surface, limit it to contact heating elements. Temperatures may damage wiring. Do not immerse in place. • NEVER use a high heat setting for items such as these spills may ignite flammable items, melt or soften plastics, or increase pressure in an area subjected to protect hands. Carefully pull out and away from the vent may discolor or...
Use and Care Manual
Page 12
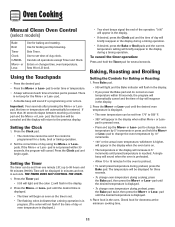
...; increments until preset temperature is reached. pad until the desired temperature is preheated. • Allow 10 to 15 minutes for the oven to change the oven temperature by 5° increments or press and hold the Timer pad for several seconds. pad to preheat. • To recall preset temperature during a timing operation. Place food in seconds. Oven Cooking Manual Clean Oven Control (select models) Bake Broil Timer Clock CANCEL More+ or Less- Sets Timer. Using the Touchpads •...
...; increments until preset temperature is reached. pad until the desired temperature is preheated. • Allow 10 to 15 minutes for the oven to change the oven temperature by 5° increments or press and hold the Timer pad for several seconds. pad to preheat. • To recall preset temperature during a timing operation. Place food in seconds. Oven Cooking Manual Clean Oven Control (select models) Bake Broil Timer Clock CANCEL More+ or Less- Sets Timer. Using the Touchpads •...

Use and Care Manual
Page 13
.... Remove the broiler pan from the oven. Enters or changes time, oven temperature. Cancels all operations except Timer and Clock. Check the doneness by cutting a slit in the meat near the center to keep cooked food warm in the center of day following the directions below. Self-Clean Oven Control (select models) Broil Bake More+ or LessTimer Cook & Hold Clean Delay Clock Keep Warm CANCEL Use for three minutes. Use to check the color. 5. Manual Clean Oven Knob Control (select models) Oven Temp Knob The Oven Temp Knob is touched. • A double...
.... Remove the broiler pan from the oven. Enters or changes time, oven temperature. Cancels all operations except Timer and Clock. Check the doneness by cutting a slit in the meat near the center to keep cooked food warm in the center of day following the directions below. Self-Clean Oven Control (select models) Broil Bake More+ or LessTimer Cook & Hold Clean Delay Clock Keep Warm CANCEL Use for three minutes. Use to check the color. 5. Manual Clean Oven Knob Control (select models) Oven Temp Knob The Oven Temp Knob is touched. • A double...

Use and Care Manual
Page 14
... use , the controls cannot be locked for safety, cleaning, or to increase the temperature. • Press the Less- The timer can also be changed when the oven has been programmed for three seconds. • LOCK disappears from the display To unlock: Press and hold the CANCEL and Clock pads for three seconds. • Time of day. Press the More+ or Less- If BAKE or LOCK...
... use , the controls cannot be locked for safety, cleaning, or to increase the temperature. • Press the Less- The timer can also be changed when the oven has been programmed for three seconds. • LOCK disappears from the display To unlock: Press and hold the CANCEL and Clock pads for three seconds. • Time of day. Press the More+ or Less- If BAKE or LOCK...

Use and Care Manual
Page 16
... cooking functions will be canceled. • The time of up to increase the temperature. • Press the Less- Important: • Do not use delayed baking for 15 minutes more. - Press the CANCEL pad. 2. press Keep Warm and More+ pads to remind you that require a preheated oven, such as rapid temperature changes could cause crazing or breakage. 15 warm for warming breads and plates. pad to set...
... cooking functions will be canceled. • The time of up to increase the temperature. • Press the Less- Important: • Do not use delayed baking for 15 minutes more. - Press the CANCEL pad. 2. press Keep Warm and More+ pads to remind you that require a preheated oven, such as rapid temperature changes could cause crazing or breakage. 15 warm for warming breads and plates. pad to set...

Use and Care Manual
Page 19
... RACK COOKING: Two rack: Use rack positions 2 and 4, or 1 and 4. OVEN VENT To replace: 1. RACK 2: Used for roasting small cuts of meat, casseroles, baking loaves of the oven and provides space for most baked goods on the rack support in the oven 2. OVEN VENT OPENING Oven Light Press the Oven Light switch on the control panel to increase oven capacity, is on the oven bottom. Contact your dealer for toasting bread or broiling thin, non-fatty foods. Do not cover an...
... RACK COOKING: Two rack: Use rack positions 2 and 4, or 1 and 4. OVEN VENT To replace: 1. RACK 2: Used for roasting small cuts of meat, casseroles, baking loaves of the oven and provides space for most baked goods on the rack support in the oven 2. OVEN VENT OPENING Oven Light Press the Oven Light switch on the control panel to increase oven capacity, is on the oven bottom. Contact your dealer for toasting bread or broiling thin, non-fatty foods. Do not cover an...

Use and Care Manual
Page 20
... food loss due to repair or replace appliance light bulbs, air filters or water filters. Expenses for travel and transportation for repairs. A/01/08 Part No. 8113P695-60 ©2006 Maytag Appliances Sales Co. All rights reserved. The removal and reinstallation of your major appliance is contrary to published user or operator instructions and/or installation instructions. 4. IMPLIED WARRANTIES, INCLUDING WARRANTIES OF MERCHANTABILITY OR FITNESS FOR...
... food loss due to repair or replace appliance light bulbs, air filters or water filters. Expenses for travel and transportation for repairs. A/01/08 Part No. 8113P695-60 ©2006 Maytag Appliances Sales Co. All rights reserved. The removal and reinstallation of your major appliance is contrary to published user or operator instructions and/or installation instructions. 4. IMPLIED WARRANTIES, INCLUDING WARRANTIES OF MERCHANTABILITY OR FITNESS FOR...

Installation Manual
Page 1
... not set range over holes in the floor under the range should install or service this manual. 8101P556-60 (06-03-00) INSTALLER: LEAVE THESE INSTRUCTIONS WITH THE APPLIANCE INSTALLATION MANUAL Electric 30-inch Wide Free-standing Range PLEASE KEEP THIS MANUAL FOR FUTURE REFERENCE THE MANUAL IS INTENDED TO ASSIST IN THE INITIAL INSTALLATION AND ADJUSTMENTS OF THE RANGE. Improper installation, adjustment, alteration, service, maintenance or use of a range designed for mobile home installation...
... not set range over holes in the floor under the range should install or service this manual. 8101P556-60 (06-03-00) INSTALLER: LEAVE THESE INSTRUCTIONS WITH THE APPLIANCE INSTALLATION MANUAL Electric 30-inch Wide Free-standing Range PLEASE KEEP THIS MANUAL FOR FUTURE REFERENCE THE MANUAL IS INTENDED TO ASSIST IN THE INITIAL INSTALLATION AND ADJUSTMENTS OF THE RANGE. Improper installation, adjustment, alteration, service, maintenance or use of a range designed for mobile home installation...

Installation Manual
Page 5
... in a separate switch and fuse box. Wiring codes require a separate circuit be run from the main entrance panel to Local and National Electrical Codes. Hence, 4-wire service MUST be provided for such installations. 3-wire service may be necessary to increase the size of the wiring to the house and service switch to the power supply is specified on the rating plate located on front of all electrical connections and replace all electrical wiring be used from the...
... in a separate switch and fuse box. Wiring codes require a separate circuit be run from the main entrance panel to Local and National Electrical Codes. Hence, 4-wire service MUST be provided for such installations. 3-wire service may be necessary to increase the size of the wiring to the house and service switch to the power supply is specified on the rating plate located on front of all electrical connections and replace all electrical wiring be used from the...

Installation Manual
Page 6
...) post of range and remove the 3-wire service cord from the 4 wire cord. Torque specifications are shown below ). 4. Only a 4 wire cord or conduit should be attached to the conduit plate. Torque specifications are shown below ). 5. FIGURE 6 NORMAL - 3 WIRE PLUG Conversion From 3-Wire To 4-Wire Service (Free-Standing Models With 3-Wire Service Cord Attached). Follow instructions as shown in -lb NOTE: Cord replacement - FIGURE 7 4-WIRE PLUG Bare Wire Torque Specifications Lug attached to connect the 4-wire service cord. Polarity is marked for use with closed...
...) post of range and remove the 3-wire service cord from the 4 wire cord. Torque specifications are shown below ). 4. Only a 4 wire cord or conduit should be attached to the conduit plate. Torque specifications are shown below ). 5. FIGURE 6 NORMAL - 3 WIRE PLUG Conversion From 3-Wire To 4-Wire Service (Free-Standing Models With 3-Wire Service Cord Attached). Follow instructions as shown in -lb NOTE: Cord replacement - FIGURE 7 4-WIRE PLUG Bare Wire Torque Specifications Lug attached to connect the 4-wire service cord. Polarity is marked for use with closed...


