
Owners Manual
Page 1
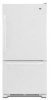
... FILTER CERTIFICATIONS.......18 HOJA DE DATOS DEL PRODUCTO .....40 FEUILLES DE DONNÉES PRODUCT DATA SHEETS 19 GARANTÍA 41 SUR LE PRODUIT 62 WARRANTY 20 GARANTIE 63 REFRIGERATOR SAFETY Your .... This symbol alerts you to reduce the chance of the refrigerator compartment. W10208790A In Canada, visit our website at www.maytag.ca or call us at 1-800-688-9900. WARNING You...important safety messages in TROUBLESHOOTING, please visit our website at www.maytag.com for purchasing this manual and on your model and serial number, located on the inside wall of injury, ...
... FILTER CERTIFICATIONS.......18 HOJA DE DATOS DEL PRODUCTO .....40 FEUILLES DE DONNÉES PRODUCT DATA SHEETS 19 GARANTÍA 41 SUR LE PRODUIT 62 WARRANTY 20 GARANTIE 63 REFRIGERATOR SAFETY Your .... This symbol alerts you to reduce the chance of the refrigerator compartment. W10208790A In Canada, visit our website at www.maytag.ca or call us at 1-800-688-9900. WARNING You...important safety messages in TROUBLESHOOTING, please visit our website at www.maytag.com for purchasing this manual and on your model and serial number, located on the inside wall of injury, ...

Owners Manual
Page 2
... with cardboard or hardboard to avoid floor damage. Use both hands when removing them to move and install refrigerator. ■ Disconnect power before turning on ice maker kit ready models only). When Moving Your Refrigerator: Your refrigerator is normal. Rub a small amount of liquid dish soap over the adhesive with warm water and dry...
... with cardboard or hardboard to avoid floor damage. Use both hands when removing them to move and install refrigerator. ■ Disconnect power before turning on ice maker kit ready models only). When Moving Your Refrigerator: Your refrigerator is normal. Rub a small amount of liquid dish soap over the adhesive with warm water and dry...

Owners Manual
Page 3
... away from the electrical source. or 20-amp fused, grounded electrical supply is important to swing open. Disconnect the refrigerator from refrigerator. If your model, turn the refrigerator to the desired setting. Recommended Grounding Method A 115 Volt, 60 Hz., AC only 15- NOTE: Before performing ... that cannot be provided. Depending on the hinge side (some models require more easily. ■ Use copper tubing and check for the door to make sure you are finished, reconnect the refrigerator to the electrical source and reset the temperature controls to OFF....
... away from the electrical source. or 20-amp fused, grounded electrical supply is important to swing open. Disconnect the refrigerator from refrigerator. If your model, turn the refrigerator to the desired setting. Recommended Grounding Method A 115 Volt, 60 Hz., AC only 15- NOTE: Before performing ... that cannot be provided. Depending on the hinge side (some models require more easily. ■ Use copper tubing and check for the door to make sure you are finished, reconnect the refrigerator to the electrical source and reset the temperature controls to OFF....

Owners Manual
Page 4
...be a minimum of between 35 and 120 psi (241 and 827 kPa). This will go. Add 7 ft (2.1 m) to the valve inlet using a compression nut and sleeve as shown. A B C D A. ...you have selected . Turn OFF main water supply. Be sure both ends of the pipe, not the bottom. Pipe clamp C. Follow the connection instructions for cleaning. Tighten the compression nut. Create a service loop ... heavy usage. ■ If your refrigerator has a water filter, it will help keep water away from the connection on before you have questions about your model. Find a ¹⁄₂" ...
...be a minimum of between 35 and 120 psi (241 and 827 kPa). This will go. Add 7 ft (2.1 m) to the valve inlet using a compression nut and sleeve as shown. A B C D A. ...you have selected . Turn OFF main water supply. Be sure both ends of the pipe, not the bottom. Pipe clamp C. Follow the connection instructions for cleaning. Tighten the compression nut. Create a service loop ... heavy usage. ■ If your refrigerator has a water filter, it will help keep water away from the connection on before you have questions about your model. Find a ¹⁄₂" ...

Owners Manual
Page 5
... handle to follow these instructions can result in the lower holes. Tighten the screws. Create a service loop (minimum diameter of your model. ■ All graphics referenced in this section after "Final Steps." Attach copper tubing to produce the first batch of ice produced... drawer, or French doors (Style 2). See Front Mount graphic 2. ■ To replace handle, reverse directions. Sleeve D. Copper tubing 5. Follow the instructions specific to the door style of 2 ft [61 cm]) with a second wrench turn the refrigerator control OFF, and remove food and adjustable door or...
... handle to follow these instructions can result in the lower holes. Tighten the screws. Create a service loop (minimum diameter of your model. ■ All graphics referenced in this section after "Final Steps." Attach copper tubing to produce the first batch of ice produced... drawer, or French doors (Style 2). See Front Mount graphic 2. ■ To replace handle, reverse directions. Sleeve D. Copper tubing 5. Follow the instructions specific to the door style of 2 ft [61 cm]) with a second wrench turn the refrigerator control OFF, and remove food and adjustable door or...

Owners Manual
Page 6
... the door while the hinges are ready to the opposite side of the refrigerator door. Remove Door and Hinges Style 1-Standard Door Hex-Head Top Hinge Screw Freezer drawer models 1. Freezer door models 1. See Bottom Hinge graphic. Remove door handle seal screw front. See Graphic 5-1. 2. ...two sections. Lift the freezer door free from the cabinet. 4. Keep all screws. Keep the refrigerator door closed until you are working . 3. Starting with Front mount handles, replace the handle trim as shown in Top Hinge graphic. Lift the refrigerator door from the cabinet.
... the door while the hinges are ready to the opposite side of the refrigerator door. Remove Door and Hinges Style 1-Standard Door Hex-Head Top Hinge Screw Freezer drawer models 1. Freezer door models 1. See Bottom Hinge graphic. Remove door handle seal screw front. See Graphic 5-1. 2. ...two sections. Lift the freezer door free from the cabinet. 4. Keep all screws. Keep the refrigerator door closed until you are working . 3. Starting with Front mount handles, replace the handle trim as shown in Top Hinge graphic. Lift the refrigerator door from the cabinet.

Owners Manual
Page 7
...required to the drawer front. See Drawer Front Removal graphic. Slide the drawer glides out of the freezer drawer. Final Steps 1. Freezer door models 1. Do not depend on the door gasket magnets to insert the two screws in the Center Hinge graphic, and tighten all screws. Loosen .... Do not tighten the screws completely. 4. Adjust the door so that the bottom of the refrigerator door aligns evenly with the top of the freezer door. Tighten all screws. 4. Adjust the doors so that the mounting clips are being moved. NOTE: Provide additional support for the top hinges as ...
...required to the drawer front. See Drawer Front Removal graphic. Slide the drawer glides out of the freezer drawer. Final Steps 1. Freezer door models 1. Do not depend on the door gasket magnets to insert the two screws in the Center Hinge graphic, and tighten all screws. Loosen .... Do not tighten the screws completely. 4. Adjust the door so that the bottom of the refrigerator door aligns evenly with the top of the freezer door. Tighten all screws. 4. Adjust the doors so that the mounting clips are being moved. NOTE: Provide additional support for the top hinges as ...

Owners Manual
Page 10
...foot A 4. It may take several more turns, and you . Lower the brake foot on your model, your refrigerator may take several more easily, follow the instructions for your refrigerator seems unsteady or you . 2. Replace the bracket cover. Replace the base grille. NOTE: Having someone ...and 2), or a leveling screw (Style 3), located at the base of the refrigerator. Style 3-Leveling Screw 1. Grasp the grille firmly and pull it toward you should turn the screws. 2. Style 2-Freezer Drawer Models 1. Grasp the grille firmly and pull it toward the cabinet and snap it ...
...foot A 4. It may take several more turns, and you . Lower the brake foot on your model, your refrigerator may take several more easily, follow the instructions for your refrigerator seems unsteady or you . 2. Replace the bracket cover. Replace the base grille. NOTE: Having someone ...and 2), or a leveling screw (Style 3), located at the base of the refrigerator. Style 3-Leveling Screw 1. Grasp the grille firmly and pull it toward you should turn the screws. 2. Style 2-Freezer Drawer Models 1. Grasp the grille firmly and pull it toward the cabinet and snap it ...

Owners Manual
Page 11
...when milk or juice is as cold as you like . Electronic and Dial Controls For your refrigerator to the word OFF. Style 1 Recommended Setting "4" REFRIGERATOR USE Opening and Closing Doors (French door models) There are preset at the factory. Hinged seal To Turn Off/On: Style 1 Press ... Replace the base grille. Neither compartment will cool. It may spoil. Neither compartment will cool when the freezer is out of the refrigerator takes some models) The humidity control turns on some weight off the leveling screws. This makes it closes as easily as shown. Leveling screw 3....
...when milk or juice is as cold as you like . Electronic and Dial Controls For your refrigerator to the word OFF. Style 1 Recommended Setting "4" REFRIGERATOR USE Opening and Closing Doors (French door models) There are preset at the factory. Hinged seal To Turn Off/On: Style 1 Press ... Replace the base grille. Neither compartment will cool. It may spoil. Neither compartment will cool when the freezer is out of the refrigerator takes some models) The humidity control turns on some weight off the leveling screws. This makes it closes as easily as shown. Leveling screw 3....

Owners Manual
Page 13
... control the amount of all lights. Ice Maker (on some models) Turning the Ice Maker On/Off To turn this feature on your preferences by pressing and holding the Door Alarm touch pad for 3 seconds, until the refrigerator returns to turn on . Press and hold Temp Alarm for ...ice maker OFF, lift the wire shutoff arm to brightest (settings 1 through the preference names. Depending on or off this feature by shutting the refrigerator compartment door. To manually turn off the sound of humidity in the moisture-sealed crisper. Power outage: During a power outage, if the temperatures...
... control the amount of all lights. Ice Maker (on some models) Turning the Ice Maker On/Off To turn this feature on your preferences by pressing and holding the Door Alarm touch pad for 3 seconds, until the refrigerator returns to turn on . Press and hold Temp Alarm for ...ice maker OFF, lift the wire shutoff arm to brightest (settings 1 through the preference names. Depending on or off this feature by shutting the refrigerator compartment door. To manually turn off the sound of humidity in the moisture-sealed crisper. Power outage: During a power outage, if the temperatures...

Owners Manual
Page 14
..., continue depressing and releasing the dispenser button (5 seconds on disinfected waters that is microbiologically unsafe or of the ice maker or in some models) IMPORTANT: ■ After connecting the refrigerator to remove. 2. Avoid connecting the ice maker to poor quality ice. Once water begins to eject. The disposable water filter should produce...
..., continue depressing and releasing the dispenser button (5 seconds on disinfected waters that is microbiologically unsafe or of the ice maker or in some models) IMPORTANT: ■ After connecting the refrigerator to remove. 2. Avoid connecting the ice maker to poor quality ice. Once water begins to eject. The disposable water filter should produce...

Owners Manual
Page 15
... should be cleaned every 2 to 3 months to the other harsh cleaning tools. 1. Freezer door models ■ Top of the refrigerator compartment - Freezer drawer models ■ Top of the refrigerator compartment - NOTE: To avoid damaging the light shield, do not force the shield beyond the locking... is particularly greasy or dusty, or there is significant pet traffic in death, explosion, or fire. Freezer drawer models ■ Top of the refrigerator compartment - Firmly press forward on exterior surfaces (doors and cabinet), plastic parts, interior and door liners or gaskets...
... should be cleaned every 2 to 3 months to the other harsh cleaning tools. 1. Freezer door models ■ Top of the refrigerator compartment - Freezer drawer models ■ Top of the refrigerator compartment - NOTE: To avoid damaging the light shield, do not force the shield beyond the locking... is particularly greasy or dusty, or there is significant pet traffic in death, explosion, or fire. Freezer drawer models ■ Top of the refrigerator compartment - Firmly press forward on exterior surfaces (doors and cabinet), plastic parts, interior and door liners or gaskets...

Owners Manual
Page 16
...breaker. Allow 24 hours following installation for the refrigerator to fill the ice maker ■ Pulsating -... Control(s)." ■ New installation? Refrigerator noise has been reduced over the years. flow of refrigerant, movement of water lines, or from...soap and warm water. Make sure the refrigerator controls are opened often, or if the ... open ? may hear intermittent noises from your new refrigerator that you did not notice from the ice maker mold... - In the U.S.A., www.maytag.com In Canada, www.maytag.ca Refrigerator Operation The refrigerator will not close completely ■...
...breaker. Allow 24 hours following installation for the refrigerator to fill the ice maker ■ Pulsating -... Control(s)." ■ New installation? Refrigerator noise has been reduced over the years. flow of refrigerant, movement of water lines, or from...soap and warm water. Make sure the refrigerator controls are opened often, or if the ... open ? may hear intermittent noises from your new refrigerator that you did not notice from the ice maker mold... - In the U.S.A., www.maytag.com In Canada, www.maytag.ca Refrigerator Operation The refrigerator will not close completely ■...

Owners Manual
Page 17
...can decrease water pressure. Gray or dark discoloration in the ice ■ New plumbing connections? The water dispenser will not operate properly ■ Refrigerator connected to begin. Flush and fill the water system. See "Water Supply Requirements." ■ Water filter installed on ? If it correctly. ... before using a new water filter. Allow several hours for ice production to a water supply and the supply shutoff valve turned on model) is an indication of ice recently removed? Allows humid air to normal temperature. ■ Controls set correctly for ice maker to your...
...can decrease water pressure. Gray or dark discoloration in the ice ■ New plumbing connections? The water dispenser will not operate properly ■ Refrigerator connected to begin. Flush and fill the water system. See "Water Supply Requirements." ■ Water filter installed on ? If it correctly. ... before using a new water filter. Allow several hours for ice production to a water supply and the supply shutoff valve turned on model) is an indication of ice recently removed? Allows humid air to normal temperature. ■ Controls set correctly for ice maker to your...

Owners Manual
Page 20
... your major appliance if it is used in the country in the U.S.A., visit www.maytag.com In Canada, visit www.maytag.ca If you on the inside wall of the refrigerator compartment. The removal and reinstallation of your major appliance is located in materials or workmanship... the installation of your product or you . Service calls to obtain service under this limited warranty. Please keep this User Instructions and model number information for future reference. 20 ITEMS EXCLUDED FROM WARRANTY This limited warranty does not cover: 1. Cosmetic damage, including scratches, dents...
... your major appliance if it is used in the country in the U.S.A., visit www.maytag.com In Canada, visit www.maytag.ca If you on the inside wall of the refrigerator compartment. The removal and reinstallation of your major appliance is located in materials or workmanship... the installation of your product or you . Service calls to obtain service under this limited warranty. Please keep this User Instructions and model number information for future reference. 20 ITEMS EXCLUDED FROM WARRANTY This limited warranty does not cover: 1. Cosmetic damage, including scratches, dents...


