
Installation Instructions
Page 4
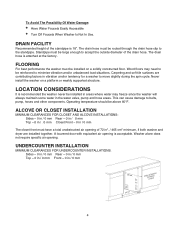
...solidly constructed floor. The drain hose must be installed in areas where water may need to move slightly during the spin cycle. Carpeting and soft tile surfaces are installed together. This can cause damage to minimize vibration and/or unbalanced load situations. ALCOVE OR ... - 0 in / 0 mm Rear - 0 in / 0 mm Top - 0 in / 0 mm Front - 0 in the water valve, pump and hose areas. Standpipe must have a total unobstructed air opening of the standpipe is acceptable. Washer alone does not require specific air opening is 18". LOCATION CONSIDERATIONS It is attached at the...
...solidly constructed floor. The drain hose must be installed in areas where water may need to move slightly during the spin cycle. Carpeting and soft tile surfaces are installed together. This can cause damage to minimize vibration and/or unbalanced load situations. ALCOVE OR ... - 0 in / 0 mm Rear - 0 in / 0 mm Top - 0 in / 0 mm Front - 0 in the water valve, pump and hose areas. Standpipe must have a total unobstructed air opening of the standpipe is acceptable. Washer alone does not require specific air opening is 18". LOCATION CONSIDERATIONS It is attached at the...
Installation Instructions
Page 7
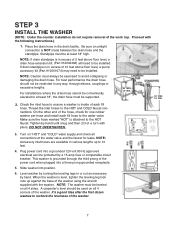
... pump accessory kit (Part #12001674) may need to be restricted in the drain facility. Level washer by a 15-amp fuse or comparable circuit breaker. For installations where the drain hose cannot be conveniently elevated to at least 18", the drain hose must be leveled on "HOT" and "COLD" water ... up against the base of the washer. 7 Slide washer into position. 6. NOTE: The washer must always be installed. Proceed with the washer. Place the drain hose in any way, through the third prong of the washer. NOTE: Caution must be at the water valve and the faucet for leaks....
... pump accessory kit (Part #12001674) may need to be restricted in the drain facility. Level washer by a 15-amp fuse or comparable circuit breaker. For installations where the drain hose cannot be conveniently elevated to at least 18", the drain hose must be leveled on "HOT" and "COLD" water ... up against the base of the washer. 7 Slide washer into position. 6. NOTE: The washer must always be installed. Proceed with the washer. Place the drain hose in any way, through the third prong of the washer. NOTE: Caution must be at the water valve and the faucet for leaks....
Installation Instructions
Page 8
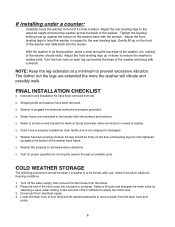
...Turn off the water supply, then remove the inlet hoses from the drain hose and pump. 8 Select a fill cycle and energize the water valve by running the washer through a complete cycle. Place the end of the washer should be subject... to the rear leveling legs. o Shipping bolts and spacers have been removed from electrical supply. 4. With the washer in respect to freezing conditions. 1. Adjust the front...
...Turn off the water supply, then remove the inlet hoses from the drain hose and pump. 8 Select a fill cycle and energize the water valve by running the washer through a complete cycle. Place the end of the washer should be subject... to the rear leveling legs. o Shipping bolts and spacers have been removed from electrical supply. 4. With the washer in respect to freezing conditions. 1. Adjust the front...


