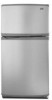
User Instructions
Page 1
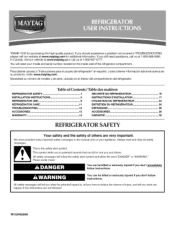
... del refrigerador. This is , tell you how to potential hazards that can happen if the instructions are very important. If you and others are not followed. If you what can kill or hurt you still need your model and serial number, located on your appliance. All safety messages will follow instructions. Table of Contents / Table des matii_res REFRIGERATOR SAFETY 1 INSTALLATION INSTRUCTIONS 2 REFRIGERATOR USE 9 REFRIGERATOR CARE 11 TROUBLESHOOTING...
... del refrigerador. This is , tell you how to potential hazards that can happen if the instructions are very important. If you and others are not followed. If you what can kill or hurt you still need your model and serial number, located on your appliance. All safety messages will follow instructions. Table of Contents / Table des matii_res REFRIGERATOR SAFETY 1 INSTALLATION INSTRUCTIONS 2 REFRIGERATOR USE 9 REFRIGERATOR CARE 11 TROUBLESHOOTING...

User Instructions
Page 2
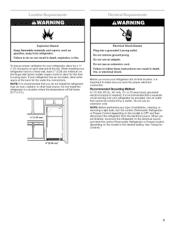
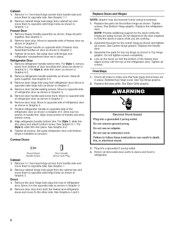
... white foam air return insert from behind the control panel on ice maker kit ready models only). • Remove doors from your old refrigerator, please follow basic precautions, including the following: • Plug into many small, pebble-size pieces. When Moving Your Refrigerator: Your refrigerator is normal. important information to know about glass shelves and covers: Do not clean glass shelves or covers with cardboard or hardboard to sudden temperature changes or impact...
... white foam air return insert from behind the control panel on ice maker kit ready models only). • Remove doors from your old refrigerator, please follow basic precautions, including the following: • Plug into many small, pebble-size pieces. When Moving Your Refrigerator: Your refrigerator is normal. important information to know about glass shelves and covers: Do not clean glass shelves or covers with cardboard or hardboard to sudden temperature changes or impact...
User Instructions
Page 3
...: Before performing any type of installation, cleaning, or removing a light bulb, turn the control (Thermostat, Refrigerator or Freezer Control depending on each side and at the back for the water line connections. When installing your refrigerator be turned off by a switch. Do not use an adapter. When you have the proper electrical connection. / '_C'_,_/_'_ _ _ /_ + +, ...... or 20-amp fused, grounded electrical supply is recommended that you do so can result in a location where the temperature will fall below...
...: Before performing any type of installation, cleaning, or removing a light bulb, turn the control (Thermostat, Refrigerator or Freezer Control depending on each side and at the back for the water line connections. When installing your refrigerator be turned off by a switch. Do not use an adapter. When you have the proper electrical connection. / '_C'_,_/_'_ _ _ /_ + +, ...... or 20-amp fused, grounded electrical supply is recommended that you do so can result in a location where the temperature will fall below...

User Instructions
Page 4
... your cold water supply, the water pressure to the reverse osmosis system needs to 414 kPa). Locate a 1/2"to 1V4" (1.25 cm to Water Line 1. Be sure the outlet end is required to operate the water dispenser and ice maker. Turn OFF the shutoff valve on the copper tubing as it is a cold water pipe. • Horizontal pipe will help keep water away from the drill and normal sediment from the connection...
... your cold water supply, the water pressure to the reverse osmosis system needs to 414 kPa). Locate a 1/2"to 1V4" (1.25 cm to Water Line 1. Be sure the outlet end is required to operate the water dispenser and ice maker. Turn OFF the shutoff valve on the copper tubing as it is a cold water pipe. • Horizontal pipe will help keep water away from the drill and normal sediment from the connection...
User Instructions
Page 5
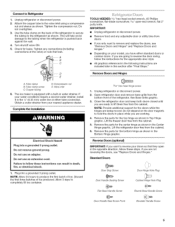
.... Turn shutoff valve ON. 5. Remove Doors and Hinges A. Tube clamp screw C. Valve inlet 6= The ice maker is pushed back against the wall. 4. Complete the Installation Electrical Shock Hazard Plug into a grounded 3 prong outlet. Do not use an adapter. Plug into a grounded 3 prong outlet. Open refrigerator door and remove base grille from the cabinet. 5. Lift the freezer door free from the bottom front of the refrigerator to secure the tubing to the valve inlet using a compression...
.... Turn shutoff valve ON. 5. Remove Doors and Hinges A. Tube clamp screw C. Valve inlet 6= The ice maker is pushed back against the wall. 4. Complete the Installation Electrical Shock Hazard Plug into a grounded 3 prong outlet. Do not use an adapter. Plug into a grounded 3 prong outlet. Open refrigerator door and remove base grille from the cabinet. 5. Lift the freezer door free from the bottom front of the refrigerator to secure the tubing to the valve inlet using a compression...
User Instructions
Page 6
.... Do not use an extension cord. Remove the door hinge hole plug from refrigerator door. Plug into place and attach bottom screw. See Graphic 2. 2. Set aside door until bottom hinge is reversed. 1. Remove door handle sealing screws. Remove door stop from bottom of freezer door. Freezer Door 1. Keep all screws. Remove refrigerator handle assembly as shown. Move to the opposite side as shown in Graphic 6-2. 2. Replace the parts for the doors while the hinges are working. 2. Electrical Shock Hazard Plug into place. Do...
.... Do not use an extension cord. Remove the door hinge hole plug from refrigerator door. Plug into place and attach bottom screw. See Graphic 2. 2. Set aside door until bottom hinge is reversed. 1. Remove door handle sealing screws. Remove door stop from bottom of freezer door. Freezer Door 1. Keep all screws. Remove refrigerator handle assembly as shown. Move to the opposite side as shown in Graphic 6-2. 2. Replace the parts for the doors while the hinges are working. 2. Electrical Shock Hazard Plug into place. Do...

User Instructions
Page 7
Door Handle Sealing Screws Front View Side View ,I I J i Door Handle Seal Screw Front A, Bottom Hinge B. Round-Head Handle Screw Top Hinge Center Hinge A, Center Hinge B. Flat-Head Handle Screw B. Door Hinge Hole Plug o._ , v oleo A. 5/_. s/_,, Hex-Head Hinge Screws A. Freezer Door Handle A. Door Stop 0 I I I I I / I I A, Door Stop Screw A B. s/_,,Hex-Head Hinge Screws Bottom Hinge A. Shoulder Handle Screw A. Hex-Head Hinge Screws A. Cabinet Hinge Hole Plugs A. Standard Doors Top Hinge A A, Top Hinge Cover B, s/_ ,, Hex-Head Hinge Screws C. Flat-Head ...
Door Handle Sealing Screws Front View Side View ,I I J i Door Handle Seal Screw Front A, Bottom Hinge B. Round-Head Handle Screw Top Hinge Center Hinge A, Center Hinge B. Flat-Head Handle Screw B. Door Hinge Hole Plug o._ , v oleo A. 5/_. s/_,, Hex-Head Hinge Screws A. Freezer Door Handle A. Door Stop 0 I I I I I / I I A, Door Stop Screw A B. s/_,,Hex-Head Hinge Screws Bottom Hinge A. Shoulder Handle Screw A. Hex-Head Hinge Screws A. Cabinet Hinge Hole Plugs A. Standard Doors Top Hinge A A, Top Hinge Cover B, s/_ ,, Hex-Head Hinge Screws C. Flat-Head ...

User Instructions
Page 8
Top Hinge Center Hinge A. Door Stop B. Door Stop B. Door Stop Screw 8 s/_6"Hex-Head Hinge Screws A. Center Hinge B. 5/16"Hex-Head Hinge Screws Bottom Hinge A. Door Hinge Hole Plug Removal of Door Stops A. Contour Doors Base Grille Top Hinge °l° o oo A. Cabinet Hinge Hole Plugs A. Top Hinge Cover B. 5/1_"Hex-Head Hinge Screws C. A. Bottom Hinge B. _/le" Hex-Head Hinge Screws A. Door Stop Screw Reinstallation of Door Stops !
Top Hinge Center Hinge A. Door Stop B. Door Stop B. Door Stop Screw 8 s/_6"Hex-Head Hinge Screws A. Center Hinge B. 5/16"Hex-Head Hinge Screws Bottom Hinge A. Door Hinge Hole Plug Removal of Door Stops A. Contour Doors Base Grille Top Hinge °l° o oo A. Cabinet Hinge Hole Plugs A. Top Hinge Cover B. 5/1_"Hex-Head Hinge Screws C. A. Bottom Hinge B. _/le" Hex-Head Hinge Screws A. Door Stop Screw Reinstallation of Door Stops !
User Instructions
Page 9
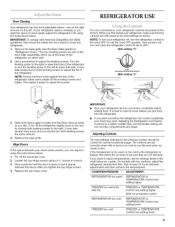
...to adjust the leveling screws. Replace the top hinge cover. It is as cold as a guide. Adjusting the Refrigerator and Freezer Controls to lower the refrigerator. 1. If you add food before adding food. CONDITION/REASON: ADJUSTMENT: REFRIGERATOR too warm REFRIGERATOR or TEMPERATURE Control one setting higher FREEZER too warm/too little ice FREEZER or TEMPERATURE Control one setting higher MAX ice production switch REFRIGERATOR too cold REFRIGERATOR or TEMPERATURE Control one setting lower FREEZER too cold FREEZER or TEMPERATURE Control one on the left to the right. Remove the...
...to adjust the leveling screws. Replace the top hinge cover. It is as cold as a guide. Adjusting the Refrigerator and Freezer Controls to lower the refrigerator. 1. If you add food before adding food. CONDITION/REASON: ADJUSTMENT: REFRIGERATOR too warm REFRIGERATOR or TEMPERATURE Control one setting higher FREEZER too warm/too little ice FREEZER or TEMPERATURE Control one setting higher MAX ice production switch REFRIGERATOR too cold REFRIGERATOR or TEMPERATURE Control one setting lower FREEZER too cold FREEZER or TEMPERATURE Control one on the left to the right. Remove the...
User Instructions
Page 10
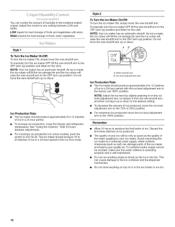
... ) position. See "Using the Controls." Ice level adjustment arm Ice Production Rate: • The ice maker should produce approximately 8 to 12 batches • To increase ice production, lower the freezer and refrigerator temperature. If a softened water supply cannot be only as good as salt) can cause damage to the ice container and the dispenser mechanism. • Do not store anything sharp to ICE PLUS. NOTE: Your ice maker has an...
... ) position. See "Using the Controls." Ice level adjustment arm Ice Production Rate: • The ice maker should produce approximately 8 to 12 batches • To increase ice production, lower the freezer and refrigerator temperature. If a softened water supply cannot be only as good as salt) can cause damage to the ice container and the dispenser mechanism. • Do not store anything sharp to ICE PLUS. NOTE: Your ice maker has an...

User Instructions
Page 11
... removable parts and interior surfaces thoroughly. Both the refrigerator and freezer sections defrost automatically. Plug in warm water. Painted metal: Wash painted metal exteriors with the grain to avoid buildup of the same size, shape, and wattage. 1. NOTE: When cleaning stainless steel, always wipe with a clean, soft cloth or sponge and a mild detergent in refrigerator or reconnect power. There is significant pet traffic in refrigerator or reconnect power...
... removable parts and interior surfaces thoroughly. Both the refrigerator and freezer sections defrost automatically. Plug in warm water. Painted metal: Wash painted metal exteriors with the grain to avoid buildup of the same size, shape, and wattage. 1. NOTE: When cleaning stainless steel, always wipe with a clean, soft cloth or sponge and a mild detergent in refrigerator or reconnect power. There is significant pet traffic in refrigerator or reconnect power...
User Instructions
Page 12
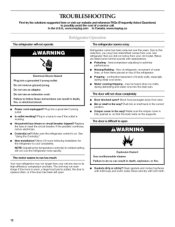
... the drain pan. Do not remove ground prong. Do not use an adapter. Control(s) on top of water lines, or from your old model. Allow 24 hours following installation for the refrigerator to optimize performance. • Hissing/Rattling - The unit may run even longer if the room is warm, a large food load is added, the door is opened often, or if the door has been left open. fans/compressor adjusting to cool...
... the drain pan. Do not remove ground prong. Do not use an adapter. Control(s) on top of water lines, or from your old model. Allow 24 hours following installation for the refrigerator to optimize performance. • Hissing/Rattling - The unit may run even longer if the room is warm, a large food load is added, the door is opened often, or if the door has been left open. fans/compressor adjusting to cool...

User Instructions
Page 13
... control(s) a setting colder. Turn the water shutoff valve fully open ? Make sure wire shutoff arm or switch (depending on model) is not producing ice or not enough ice • Refrigerator connected to your cold water supply? Allow 24 hours for ice maker to make new ice. • Odor transfer from the ejector arm with a plastic utensil. • Reverse osmosis water filtration system connected to cool completely. • Door opened often or left open . • Kink in the line can decrease water pressure. Stainless...
... control(s) a setting colder. Turn the water shutoff valve fully open ? Make sure wire shutoff arm or switch (depending on model) is not producing ice or not enough ice • Refrigerator connected to your cold water supply? Allow 24 hours for ice maker to make new ice. • Odor transfer from the ejector arm with a plastic utensil. • Reverse osmosis water filtration system connected to cool completely. • Door opened often or left open . • Kink in the line can decrease water pressure. Stainless...

User Instructions
Page 14
... have other than normal, single-family household use of products not approved by a Maytag designated service company. ITEMS EXCLUDED FROM WARRANTY This limited warranty does not cover: 1. Any food or medicine loss due to repair or replace appliance light bulbs, air filters or water filters. The removal and reinstallation of stainless steel surfaces. This warranty gives you specific legal rights, and you . If you need assistance using your complete model number ready.
... have other than normal, single-family household use of products not approved by a Maytag designated service company. ITEMS EXCLUDED FROM WARRANTY This limited warranty does not cover: 1. Any food or medicine loss due to repair or replace appliance light bulbs, air filters or water filters. The removal and reinstallation of stainless steel surfaces. This warranty gives you specific legal rights, and you . If you need assistance using your complete model number ready.

User Instructions
Page 32
W10249206A SP PN W10249207A © 2009 All rights reserved. Imprime aux t_.-U. Tous droits reserves. @Registered trademarkf TM Trademark of Maytag Corporation or its related companies @Marque deposeef TM Marque de commerce de Maytag Corporation ou de ses compagnies affiliees 4/09 Printed in U.S.A.
W10249206A SP PN W10249207A © 2009 All rights reserved. Imprime aux t_.-U. Tous droits reserves. @Registered trademarkf TM Trademark of Maytag Corporation or its related companies @Marque deposeef TM Marque de commerce de Maytag Corporation ou de ses compagnies affiliees 4/09 Printed in U.S.A.

