
Owners Manual
Page 2
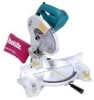
...-27/32" x 18-23/32" x 20-15/16") Net weight 11.0 kg (24.2 lbs) • Manufacturer reserves the right to change specifications without notice. • Specifications may differ from tool before turning it on. 4. KNOW YOUR POWER TOOL. Read the owner's manual carefully. .... KEEP WORK AREA CLEAN. Cluttered areas and benches invite accidents. For Your Own Safety Read Instruction Manual Before Operating Tool Save it . 2. SPECIFICATIONS Blade diameter 255 mm (10") Hole diameter 15.88 mm (5/8") Max. Cutting capacities (H x W) Bevel angle Miter angle 0° 45° ...
...-27/32" x 18-23/32" x 20-15/16") Net weight 11.0 kg (24.2 lbs) • Manufacturer reserves the right to change specifications without notice. • Specifications may differ from tool before turning it on. 4. KNOW YOUR POWER TOOL. Read the owner's manual carefully. .... KEEP WORK AREA CLEAN. Cluttered areas and benches invite accidents. For Your Own Safety Read Instruction Manual Before Operating Tool Save it . 2. SPECIFICATIONS Blade diameter 255 mm (10") Hole diameter 15.88 mm (5/8") Max. Cutting capacities (H x W) Bevel angle Miter angle 0° 45° ...
Owners Manual
Page 3
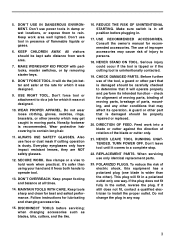
... tool, a guard or other jewelry which it still does not fit, contact a qualified electrician to rain. Do not change the plug in a polarized outlet only one blade is damaged should be properly repaired or replaced. 20. DON'T USE IN DANGEROUS ENVIRONMENT. Keep work area. 7. It ... may affect its intended function - DON'T OVERREACH. Keep proper footing and balance at the rate for lubricating and changing accessories. 15. MAINTAIN TOOLS WITH CARE. when changing accessories such as blades, bits, cutters, and the like. 16. Make sure switch is dusty. The use of electric shock, this...
... tool, a guard or other jewelry which it still does not fit, contact a qualified electrician to rain. Do not change the plug in a polarized outlet only one blade is damaged should be properly repaired or replaced. 20. DON'T USE IN DANGEROUS ENVIRONMENT. Keep work area. 7. It ... may affect its intended function - DON'T OVERREACH. Keep proper footing and balance at the rate for lubricating and changing accessories. 15. MAINTAIN TOOLS WITH CARE. when changing accessories such as blades, bits, cutters, and the like. 16. Make sure switch is dusty. The use of electric shock, this...
Owners Manual
Page 4
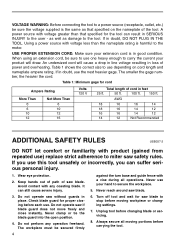
...same as damage to the tool. It can suffer serious personal injury. 1. Do not operate saw blade. 6. Turn off tool and wait for proper closing before moving portions before changing blade or servicing. 8. USE PROPER EXTENSION CORD. An undersized cord will draw. Table 1: Minimum gage... source with voltage less than that specified on cord length and nameplate ampere rating. Avoid contact with a vise during all moving workpiece or changing settings. 7. If you use your hand to the motor. The smaller the gage number, the heavier the cord. The workpiece must be...
...same as damage to the tool. It can suffer serious personal injury. 1. Do not operate saw blade. 6. Turn off tool and wait for proper closing before moving portions before changing blade or servicing. 8. USE PROPER EXTENSION CORD. An undersized cord will draw. Table 1: Minimum gage... source with voltage less than that specified on cord length and nameplate ampere rating. Avoid contact with a vise during all moving workpiece or changing settings. 7. If you use your hand to the motor. The smaller the gage number, the heavier the cord. The workpiece must be...
Owners Manual
Page 10
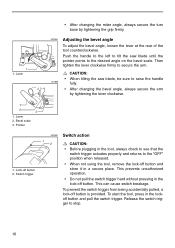
... the turn base by tightening the lever clockwise. 1 2 3 1. CAUTION: • When tilting the saw blade until the pointer points to raise the handle 001865 fully. • After changing the bevel angle, always secure the arm by tightening the grip firmly. 001864 Adjusting the bevel angle To adjust ... switch trigger from being accidentally pulled, a lock-off button 2. This can cause switch breakage. Push the handle to the left to tilt the saw blade, be sure to the desired angle on the bevel scale. Lever 2. Bevel scale 3. 1 1. Switch trigger • When not using the tool,...
... the turn base by tightening the lever clockwise. 1 2 3 1. CAUTION: • When tilting the saw blade until the pointer points to raise the handle 001865 fully. • After changing the bevel angle, always secure the arm by tightening the grip firmly. 001864 Adjusting the bevel angle To adjust ... switch trigger from being accidentally pulled, a lock-off button 2. This can cause switch breakage. Push the handle to the left to tilt the saw blade, be sure to the desired angle on the bevel scale. Lever 2. Bevel scale 3. 1 1. Switch trigger • When not using the tool,...


