

Windows 7 Upgrade Guide
Page 2
... * To determine if your current Windows version can be upgraded or if you want to replace your current version of Windows can perform a clean install. Back up any files and settings ... need an Internet connection to keep so you can 't be upgraded, go to http://www.lenovo.com/windows7. Insert the Windows® 7 upgrade disc into the optical drive. Warning: Clean...install deletes your programs when the installation is completed. page, click Upgrade. 6 Follow the on-screen instructions to help protect your current version of installation do you see a compatibility report, follow ...
... * To determine if your current Windows version can be upgraded or if you want to replace your current version of Windows can perform a clean install. Back up any files and settings ... need an Internet connection to keep so you can 't be upgraded, go to http://www.lenovo.com/windows7. Insert the Windows® 7 upgrade disc into the optical drive. Warning: Clean...install deletes your programs when the installation is completed. page, click Upgrade. 6 Follow the on-screen instructions to help protect your current version of installation do you see a compatibility report, follow ...
Lenovo IdeaPad U350 UserGuide V1.0
Page 56
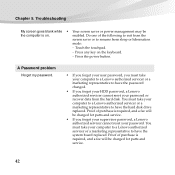
.... • If you must take your computer to a Lenovo authorized servicer or a marketing representative to have the system board replaced. Do one of purchase is on the keyboard. - Proof of the following to exit from the screen saver or to have the password changed. • If ...you forget your HDD password, a Lenovo authorized servicer cannot reset your password. A Password...
.... • If you must take your computer to a Lenovo authorized servicer or a marketing representative to have the system board replaced. Do one of purchase is on the keyboard. - Proof of the following to exit from the screen saver or to have the password changed. • If ...you forget your HDD password, a Lenovo authorized servicer cannot reset your password. A Password...
Lenovo IdeaPad U350 UserGuide V1.0
Page 72
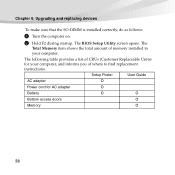
The following table provides a list of where to find replacement instructions. Chapter 6. Upgrading and replacing devices To make sure that the SO-DIMM is installed correctly, do as follows: 1 Turn the computer on. 2 Hold F2 during startup. The BIOS Setup Utility screen opens. The Total Memory item shows the total amount of memory installed in your computer, and informs you of CRUs (Customer Replaceable Units) for AC adapter O Battery O O Bottom access doors O Memory O 58 Setup Poster User Guide AC adapter O Power cord for your computer.
The following table provides a list of where to find replacement instructions. Chapter 6. Upgrading and replacing devices To make sure that the SO-DIMM is installed correctly, do as follows: 1 Turn the computer on. 2 Hold F2 during startup. The BIOS Setup Utility screen opens. The Total Memory item shows the total amount of memory installed in your computer, and informs you of CRUs (Customer Replaceable Units) for AC adapter O Battery O O Bottom access doors O Memory O 58 Setup Poster User Guide AC adapter O Power cord for your computer.

