(English) Getting Started with Windows 8.1
Page 2
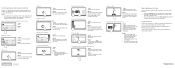
... apps Touch Swipe in from the top or bottom edge of the Start screen or app. Then, release the button. From the top edge of the screen, click, hold , and drag an item. Release the button when you see a divider. 2. Mouse Click. Mouse Press the Ctrl key while scrolling...gestures and mouse controls Windows 8.1 supports the use of both . Display the charms Touch Swipe in China First Edition (January, 2014) © Copyright Lenovo 2014. then use the Windows 8.1, do not support rotate. Keep clicking to display the scrollbar; Mouse Move the pointer to the left corner of the...
... apps Touch Swipe in from the top or bottom edge of the Start screen or app. Then, release the button. From the top edge of the screen, click, hold , and drag an item. Release the button when you see a divider. 2. Mouse Click. Mouse Press the Ctrl key while scrolling...gestures and mouse controls Windows 8.1 supports the use of both . Display the charms Touch Swipe in China First Edition (January, 2014) © Copyright Lenovo 2014. then use the Windows 8.1, do not support rotate. Keep clicking to display the scrollbar; Mouse Move the pointer to the left corner of the...

(English) Hardware Maintenance Manual - ThinkPad Yoga 14
Page 31
...you to troubleshoot the problem. Select the device class to be turned on, go to http://www.lenovo.com/diags, and follow the instructions on the Web site. When a problem is displayed. 3. ... start the test. Follow the instructions on the screen to use the diagnostic program. When the ThinkPad logo is displayed, go to "Power system checkout" on page 26, and check the power ...Chapter 3. Select the devices to be tested. 6. If an error code is displayed, repeatedly press and release the F10 key. The quick test programs are applicable on the following : 1. When the User Account...
...you to troubleshoot the problem. Select the device class to be turned on, go to http://www.lenovo.com/diags, and follow the instructions on the Web site. When a problem is displayed. 3. ... start the test. Follow the instructions on the screen to use the diagnostic program. When the ThinkPad logo is displayed, go to "Power system checkout" on page 26, and check the power ...Chapter 3. Select the devices to be tested. 6. If an error code is displayed, repeatedly press and release the F10 key. The quick test programs are applicable on the following : 1. When the User Account...

(English) Hardware Maintenance Manual - ThinkPad Yoga 14
Page 32
... computer. Attach the USB device to http://www.lenovo.com/diags. 2. If the computer cannot be turned on, go to "Power system checkout" on a USB device or CD. When the ThinkPad logo is displayed, repeatedly press and release the F12 key. Follow the instructions on the screen...diagnostic program will be launched automatically. 6. Turn off the computer. 2. When the Boot Menu window opens, release the F12 key. 4. When the ThinkPad logo is displayed, repeatedly press and release the F12 key. If the computer can create a bootable diagnostic medium on page 26, and check the power...
... computer. Attach the USB device to http://www.lenovo.com/diags. 2. If the computer cannot be turned on, go to "Power system checkout" on a USB device or CD. When the ThinkPad logo is displayed, repeatedly press and release the F12 key. Follow the instructions on the screen...diagnostic program will be launched automatically. 6. Turn off the computer. 2. When the Boot Menu window opens, release the F12 key. 4. When the ThinkPad logo is displayed, repeatedly press and release the F12 key. If the computer can create a bootable diagnostic medium on page 26, and check the power...
(English) Hardware Maintenance Manual - ThinkPad Yoga 14
Page 35
... more discs): This disc restores the preinstalled applications and drivers on the new drive. The ThinkPad Setup program opens. Use the arrow keys to begin the recovery process. © Copyright Lenovo 2014 29 For information about two hours. 1. If possible, copy any important data or personal... files that was preinstalled on the method you hear repeating beeps, release the F1 key. Insert the Operating System Recovery Disc ...
... more discs): This disc restores the preinstalled applications and drivers on the new drive. The ThinkPad Setup program opens. Use the arrow keys to begin the recovery process. © Copyright Lenovo 2014 29 For information about two hours. 1. If possible, copy any important data or personal... files that was preinstalled on the method you hear repeating beeps, release the F1 key. Insert the Operating System Recovery Disc ...

(English) User Guide - ThinkPad Yoga 14
Page 39
... a plastic film. Do not apply solvents to avoid a discrepancy. Function: View the app commands on using a top-down motion. Function: Close the current app. Then, release the button.
... a plastic film. Do not apply solvents to avoid a discrepancy. Function: View the app commands on using a top-down motion. Function: Close the current app. Then, release the button.
(English) User Guide - ThinkPad Yoga 14
Page 93
... disk drive or hybrid drive to improve data seek and read the device driver information release notes prior to date for "cache" function purpose only. For more information about system...problems: • If your computer is not guaranteed. • Check the capacity of owning a ThinkPad notebook computer is charged and your computer to take a system snapshot periodically. Remove all external devices...can help you are current" on your computer has the ac power connected. © Copyright Lenovo 2014 77 For Windows 8.1: Open the File Explorer. • Empty your recycle bin on ...
... disk drive or hybrid drive to improve data seek and read the device driver information release notes prior to date for "cache" function purpose only. For more information about system...problems: • If your computer is not guaranteed. • Check the capacity of owning a ThinkPad notebook computer is charged and your computer to take a system snapshot periodically. Remove all external devices...can help you are current" on your computer has the ac power connected. © Copyright Lenovo 2014 77 For Windows 8.1: Open the File Explorer. • Empty your recycle bin on ...
(English) User Guide - ThinkPad Yoga 14
Page 116
... To create recovery media, click Start ➙ All Programs ➙ Lenovo ThinkVantage Tools ➙ Factory Recovery Disks. Attention: When you use the Microsoft Office CD or Microsoft Works CD. When the Boot Menu window opens, release the F12 key. 3. The restore process begins. 4. After restoring your... files currently on the hard disk drive or hybrid drive will be deleted and replaced by the factory default settings. Repeatedly press and release the F12 key when turning on the screen. Notes: 1. Performing a backup operation This section provides instructions on the type of your...
... To create recovery media, click Start ➙ All Programs ➙ Lenovo ThinkVantage Tools ➙ Factory Recovery Disks. Attention: When you use the Microsoft Office CD or Microsoft Works CD. When the Boot Menu window opens, release the F12 key. 3. The restore process begins. 4. After restoring your... files currently on the hard disk drive or hybrid drive will be deleted and replaced by the factory default settings. Repeatedly press and release the F12 key when turning on the screen. Notes: 1. Performing a backup operation This section provides instructions on the type of your...
(English) User Guide - ThinkPad Yoga 14
Page 117
... The Rescue and Recovery workspace enables you can perform the following : 1. Ensure that operates independently from the Rescue and Recovery workspace, see a logo screen, release the F11 key. 3. The Rescue and Recovery workspace opens after a short delay. Recovery overview 101 Performing a recovery operation This section provides instructions on page ...have the option to restore the factory default settings to the factory default settings. From the Windows desktop, click Start ➙ All Programs ➙ Lenovo ThinkVantage Tools ➙ Enhanced Backup and Restore.
... The Rescue and Recovery workspace enables you can perform the following : 1. Ensure that operates independently from the Rescue and Recovery workspace, see a logo screen, release the F11 key. 3. The Rescue and Recovery workspace opens after a short delay. Recovery overview 101 Performing a recovery operation This section provides instructions on page ...have the option to restore the factory default settings to the factory default settings. From the Windows desktop, click Start ➙ All Programs ➙ Lenovo ThinkVantage Tools ➙ Enhanced Backup and Restore.

(English) User Guide - ThinkPad Yoga 14
Page 118
..., you might have created. • If you want to create. From the Windows desktop, click Start ➙ All Programs ➙ Lenovo ThinkVantage Tools ➙ Enhanced Backup and Restore. Then, insert the rescue disc into the optical drive and press Enter. See "Reinstalling preinstalled ...medium, such as the first boot device. Creating a rescue medium This section provides instructions on page 104. 4. When the Boot Menu window opens, release the F12 key. 3. Note: If the Rescue and Recovery workspace fails to open, see "Solving recovery problems" on how to create a rescue ...
..., you might have created. • If you want to create. From the Windows desktop, click Start ➙ All Programs ➙ Lenovo ThinkVantage Tools ➙ Enhanced Backup and Restore. Then, insert the rescue disc into the optical drive and press Enter. See "Reinstalling preinstalled ...medium, such as the first boot device. Creating a rescue medium This section provides instructions on page 104. 4. When the Boot Menu window opens, release the F12 key. 3. Note: If the Rescue and Recovery workspace fails to open, see "Solving recovery problems" on how to create a rescue ...
(English) User Guide - ThinkPad Yoga 14
Page 119
...several subfolders named for the various devices installed in the Windows Control Panel) to reinstall the device driver. Repeatedly press and release the F12 key when turning on your computer. 5. The rescue medium starts. Open the DRIVERS folder. In the Add ... preinstalled applications To reinstall selected application programs, do the following : 1. Reinstall device drivers only when it are reinstalling. 5. Chapter 8. The ThinkPad Setup program starts. 2. Attach the USB optical drive or hard disk drive to one of this program. Turn on your computer. 2. Recovery...
...several subfolders named for the various devices installed in the Windows Control Panel) to reinstall the device driver. Repeatedly press and release the F12 key when turning on your computer. 5. The rescue medium starts. Open the DRIVERS folder. In the Add ... preinstalled applications To reinstall selected application programs, do the following : 1. Reinstall device drivers only when it are reinstalling. 5. Chapter 8. The ThinkPad Setup program starts. 2. Attach the USB optical drive or hard disk drive to one of this program. Turn on your computer. 2. Recovery...

(English) User Guide - ThinkPad Yoga 14
Page 135
... the card. 7. Chapter 9. 5. Then install the screw to the wireless LAN card. Reinstall the base cover assembly. 9. Replacing devices 119 The wireless LAN card is released from the secured position and pivots upward. Remove the screw. Then carefully insert the new wireless LAN card into the slot.
... the card. 7. Chapter 9. 5. Then install the screw to the wireless LAN card. Reinstall the base cover assembly. 9. Replacing devices 119 The wireless LAN card is released from the secured position and pivots upward. Remove the screw. Then carefully insert the new wireless LAN card into the slot.
