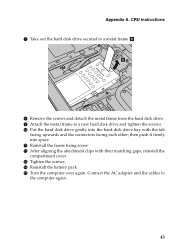
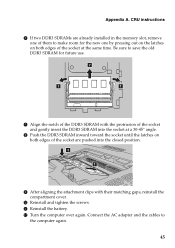
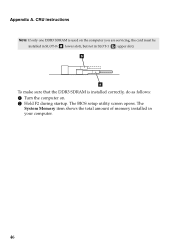
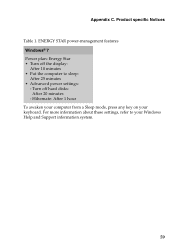
IdeaPad Z565 Won't Turn On - Lenovo
IdeaPad Z565 Won't Turn On

View Results Below
Free Lenovo IdeaPad Z565 manuals!
Problems with Lenovo IdeaPad Z565?
Ask a Question
Free Lenovo IdeaPad Z565 manuals!
Problems with Lenovo IdeaPad Z565?
Ask a Question
Related Manual Pages


Similar Questions

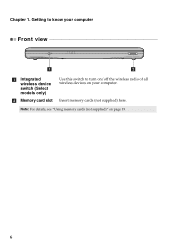
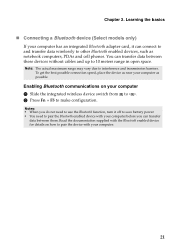
Wifi Capability Turn Off
wifi drivers probem wifi capability turned off
wifi drivers probem wifi capability turned off
(Posted by lavanderameshwar01 7 years ago)


How To Turn On Wireless Capability On Lenovo Ideapad
(Posted by Mdmar 10 years ago)

Wifi Stays Turned Of
I have a Levono B560. Windows 8 installedsince a couple of days, I can not turn the WiFi mode on. ...
I have a Levono B560. Windows 8 installedsince a couple of days, I can not turn the WiFi mode on. ...
(Posted by sstein 10 years ago)
