
User Guide
Page 4
... The Charms Bar 12 Shutting down the computer 12 Switching between apps 12 Closing an app 13 Opening other system programs 13 Windows Help and Support 13 Using the Rescue System 15 OneKey Recovery 16 Driver and Application Installation 17 Troubleshooting and Confirming Setup 19 Troubleshooting Display Problems 20 Troubleshooting Audio...
... The Charms Bar 12 Shutting down the computer 12 Switching between apps 12 Closing an app 13 Opening other system programs 13 Windows Help and Support 13 Using the Rescue System 15 OneKey Recovery 16 Driver and Application Installation 17 Troubleshooting and Confirming Setup 19 Troubleshooting Display Problems 20 Troubleshooting Audio...
User Guide
Page 5
Troubleshooting Problems with Optical Drives and Hard Disks 23 Special considerations for troubleshooting Windows 24 Windows Help and Support 24 BIOS setup utility 25 Performing Daily Maintenance Tasks 25 Hardware Replacement Guide 27 Locations 30 Replacing hardware 35 Appendix 45 Declaration 45 Trademarks 46 Energy Star Statement 47 Enabling ErP compliance mode 48 ii Contents
Troubleshooting Problems with Optical Drives and Hard Disks 23 Special considerations for troubleshooting Windows 24 Windows Help and Support 24 BIOS setup utility 25 Performing Daily Maintenance Tasks 25 Hardware Replacement Guide 27 Locations 30 Replacing hardware 35 Appendix 45 Declaration 45 Trademarks 46 Energy Star Statement 47 Enabling ErP compliance mode 48 ii Contents

User Guide
Page 11
... connector of the computer. When you attach an external audio device, a cable is equipped with an optional TV tuner card. TV-Tuner connector (optional) Only supported on a stereo system or other external recording device. HDMI connector (optional) Connects to receive audio signals from the computer to attach a device that requires a USB...
... connector of the computer. When you attach an external audio device, a cable is equipped with an optional TV tuner card. TV-Tuner connector (optional) Only supported on a stereo system or other external recording device. HDMI connector (optional) Connects to receive audio signals from the computer to attach a device that requires a USB...
User Guide
Page 12
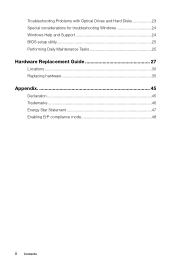
...Green line-out connector Pink Mic-in your actual audio configuration interface and read the electronic Help information for models whose motherboard supports audio transformation from 2.0 stereo sound to configure it. 3. Note: If the audio configuration interfaces above are different from those ...surround from the Playback dialog box, then click the Configure button to 5.1 surround sound.) This model of computer supports the transformation of stereo sound into 5.1 surround sound. User Guide 7 5.1 Audio configuration instructions (These instructions are only for further assistance.
...Green line-out connector Pink Mic-in your actual audio configuration interface and read the electronic Help information for models whose motherboard supports audio transformation from 2.0 stereo sound to configure it. 3. Note: If the audio configuration interfaces above are different from those ...surround from the Playback dialog box, then click the Configure button to 5.1 surround sound.) This model of computer supports the transformation of stereo sound into 5.1 surround sound. User Guide 7 5.1 Audio configuration instructions (These instructions are only for further assistance.

User Guide
Page 15
... to other end to the network router or broadband modem. Tap or click Connect, then follow the steps on the manufacturer. Contact your computer to support a wireless (selected models only) or wired network that connects your ISP for detailed setup instructions. Note: Broadband modem and router installation procedures vary depending on...
... to other end to the network router or broadband modem. Tap or click Connect, then follow the steps on the manufacturer. Contact your computer to support a wireless (selected models only) or wired network that connects your ISP for detailed setup instructions. Note: Broadband modem and router installation procedures vary depending on...
User Guide
Page 16
For any question related to the operating system, please contact Microsoft directly. Please use it in accordance with the End User License Agreement (EULA) between apps Closing an app Opening other system programs Windows Help and Support Attention: The Windows 8 operating system is provided by Microsoft Corporation. User Guide 11 Using Windows 8 This chapter contains the following topics: Switching between the main Windows 8 interfaces The Charms Bar Shutting down the computer Switching between you and Microsoft.
For any question related to the operating system, please contact Microsoft directly. Please use it in accordance with the End User License Agreement (EULA) between apps Closing an app Opening other system programs Windows Help and Support Attention: The Windows 8 operating system is provided by Microsoft Corporation. User Guide 11 Using Windows 8 This chapter contains the following topics: Switching between the main Windows 8 interfaces The Charms Bar Shutting down the computer Switching between you and Microsoft.
User Guide
Page 18
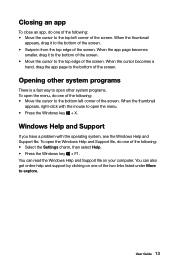
... of the following: • Move the cursor to explore. To open the menu. • Press the Windows key + X. You can read the Windows Help and Support file on one of the two links listed under More to the bottom left corner of the screen. When the thumbnail appears, drag it to... to the bottom of the screen. When the thumbnail appears, right-click with the operating system, see the Windows Help and Support file. You can also get online help and support by clicking on your computer. User Guide 13 When the cursor becomes a hand, drag the app page to the top edge...
... of the following: • Move the cursor to explore. To open the menu. • Press the Windows key + X. You can read the Windows Help and Support file on one of the two links listed under More to the bottom left corner of the screen. When the thumbnail appears, drag it to... to the bottom of the screen. When the thumbnail appears, right-click with the operating system, see the Windows Help and Support file. You can also get online help and support by clicking on your computer. User Guide 13 When the cursor becomes a hand, drag the app page to the top edge...
User Guide
Page 25
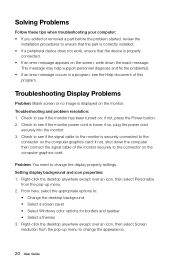
... desktop anywhere except over an icon, then select Screen resolution from the pop-up menu to change the display property settings. This message may help support personnel diagnose and fix the problem(s). • If an error message occurs in a program, see if the monitor power cord is loose; Troubleshooting Display Problems...
... desktop anywhere except over an icon, then select Screen resolution from the pop-up menu to change the display property settings. This message may help support personnel diagnose and fix the problem(s). • If an error message occurs in a program, see if the monitor power cord is loose; Troubleshooting Display Problems...
User Guide
Page 29
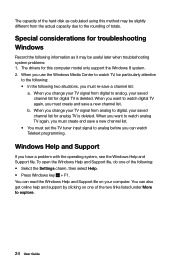
...under More to digital, your computer. When you want to analog, your saved channel list for analog TV is deleted. Windows Help and Support If you use the Windows Media Center to the following: • In the following : • Select the Settings charm, then select... must create and save a new channel list. b. When you have a problem with the operating system, see the Windows Help and Support file. Special considerations for this method may be useful later when troubleshooting system problems: 1. The drivers for troubleshooting Windows Record the following ...
...under More to digital, your computer. When you want to analog, your saved channel list for analog TV is deleted. Windows Help and Support If you use the Windows Media Center to the following: • In the following : • Select the Settings charm, then select... must create and save a new channel list. b. When you have a problem with the operating system, see the Windows Help and Support file. Special considerations for this method may be useful later when troubleshooting system problems: 1. The drivers for troubleshooting Windows Record the following ...

User Guide
Page 30
... utility? There are two boot modes: UEFI and Legacy. Clean your computer is very important to periodically clean the computer to Legacy support. Only use liquid or aerosol cleaners, which may contain flammable substances. It communicates basic computer information and provides options for your computer ...BIOS setup utility and set boot mode to change the boot mode to prevent dust buildup. If you need to UEFI or Legacy support on the computer, then select Startup → Boot Priority. Performing Daily Maintenance Tasks Cleaning the computer components Because many of the ...
... utility? There are two boot modes: UEFI and Legacy. Clean your computer is very important to periodically clean the computer to Legacy support. Only use liquid or aerosol cleaners, which may contain flammable substances. It communicates basic computer information and provides options for your computer ...BIOS setup utility and set boot mode to change the boot mode to prevent dust buildup. If you need to UEFI or Legacy support on the computer, then select Startup → Boot Priority. Performing Daily Maintenance Tasks Cleaning the computer components Because many of the ...
User Guide
Page 33
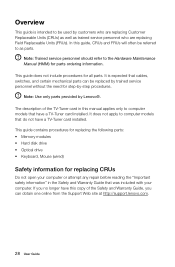
...step procedures. Overview This guide is expected that cables, switches, and certain mechanical parts can obtain one online from the Support Web site at http://support.lenovo.com. 28 User Guide It does not apply to computer models that have a TV-Tuner card installed. If you ...open your computer or attempt any repair before reading the "Important safety information" in this guide, CRUs and FRUs will often be replaced by Lenovo®. This guide contains procedures for replacing the following parts: • Memory modules • Hard disk drive • Optical drive •...
...step procedures. Overview This guide is expected that cables, switches, and certain mechanical parts can obtain one online from the Support Web site at http://support.lenovo.com. 28 User Guide It does not apply to computer models that have a TV-Tuner card installed. If you ...open your computer or attempt any repair before reading the "Important safety information" in this guide, CRUs and FRUs will often be replaced by Lenovo®. This guide contains procedures for replacing the following parts: • Memory modules • Hard disk drive • Optical drive •...

User Guide
Page 34
...: The screws for your computer is available from the World Wide Web. During the disassembly procedure, group the screws with their corresponding components to http://support.lenovo.com. Additional information resources If you need the following information: • CRU removal and installation information • Publications • Troubleshooting information • Parts information •...
...: The screws for your computer is available from the World Wide Web. During the disassembly procedure, group the screws with their corresponding components to http://support.lenovo.com. Additional information resources If you need the following information: • CRU removal and installation information • Publications • Troubleshooting information • Parts information •...

User Guide
Page 38
... called the planar or motherboard) is the main circuit board in your computer. It provides basic computer functions and supports a variety of devices that are factory-installed or that you can install later. Lenovo H505s 12 3 4 5 6 13 12 11 10 9 8 7 Microprocessor and heat sink Memory slots (2) Thermal sensor header Battery Mini PCI-E slot...
... called the planar or motherboard) is the main circuit board in your computer. It provides basic computer functions and supports a variety of devices that are factory-installed or that you can install later. Lenovo H505s 12 3 4 5 6 13 12 11 10 9 8 7 Microprocessor and heat sink Memory slots (2) Thermal sensor header Battery Mini PCI-E slot...
User Guide
Page 40
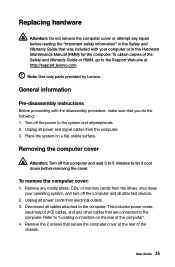
... site at the rear of the chassis. Remove any other cables that secure the computer cover at http://support.lenovo.com. This includes power cords, input/output (I/O) cables, and any media (disks, CDs, or memory cards) from the drives, shut down before reading the "Important ... cool down your computer or in the Safety and Warranty Guide that you do the following: 1. User Guide 35 Note: Use only parts provided by Lenovo. Unplug all peripherals. 2. Removing the computer cover Attention: Turn off the power to the computer.
... site at the rear of the chassis. Remove any other cables that secure the computer cover at http://support.lenovo.com. This includes power cords, input/output (I/O) cables, and any media (disks, CDs, or memory cards) from the drives, shut down before reading the "Important ... cool down your computer or in the Safety and Warranty Guide that you do the following: 1. User Guide 35 Note: Use only parts provided by Lenovo. Unplug all peripherals. 2. Removing the computer cover Attention: Turn off the power to the computer.

User Guide
Page 43
... any repair before reading the "Important safety information" in the Safety and Warranty Guide that secure the optical disk drive bay to the Support Web site at http://support.lenovo.com. Remove the computer cover. Slide out the optical disk drive bay, then lift it up. 2 1 38 User Guide Remove the front bezel...
... any repair before reading the "Important safety information" in the Safety and Warranty Guide that secure the optical disk drive bay to the Support Web site at http://support.lenovo.com. Remove the computer cover. Slide out the optical disk drive bay, then lift it up. 2 1 38 User Guide Remove the front bezel...

User Guide
Page 45
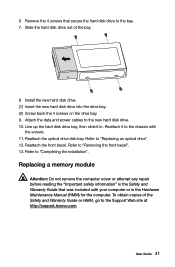
... obtain copies of the Safety and Warranty Guide or HMM, go to "Removing the front bezel". 3. Remove the front bezel. Refer to the Support Web site at http://support.lenovo.com. Remove the screw that was included with your computer or in the Safety and Warranty Guide that secures the hard disk drive...
... obtain copies of the Safety and Warranty Guide or HMM, go to "Removing the front bezel". 3. Remove the front bezel. Refer to the Support Web site at http://support.lenovo.com. Remove the screw that was included with your computer or in the Safety and Warranty Guide that secures the hard disk drive...
User Guide
Page 46
... attempt any repair before reading the "Important safety information" in the Safety and Warranty Guide that secure the hard disk drive to the Support Web site at http://support.lenovo.com. Remove the 4 screws that was included with the screws. 11. Refer to "Removing the front bezel". 13. Slide the hard disk drive...
... attempt any repair before reading the "Important safety information" in the Safety and Warranty Guide that secure the hard disk drive to the Support Web site at http://support.lenovo.com. Remove the 4 screws that was included with the screws. 11. Refer to "Removing the front bezel". 13. Slide the hard disk drive...
User Guide
Page 50
... contract (if any) or product packing list, or consult the distributor for any questions or comments, contact or visit the Lenovo Web site: Service Web site: http://support.lenovo.com User Guide 45 Lenovo is protected by any means or translated into any time without prior written permission of the manual, at any language...
... contract (if any) or product packing list, or consult the distributor for any questions or comments, contact or visit the Lenovo Web site: Service Web site: http://support.lenovo.com User Guide 45 Lenovo is protected by any means or translated into any time without prior written permission of the manual, at any language...
User Guide
Page 52
...your Windows Help and Support information system. Reduced electrical consumption contributes to offer our customers products with an ENERGY STAR compliant designation. Department of Energy aimed at the time of manufacture. For more information about ENERGY STAR, go to http://www.lenovo.com. • 4746...To awaken your computer from a Sleep or System Standby mode, press any key on your day-to your computer has been inactive for Lenovo computers, go to sleep: After 25 minutes • Advanced power settings: - Energy Star Statement ENERGY STAR® is proud to ...
...your Windows Help and Support information system. Reduced electrical consumption contributes to offer our customers products with an ENERGY STAR compliant designation. Department of Energy aimed at the time of manufacture. For more information about ENERGY STAR, go to http://www.lenovo.com. • 4746...To awaken your computer from a Sleep or System Standby mode, press any key on your day-to your computer has been inactive for Lenovo computers, go to sleep: After 25 minutes • Advanced power settings: - Energy Star Statement ENERGY STAR® is proud to ...


