Safety and General Information Guide - Notebook
Page 4
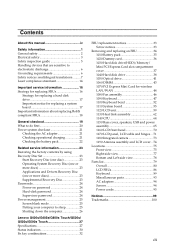
Getting help and service 21 Getting help on deleting data from your hard disk 27 Appendix B. Important safety information 1 Conditions that require immediate action 1 Safety guidelines 3 ...Being gentle with your computer 14 Carrying your computer properly 15 For outdoor use 15 Handling storage media and drives properly 15 Data safety 16 Taking care in setting passwords 16 Cleaning the cover of your computer 16 ... Calling the customer support center 22 Getting help around the world ...24 Lenovo product service information for maintenance....20 Chapter 3. Contents Chapter 1.
Getting help and service 21 Getting help on deleting data from your hard disk 27 Appendix B. Important safety information 1 Conditions that require immediate action 1 Safety guidelines 3 ...Being gentle with your computer 14 Carrying your computer properly 15 For outdoor use 15 Handling storage media and drives properly 15 Data safety 16 Taking care in setting passwords 16 Cleaning the cover of your computer 16 ... Calling the customer support center 22 Getting help around the world ...24 Lenovo product service information for maintenance....20 Chapter 3. Contents Chapter 1.
Safety and General Information Guide - Notebook
Page 20
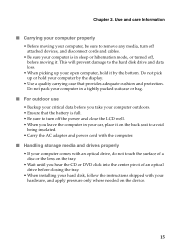
... • Carry the AC adapter and power cord with the computer. ■ Handling storage media and drives properly • If your computer comes with an optical drive, do not touch the surface of an optical drive before moving your computer, be sure to remove any media, turn off the power and close the... attached devices, and disconnect cords and cables. • Be sure your hardware, and apply pressure only where needed on the back seat to the hard disk drive and data loss. • When picking up or hold your open computer, hold it . Do not pick up your computer by the bottom. ...
... • Carry the AC adapter and power cord with the computer. ■ Handling storage media and drives properly • If your computer comes with an optical drive, do not touch the surface of an optical drive before moving your computer, be sure to remove any media, turn off the power and close the... attached devices, and disconnect cords and cables. • Be sure your hardware, and apply pressure only where needed on the back seat to the hard disk drive and data loss. • When picking up or hold your open computer, hold it . Do not pick up your computer by the bottom. ...
Safety and General Information Guide - Notebook
Page 21
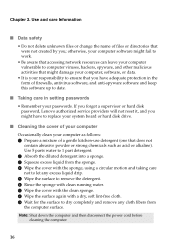
... safety • Do not delete unknown files or change the name of files or directories that you ; If you forget a supervisor or hard disk password, Lenovo authorized service providers will not reset it, and you might damage your computer, software, or data. • It is your responsibility to... ensure that were not created by you have to replace your system board or hard disk drive. ■ Cleaning the cover of firewalls, antivirus ...
... safety • Do not delete unknown files or change the name of files or directories that you ; If you forget a supervisor or hard disk password, Lenovo authorized service providers will not reset it, and you might damage your computer, software, or data. • It is your responsibility to... ensure that were not created by you have to replace your system board or hard disk drive. ■ Cleaning the cover of firewalls, antivirus ...
Safety and General Information Guide - Notebook
Page 25
...; To free up your computer is in front of your recycle bin on other non-Lenovo hardware. If the hard disk drive gets too full, the operating system will slow down . 20 Entries might produce errors. 2 Empty your hard disk drive from time to keep your computer. When calling the customer support center, please make...
...; To free up your computer is in front of your recycle bin on other non-Lenovo hardware. If the hard disk drive gets too full, the operating system will slow down . 20 Entries might produce errors. 2 Empty your hard disk drive from time to keep your computer. When calling the customer support center, please make...
Hardware Maintenance Manual - Notebook
Page 3
... 23 Passwords 24 Power-on password 24 Hard-disk password 24 Supervisor password 24 Power management 25 Screen blank mode 25 Putting your computer to sleep 25 Shutting down the computer 26 Lenovo G400s/G405s/G400s Touch/G500s/ G505s/G500s Touch 27 Specifications 27 Status indicators 30 Fn... key combinations 32 FRU replacement notices 33 Screw notices 33 Removing and replacing an FRU 34 1010 Battery pack 35 1020 Dummy card 36 1030 Hard disk drive(HDD)/Memory/ ...
... 23 Passwords 24 Power-on password 24 Hard-disk password 24 Supervisor password 24 Power management 25 Screen blank mode 25 Putting your computer to sleep 25 Shutting down the computer 26 Lenovo G400s/G405s/G400s Touch/G500s/ G505s/G500s Touch 27 Specifications 27 Status indicators 30 Fn... key combinations 32 FRU replacement notices 33 Screw notices 33 Removing and replacing an FRU 34 1010 Battery pack 35 1020 Dummy card 36 1030 Hard disk drive(HDD)/Memory/ ...
Hardware Maintenance Manual - Notebook
Page 20
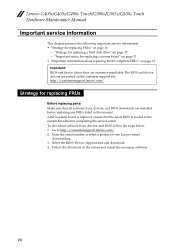
...listed in this manual. Strategy for replacing FRUs" on the customer support site: http://consumersupport.lenovo.com/. Enter the serial number or select a product or use Lenovo smart downloading. 3. Lenovo G400s/G405s/G400s Touch/G500s/G505s/G500s Touch Hardware Maintenance Manual Important service information This chapter presents the following important service information: • ... RoHS compliant FRUs" on page 18 Important: BIOS and device driver fixes are posted on page 16 - "Important notice for replacing a hard disk drive" on the screen and install the necessary software. 16
...listed in this manual. Strategy for replacing FRUs" on the customer support site: http://consumersupport.lenovo.com/. Enter the serial number or select a product or use Lenovo smart downloading. 3. Lenovo G400s/G405s/G400s Touch/G500s/G505s/G500s Touch Hardware Maintenance Manual Important service information This chapter presents the following important service information: • ... RoHS compliant FRUs" on page 18 Important: BIOS and device driver fixes are posted on page 16 - "Important notice for replacing a hard disk drive" on the screen and install the necessary software. 16
Hardware Maintenance Manual - Notebook
Page 21
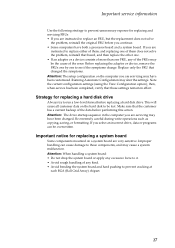
...servicing may have been customized. Important notice for replacing a hard disk drive Always try to run a low-level format before replacing a hard disk drive. Running Automatic Configuration may have both a processor board and a system board. Attention: The drive startup sequence in effect. Improper handling can be lost. then...to replace an FRU, but the replacement does not solve the problem, reinstall the original FRU before you select an incorrect drive, data or programs can cause damage to those settings remain in the computer you are instructed to replace either of them, ...
...servicing may have been customized. Important notice for replacing a hard disk drive Always try to run a low-level format before replacing a hard disk drive. Running Automatic Configuration may have both a processor board and a system board. Attention: The drive startup sequence in effect. Improper handling can be lost. then...to replace an FRU, but the replacement does not solve the problem, reinstall the original FRU before you select an incorrect drive, data or programs can cause damage to those settings remain in the computer you are instructed to replace either of them, ...

Hardware Maintenance Manual - Notebook
Page 24
... force, or dropped. 20 Failing FRU name and part number 7. Date of an incorrect AC adapter on which the failing FRU was detected 6. Lenovo G400s/G405s/G400s Touch/G500s/G505s/G500s Touch Hardware Maintenance Manual What to do first When you do return an FRU, you attach to it may be a symptom of unauthorized service... a nonsupported device • Forgotten computer password (making the computer unusable) • Sticky keys caused by the improper insertion of a PC Card or the installation of a hard disk drive becomes noisy, it : 1.
... force, or dropped. 20 Failing FRU name and part number 7. Date of an incorrect AC adapter on which the failing FRU was detected 6. Lenovo G400s/G405s/G400s Touch/G500s/G505s/G500s Touch Hardware Maintenance Manual What to do first When you do return an FRU, you attach to it may be a symptom of unauthorized service... a nonsupported device • Forgotten computer password (making the computer unusable) • Sticky keys caused by the improper insertion of a PC Card or the installation of a hard disk drive becomes noisy, it : 1.
Hardware Maintenance Manual - Notebook
Page 27
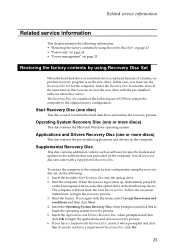
...the first boot-up , immediately press F12; Insert the bootable Start Recovery Disc into the optical drive. 2. Start Recovery Disc (one disc) This disc is on the new drive. When the Lenovo logo comes up device. Applications and Drivers Recovery Disc (one or more discs) This disc restores ...using the recovery disc set of DVDs to restore the computer to the original factory configuration using Recovery Disc Set When the hard disk drive or solid state drive is replaced because of the following set , do not have a Supplemental Recovery Disc, insert it when prompted and click ...
...the first boot-up , immediately press F12; Insert the bootable Start Recovery Disc into the optical drive. 2. Start Recovery Disc (one disc) This disc is on the new drive. When the Lenovo logo comes up device. Applications and Drivers Recovery Disc (one or more discs) This disc restores ...using the recovery disc set of DVDs to restore the computer to the original factory configuration using Recovery Disc Set When the hard disk drive or solid state drive is replaced because of the following set , do not have a Supplemental Recovery Disc, insert it when prompted and click ...
Hardware Maintenance Manual - Notebook
Page 28
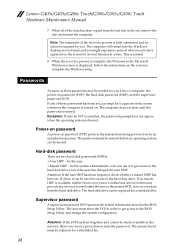
... the computer is turned on password (POP), the hard disk password (HDP), and the supervisor password (SVP). The system board must be needed for the user + Master HDP - Lenovo G400s/G405s/G400s Touch/G500s/G505s/G500s Touch Hardware Maintenance Manual 7. The computer will restart into ...the Windows desktop several minutes at a time. This is entered. When the recovery process is fully automated and no service procedure to the hard disk drive. Exception: If ...
... the computer is turned on password (POP), the hard disk password (HDP), and the supervisor password (SVP). The system board must be needed for the user + Master HDP - Lenovo G400s/G405s/G400s Touch/G500s/G505s/G500s Touch Hardware Maintenance Manual 7. The computer will restart into ...the Windows desktop several minutes at a time. This is entered. When the recovery process is fully automated and no service procedure to the hard disk drive. Exception: If ...

Hardware Maintenance Manual - Notebook
Page 32
Lenovo G400s/G405s/G400s Touch/G500s/G505s/G500s Touch Hardware Maintenance Manual Table 1. Specifications (continued) Feature Hard disk drive Solid-state drive Optical drive I/O port MODEM slot Audio Video Ethernet (on the system board) PCI Express Mini Card slot WLAN WWAN Bluetooth wireless Touch pad Description • 320GB, 5400rpm • 500GB, 5400rpm • 750GB, 5400rpm • 1TB, 5400rpm • 500G+... × 1 • SSD × 1 • Intel 11gn(1x1) • Intel 11gn+BT combo card • N/A • combined in combo card • One-piece multi-touch touch pad 28
Lenovo G400s/G405s/G400s Touch/G500s/G505s/G500s Touch Hardware Maintenance Manual Table 1. Specifications (continued) Feature Hard disk drive Solid-state drive Optical drive I/O port MODEM slot Audio Video Ethernet (on the system board) PCI Express Mini Card slot WLAN WWAN Bluetooth wireless Touch pad Description • 320GB, 5400rpm • 500GB, 5400rpm • 750GB, 5400rpm • 1TB, 5400rpm • 500G+... × 1 • SSD × 1 • Intel 11gn(1x1) • Intel 11gn+BT combo card • N/A • combined in combo card • One-piece multi-touch touch pad 28

Hardware Maintenance Manual - Notebook
Page 41
....5 × 8 mm, flat-head, nylok-coated (2) (G400s) Color Black Black Torque 2.38 ~ 2.48 kgfcm 2.38 ~ 2.45 kgfcm 37 Lenovo G400s/G405s/G400s Touch/G500s/G505s/G500s Touch 1030 Hard disk drive(HDD)/Memory/Mini PCI Express Card slot compartment cover For access, remove this FRU: • "1010 Battery pack" on page 35 Figure 3. Removal steps of ...
....5 × 8 mm, flat-head, nylok-coated (2) (G400s) Color Black Black Torque 2.38 ~ 2.48 kgfcm 2.38 ~ 2.45 kgfcm 37 Lenovo G400s/G405s/G400s Touch/G500s/G505s/G500s Touch 1030 Hard disk drive(HDD)/Memory/Mini PCI Express Card slot compartment cover For access, remove this FRU: • "1010 Battery pack" on page 35 Figure 3. Removal steps of ...
Hardware Maintenance Manual - Notebook
Page 42
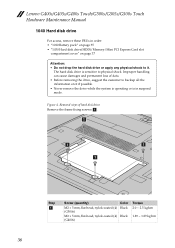
...all the information on page 37 Attention: • Do not drop the hard disk drive or apply any physical shock to physical shock. Lenovo G400s/G405s/G400s Touch/G500s/G505s/G500s Touch Hardware Maintenance Manual 1040 Hard disk drive For access, remove these FRUs in order: • "1010 Battery pack..." on page 35 • "1030 Hard disk drive(HDD)/Memory/Mini PCI Express Card slot ...
...all the information on page 37 Attention: • Do not drop the hard disk drive or apply any physical shock to physical shock. Lenovo G400s/G405s/G400s Touch/G500s/G505s/G500s Touch Hardware Maintenance Manual 1040 Hard disk drive For access, remove these FRUs in order: • "1010 Battery pack..." on page 35 • "1030 Hard disk drive(HDD)/Memory/Mini PCI Express Card slot ...

Hardware Maintenance Manual - Notebook
Page 43
c 39 b Take out the hard disk drive secured in the direction shown by arrow b . Lenovo G400s/G405s/G400s Touch/G500s/G505s/G500s Touch Figure 4. Removal steps of hard disk drive (continued) Pull the tab in a metal frame c .
c 39 b Take out the hard disk drive secured in the direction shown by arrow b . Lenovo G400s/G405s/G400s Touch/G500s/G505s/G500s Touch Figure 4. Removal steps of hard disk drive (continued) Pull the tab in a metal frame c .

Hardware Maintenance Manual - Notebook
Page 44
d d e d d Step d Screw (quantity) Color Torque M3 × 3 mm, flat-head, nylok-coated(4) White 2.88 ~ 2.95 kgfcm When installing: Make sure that the HDD connector is attached firmly. 40 Removal steps of hard disk drive (continued) Remove four screws d and detach the metal frame from the hard disk drive e. Lenovo G400s/G405s/G400s Touch/G500s/G505s/G500s Touch Hardware Maintenance Manual Figure 4.
d d e d d Step d Screw (quantity) Color Torque M3 × 3 mm, flat-head, nylok-coated(4) White 2.88 ~ 2.95 kgfcm When installing: Make sure that the HDD connector is attached firmly. 40 Removal steps of hard disk drive (continued) Remove four screws d and detach the metal frame from the hard disk drive e. Lenovo G400s/G405s/G400s Touch/G500s/G505s/G500s Touch Hardware Maintenance Manual Figure 4.

Hardware Maintenance Manual - Notebook
Page 45
... in the direction shown by arrow b. Lenovo G400s/G405s/G400s Touch/G500s/G505s/G500s Touch 1050 Optical drive For access, remove these FRUs in the direction shown by arrow c. 1 Step a Screw (quantity) Color M2.5 × 3 mm, flat-head, nylok-coated Black (1) (G500s) M 2 × 9 mm, flat-head, ...nylok-coated (1) Black (G400s) Torque 1.5 ~ 2.0 kgfcm 41 Removal steps of optical drive Remove the screw a, insert a screw driver into the screw hole and push the optical drive in order: • "1010 Battery pack" on page 35 • "1030 Hard disk drive...
... in the direction shown by arrow b. Lenovo G400s/G405s/G400s Touch/G500s/G505s/G500s Touch 1050 Optical drive For access, remove these FRUs in the direction shown by arrow c. 1 Step a Screw (quantity) Color M2.5 × 3 mm, flat-head, nylok-coated Black (1) (G500s) M 2 × 9 mm, flat-head, ...nylok-coated (1) Black (G400s) Torque 1.5 ~ 2.0 kgfcm 41 Removal steps of optical drive Remove the screw a, insert a screw driver into the screw hole and push the optical drive in order: • "1010 Battery pack" on page 35 • "1030 Hard disk drive...
Hardware Maintenance Manual - Notebook
Page 47
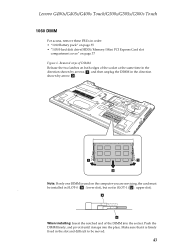
... Hard disk drive(HDD)/Memory/Mini PCI Express Card slot compartment cover" on the computer you are servicing, the card must be moved. 43 Push the DIMM firmly, and pivot it until it is used on page 37 Figure 6. Make sure that it snaps into the socket. Lenovo G400s/G405s/G400s Touch/G500s/G505s/G500s Touch 1060...
... Hard disk drive(HDD)/Memory/Mini PCI Express Card slot compartment cover" on the computer you are servicing, the card must be moved. 43 Push the DIMM firmly, and pivot it until it is used on page 37 Figure 6. Make sure that it snaps into the socket. Lenovo G400s/G405s/G400s Touch/G500s/G505s/G500s Touch 1060...

Hardware Maintenance Manual - Notebook
Page 48
...coated (1) (G400s) Color Black Black Torque 1.0 ~ 1.5 kgfcm 1.89 ~ 1.96 kgfcm Remove the card in the direction shown by arrows. Lenovo G400s/G405s/G400s Touch/G500s/G505s/G500s Touch Hardware Maintenance Manual 1070 PCI Express Mini Card for wireless LAN/WAN Disconnect the two wireless LAN cables a, and then remove the screw... step a. Notes: wireless LAN card has 2 cables in order: • "1010 Battery pack" on page 35 • "1030 Hard disk drive(HDD)/Memory/Mini PCI Express Card slot compartment cover" on page 37 Figure 7. Removal steps of PCI Express Mini Card for wireless LAN/...
...coated (1) (G400s) Color Black Black Torque 1.0 ~ 1.5 kgfcm 1.89 ~ 1.96 kgfcm Remove the card in the direction shown by arrows. Lenovo G400s/G405s/G400s Touch/G500s/G505s/G500s Touch Hardware Maintenance Manual 1070 PCI Express Mini Card for wireless LAN/WAN Disconnect the two wireless LAN cables a, and then remove the screw... step a. Notes: wireless LAN card has 2 cables in order: • "1010 Battery pack" on page 35 • "1030 Hard disk drive(HDD)/Memory/Mini PCI Express Card slot compartment cover" on page 37 Figure 7. Removal steps of PCI Express Mini Card for wireless LAN/...

Hardware Maintenance Manual - Notebook
Page 50
Lenovo G400s/G405s/G400s Touch/G500s/G505s/G500s Touch Hardware Maintenance Manual 1080 Fan assembly For access, remove these FRUs in the direction shown by arrow b . 1 1 b When installing: Make sure that the fan connector ... system board. Removal steps of fan assembly Remove two screws a , unplug the fan connector in order: • "1010 Battery pack" on page 35 • "1030 Hard disk drive(HDD)/Memory/Mini PCI Express Card slot compartment cover" on page 37 Figure 8. Step a Screw (quantity) Color Torque M2 × 3.5 mm, flat-head, nylok...
Lenovo G400s/G405s/G400s Touch/G500s/G505s/G500s Touch Hardware Maintenance Manual 1080 Fan assembly For access, remove these FRUs in the direction shown by arrow b . 1 1 b When installing: Make sure that the fan connector ... system board. Removal steps of fan assembly Remove two screws a , unplug the fan connector in order: • "1010 Battery pack" on page 35 • "1030 Hard disk drive(HDD)/Memory/Mini PCI Express Card slot compartment cover" on page 37 Figure 8. Step a Screw (quantity) Color Torque M2 × 3.5 mm, flat-head, nylok...
Hardware Maintenance Manual - Notebook
Page 51
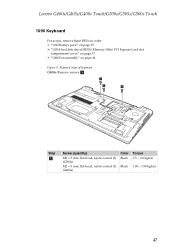
Removal steps of keyboard G500s: Remove screws a . 1 1 1 Step a Screw (quantity) M2 × 5 mm, flat-head, nylok-coated (3) (G500s) M2 × 9 mm, flat-head, nylok-coated (3) (G400s) Color Black Black Torque 1.5 ~ 2.0 kgfcm 1.89 ~ 1.98 kgfcm 47 Lenovo G400s/G405s/G400s Touch/G500s/G505s/G500s Touch 1090 Keyboard For access, remove these FRUs in order: • "1010 Battery pack" on page 35 • "1030 Hard disk drive(HDD)/Memory/Mini PCI Express Card slot compartment cover" on page 37 • "1080 Fan assembly" on page 46 Figure 9.
Removal steps of keyboard G500s: Remove screws a . 1 1 1 Step a Screw (quantity) M2 × 5 mm, flat-head, nylok-coated (3) (G500s) M2 × 9 mm, flat-head, nylok-coated (3) (G400s) Color Black Black Torque 1.5 ~ 2.0 kgfcm 1.89 ~ 1.98 kgfcm 47 Lenovo G400s/G405s/G400s Touch/G500s/G505s/G500s Touch 1090 Keyboard For access, remove these FRUs in order: • "1010 Battery pack" on page 35 • "1030 Hard disk drive(HDD)/Memory/Mini PCI Express Card slot compartment cover" on page 37 • "1080 Fan assembly" on page 46 Figure 9.


