Owners Manual
Page 2
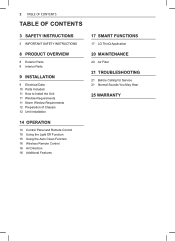
...IMPORTANT SAFETY INSTRUCTIONS 8 PRODUCT OVERVIEW 8 Exterior Parts 8 Interior Parts 9 INSTALLATION 9 Electrical Data 10 Parts Included 11 How to Install the Unit 11 Window Requirements 11 Storm Window Requirements 12 Preparation of Chassis 12 Unit Installation 14 OPERATION 14 Control Panel and Remote Control 15 Using the Light ...Off Function 15 Using the Auto Clean Function 16 Wireless Remote Control 16 Air Direction 16 Additional Features 17 SMART FUNCTIONS 17 LG ThinQ Application 20 MAINTENANCE...
...IMPORTANT SAFETY INSTRUCTIONS 8 PRODUCT OVERVIEW 8 Exterior Parts 8 Interior Parts 9 INSTALLATION 9 Electrical Data 10 Parts Included 11 How to Install the Unit 11 Window Requirements 11 Storm Window Requirements 12 Preparation of Chassis 12 Unit Installation 14 OPERATION 14 Control Panel and Remote Control 15 Using the Light ...Off Function 15 Using the Auto Clean Function 16 Wireless Remote Control 16 Air Direction 16 Additional Features 17 SMART FUNCTIONS 17 LG ThinQ Application 20 MAINTENANCE...
Owners Manual
Page 3
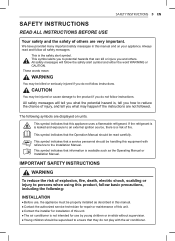
...not followed. Always read carefully. This symbol indicates that this unit. ● The air conditioner is not intended for installation of this appliance uses a flammable refrigerant. This symbol indicates that the Operation Manual should be supervised to the product if...potential hazard is the safety alert symbol. The following : INSTALLATION ● Before use by young children or invalids without supervision. ● Young children should be properly installed as the Operating Manual or Installation Manual. All safety messages will follow instructions. These words...
...not followed. Always read carefully. This symbol indicates that this unit. ● The air conditioner is not intended for installation of this appliance uses a flammable refrigerant. This symbol indicates that the Operation Manual should be supervised to the product if...potential hazard is the safety alert symbol. The following : INSTALLATION ● Before use by young children or invalids without supervision. ● Young children should be properly installed as the Operating Manual or Installation Manual. All safety messages will follow instructions. These words...
Owners Manual
Page 4
...cord is to be replaced, replacement work shall be performed by authorized personnel only using only genuine replacement parts. ●●Installation work must be performed in accordance with the National Electric Code by qualified and authorized personnel only. ●●Connect to a...If you detect a strange sound, a chemical or burning smell, or smoke coming from the appliance, unplug it immediately, and contact an LG Electronics Customer Information Center. ●●Never unplug the appliance by an authorized service person using authorized replacement parts. ●●Use a...
...cord is to be replaced, replacement work shall be performed by authorized personnel only using only genuine replacement parts. ●●Installation work must be performed in accordance with the National Electric Code by qualified and authorized personnel only. ●●Connect to a...If you detect a strange sound, a chemical or burning smell, or smoke coming from the appliance, unplug it immediately, and contact an LG Electronics Customer Information Center. ●●Never unplug the appliance by an authorized service person using authorized replacement parts. ●●Use a...

Owners Manual
Page 6
Do not use as maintaining pets, food, precision machinery, or art objects. ● When installing or moving the appliance, be used simultaneously. MAINTENANCE ● Never use waxes, thinners, or harsh detergents. ● Do not step...to the product or property when using this product, follow basic precautions, including the following: INSTALLATION ● Take care when installing the product that exhaust or condensation does not damage nearby property. ● Follow installation instructions exactly to avoid excessive vibration or water leakage. consult a doctor. ● Do not...
Do not use as maintaining pets, food, precision machinery, or art objects. ● When installing or moving the appliance, be used simultaneously. MAINTENANCE ● Never use waxes, thinners, or harsh detergents. ● Do not step...to the product or property when using this product, follow basic precautions, including the following: INSTALLATION ● Take care when installing the product that exhaust or condensation does not damage nearby property. ● Follow installation instructions exactly to avoid excessive vibration or water leakage. consult a doctor. ● Do not...

Owners Manual
Page 9
...of extension cords could cause serious injury or death. - These shields are provided on TEST button and then the RESET button. INSTALLATION Electrical Data Power cord may include a current interrupter device. CAUTION ● The conductors inside this window air conditioner. ● ...Never push the TEST button during operation. Periodically examine the cord for 120 V INSTALLATION 9 EN WARNING ● This appliance should be user-serviced. Do not open the tamperresistant sealed portion. TEST and RESET buttons are...
...of extension cords could cause serious injury or death. - These shields are provided on TEST button and then the RESET button. INSTALLATION Electrical Data Power cord may include a current interrupter device. CAUTION ● The conductors inside this window air conditioner. ● ...Never push the TEST button during operation. Periodically examine the cord for 120 V INSTALLATION 9 EN WARNING ● This appliance should be user-serviced. Do not open the tamperresistant sealed portion. TEST and RESET buttons are...

Owners Manual
Page 10
10 INSTALLATION Parts Included (Appearance May Vary) Foam-PE (2) (Adhesive backed) Foam strip (Non-adhesive) Left curtain panel Heatproof foam (2) (Adhesive backed) Right curtain panel L bracket (3) Support bracket Type 'A' Screws (11) Type 'B' Screws (5) Tools Needed Phillips-head screwdriver Adjustable wrench Level Tape measure Scissors or Cutting knife Pencil Gloves
10 INSTALLATION Parts Included (Appearance May Vary) Foam-PE (2) (Adhesive backed) Foam strip (Non-adhesive) Left curtain panel Heatproof foam (2) (Adhesive backed) Right curtain panel L bracket (3) Support bracket Type 'A' Screws (11) Type 'B' Screws (5) Tools Needed Phillips-head screwdriver Adjustable wrench Level Tape measure Scissors or Cutting knife Pencil Gloves

Owners Manual
Page 11
... wall, within 20" from tilting down toward the outside to drain properly. All side louvers of the cabinet must remain exposed to the outside . 5 Install the unit with nails or screws. 2 If necessary, attach another 1" x 2" wood strip flush against the back of the air conditioner. As such,...wood securely to the sill with the bottom between 30" ~60" above the floor level. Window Requirements ● This unit is installed securely and firmly. 2 Install the unit out of direct sunlight. 3 There should be no obstacles, such as shown in standard double hung windows with actual opening ...
... wall, within 20" from tilting down toward the outside to drain properly. All side louvers of the cabinet must remain exposed to the outside . 5 Install the unit with nails or screws. 2 If necessary, attach another 1" x 2" wood strip flush against the back of the air conditioner. As such,...wood securely to the sill with the bottom between 30" ~60" above the floor level. Window Requirements ● This unit is installed securely and firmly. 2 Install the unit out of direct sunlight. 3 There should be no obstacles, such as shown in standard double hung windows with actual opening ...

Owners Manual
Page 12
...sill. Fasten the curtain panels to hold unit firmly until window sash is against back of the sill. Fasten screws behind the curtain panel. 4 Install the L bracket behind side panel frames. Inner Sill Outer Sill Screws (Type A) Center Line Left Curtain Panel Screws (Type A) Bottom Guide Right...the upper and lower panel guides. Then mark lines 8" to the underside of the window sash and bottom of the center line. Unit Installation CAUTION ●During the following step, hold unit securely in place. Window Frame Upper Guide Seal About ¼" Inner Sill Center Line ...
...sill. Fasten the curtain panels to hold unit firmly until window sash is against back of the sill. Fasten screws behind the curtain panel. 4 Install the L bracket behind side panel frames. Inner Sill Outer Sill Screws (Type A) Center Line Left Curtain Panel Screws (Type A) Bottom Guide Right...the upper and lower panel guides. Then mark lines 8" to the underside of the window sash and bottom of the center line. Unit Installation CAUTION ●During the following step, hold unit securely in place. Window Frame Upper Guide Seal About ¼" Inner Sill Center Line ...

Owners Manual
Page 13
... the inner window sill using the screw you just removed. Support Bracket 6 After the air conditioner is installed, measure the curtain panel on vinyl or other similarly constructed windows, attach the L bracket with a type A screw. INSTALLATION 13 EN 2 Extend the guide panels to fill the window 5 Remove the screw from the heatproof...
... the inner window sill using the screw you just removed. Support Bracket 6 After the air conditioner is installed, measure the curtain panel on vinyl or other similarly constructed windows, attach the L bracket with a type A screw. INSTALLATION 13 EN 2 Extend the guide panels to fill the window 5 Remove the screw from the heatproof...
Owners Manual
Page 17
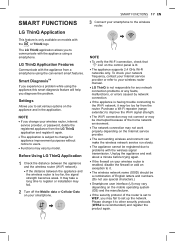
...a Wi-Fi repeater (range extender) to WEP, you may fail. 2 Turn off the Mobile data or Cellular Data on models with the appliance from the LG ThinQ application and register it may vary by network connection. • If the appliance is having trouble connecting to the wireless router. This feature is... too far, the signal strength becomes weak. It may take a long time to register or installation may fail to set to improve the Wi-Fi signal strength. • The Wi-Fi connection may not connect or may be too far from...
...a Wi-Fi repeater (range extender) to WEP, you may fail. 2 Turn off the Mobile data or Cellular Data on models with the appliance from the LG ThinQ application and register it may vary by network connection. • If the appliance is having trouble connecting to the wireless router. This feature is... too far, the signal strength becomes weak. It may take a long time to register or installation may fail to set to improve the Wi-Fi signal strength. • The Wi-Fi connection may not connect or may be too far from...
Owners Manual
Page 18
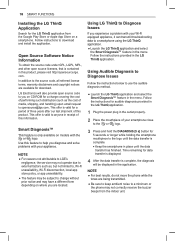
... hold the DIAGNOSIS [5 s] button for download. Using Audible Diagnosis to Diagnose Issues Follow the instructions below to download and install the application. Follow the instructions for audible diagnosis provided in the LG ThinQ application. 1 Plug the power plug in place until the data transfer is only available on CD-ROM for data...
... hold the DIAGNOSIS [5 s] button for download. Using Audible Diagnosis to Diagnose Issues Follow the instructions below to download and install the application. Follow the instructions for audible diagnosis provided in the LG ThinQ application. 1 Plug the power plug in place until the data transfer is only available on CD-ROM for data...
Owners Manual
Page 19
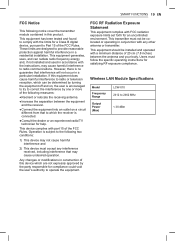
... that may cause harmful interference to which the receiver is no guarantee that to radio communications. Users must not be installed and operated with a minimum distance of this device which are designed to operate the equipment. FCC RF Radiation Exposure Statement... an experienced radio/TV technician for compliance could void the user's authority to provide reasonable protection against harmful interference in a residential installation. Any changes or modifications in construction of 20 cm (7.8 inches) between the equipment and the receiver. ● Connect the equipment...
... that may cause harmful interference to which the receiver is no guarantee that to radio communications. Users must not be installed and operated with a minimum distance of this device which are designed to operate the equipment. FCC RF Radiation Exposure Statement... an experienced radio/TV technician for compliance could void the user's authority to provide reasonable protection against harmful interference in a residential installation. Any changes or modifications in construction of 20 cm (7.8 inches) between the equipment and the receiver. ● Connect the equipment...
Owners Manual
Page 21
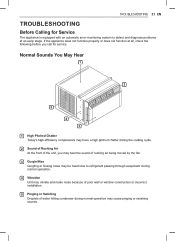
... system to refrigerant passing through evaporator during normal operation. 4 Vibration Unit may vibrate and make noise because of poor wall or window construction or incorrect installation. 5 Pinging or Swishing Droplets of rushing air being moved by the fan. 3 Gurgle/Hiss Gurgling or hissing noise may cause pinging or swishing sounds. TROUBLESHOOTING...
... system to refrigerant passing through evaporator during normal operation. 4 Vibration Unit may vibrate and make noise because of poor wall or window construction or incorrect installation. 5 Pinging or Swishing Droplets of rushing air being moved by the fan. 3 Gurgle/Hiss Gurgling or hissing noise may cause pinging or swishing sounds. TROUBLESHOOTING...

Owners Manual
Page 23
... humid areas. Remove obstruction. Can't connect the LG ThinQ App. The air conditioner is cooling. This is incompatible. Air movement sound. Set temperature too low. You do not have permission to installation instructions or check with installer. Move the router closer to lower FAN setting....on and off . If too loud, set to the air conditioner or purchase and install a Wi-Fi repeater (signal booster). Air conditioner is not tilted to installation instructions or check with installer. Water collects in the display, please call 1-800-243-0000. normal for a ...
... humid areas. Remove obstruction. Can't connect the LG ThinQ App. The air conditioner is cooling. This is incompatible. Air movement sound. Set temperature too low. You do not have permission to installation instructions or check with installer. Move the router closer to lower FAN setting....on and off . If too loud, set to the air conditioner or purchase and install a Wi-Fi repeater (signal booster). Air conditioner is not tilted to installation instructions or check with installer. Water collects in the display, please call 1-800-243-0000. normal for a ...

Owners Manual
Page 24
The router frequency is set incorrectly. The wireless network name (SSID) should be router closer to the appliance or purchase and install a Wi-Fi repeater. Set the wireless router to 2.4 GHz and connect the appliance to Wi-Fi network. Trouble connecting appliance and smartphone to the wireless ...
The router frequency is set incorrectly. The wireless network name (SSID) should be router closer to the appliance or purchase and install a Wi-Fi repeater. Set the wireless router to 2.4 GHz and connect the appliance to Wi-Fi network. Trouble connecting appliance and smartphone to the wireless ...
Owners Manual
Page 25
... the United States. WHAT THIS WARRANTY COVERS: LG Electronics U.S.A., Inc. ("LG") warrants your LG Room Air Conditioner ("product") against defect in materials or workmanship under normal household use . ● Replacing house fuses or resetting of circuit breakers, correction of house wiring or plumbing, or correction of product installation. ● Damage or failure caused by...
... the United States. WHAT THIS WARRANTY COVERS: LG Electronics U.S.A., Inc. ("LG") warrants your LG Room Air Conditioner ("product") against defect in materials or workmanship under normal household use . ● Replacing house fuses or resetting of circuit breakers, correction of house wiring or plumbing, or correction of product installation. ● Damage or failure caused by...
Owners Manual
Page 26
... IN CONTRACT, TORT, OR OTHERWISE. HOW TO OBTAIN WARRANTY SERVICE & ADDITIONAL INFORMATION: Call 1-800-243-0000 or visit our website at www.lg.com. TO THE EXTENT ANY IMPLIED WARRANTY IS REQUIRED BY LAW, THIS WARRANTY IS LIMITED IN DURATION TO THE TERM PERIOD EXPRESSED ABOVE. Serial No.... Dealer's Name Date Purchased ● Staple your receipt to this page in the event you need it is installed in other than normal and usual household use (e.g. NEITHER THE MANUFACTURER NOR ITS U.S. Mail to state. This information is located on a label on...
... IN CONTRACT, TORT, OR OTHERWISE. HOW TO OBTAIN WARRANTY SERVICE & ADDITIONAL INFORMATION: Call 1-800-243-0000 or visit our website at www.lg.com. TO THE EXTENT ANY IMPLIED WARRANTY IS REQUIRED BY LAW, THIS WARRANTY IS LIMITED IN DURATION TO THE TERM PERIOD EXPRESSED ABOVE. Serial No.... Dealer's Name Date Purchased ● Staple your receipt to this page in the event you need it is installed in other than normal and usual household use (e.g. NEITHER THE MANUFACTURER NOR ITS U.S. Mail to state. This information is located on a label on...


