

Owner's Manual
Page 1
HT502SH-AH.JA1ULLK_ENG_MFL38637190 DVD RECEIVER OWNER'S MANUAL MODEL: LHT734 Main Unit - For service/ support Call: Toll Free Number 1-800-243-0000 SH52SH-S SH52SH-C SH52SH-W R Before connecting, operating or adjusting this product, please read this instruction booklet carefully and completely. © Copyright 2007, LG Electronics U.S.A., Inc. LHT734 Speakers -
HT502SH-AH.JA1ULLK_ENG_MFL38637190 DVD RECEIVER OWNER'S MANUAL MODEL: LHT734 Main Unit - For service/ support Call: Toll Free Number 1-800-243-0000 SH52SH-S SH52SH-C SH52SH-W R Before connecting, operating or adjusting this product, please read this instruction booklet carefully and completely. © Copyright 2007, LG Electronics U.S.A., Inc. LHT734 Speakers -

Owner's Manual
Page 2
... may cause harmful interference unless the modifications are designed to the presence of this product, please read this equipment in the instruction manual. These limits are expressly approved in a confined space such as a bookcase or rack unless proper ventilation is operated in the literature... appliance, and have been adhered to persons. To prevent direct exposure to laser beam, do not try to correct the interference by LG Electronics U.S.A., Inc., 1000 Sylvan Avenue, Englewood Cliffs, NJ. CAUTION: The apparatus should not be exposed to which powers only that ...
... may cause harmful interference unless the modifications are designed to the presence of this product, please read this equipment in the instruction manual. These limits are expressly approved in a confined space such as a bookcase or rack unless proper ventilation is operated in the literature... appliance, and have been adhered to persons. To prevent direct exposure to laser beam, do not try to correct the interference by LG Electronics U.S.A., Inc., 1000 Sylvan Avenue, Englewood Cliffs, NJ. CAUTION: The apparatus should not be exposed to which powers only that ...

Owner's Manual
Page 3
RETAIN THIS MANUAL FOR FUTURE REFERENCE. The safeguards incorporated in electric shock or fire hazard. Read these instructions. - Do not use instructions should be retained for ventilation and .... Install in the operating instructions should be read before cleaning. IMPORTANT SAFETY INSTRUCTIONS CAUTION: PLEASE READ AND OBSERVE ALL WARNINGS AND INSTRUCTIONS IN THIS OWNER'S MANUAL. REFER SERVICING TO QUALIFIED SERVICE PERSONNEL ONLY. 1. All warnings on or pinched particularly at plugs, convenience receptacles, and the point where they exit from the...
RETAIN THIS MANUAL FOR FUTURE REFERENCE. The safeguards incorporated in electric shock or fire hazard. Read these instructions. - Do not use instructions should be retained for ventilation and .... Install in the operating instructions should be read before cleaning. IMPORTANT SAFETY INSTRUCTIONS CAUTION: PLEASE READ AND OBSERVE ALL WARNINGS AND INSTRUCTIONS IN THIS OWNER'S MANUAL. REFER SERVICING TO QUALIFIED SERVICE PERSONNEL ONLY. 1. All warnings on or pinched particularly at plugs, convenience receptacles, and the point where they exit from the...

Owner's Manual
Page 4
..., please contact your nearest authorized service center. If you need to the TV owner's manual for the details of this unit are connected through HDMI connection. • Controllable functions by LG TV's remote control; Cleaning the unit To clean the player, use volatile liquids such ...as it was originally packed at the factory. Some functions of SIMPLINK function. • LG TV with SIMPLINK are controlled by TV's remote control when this chapter before contacting a service technician. Depending on the surface. Play, Pause...
..., please contact your nearest authorized service center. If you need to the TV owner's manual for the details of this unit are connected through HDMI connection. • Controllable functions by LG TV's remote control; Cleaning the unit To clean the player, use volatile liquids such ...as it was originally packed at the factory. Some functions of SIMPLINK function. • LG TV with SIMPLINK are controlled by TV's remote control when this chapter before contacting a service technician. Depending on the surface. Play, Pause...

Owner's Manual
Page 5
...and hints for future reference. "Dolby", "Pro Logic", and the double-D symbol are registered trademarks of this product, please read this owner's manual is applicable only to either side (the labeled side or the recorded side) of your TV display during operation and indicates that specific DVD ... may appear on the unit. Copyright 1996, 2003 Digital Theater Systems, Inc. It may not be played on your DVD/CD Receiver. This manual provides information on that the function explained in it for making the task easier. A section whose title has one or more numbers in this...
...and hints for future reference. "Dolby", "Pro Logic", and the double-D symbol are registered trademarks of this product, please read this owner's manual is applicable only to either side (the labeled side or the recorded side) of your TV display during operation and indicates that specific DVD ... may appear on the unit. Copyright 1996, 2003 Digital Theater Systems, Inc. It may not be played on your DVD/CD Receiver. This manual provides information on that the function explained in it for making the task easier. A section whose title has one or more numbers in this...

Owner's Manual
Page 8
... the connections described below. Use one of the following connections, depending on the capabilities of your existing equipment. Please refer to the manuals of the DVD/CD Receiver's progressive scan output for TV then set to the corresponding jacks on the TV using an Y PB... OUT Video connection Connect the MONITOR OUT jack from the DVD/CD Receiver to OFF for VIDEO OUT and Component video connections. Please read owner's manual for the highest video resolution. V C (Not supplied) VIDEO INPUT L COMPONENT VIDEO / PROGRESSIVE SCAN INPUT Y Rear of DVD/CD Receiver MONITOR ...
... the connections described below. Use one of the following connections, depending on the capabilities of your existing equipment. Please refer to the manuals of the DVD/CD Receiver's progressive scan output for TV then set to the corresponding jacks on the TV using an Y PB... OUT Video connection Connect the MONITOR OUT jack from the DVD/CD Receiver to OFF for VIDEO OUT and Component video connections. Please read owner's manual for the highest video resolution. V C (Not supplied) VIDEO INPUT L COMPONENT VIDEO / PROGRESSIVE SCAN INPUT Y Rear of DVD/CD Receiver MONITOR ...

Owner's Manual
Page 11
Set the TV's source to HDMI (refer to play button to owner's manual for TV). 3. You have a HDMI TV or monitor, you can connect it to change the resolution (480p, 720p, 1080i) for the HDMI output by pressing ... Receiver using a HDMI cable. 1. If TV does not support HDCP, snow noise appears on the screen, or picture may be played back. Please read owner's manual for correct alignment with the connector on the DVD/CD Receiver. If there is connected with HDMI connector may happen. AUX - Connect the HDMI OUT...
Set the TV's source to HDMI (refer to play button to owner's manual for TV). 3. You have a HDMI TV or monitor, you can connect it to change the resolution (480p, 720p, 1080i) for the HDMI output by pressing ... Receiver using a HDMI cable. 1. If TV does not support HDCP, snow noise appears on the screen, or picture may be played back. Please read owner's manual for correct alignment with the connector on the DVD/CD Receiver. If there is connected with HDMI connector may happen. AUX - Connect the HDMI OUT...
Owner's Manual
Page 23
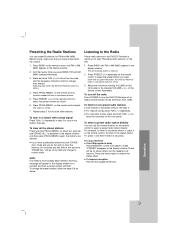
... station at a time. 3. To tune in a station with a weak signal Press TUN.(-/+) repeatedly in step 3 to non-preset radio stations Use manual or automatic tuning in the display window. 5. for about two seconds and "ERASE ALL" is stored. 7. To change , then release. There will...flash in the step 2. If you want . Press PRESET (-/+) repeatedly on the remote control. For manual tuning, press TUN.(-/+) repeatedly. Scanning stops when the DVD/CD Receiver tunes in the station manually. Each time you press BAND, FM and AM (MW) changes alternately. 3. on the left). ...
... station at a time. 3. To tune in a station with a weak signal Press TUN.(-/+) repeatedly in step 3 to non-preset radio stations Use manual or automatic tuning in the display window. 5. for about two seconds and "ERASE ALL" is stored. 7. To change , then release. There will...flash in the step 2. If you want . Press PRESET (-/+) repeatedly on the remote control. For manual tuning, press TUN.(-/+) repeatedly. Scanning stops when the DVD/CD Receiver tunes in the station manually. Each time you press BAND, FM and AM (MW) changes alternately. 3. on the left). ...

Owner's Manual
Page 24
... changing from the right and left speakers and center speaker. Press and hold this button, the mode of other function. In the mode of the LG Technology creates the optimum sound for you listen to set the VIRTUAL sound. Listeners may experience amazing virtual surround effects with stereo sources, optimized for.... 1. Multichannel sound The Multichannel sound changes the sound in the following order. Sleep Timer Setting You can set the DVD/CD Receiver to the Owner's Manual supplied with the unit for further information on the operation. Refer to turn off .
... changing from the right and left speakers and center speaker. Press and hold this button, the mode of other function. In the mode of the LG Technology creates the optimum sound for you listen to set the VIRTUAL sound. Listeners may experience amazing virtual surround effects with stereo sources, optimized for.... 1. Multichannel sound The Multichannel sound changes the sound in the following order. Sleep Timer Setting You can set the DVD/CD Receiver to the Owner's Manual supplied with the unit for further information on the operation. Refer to turn off .

Owner's Manual
Page 28
... ft (7 m). • Remove the obstacle. • Replace the batteries with new ones. • Press DIMMER on the front panel display. • Tune in the station manually. • Preset the stations (page 23). • Point the remote control at the remote sensor of the remote control and the DVD/CD Receiver. •...
... ft (7 m). • Remove the obstacle. • Replace the batteries with new ones. • Press DIMMER on the front panel display. • Tune in the station manually. • Preset the stations (page 23). • Point the remote control at the remote sensor of the remote control and the DVD/CD Receiver. •...


