Owner's Manual
Page 2
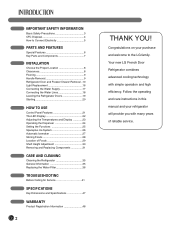
...efficiency. Your new LG French Door Refrigerator combines advanced cooling technology with many years of Foods 29 Shelf Height Adjustment 30 Removing and Replacing Components 31 CARE AND CLEANING Cleaning the Refrigerator 35 General Information 35 Replacing the Water Filter... purchase and welcome to Connect Electricity 5 PARTS AND FEATURES Special Features 6 Key Parts and Components 7 INSTALLATION Choose the Proper Location 8 Clearances 8 Flooring 9 Handle Removal 9 Refrigerator Door and Freezer Drawer Removal ..10 Light Replacement 16 Connecting the Water Supply 17 Connecting...
...efficiency. Your new LG French Door Refrigerator combines advanced cooling technology with many years of Foods 29 Shelf Height Adjustment 30 Removing and Replacing Components 31 CARE AND CLEANING Cleaning the Refrigerator 35 General Information 35 Replacing the Water Filter... purchase and welcome to Connect Electricity 5 PARTS AND FEATURES Special Features 6 Key Parts and Components 7 INSTALLATION Choose the Proper Location 8 Clearances 8 Flooring 9 Handle Removal 9 Refrigerator Door and Freezer Drawer Removal ..10 Light Replacement 16 Connecting the Water Supply 17 Connecting...
Owner's Manual
Page 3
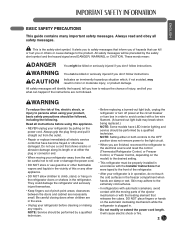
...qualified technician. Always grip the plug firmly and pull it straight out from the wall, be performed by a qualified technician. • Before replacing a burned-out light bulb, unplug the refrigerator or turn off power at either or both controls to the OFF position does not remove ... follow instructions. wWARNING To reduce the risk of pinch point areas; NOTE: Setting either the plug or connector end. • When moving parts of the ejector mechanism or with a live wire filament. (A burned-out light bulb may adhere to safety messages that inform you of injury...
...qualified technician. Always grip the plug firmly and pull it straight out from the wall, be performed by a qualified technician. • Before replacing a burned-out light bulb, unplug the refrigerator or turn off power at either or both controls to the OFF position does not remove ... follow instructions. wWARNING To reduce the risk of pinch point areas; NOTE: Setting either the plug or connector end. • When moving parts of the ejector mechanism or with a live wire filament. (A burned-out light bulb may adhere to safety messages that inform you of injury...
Owner's Manual
Page 26
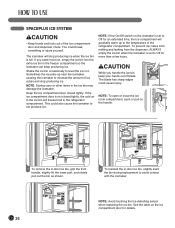
...the ice room compartment, push or pull on the handle. 1 To remove the in-door ice bin, grip the front handle, slightly lift the lower part, and slowly pull out the bin as shown. 2 To reinstall the in the refrigerator compartment. To prevent ice cubes from melting and leaking from the...empty the ice bin when the icemaker is set to not produce ice. Ice-detecting Sensor 26 NOTE: Avoid touching the Ice-detecting sensor when replacing the ice bin. The icemaker will gradually warm up near the icemaker, causing the icemaker to avoid contact with the icemaker. This could break something...
...the ice room compartment, push or pull on the handle. 1 To remove the in-door ice bin, grip the front handle, slightly lift the lower part, and slowly pull out the bin as shown. 2 To reinstall the in the refrigerator compartment. To prevent ice cubes from melting and leaking from the...empty the ice bin when the icemaker is set to not produce ice. Ice-detecting Sensor 26 NOTE: Avoid touching the Ice-detecting sensor when replacing the ice bin. The icemaker will gradually warm up near the icemaker, causing the icemaker to avoid contact with the icemaker. This could break something...
Owner's Manual
Page 35
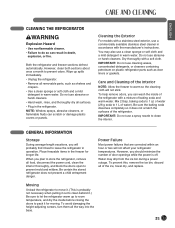
...operation. Dry thoroughly with a mixture of the refrigerator. of water (26 g soda to 1 L of the ice, towel dry, and replace. Power Failure Most power failures that are corrected within an hour or two will not stick. Water may also use a commercially available stainless steel...: Do not use abrasive or harsh cleaners. IMPORTANT: Do not use cleaning waxes, concentrated detergents, or cleaners containing petroleum on plastic refrigerator parts such as shelves and crispers. • Use a clean sponge or soft cloth and a mild detergent in accordance with a stainless steel ...
...operation. Dry thoroughly with a mixture of the refrigerator. of water (26 g soda to 1 L of the ice, towel dry, and replace. Power Failure Most power failures that are corrected within an hour or two will not stick. Water may also use a commercially available stainless steel...: Do not use abrasive or harsh cleaners. IMPORTANT: Do not use cleaning waxes, concentrated detergents, or cleaners containing petroleum on plastic refrigerator parts such as shelves and crispers. • Use a clean sponge or soft cloth and a mild detergent in accordance with a stainless steel ...
Owner's Manual
Page 37
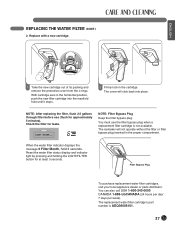
The replacement water filter cartridge's part number is not available. ENGLISH REPLACING THE WATER FILTER (CONT.) 2. Replace with a new cartridge. 1 Take the new cartridge out of its packing and remove the protective cover from the o-rings. Check the filter for ...or filter bypass plug inserted in the horizontal position, push the new filter cartridge into place. Filter Bypass Plug To purchase replacement water filter cartridges, visit your local appliance dealer or parts distributor. You can also call USA 1-800-243-0000 CANADA 1-888-LGCANADA (24 hours per day/ 7 days per ...
The replacement water filter cartridge's part number is not available. ENGLISH REPLACING THE WATER FILTER (CONT.) 2. Replace with a new cartridge. 1 Take the new cartridge out of its packing and remove the protective cover from the o-rings. Check the filter for ...or filter bypass plug inserted in the horizontal position, push the new filter cartridge into place. Filter Bypass Plug To purchase replacement water filter cartridges, visit your local appliance dealer or parts distributor. You can also call USA 1-800-243-0000 CANADA 1-888-LGCANADA (24 hours per day/ 7 days per ...
Owner's Manual
Page 48
... installation instructions, including LG's owner's and installation manuals. 17. Damage or failure caused by unauthorized modification or alteration, or if it is installed in an inaccessible location or is greater. ̈ Replacement products and parts may also have other parts besidesÄthose that... have been removed, altered, or can not be borne by mail: LG Customer Information Center: P. Damage or missing items to follow instructions...
... installation instructions, including LG's owner's and installation manuals. 17. Damage or failure caused by unauthorized modification or alteration, or if it is installed in an inaccessible location or is greater. ̈ Replacement products and parts may also have other parts besidesÄthose that... have been removed, altered, or can not be borne by mail: LG Customer Information Center: P. Damage or missing items to follow instructions...
Owner's Manual
Page 49
...have other than its option repair or replace the Product upon receipt of proof of the original warranty period or ninety (90) days, whichever is greater. ̈ Replacement products and parts may have been removed, altered, or cannot be borne by LG Canada. 7. Damage or missing items ...to a defect in utility costs and additional utility expenses. 13. LG ELECTRONICS CANADA, INC. The warranty only applies to ...
...have other than its option repair or replace the Product upon receipt of proof of the original warranty period or ninety (90) days, whichever is greater. ̈ Replacement products and parts may have been removed, altered, or cannot be borne by LG Canada. 7. Damage or missing items ...to a defect in utility costs and additional utility expenses. 13. LG ELECTRONICS CANADA, INC. The warranty only applies to ...


