
Owners Manual
Page 2
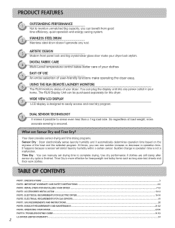
...bed sheets and thick work clothes. ELECTRICAL REQUIREMENTS FOR ELECTRIC DRYER ...PART& ELECTRICAL REQUIREMENTS FOR GAS DRYERS ...PART7. It happens because a sensor will detect laundry humidity within a certain period. TROUBLESHOOTING GUIDE ...LG DRYER LiMiTED WARRANTY ...2 3 4-6 7-12 13-14 15-18 .... At times, you can plug the display unit into any rust. J PART1 SPECIFICATIONS ...PART2 IMPORTANT WARRANTY AND SAFETY INSTRUCTIONS ...PART& INITIAL STEPS FOR INSTALLING YOUR DRYER ...PART4 ACCESSORIES INSTALLATION ...PART5. Sudden change in operation time. You can benefit from good ...
...bed sheets and thick work clothes. ELECTRICAL REQUIREMENTS FOR ELECTRIC DRYER ...PART& ELECTRICAL REQUIREMENTS FOR GAS DRYERS ...PART7. It happens because a sensor will detect laundry humidity within a certain period. TROUBLESHOOTING GUIDE ...LG DRYER LiMiTED WARRANTY ...2 3 4-6 7-12 13-14 15-18 .... At times, you can plug the display unit into any rust. J PART1 SPECIFICATIONS ...PART2 IMPORTANT WARRANTY AND SAFETY INSTRUCTIONS ...PART& INITIAL STEPS FOR INSTALLING YOUR DRYER ...PART4 ACCESSORIES INSTALLATION ...PART5. Sudden change in operation time. You can benefit from good ...
Owners Manual
Page 4
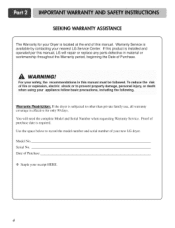
...Warranty for only 90 days. IRNING! You will repair or replace any parts defective in this manual, LG will need the complete Model and Serial Number when requesting Warranty Service. ...record the model number and serial number of Purchase _ Staple your new LG dryer. Warranty Restriction: If the dryer is subjected to prevent property damage, personal injury, or death ...when using your nearest LG Service Center. For your safety, the recommendations in material or workmanship throughout the Warranty ...
...Warranty for only 90 days. IRNING! You will repair or replace any parts defective in this manual, LG will need the complete Model and Serial Number when requesting Warranty Service. ...record the model number and serial number of Purchase _ Staple your new LG dryer. Warranty Restriction: If the dryer is subjected to prevent property damage, personal injury, or death ...when using your nearest LG Service Center. For your safety, the recommendations in material or workmanship throughout the Warranty ...
Owners Manual
Page 5
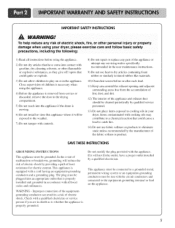
... mafiunction or breakdown, grounding will not fit the outlet, have come into contact with the appliance. Check with controls. 8) Do not repair or replace any part of the appliance or attempt any risk of electric shock, fire, or other flammable or explosive substances, as to whether the appliance is properly grounded...
... mafiunction or breakdown, grounding will not fit the outlet, have come into contact with the appliance. Check with controls. 8) Do not repair or replace any part of the appliance or attempt any risk of electric shock, fire, or other flammable or explosive substances, as to whether the appliance is properly grounded...
Owners Manual
Page 7
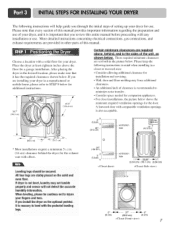
... of your dryer. Please note that every section of this entire manual before proceeding with a solid floor for use . After placing the dryer in other parts of this manual. Please keep the t`011owing instructions in mind when installing in the picture below for a garage installation. More detailed instructions concerning electrical connections...
... of your dryer. Please note that every section of this entire manual before proceeding with a solid floor for use . After placing the dryer in other parts of this manual. Please keep the t`011owing instructions in mind when installing in the picture below for a garage installation. More detailed instructions concerning electrical connections...
Owners Manual
Page 9
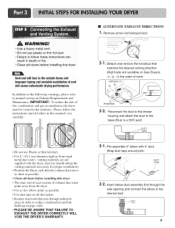
...) _i), @%_3)the order of vent will cause undesirable drying performance, In addition to the following warnings, please refer to the base.(Duct is a SVC part) DUCT TAPE f \ 3-1. Reconnect the duct to the blower housing and attach the duct to manual section on pipe walls. • PLEASE BE AWARE THAT FAILURE...
...) _i), @%_3)the order of vent will cause undesirable drying performance, In addition to the following warnings, please refer to the base.(Duct is a SVC part) DUCT TAPE f \ 3-1. Reconnect the duct to the blower housing and attach the duct to manual section on pipe walls. • PLEASE BE AWARE THAT FAILURE...
Owners Manual
Page 10
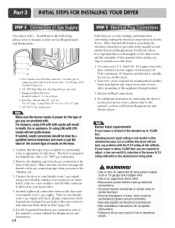
... all electrical connections • See installation instructions for use this manual's section on Gas Requirements and Instructions. In addition to the following, please refer to Part 7(page 20) 5.
... all electrical connections • See installation instructions for use this manual's section on Gas Requirements and Instructions. In addition to the following, please refer to Part 7(page 20) 5.
Owners Manual
Page 11
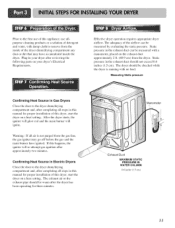
... dirt that may go off before the gas and the main burner have accumulated inside of the airflow can be warm after reviewing the following parts on a heat setting. The dryer should not exceed 0.6 inches (1.5 cm). If this manual for three minutes. Plug-in the exhaust duct should be checked while...
... dirt that may go off before the gas and the main burner have accumulated inside of the airflow can be warm after reviewing the following parts on a heat setting. The dryer should not exceed 0.6 inches (1.5 cm). If this manual for three minutes. Plug-in the exhaust duct should be checked while...
Owners Manual
Page 12
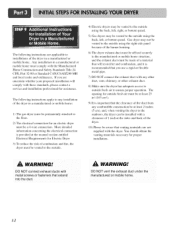
... permanently attached to the floor. 2) The electrical connection for an electric dryer must comply with the Manufactured Home Construction and Safety Standards Title 24 CFR, Part 32-80 or Standard CAN/CSAOZ240 MH and local codes and ordinances. Gas dryer may be vented to the outside using the right side panel...
... permanently attached to the floor. 2) The electrical connection for an electric dryer must comply with the Manufactured Home Construction and Safety Standards Title 24 CFR, Part 32-80 or Standard CAN/CSAOZ240 MH and local codes and ordinances. Gas dryer may be vented to the outside using the right side panel...
Owners Manual
Page 14
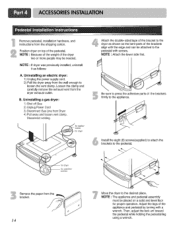
...by turning with the edge and can be attached to the pedestal. NOTE : If dryer was previously installed, uninstall it as shown so the bent parts of the bracket to the dryer as follows: A. combo Attach the double-sided tape of the brackets align with a wrench. for proper operation. ...Remove pedestal, installation hardware, and instructions from the wall enough to loosen the vent clamp. B. I Be sure to press the adhesive parts of the pedestal. NOTE • Because of the weight of the dryer two or more people may be placed on top of the brackets firmly...
...by turning with the edge and can be attached to the pedestal. NOTE : If dryer was previously installed, uninstall it as shown so the bent parts of the bracket to the dryer as follows: A. combo Attach the double-sided tape of the brackets align with a wrench. for proper operation. ...Remove pedestal, installation hardware, and instructions from the wall enough to loosen the vent clamp. B. I Be sure to press the adhesive parts of the pedestal. NOTE • Because of the weight of the dryer two or more people may be placed on top of the brackets firmly...
Owners Manual
Page 34
...warranty period set forth below, effective from the menu, and have product type (Dryer), model number, serial number, and ZiP code ready. LG Electronics Inc. and Damages or operating problems that result from misuse, abuse, operation outside environmental specifications or contrary to the original purchaser of ...CUSTOMERINTER-ACTIVECENTERNUMBERS: To Prove Warranty Coverage Retain your product if if proves to prove date of In-Home Service on all parts including the Drum Tub and Motor. Please have your home to your product type (Dryer), model number, serial number, and ZiP Code...
...warranty period set forth below, effective from the menu, and have product type (Dryer), model number, serial number, and ZiP code ready. LG Electronics Inc. and Damages or operating problems that result from misuse, abuse, operation outside environmental specifications or contrary to the original purchaser of ...CUSTOMERINTER-ACTIVECENTERNUMBERS: To Prove Warranty Coverage Retain your product if if proves to prove date of In-Home Service on all parts including the Drum Tub and Motor. Please have your home to your product type (Dryer), model number, serial number, and ZiP Code...


