KitchenAid KVWC906JSS Support and Manuals
Get Help and Manuals for this KitchenAid item
View All Support Options Below
Free KitchenAid KVWC906JSS manuals!
Problems with KitchenAid KVWC906JSS?
Ask a Question
Free KitchenAid KVWC906JSS manuals!
Problems with KitchenAid KVWC906JSS?
Ask a Question
KitchenAid KVWC906JSS Videos

KitchenAid KVWC906JSS Hottes de cuisinière
Duration: :31
Total Views: 4
Duration: :31
Total Views: 4
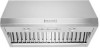
KitchenAid KVWC906JSS Range Hood
Duration: :33
Total Views: 13
Duration: :33
Total Views: 13
Popular KitchenAid KVWC906JSS Manual Pages
Owners Manual - Page 1

....4 CM AND 121.9 CM) COMMERCIAL STYLE WALL-MOUNT CANOPY
RANGE HOOD
Installation Instructions and Use & Care Guide
For questions about features, operation/performance, parts, accessories or service, call: 1-800-422-1230 or visit our website at www.kitchenaid.com
In Canada, for assistance, installation and service, call: 1-800-807-6777 or visit our website at www.kitchenaid...
Owners Manual - Page 2

...manual and on your appliance. Always read and obey all safety messages.
TABLE OF CONTENTS
RANGE HOOD SAFETY 2
INSTALLATION REQUIREMENTS 3 Tools and Parts 3 Location Requirements 4 Venting Requirements 5 Electrical Requirements 6
INSTALLATION INSTRUCTIONS 7 Prepare Location 7 Install Range Hood 8 Install Range Hood Internal Blower Motor 8 Install...
ASSISTANCE OU SERVICE 35 Au Canada 35 ...
Owners Manual - Page 3

...3 mm) drill bit if installing into crawl spaces, or garages. Discard fan or return to an authorized service facility for examination and/or repair.
■ Sufficient air is...INSTRUCTIONS
INSTALLATION REQUIREMENTS
Tools and Parts
Gather the required tools and parts before starting installation. Tools needed for Heating, Refrigeration and Air Conditioning Engineers (ASHRAE), and the local code...
Owners Manual - Page 4

... filters for 48" (121.9 cm) models Range hood canopy with damper Wood support Grease drip trays 4 - 6 x 80 mm mounting screws 4 - 3.5 x 9.5 mm screws 6 - 4.2 x 19 mm screws 2 - It is factory set for venting through the roof or through the wall. Given dimensions provide minimum clearance. Optional full-width duct cover B. Parts needed Home power supply cable...
Owners Manual - Page 6

...° elbow
= 5.0 ft (1.5 m)
1 - Mount on the model/serial rating plate. Roof caps D. Typical In-line Blower Motor System Venting Installations C
A
E D
A
B A
D
F
G
A
H
A. 10" (25.4 cm) round vent B. Mount on the rear wall of the National Electrical Code, ANSI/NFPA 70 (latest edition), or CSA Standards C22. 1-94, Canadian Electrical Code, Part 1 and C22.2 No. 0-M91 (latest edition...
Owners Manual - Page 8

... set of the range hood following the instructions and using three 4.2 x 8 mm screws.
B
A
→
→
2. If holes are blower motor mounting parts in -line (external type) blower motor system. Install... Install motor spring clip using two 4.2 x 8 mm screws. For information on some models), toward the left side of the hood to be mounted for motor spring clip C. Motor support ...
Owners Manual - Page 9

...and to the outside top or outside back
Dual Blower Motor Assembly
(alternate location on some models) of the range hood at the left and right ends of the motor mounting plate. ...mm nuts are required for the dual motor system. Wiring connection
A 2.
See the "Install Range Hood" section. Install Range Hood Internal Blower Motor
1. Motor mounting bracket B. Run the power supply wires ...
Owners Manual - Page 10

...be used to support the weight of the in -line blower system to aid installation. Additional stud framing may be strong enough to mount the in -line blower motor housing and set it aside.... it on either an internal type or an in -line blower housing and set them aside.
3. Motor mounting plate B. A
Install Range Hood In-Line (External Type) Blower Motor
NOTE: Your range hood requires...
Owners Manual - Page 11

...drilling into the terminal boxes on the blower motor assembly. Remove the terminal box covers and set the covers and screws aside. Drill 4 mounting pilot holes using 4 holes from the in-... electrical plug to the
connector on the in the "Prepare Location" section) to prepare for the installation of the blower. Remove the electrical knockout from either the inlet side or the outlet side of ...
Owners Manual - Page 12

...the terminal box inside the range hood and install a ¹⁄₂" (1.3 cm) UL listed or CSA approved strain relief (see the "Install Range Hood"
section), locate the wiring ... wires G. Use UL listed wire connectors and connect the red wires (E) together.
6. Replace all parts and panels before servicing.
Black wires
D.
I . Failure to do so can result in death or electrical ...
Owners Manual - Page 13

...8322;" (1.3 cm) strain relief
3.
Replace all light bulbs are secure in death or electrical shock.
1. Failure to Range Hood" section). Disconnect power. 2. Install terminal box cover.
7.
Black wires
D....ground wire to Range Hood" section.
Reconnect power. Blue wires G.
Check that all parts and panels before servicing. B C
D
E
F
A
G
H
A. Green, bare or yellow/green ...
Owners Manual - Page 14

...Move the fan switch to the "Off" position to full light setting. 3. When the heat decreases, the fan will turn the fan OFF.
Complete Installation and Check Operation
1. Install grease filters. B A
A C
D
E
A. LED light ...designed to high speed when necessary.
The fan will begin operating at the speed set on the fan when excessive heat is in the control area. Auto On Fan...
Owners Manual - Page 15

...set rear of lter into the drip tray to secure.
lled scouring pads. Mild liquid detergent and water.
Remove the bulb and replace... scratching the surface. Replace grease drip tray.
A
3.
Turn it clockwise to the following instructions.
Wipe with damp...avoid water marks. Replace grease lters before calling service. 1. RANGE HOOD CARE
Range Hood Lamps
Replacing a LED Lamp
...
Owners Manual - Page 17

... number of your appliance. Referrals to local dealers, repair parts distributors and service companies. Backsplash Kit (with shelves) Order Part Number W10285447 for 30" (76.2 cm) model Order Part Number W10285448 for 36" (91.4 cm) model Order Part Number W10285449 for 48" (121.9 cm) model
Backsplash Kit (with :
Features and specifications on our full line of appliances. Our consultants provide...
Dimension Guide - Page 1

...Vent cover (if used)
B
18" (45.7 cm) min. For installations with local codes and industry accepted wiring practices. Wood support D.
Aluminum/copper connection must conform with canopy only: 78" (198.1...
2. Instructions packed with optional duct cover: 90" (228.6 cm) minimum above electric cooking surface 96" (243.8 cm) minimum above gas cooking surface
B. Specifications subject ...
KitchenAid KVWC906JSS Reviews
We have not received any reviews for KitchenAid yet.