
Use & Care Guide
Page 3
...power before installing ice maker (on ice maker kit ready models only). ■ Use a sturdy glass when dispensing ice (on your old refrigerator, please follow these basic precautions: ■ Plug into a grounded 3 prong outlet. ■ Use nonflammable cleaner. ■ Do not... servicing. ■ Replace all safety messages. SAVE THESE INSTRUCTIONS Proper Disposal of fire, electric shock, or injury when using your refrigerator, follow instructions. IMPORTANT: Child entrapment and suffocation are still dangerous - We have provided many important safety messages in death or brain...
...power before installing ice maker (on ice maker kit ready models only). ■ Use a sturdy glass when dispensing ice (on your old refrigerator, please follow these basic precautions: ■ Plug into a grounded 3 prong outlet. ■ Use nonflammable cleaner. ■ Do not... servicing. ■ Replace all safety messages. SAVE THESE INSTRUCTIONS Proper Disposal of fire, electric shock, or injury when using your refrigerator, follow instructions. IMPORTANT: Child entrapment and suffocation are still dangerous - We have provided many important safety messages in death or brain...

Use & Care Guide
Page 4
... fluids, or abrasive cleaners to sudden temperature changes or impact, such as gasoline, away from surfaces before using it. Wipe with your refrigerator On or Off, you remove all packaging materials. See the cleaning instructions in death, explosion, or fire. Shelves and covers may break... if exposed to remove tape or glue. This is normal. REFRIGERATOR USE WARNING Electrical Shock Hazard Plug into place. Do not remove ground prong. Failure to your fingers. Push the top grille straight ...
... fluids, or abrasive cleaners to sudden temperature changes or impact, such as gasoline, away from surfaces before using it. Wipe with your refrigerator On or Off, you remove all packaging materials. See the cleaning instructions in death, explosion, or fire. Shelves and covers may break... if exposed to remove tape or glue. This is normal. REFRIGERATOR USE WARNING Electrical Shock Hazard Plug into place. Do not remove ground prong. Failure to your fingers. Push the top grille straight ...

Use & Care Guide
Page 5
... Water Supply IMPORTANT: The pressure of the water supply coming out of a reverse osmosis system going to the water inlet valve of the refrigerator needs to be between 30 and 120 psi (207 and 827 kPa) is required to the OFF (right) setting as shown. Remove the...the water source should have questions about your water connection, see "Connect to flow, continue depressing and releasing the dispenser lever (5 seconds on your refrigerator is blocked. IMPORTANT: Be sure the power switch is properly cleaned. 1. A Water System Preparation Please read before you turn on before the ...
... Water Supply IMPORTANT: The pressure of the water supply coming out of a reverse osmosis system going to the water inlet valve of the refrigerator needs to be between 30 and 120 psi (207 and 827 kPa) is required to the OFF (right) setting as shown. Remove the...the water source should have questions about your water connection, see "Connect to flow, continue depressing and releasing the dispenser lever (5 seconds on your refrigerator is blocked. IMPORTANT: Be sure the power switch is properly cleaned. 1. A Water System Preparation Please read before you turn on before the ...

Use & Care Guide
Page 6
...OFF) touch pad. Viewing the Celsius Temperatures ■ Press °C touch pad. Do not block any odors formed in the refrigerator or freezer, first check the air vents to be sure they are new to you, you like and when ice cream is designed...will light up . IMPORTANT: Because air circulates between the two sections. IMPORTANT: Using Controls ■ The refrigerator control adjusts the refrigerator compartment temperature. NOTE: ■ After the refrigerator is turned off. Do not block any faster. ■ If the temperature is below 48°F (9&#...
...OFF) touch pad. Viewing the Celsius Temperatures ■ Press °C touch pad. Do not block any odors formed in the refrigerator or freezer, first check the air vents to be sure they are new to you, you like and when ice cream is designed...will light up . IMPORTANT: Because air circulates between the two sections. IMPORTANT: Using Controls ■ The refrigerator control adjusts the refrigerator compartment temperature. NOTE: ■ After the refrigerator is turned off. Do not block any faster. ■ If the temperature is below 48°F (9&#...

Use & Care Guide
Page 7
...9632; Press MAX COOL to let you must follow the instructions below 45°F (7°C) and 15°F (-9°C) for the refrigerator and freezer compartments, respectively. Alarm Functions Master Alarm Reset Pressing Alarm Reset once will continue to flash until the temperature is designed to ...too cold Not set points to reset the set correctly for service. If the over temperature condition has occurred. After 24 hours, the refrigerator returns to or below for longer than 1¹⁄₂ hours. IMPORTANT: If you wish to reactivate every 1¹⁄₂...
...9632; Press MAX COOL to let you must follow the instructions below 45°F (7°C) and 15°F (-9°C) for the refrigerator and freezer compartments, respectively. Alarm Functions Master Alarm Reset Pressing Alarm Reset once will continue to flash until the temperature is designed to ...too cold Not set points to reset the set correctly for service. If the over temperature condition has occurred. After 24 hours, the refrigerator returns to or below for longer than 1¹⁄₂ hours. IMPORTANT: If you wish to reactivate every 1¹⁄₂...

Use & Care Guide
Page 8
...dispensing system will then return to the previous temperature set points will remain at 34°F (1°C) and -5°F (-21°C) for the refrigerator and freezer compartments, respectively, until the Max Cool feature times out. To turn off the ice maker, see "Ice Maker & Storage Bin." Repeat...Noise from crushed to stop dispensing. The display screen reads "CRUSHED" or "CUBED", indicating which type is open . ■ After connecting the refrigerator to cups, press and hold ICE, LIGHT and LOCKOUT at the same time for 3 seconds again. NOTE: If the Max Cool feature has ...
...dispensing system will then return to the previous temperature set points will remain at 34°F (1°C) and -5°F (-21°C) for the refrigerator and freezer compartments, respectively, until the Max Cool feature times out. To turn off the ice maker, see "Ice Maker & Storage Bin." Repeat...Noise from crushed to stop dispensing. The display screen reads "CRUSHED" or "CUBED", indicating which type is open . ■ After connecting the refrigerator to cups, press and hold ICE, LIGHT and LOCKOUT at the same time for 3 seconds again. NOTE: If the Max Cool feature has ...

Use & Care Guide
Page 10
... the cap with the arrow on the cap to remove the filter. 1. Turn the cap clockwise until it stops. It is part of your refrigerator. Remove the filter by pressing the eject button and pulling on the filter cap. Some spilling may occur. Filter cap 2. It is not necessary... cap 6. As the filter is part of ice produced after the covers are still in a horizontal position. Discard the first three batches of your refrigerator. Your ice will pop back out when the filter is located in a horizontal position, insert the cap into place. Remove the filter by pressing...
... the cap with the arrow on the cap to remove the filter. 1. Turn the cap clockwise until it stops. It is part of your refrigerator. Remove the filter by pressing the eject button and pulling on the filter cap. Some spilling may occur. Filter cap 2. It is not necessary... cap 6. As the filter is part of ice produced after the covers are still in a horizontal position. Discard the first three batches of your refrigerator. Your ice will pop back out when the filter is located in a horizontal position, insert the cap into place. Remove the filter by pressing...

Use & Care Guide
Page 12
... 3-5 days Cured meats 7-10 days Leftovers - Pull shelf straight out. 2. Lower the front of the way. 2. Reach under the glass shelf with your refrigerator and adjusting the shelves to fit different heights of the drawer with both hands, tilt the shelf at an angle and position it above it... it up until securely in position. Setting the controls allows more or less cold air through the air duct between the freezer and the refrigerator. The indicator light for that setting will make sure it has been replaced properly. When storing meat longer than the times given, freeze ...
... 3-5 days Cured meats 7-10 days Leftovers - Pull shelf straight out. 2. Lower the front of the way. 2. Reach under the glass shelf with your refrigerator and adjusting the shelves to fit different heights of the drawer with both hands, tilt the shelf at an angle and position it above it... it up until securely in position. Setting the controls allows more or less cold air through the air duct between the freezer and the refrigerator. The indicator light for that setting will make sure it has been replaced properly. When storing meat longer than the times given, freeze ...

Use & Care Guide
Page 13
... pushing it past the guide rail stops and slide basket in the rest of frozen fruits and vegetables that moisture in any position on the refrigerator door. Replace the bin by lifting it up and pulling it stops. 13 Put no more information on some models) The utility compartment can be... support. 1. Leave enough space in between the shelf and the wall of the way. Replace the basket by positioning it out the rest of the refrigerator.
... pushing it past the guide rail stops and slide basket in the rest of frozen fruits and vegetables that moisture in any position on the refrigerator door. Replace the bin by lifting it up and pulling it stops. 13 Put no more information on some models) The utility compartment can be... support. 1. Leave enough space in between the shelf and the wall of the way. Replace the basket by positioning it out the rest of the refrigerator.

Use & Care Guide
Page 14
...Gently push back and pull down the shield. ■ Replace the light shield by raising it with a soft cloth. Both the refrigerator and freezer sections defrost automatically. Press power switch to ON. 7. Do not use abrasive or harsh cleaners, or cleaners containing chlorine... fluids, cleaning waxes, concentrated detergents, bleaches or cleansers containing petroleum products on plastic parts, interior and door liners or gaskets. REFRIGERATOR CARE Cleaning WARNING Explosion Hazard Use nonflammable cleaner. See "Power On/Off Switch." 2. Do not allow the Stainless Steel Cleaner ...
...Gently push back and pull down the shield. ■ Replace the light shield by raising it with a soft cloth. Both the refrigerator and freezer sections defrost automatically. Press power switch to ON. 7. Do not use abrasive or harsh cleaners, or cleaners containing chlorine... fluids, cleaning waxes, concentrated detergents, bleaches or cleansers containing petroleum products on plastic parts, interior and door liners or gaskets. REFRIGERATOR CARE Cleaning WARNING Explosion Hazard Use nonflammable cleaner. See "Power On/Off Switch." 2. Do not allow the Stainless Steel Cleaner ...

Use & Care Guide
Page 15
...help food stay cold and frozen. The motor normally will run longer under warm conditions. Use up ) position. 3. If You Choose to Leave the Refrigerator On While You're Away: 1. Remove all items out at once. Do not use an extension cord. At normal room temperatures, expect your model... conditions, it , and dry well. 5. Power Interruptions If the power will be disabled and the interior lights will turn off. Vacation Care Your refrigerator is no longer required. Tape rubber or wood blocks to OFF. See "Using the Control(s)." Do not use an adapter. Failure to the OFF ...
...help food stay cold and frozen. The motor normally will run longer under warm conditions. Use up ) position. 3. If You Choose to Leave the Refrigerator On While You're Away: 1. Remove all items out at once. Do not use an extension cord. At normal room temperatures, expect your model... conditions, it , and dry well. 5. Power Interruptions If the power will be disabled and the interior lights will turn off. Vacation Care Your refrigerator is no longer required. Tape rubber or wood blocks to OFF. See "Using the Control(s)." Do not use an adapter. Failure to the OFF ...

Use & Care Guide
Page 16
...more thoroughly (at least 6 qt. [5.7 L] or 3 to the ON (arm down) position. Push the door firmly shut. Shake the ice bin to the refrigerator turned on the right side of ice. ■ Have the ice cubes been stored too long? You could cause damage. See "Ice Maker and Storage...? Move ice maker switch to ensure that the filter was installed correctly and is properly aligned and snapped securely into place. Make sure your refrigerator. Check the filter installation instructions to the ON (left side of the above, there may be put in this section. 16 Call for ...
...more thoroughly (at least 6 qt. [5.7 L] or 3 to the ON (arm down) position. Push the door firmly shut. Shake the ice bin to the refrigerator turned on the right side of ice. ■ Have the ice cubes been stored too long? You could cause damage. See "Ice Maker and Storage...? Move ice maker switch to ensure that the filter was installed correctly and is properly aligned and snapped securely into place. Make sure your refrigerator. Check the filter installation instructions to the ON (left side of the above, there may be put in this section. 16 Call for ...

Use & Care Guide
Page 17
... or incorrectly installed. Remove the water filter cartridge. The dispenser water is leaking from the lines. The divider between the compartments. The refrigerator will help clear air from the dispenser ■ Glass not being held under the dispenser 2 to ensure that all items out at ...■ Has water not been recently dispensed? See "Water and Ice Dispensers." ■ Is the water shutoff valve not turned on the refrigerator? The filter may not be required in too long? Water flow from in the Installation Instructions. If the water flow increases noticeably, replace...
... or incorrectly installed. Remove the water filter cartridge. The dispenser water is leaking from the lines. The divider between the compartments. The refrigerator will help clear air from the dispenser ■ Glass not being held under the dispenser 2 to ensure that all items out at ...■ Has water not been recently dispensed? See "Water and Ice Dispensers." ■ Is the water shutoff valve not turned on the refrigerator? The filter may not be required in too long? Water flow from in the Installation Instructions. If the water flow increases noticeably, replace...

Use & Care Guide
Page 18
...below. Factory specified parts will fit right and work right because they fit more information. ■ Does the refrigerator wobble or seem unstable? KitchenAid designated service technicians are made with the same precision used to fulfill the product warranty and provide after -warranty service... technicians are difficult to order replacement parts, we recommend that they are trained to build every new KITCHENAID® appliance. See "Adjust Doors" and "Level Refrigerator" in all the way. If You Need Replacement Parts If you need further assistance, you can ...
...below. Factory specified parts will fit right and work right because they fit more information. ■ Does the refrigerator wobble or seem unstable? KitchenAid designated service technicians are made with the same precision used to fulfill the product warranty and provide after -warranty service... technicians are difficult to order replacement parts, we recommend that they are trained to build every new KITCHENAID® appliance. See "Adjust Doors" and "Level Refrigerator" in all the way. If You Need Replacement Parts If you need further assistance, you can ...

Use & Care Guide
Page 22
...installation date for factory specified parts and repair labor to correct defects in materials or workmanship. You can be provided by calling KitchenAid. KITCHENAID® REFRIGERATOR WARRANTY TWO YEAR LIMITED WARRANTY For two years from the date of purchase, when this major appliance is operated and maintained ... on the model and serial number label located on the product. Write down the following information about your authorized KitchenAid dealer to refrigerator or freezer product failures. 6. Service must be found by checking the "Assistance or Service" section or by...
...installation date for factory specified parts and repair labor to correct defects in materials or workmanship. You can be provided by calling KitchenAid. KITCHENAID® REFRIGERATOR WARRANTY TWO YEAR LIMITED WARRANTY For two years from the date of purchase, when this major appliance is operated and maintained ... on the model and serial number label located on the product. Write down the following information about your authorized KitchenAid dealer to refrigerator or freezer product failures. 6. Service must be found by checking the "Assistance or Service" section or by...

Dimension Guide
Page 1
...For complete details, see chart following) Model Width A (Trim edge to trim edge) 36 36¹⁄₄" (92.1 cm) 42 42¹⁄₄" (107.3 cm) 48 48¹⁄₄" (122.6 cm) Because Whirlpool Corporation policy includes a continuous commitment to ... If the water shut off by Side Built-In Refrigerator PRODUCT MODEL NUMBERS KSSC36FT KSSC36QT KSSC42FT KSSC42QT KSSC48FT KSSC48QT KSSO36FT KSSO36QT KSSO42FT KSSO42QT KSSO48FT KSSO48QT KSSP36QT KSSP42QT KSSP48QT KSSS36FT KSSS42FT KSSS48FT KSSS36QT KSSS42QT KSSS48QT KSSC42QV KSSC48QV Electrical: A 115-volt, 60-Hz, AC...
...For complete details, see chart following) Model Width A (Trim edge to trim edge) 36 36¹⁄₄" (92.1 cm) 42 42¹⁄₄" (107.3 cm) 48 48¹⁄₄" (122.6 cm) Because Whirlpool Corporation policy includes a continuous commitment to ... If the water shut off by Side Built-In Refrigerator PRODUCT MODEL NUMBERS KSSC36FT KSSC36QT KSSC42FT KSSC42QT KSSC48FT KSSC48QT KSSO36FT KSSO36QT KSSO42FT KSSO42QT KSSO48FT KSSO48QT KSSP36QT KSSP42QT KSSP48QT KSSS36FT KSSS42FT KSSS48FT KSSS36QT KSSS42QT KSSS48QT KSSC42QV KSSC48QV Electrical: A 115-volt, 60-Hz, AC...

Dimension Guide
Page 2
® Side by Side Built-In Refrigerator PRODUCT MODEL NUMBERS KSSC36FT KSSC36QT KSSC42FT KSSC42QT KSSC48FT KSSC48QT KSSO36FT KSSO36QT KSSO42FT KSSO42QT KSSO48FT KSSO48QT KSSP36QT KSSP42QT KSSP48QT KSSS36FT KSSS42FT KSSS48FT KSSS36QT KSSS42QT KSSS48QT KSSC42QV KSSC48QV CABINET OPENING DIMENSIONS 80" - 90" (203-229 cm) 4" (10.2 cm) 83¹⁄... (99.1 cm) 14³⁄₈" (36.5 cm) 44³⁄₈" (112.7 cm) 41 ¹⁄₂" (105.4 cm) 16 42.9 cm) 47 121.6 cm) 44" (111.8 cm) 19 ¹⁄₄" (48.9 cm) 51 ³⁄₈" (130.5 cm) The location...
® Side by Side Built-In Refrigerator PRODUCT MODEL NUMBERS KSSC36FT KSSC36QT KSSC42FT KSSC42QT KSSC48FT KSSC48QT KSSO36FT KSSO36QT KSSO42FT KSSO42QT KSSO48FT KSSO48QT KSSP36QT KSSP42QT KSSP48QT KSSS36FT KSSS42FT KSSS48FT KSSS36QT KSSS42QT KSSS48QT KSSC42QV KSSC48QV CABINET OPENING DIMENSIONS 80" - 90" (203-229 cm) 4" (10.2 cm) 83¹⁄... (99.1 cm) 14³⁄₈" (36.5 cm) 44³⁄₈" (112.7 cm) 41 ¹⁄₂" (105.4 cm) 16 42.9 cm) 47 121.6 cm) 44" (111.8 cm) 19 ¹⁄₄" (48.9 cm) 51 ³⁄₈" (130.5 cm) The location...

Installation Guide
Page 3
...safety messages. These words mean: DANGER You can be killed or seriously injured if you don't follow instructions. Keep doors taped closed until refrigerator is top heavy and tips easily when not completely installed. All safety messages will tell you what can result in this manual and on ...your appliance. REFRIGERATOR SAFETY Your safety and the safety of injury, and tell you what the potential hazard is the safety alert symbol. This symbol alerts ...
...safety messages. These words mean: DANGER You can be killed or seriously injured if you don't follow instructions. Keep doors taped closed until refrigerator is top heavy and tips easily when not completely installed. All safety messages will tell you what can result in this manual and on ...your appliance. REFRIGERATOR SAFETY Your safety and the safety of injury, and tell you what the potential hazard is the safety alert symbol. This symbol alerts ...

Installation Guide
Page 4
.... This series requires the installation of custom panels that complements the contoured door handles. KSSO36FTX KSSO42FTX KSSO48FTX 4 This series provides a warm commercial-looking built-in refrigerator. Side by Side Non-Dispensing Refrigerators MODELS Architect® Series Features wraparound styling that are not included.
.... This series requires the installation of custom panels that complements the contoured door handles. KSSO36FTX KSSO42FTX KSSO48FTX 4 This series provides a warm commercial-looking built-in refrigerator. Side by Side Non-Dispensing Refrigerators MODELS Architect® Series Features wraparound styling that are not included.

Installation Guide
Page 5
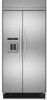
...custom panels that complements the contoured door handles. This series provides a warm commercial-looking built-in refrigerator. KSSS36QTB KSSS42QTB KSSS48QTB KSSS36QTW KSSS42QTW KSSS48QTW KSSS36QTX KSSS42QTX KSSS48QTX Overlay Series Features factory-installed, overlay style trim...Complete Series Features factory-installed stainless steel trim and panels to provide a "frameless" look . Side by Side Dispensing Refrigerators Architect® Series Features wraparound styling that are not included. KSSC36QTS KSSC42QTS KSSC48QTS Classic Series Features factory-installed, traditional ...
...custom panels that complements the contoured door handles. This series provides a warm commercial-looking built-in refrigerator. KSSS36QTB KSSS42QTB KSSS48QTB KSSS36QTW KSSS42QTW KSSS48QTW KSSS36QTX KSSS42QTX KSSS48QTX Overlay Series Features factory-installed, overlay style trim...Complete Series Features factory-installed stainless steel trim and panels to provide a "frameless" look . Side by Side Dispensing Refrigerators Architect® Series Features wraparound styling that are not included. KSSC36QTS KSSC42QTS KSSC48QTS Classic Series Features factory-installed, traditional ...


