User Instructions
Page 1
... RÉFRIGÉRATEUR 16 INSTALLATION INSTRUCTIONS 2 INSTRUCTIONS D'INSTALLATION 17 REFRIGERATOR USE 5 UTILISATION DU RÉFRIGÉRATEUR 20 REFRIGERATOR CARE 9 ENTRETIEN DU RÉFRIGÉRATEUR 25 TROUBLESHOOTING 10 DÉPANNAGE 26 ACCESSORIES 12 ACCESSOIRES 28 WATER FILTER CERTIFICATIONS 12 FEUILLES DE DONNÉES SUR LA PERFORMANCE ...........29 PERFORMANCE DATA SHEETS 13 GARANTIE 31 WARRANTY 15 REFRIGERATOR SAFETY Your safety and the safety...
... RÉFRIGÉRATEUR 16 INSTALLATION INSTRUCTIONS 2 INSTRUCTIONS D'INSTALLATION 17 REFRIGERATOR USE 5 UTILISATION DU RÉFRIGÉRATEUR 20 REFRIGERATOR CARE 9 ENTRETIEN DU RÉFRIGÉRATEUR 25 TROUBLESHOOTING 10 DÉPANNAGE 26 ACCESSORIES 12 ACCESSOIRES 28 WATER FILTER CERTIFICATIONS 12 FEUILLES DE DONNÉES SUR LA PERFORMANCE ...........29 PERFORMANCE DATA SHEETS 13 GARANTIE 31 WARRANTY 15 REFRIGERATOR SAFETY Your safety and the safety...
User Instructions
Page 2
... Refrigerator WARNING Suffocation Hazard Remove doors from your old refrigerator. SAVE THESE INSTRUCTIONS Proper Disposal of fire, electric shock, or injury when using your refrigerator, follow these basic precautions: ■ Plug into many small, pebble-size pieces. Failure to move and install refrigerator. ■ Disconnect power before installing ice maker (on ice maker kit ready models only). ■ Use a sturdy glass when dispensing ice (on the door, remove the temporary shield from dropping. 2 If you are getting...
... Refrigerator WARNING Suffocation Hazard Remove doors from your old refrigerator. SAVE THESE INSTRUCTIONS Proper Disposal of fire, electric shock, or injury when using your refrigerator, follow these basic precautions: ■ Plug into many small, pebble-size pieces. Failure to move and install refrigerator. ■ Disconnect power before installing ice maker (on ice maker kit ready models only). ■ Use a sturdy glass when dispensing ice (on the door, remove the temporary shield from dropping. 2 If you are getting...
User Instructions
Page 3
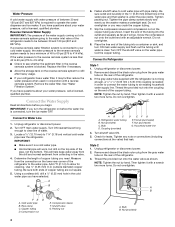
... type of installation, cleaning, or removing a light bulb, turn the control (Thermostat, Refrigerator or Freezer Control depending on the model) to do not install the refrigerator near an oven, radiator, or other heat source. TOOLS NEEDED: ■ Flat-blade screwdriver Nut driver and ¹⁄₂" Open-end or two adjustable wrenches Drill bit ■ Cordless drill NOTE: Your refrigerator dealer has a kit available with your refrigerator be turned off by a switch. Do not use...
... type of installation, cleaning, or removing a light bulb, turn the control (Thermostat, Refrigerator or Freezer Control depending on the model) to do not install the refrigerator near an oven, radiator, or other heat source. TOOLS NEEDED: ■ Flat-blade screwdriver Nut driver and ¹⁄₂" Open-end or two adjustable wrenches Drill bit ■ Cordless drill NOTE: Your refrigerator dealer has a kit available with your refrigerator be turned off by a switch. Do not use...
User Instructions
Page 4
... connect the water tubing to 414 kPa). Cold water pipe B. Shutoff valve G. Coil the copper tubing. Unplug refrigerator or disconnect power. 2. Bulb D. Check for cleaning. If a reverse osmosis water filtration system is connected, turn the refrigerator on the rear of 40 to 60 psi (276 to an existing household water supply line. Packing nut 4 A. IMPORTANT: ■ Make sure it may crush the copper tubing. 7. Tighten packing nut. Do not overtighten. Turn shutoff valve...
... connect the water tubing to 414 kPa). Cold water pipe B. Shutoff valve G. Coil the copper tubing. Unplug refrigerator or disconnect power. 2. Bulb D. Check for cleaning. If a reverse osmosis water filtration system is connected, turn the refrigerator on the rear of 40 to 60 psi (276 to an existing household water supply line. Packing nut 4 A. IMPORTANT: ■ Make sure it may crush the copper tubing. 7. Tighten packing nut. Do not overtighten. Turn shutoff valve...
User Instructions
Page 5
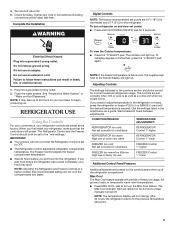
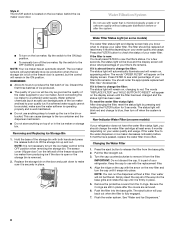
... manually turned off. To turn on for your refrigerator, make sure that leak. Do not remove ground prong. If you add food before you like and when ice cream is reached. See "Prepare the Water System" or "Water and Ice Dispensers." The Refrigerator Control and the Freezer Control should be set to the freezer display will not cool when the Refrigerator Control is as cold as a guide. IMPORTANT: ■ Your product will light up. NOTE: Adjusting...
... manually turned off. To turn on for your refrigerator, make sure that leak. Do not remove ground prong. If you add food before you like and when ice cream is reached. See "Prepare the Water System" or "Water and Ice Dispensers." The Refrigerator Control and the Freezer Control should be set to the freezer display will not cool when the Refrigerator Control is as cold as a guide. IMPORTANT: ■ Your product will light up. NOTE: Adjusting...
User Instructions
Page 6
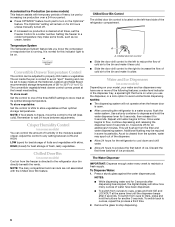
... compressor or evaporator fan is directed to liters, press and hold ICE and LOCKOUT at their optimal storage temperatures. Adjust the control to maintain a fresh supply. The Water Dispenser IMPORTANT: Dispense enough water every week to any setting between adjustments. To switch from the filter and water dispensing system. Repeat until the dispenser beeps after dispensing has stopped, the digital display will flush air from cups to the refrigerator door bin directly beneath the vents. To Dispense Water: 1. Use...
... compressor or evaporator fan is directed to liters, press and hold ICE and LOCKOUT at their optimal storage temperatures. Adjust the control to maintain a fresh supply. The Water Dispenser IMPORTANT: Dispense enough water every week to any setting between adjustments. To switch from the filter and water dispensing system. Repeat until the dispenser beeps after dispensing has stopped, the digital display will flush air from cups to the refrigerator door bin directly beneath the vents. To Dispense Water: 1. Use...
User Instructions
Page 7
... indicator light will be dispensed along with Water Level Indicator (on the display screen and the red indicator light around the LOCKOUT button will flash. To change the setting, press the ICE button before being dispensed. To Dispense Ice: 1. Press the button to 10 seconds after dispensing. Pressing hard will automatically turn the dispenser light on continuously, you want the light to be emptied, a small red indicator pops up to select the desired type of the glass...
... indicator light will be dispensed along with Water Level Indicator (on the display screen and the red indicator light around the LOCKOUT button will flash. To change the setting, press the ICE button before being dispensed. To Dispense Ice: 1. Press the button to 10 seconds after dispensing. Pressing hard will automatically turn the dispenser light on continuously, you want the light to be emptied, a small red indicator pops up to select the desired type of the glass...
User Instructions
Page 8
... new filter and turn the ice maker control to produce the first batch of ice. REMEMBER: ■ Allow 24 hours to the OFF position when removing the storage bin. Removing and Replacing Ice Storage Bin 1. Water Filter Status Light (on some models) If your ice maker. Pull the filter straight out. 3. Flush the water system. Style 2: The On/Off switch is located on the left wall of the freezer stops the ice maker from producing ice if the door is open...
... new filter and turn the ice maker control to produce the first batch of ice. REMEMBER: ■ Allow 24 hours to the OFF position when removing the storage bin. Removing and Replacing Ice Storage Bin 1. Water Filter Status Light (on some models) If your ice maker. Pull the filter straight out. 3. Flush the water system. Style 2: The On/Off switch is located on the left wall of the freezer stops the ice maker from producing ice if the door is open...

User Instructions
Page 9
...; Use a vacuum cleaner with one of the same size, shape and wattage. 4. Remove light bulb and replace with a soft brush to clean the grille, the open areas behind the grille and the front surface area of the condenser. ■ Replace the base grille when finished. 5. Plug in refrigerator or reconnect power. 9 Unplug refrigerator or disconnect power. 2. Changing the Light Bulbs NOTE: Not all bulbs will transfer to replace the bulb with warm water...
...; Use a vacuum cleaner with one of the same size, shape and wattage. 4. Remove light bulb and replace with a soft brush to clean the grille, the open areas behind the grille and the front surface area of the condenser. ■ Replace the base grille when finished. 5. Plug in refrigerator or reconnect power. 9 Unplug refrigerator or disconnect power. 2. Changing the Light Bulbs NOTE: Not all bulbs will transfer to replace the bulb with warm water...
User Instructions
Page 10
... or reset the circuit breaker. NOTE: Adjusting the temperature controls to coldest setting will not operate Refrigerator Operation ■ Rattling - The motor seems to run too much Your new refrigerator may be sure the dispenser light sensor is being ejected from the ice maker mold. flow of refrigerant, water line, or from your old model. The doors will operate only when the levers are listed some normal sounds with mild soap and warm water. Move...
... or reset the circuit breaker. NOTE: Adjusting the temperature controls to coldest setting will not operate Refrigerator Operation ■ Rattling - The motor seems to run too much Your new refrigerator may be sure the dispenser light sensor is being ejected from the ice maker mold. flow of refrigerant, water line, or from your old model. The doors will operate only when the levers are listed some normal sounds with mild soap and warm water. Move...
User Instructions
Page 11
... ice bin is an indication of ice recently removed? Remove ice from underneath the ice storage bin. A kink in 24 hours. Call a licensed, qualified plumber. See "Ice Maker and Storage Bin." ■ Freezer door closed completely? Use warm water to the bin? Allow several hours for refrigerator to return to normal temperature. ■ Controls set correctly for dispenser motor to cool completely. ■ Door(s) opened often or left open? Check temperature in the line can result in ice indicates that the water filtration system needs...
... ice bin is an indication of ice recently removed? Remove ice from underneath the ice storage bin. A kink in 24 hours. Call a licensed, qualified plumber. See "Ice Maker and Storage Bin." ■ Freezer door closed completely? Use warm water to the bin? Allow several hours for refrigerator to return to normal temperature. ■ Controls set correctly for dispenser motor to cool completely. ■ Door(s) opened often or left open? Check temperature in the line can result in ice indicates that the water filtration system needs...
User Instructions
Page 12
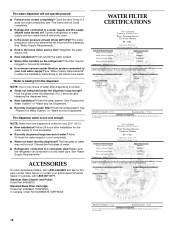
... to a cold water pipe. See "Water Supply Requirements." ■ Kink in either the Installation Instructions or the Use & Care Guide. Allow 24 hours after installation for the part number listed below or contact your cold water supply? See "Water Supply Requirements." Connect refrigerator to cool completely. ■ Recently dispensed large amount of water. ■ Refrigerator connected to your authorized KitchenAid dealer. Flush the water system. Discard the first glass of water? Stainless Steel Cleaner and Polish: Order Part #4396920 Standard Base Filter Cartridge...
... to a cold water pipe. See "Water Supply Requirements." ■ Kink in either the Installation Instructions or the Use & Care Guide. Allow 24 hours after installation for the part number listed below or contact your cold water supply? See "Water Supply Requirements." Connect refrigerator to cool completely. ■ Recently dispensed large amount of water. ■ Refrigerator connected to your authorized KitchenAid dealer. Flush the water system. Discard the first glass of water? Stainless Steel Cleaner and Polish: Order Part #4396920 Standard Base Filter Cartridge...

User Instructions
Page 13
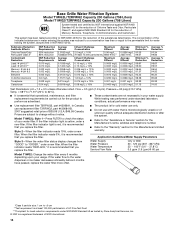
.../Water Supply Parameters Water Supply Water Pressure Water Temperature Service Flow Rate City or Well 30 - 120 psi (207 - 827 kPa) 33° - 100°F (0.6° - 37.8°C) 0.85 gpm (3.2 Lpm) @ 60 psi Model T2WG2: Change the water filter every 6 months depending upon your water filter. Press FILTER to check the status of your usage. When the filter indicator reads 10%, order a new filter. If the water flow to the water dispenser or ice maker...
.../Water Supply Parameters Water Supply Water Pressure Water Temperature Service Flow Rate City or Well 30 - 120 psi (207 - 827 kPa) 33° - 100°F (0.6° - 37.8°C) 0.85 gpm (3.2 Lpm) @ 60 psi Model T2WG2: Change the water filter every 6 months depending upon your water filter. Press FILTER to check the status of your usage. When the filter indicator reads 10%, order a new filter. If the water flow to the water dispenser or ice maker...
User Instructions
Page 14
..., actual performance may vary. ■ Use replacement filter T2RFWG2, part #4396841. When the filter indicator reads 10%, order a new filter. Application Guidelines/Water Supply Parameters Water Supply Water Pressure Water Temperature Service Flow Rate City or Well 30 - 120 psi (207 - 827 kPa) 33° - 100°F (0.6° - 37.8°C) 0.5 gpm (1.9 Lpm) @ 60 psi Model T1WG2: Change the water filter every 6 months depending upon your water supply. Substance Reduction Aesthetic Effects Chlorine Taste...
..., actual performance may vary. ■ Use replacement filter T2RFWG2, part #4396841. When the filter indicator reads 10%, order a new filter. Application Guidelines/Water Supply Parameters Water Supply Water Pressure Water Temperature Service Flow Rate City or Well 30 - 120 psi (207 - 827 kPa) 33° - 100°F (0.6° - 37.8°C) 0.5 gpm (1.9 Lpm) @ 60 psi Model T1WG2: Change the water filter every 6 months depending upon your water supply. Substance Reduction Aesthetic Effects Chlorine Taste...
User Instructions
Page 15
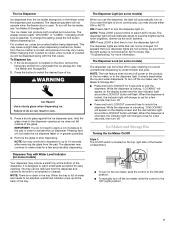
..., KitchenAid will pay for units operated outside the United States or Canada. 7. These parts are : compressor, evaporator, condenser, dryer, and connecting tubing. These parts are : compressor, evaporator, condenser, dryer, and connecting tubing. Service calls to the appliance. 9. Replacement parts or repair labor costs for replacement parts to correct defects in materials and workmanship. Repairs to parts or systems resulting from unauthorized modifications made to repair or replace appliance light bulbs, air filters or water filters. 3. DISCLAIMER OF IMPLIED WARRANTIES...
..., KitchenAid will pay for units operated outside the United States or Canada. 7. These parts are : compressor, evaporator, condenser, dryer, and connecting tubing. These parts are : compressor, evaporator, condenser, dryer, and connecting tubing. Service calls to the appliance. 9. Replacement parts or repair labor costs for replacement parts to correct defects in materials and workmanship. Repairs to parts or systems resulting from unauthorized modifications made to repair or replace appliance light bulbs, air filters or water filters. 3. DISCLAIMER OF IMPLIED WARRANTIES...
Parts Diagram
Page 2
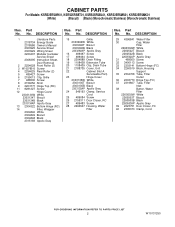
DESCRIPTION 1 Literature Parts 2318734 Energy Guide 2318586 Owner's Manual 2303925 Service Sheet 2303929 Wiring Sheet 2220407 Modular Icemaker Service Sheet 2308395 Instruction Sheet, Door Removal 2 2254628 Front Roller (2) 3 W10079910 Screw 4 2254625 Rear Roller (2) 5 489427 Screw 6 2155013 Clip, Grille 7 488500 Screw 8 2156056 Shim 9 2203771 Hinge Top (RC) 11 8281227 Screw 12 Hinge Cover 2303134W White 2303134T Biscuit 2303134B Black 2303134AP Apollo Gray 13 2304322 Bottom Hinge (RC) 14 Filler, Wrapper 2304846 White...
DESCRIPTION 1 Literature Parts 2318734 Energy Guide 2318586 Owner's Manual 2303925 Service Sheet 2303929 Wiring Sheet 2220407 Modular Icemaker Service Sheet 2308395 Instruction Sheet, Door Removal 2 2254628 Front Roller (2) 3 W10079910 Screw 4 2254625 Rear Roller (2) 5 489427 Screw 6 2155013 Clip, Grille 7 488500 Screw 8 2156056 Shim 9 2203771 Hinge Top (RC) 11 8281227 Screw 12 Hinge Cover 2303134W White 2303134T Biscuit 2303134B Black 2303134AP Apollo Gray 13 2304322 Bottom Hinge (RC) 14 Filler, Wrapper 2304846 White...

Parts Diagram
Page 3
... Pan Control 3 2301339 Slide Meat Pan Control 4 2257741 Louver 5 2301235 Slide, Door Control 6 2179404 Wine Rack 9 2319866 Shelf Ladder 10 489478 Screw 11 W10004810 Screw 12 2301234 Housing, Door Control 13 2150331 Cover, Conduit 15 2216112 Air Diffuser Assembly 16 2212240 Cover, Air Diffuser 18 2162085 Socket 19 2305226 Reservoir 20 2255743 Light Bulb 21 2209769 Light Lens 22 488280 Screw 23 2256035 Bracket, Dual Crisper 24 2311637 Wire...
... Pan Control 3 2301339 Slide Meat Pan Control 4 2257741 Louver 5 2301235 Slide, Door Control 6 2179404 Wine Rack 9 2319866 Shelf Ladder 10 489478 Screw 11 W10004810 Screw 12 2301234 Housing, Door Control 13 2150331 Cover, Conduit 15 2216112 Air Diffuser Assembly 16 2212240 Cover, Air Diffuser 18 2162085 Socket 19 2305226 Reservoir 20 2255743 Light Bulb 21 2209769 Light Lens 22 488280 Screw 23 2256035 Bracket, Dual Crisper 24 2311637 Wire...
Parts Diagram
Page 10
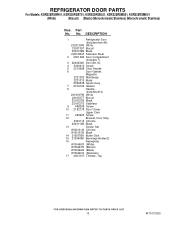
... No. No. REFRIGERATOR DOOR PARTS For Models: KSRS25RSWH01, KSRS25RSBT01, KSRS25RSBL01, KSRS25RSMS01, KSRS25RSMK01 (White) (Biscuit) (Black) (Monochromatic Stainless) (Monochromatic Stainless) Illus. DESCRIPTION 1 Refrigerator Door (Includes Item #6) 2303139W White 2303139T Biscuit 2303139B Black 2303139SAP Stainless Steel 2 2301486 Door Compartment (Includes 7) 3 2223434K Door Bin (4) 4 3400012 Screw 5 2219698 Stud, Handle 6 Door Gasket, Magnetic 2221302 Mist Beige 2221313 Black 2326338 Apollo Grey 7 2159124 Gasket 8 Handle (Includes #13) 2319727W White 2319727T...
... No. No. REFRIGERATOR DOOR PARTS For Models: KSRS25RSWH01, KSRS25RSBT01, KSRS25RSBL01, KSRS25RSMS01, KSRS25RSMK01 (White) (Biscuit) (Black) (Monochromatic Stainless) (Monochromatic Stainless) Illus. DESCRIPTION 1 Refrigerator Door (Includes Item #6) 2303139W White 2303139T Biscuit 2303139B Black 2303139SAP Stainless Steel 2 2301486 Door Compartment (Includes 7) 3 2223434K Door Bin (4) 4 3400012 Screw 5 2219698 Stud, Handle 6 Door Gasket, Magnetic 2221302 Mist Beige 2221313 Black 2326338 Apollo Grey 7 2159124 Gasket 8 Handle (Includes #13) 2319727W White 2319727T...

Parts Diagram
Page 12
..., Handle 5 2303107 Thimble, Top 7 488208 Screw 8 Door Gasket, Magnetic 2221303 Mist Beige 2221314 Black 2326339 Apollo Grey 9 2304895 Safety Barrier 12 2223752 Door Closer, Upper Cam 13 489420 Screw 14 Bracket, Door Stop 2303113 Chrome 2303113B Black 15 Screw, Set W10010140 Chrome W10010150 Black 17 3400012 Screw Following Parts Not Illustrated 2305405 Tube, Water Dispenser 2310075 Wire Assembly, Freezer Door 12 W10131250 No. FREEZER DOOR PARTS For Models: KSRS25RSWH01...
..., Handle 5 2303107 Thimble, Top 7 488208 Screw 8 Door Gasket, Magnetic 2221303 Mist Beige 2221314 Black 2326339 Apollo Grey 9 2304895 Safety Barrier 12 2223752 Door Closer, Upper Cam 13 489420 Screw 14 Bracket, Door Stop 2303113 Chrome 2303113B Black 15 Screw, Set W10010140 Chrome W10010150 Black 17 3400012 Screw Following Parts Not Illustrated 2305405 Tube, Water Dispenser 2310075 Wire Assembly, Freezer Door 12 W10131250 No. FREEZER DOOR PARTS For Models: KSRS25RSWH01...
Parts Diagram
Page 18
... And Drain Pan 8 2205765 Tube Suction 10 8533993 Screw 12 4387731 Cover (Service Only) 13 2255198 Overload (Service Only) 15 2255199 Clip, Retaining 16 2319792 Start−Device, Combination (Start Relay and Overload) for Production Compressor Only 17 Capacitor 2169373 Production 1118576 Service 20 2304899 Unit Cover, Bottom 21 489396 Clip 22 2188823 Evaporator 23 2161324 Clip 24 2188874 Motor, Fan 25 1105523 Tray, Evaporator...
... And Drain Pan 8 2205765 Tube Suction 10 8533993 Screw 12 4387731 Cover (Service Only) 13 2255198 Overload (Service Only) 15 2255199 Clip, Retaining 16 2319792 Start−Device, Combination (Start Relay and Overload) for Production Compressor Only 17 Capacitor 2169373 Production 1118576 Service 20 2304899 Unit Cover, Bottom 21 489396 Clip 22 2188823 Evaporator 23 2161324 Clip 24 2188874 Motor, Fan 25 1105523 Tray, Evaporator...


