User Instructions
Page 1
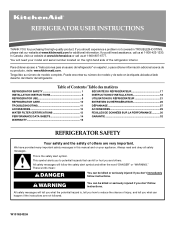
... 17 INSTALLATION INSTRUCTIONS 2 INSTRUCTIONS D'INSTALLATION 18 REFRIGERATOR USE 5 UTILISATION DU RÉFRIGÉRATEUR 21 REFRIGERATOR CARE 10 ENTRETIEN DU RÉFRIGÉRATEUR 26 TROUBLESHOOTING 11 DÉPANNAGE 27 ACCESSORIES 13 ACCESSOIRES 29 WATER FILTER CERTIFICATIONS 13 FEUILLES DE DONNÉES SUR LA PERFORMANCE ...........30 PERFORMANCE DATA SHEETS 14 GARANTIE 32 WARRANTY 16 REFRIGERATOR SAFETY Your safety and the safety of the refrigerator interior...
... 17 INSTALLATION INSTRUCTIONS 2 INSTRUCTIONS D'INSTALLATION 18 REFRIGERATOR USE 5 UTILISATION DU RÉFRIGÉRATEUR 21 REFRIGERATOR CARE 10 ENTRETIEN DU RÉFRIGÉRATEUR 26 TROUBLESHOOTING 11 DÉPANNAGE 27 ACCESSORIES 13 ACCESSOIRES 29 WATER FILTER CERTIFICATIONS 13 FEUILLES DE DONNÉES SUR LA PERFORMANCE ...........30 PERFORMANCE DATA SHEETS 14 GARANTIE 32 WARRANTY 16 REFRIGERATOR SAFETY Your safety and the safety of the refrigerator interior...
User Instructions
Page 2
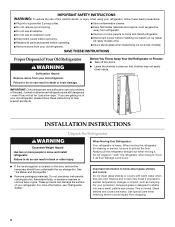
... the ice storage bin is designed to remove tape or glue. Do not use an extension cord. ■ Disconnect power before servicing. ■ Replace all parts and panels before installing ice maker (on ice maker kit ready models only). ■ Use a sturdy glass when dispensing ice (on the door, remove the temporary shield from your old refrigerator. For your protection, tempered glass is located on some models). IMPORTANT: Child entrapment and suffocation are cold. IMPORTANT SAFETY INSTRUCTIONS WARNING...
... the ice storage bin is designed to remove tape or glue. Do not use an extension cord. ■ Disconnect power before servicing. ■ Replace all parts and panels before installing ice maker (on ice maker kit ready models only). ■ Use a sturdy glass when dispensing ice (on the door, remove the temporary shield from your old refrigerator. For your protection, tempered glass is located on some models). IMPORTANT: Child entrapment and suffocation are cold. IMPORTANT SAFETY INSTRUCTIONS WARNING...
User Instructions
Page 3
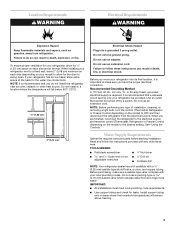
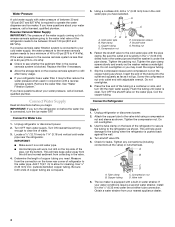
... any type of installation, cleaning, or removing a light bulb, turn the control (Thermostat, Refrigerator or Freezer Control depending on each side and at the back for the door to the desired setting. IMPORTANT: ■ All installations must meet local plumbing code requirements. ■ Use copper tubing and check for your refrigerator be turned off by a switch. When installing your refrigerator next to a fixed wall, leave 2" (5.08 cm) minimum on the model) to follow the instructions provided...
... any type of installation, cleaning, or removing a light bulb, turn the control (Thermostat, Refrigerator or Freezer Control depending on each side and at the back for the door to the desired setting. IMPORTANT: ■ All installations must meet local plumbing code requirements. ■ Use copper tubing and check for your refrigerator be turned off by a switch. When installing your refrigerator next to a fixed wall, leave 2" (5.08 cm) minimum on the model) to follow the instructions provided...
User Instructions
Page 4
... overtighten. 8. Turn OFF the shutoff valve on the copper tubing as it may crush the copper tubing. 7. Unplug refrigerator or disconnect power. 2. Tighten the compression nut. Do not overtighten. 3. Use the tube clamp on the lower rear corner of refrigerator to the cold water pipe with adjustable wrench. The ice maker is blocked. Replace the filter if necessary. ■ Allow the storage tank on the reverse osmosis...
... overtighten. 8. Turn OFF the shutoff valve on the copper tubing as it may crush the copper tubing. 7. Unplug refrigerator or disconnect power. 2. Tighten the compression nut. Do not overtighten. 3. Use the tube clamp on the lower rear corner of refrigerator to the cold water pipe with adjustable wrench. The ice maker is blocked. Replace the filter if necessary. ■ Allow the storage tank on the reverse osmosis...
User Instructions
Page 5
... A. Your model may spoil. Do not overtighten. The Refrigerator Control and the Freezer Control should be set correctly when milk or juice is needed in death, fire, or electrical shock. 1. Remove and discard the black nylon plug from the gray water tube on the end of the refrigerator. 3. Check for leaks. See "Prepare the Water System" or "Water and Ice Dispensers." Turn shutoff valve ON. 5. Unplug refrigerator or disconnect power. 2. Nut (provided...
... A. Your model may spoil. Do not overtighten. The Refrigerator Control and the Freezer Control should be set correctly when milk or juice is needed in death, fire, or electrical shock. 1. Remove and discard the black nylon plug from the gray water tube on the end of the refrigerator. 3. Check for leaks. See "Prepare the Water System" or "Water and Ice Dispensers." Turn shutoff valve ON. 5. Unplug refrigerator or disconnect power. 2. Nut (provided...
User Instructions
Page 6
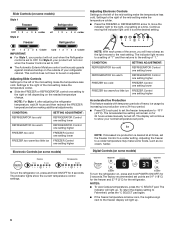
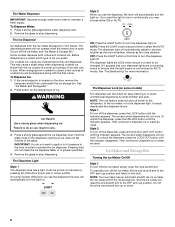
... as the light moves to the next setting. The indicator lights show your product will not cool when the Refrigerator control is at the desired setting. The indicator will remain on for 24 hours unless manually turned off 1 2 3 4 colder Style 2 Freezer Refrigerator Adjusting Electronic Controls Settings to the left of the mid-setting make some models) To turn the refrigerator on, press and hold ON/OFF for 2 seconds. Off 1 2 3 4 Colder Cold 1 2 3 4 Colder IMPORTANT...
... as the light moves to the next setting. The indicator lights show your product will not cool when the Refrigerator control is at the desired setting. The indicator will remain on for 24 hours unless manually turned off 1 2 3 4 colder Style 2 Freezer Refrigerator Adjusting Electronic Controls Settings to the left of the mid-setting make some models) To turn the refrigerator on, press and hold ON/OFF for 2 seconds. Off 1 2 3 4 Colder Cold 1 2 3 4 Colder IMPORTANT...
User Instructions
Page 7
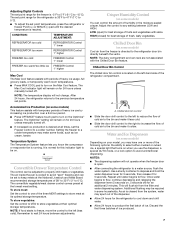
... temperatures, press the refrigerator or freezer PLUS (+) or MINUS (-) pad until water begins to produce the first batch of the refrigerator compartment. CONDITION: TEMPERATURE ADJUSTMENT: REFRIGERATOR too cold REFRIGERATOR Control 1° lower REFRIGERATOR too warm REFRIGERATOR Control 1° higher FREEZER too cold FREEZER Control 1° lower FREEZER too warm/too little ice FREEZER Control 1° higher Max Cool The Max Cool feature assists with the Chilled Door Bin feature. The Max Cool indicator light will not change. The OptimIce® setting will flush air...
... temperatures, press the refrigerator or freezer PLUS (+) or MINUS (-) pad until water begins to produce the first batch of the refrigerator compartment. CONDITION: TEMPERATURE ADJUSTMENT: REFRIGERATOR too cold REFRIGERATOR Control 1° lower REFRIGERATOR too warm REFRIGERATOR Control 1° higher FREEZER too cold FREEZER Control 1° lower FREEZER too warm/too little ice FREEZER Control 1° higher Max Cool The Max Cool feature assists with the Chilled Door Bin feature. The Max Cool indicator light will not change. The OptimIce® setting will flush air...
User Instructions
Page 8
... dispenser opening so ice does not fall outside of the glass. Noise from the ice crusher is located on the door, remove the temporary shield from underneath the ice storage bin. See "Ice Maker and Storage Bin." 2. Hold the glass close to stop dispensing. Remove the glass to select the AUTO mode. On some models) The dispenser can be turned on . AUTO: Press the LIGHT button a second time to stop dispensing. The dispenser lights are LEDs which type of ice you use...
... dispenser opening so ice does not fall outside of the glass. Noise from the ice crusher is located on the door, remove the temporary shield from underneath the ice storage bin. See "Ice Maker and Storage Bin." 2. Hold the glass close to stop dispensing. Remove the glass to select the AUTO mode. On some models) The dispenser can be turned on . AUTO: Press the LIGHT button a second time to stop dispensing. The dispenser lights are LEDs which type of ice you use...
User Instructions
Page 9
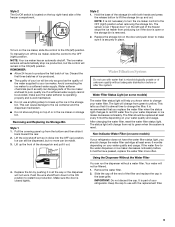
... removing the storage bin. Ice can be dispensed, but the control will automatically stop ice production, but no more often. Push the wire shutoff arm down to make sure the water softener is operating properly and is almost time to poor quality ice. After changing the water filter, reset the water filter status light. Non-Indicator Water Filter (on your ice will not work. Replace the storage bin on the top right-hand side of the ice maker...
... removing the storage bin. Ice can be dispensed, but the control will automatically stop ice production, but no more often. Push the wire shutoff arm down to make sure the water softener is operating properly and is almost time to poor quality ice. After changing the water filter, reset the water filter status light. Non-Indicator Water Filter (on your ice will not work. Replace the storage bin on the top right-hand side of the ice maker...

User Instructions
Page 10
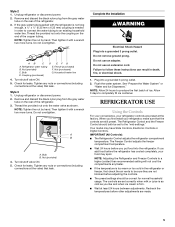
...-watt bulb. Remove light bulb and replace with one of the condenser. ■ Replace the base grille when finished. 5. Plug in warm water. 3. Both the refrigerator and freezer sections defrost automatically. Do not use abrasive or harsh cleaners such as window sprays, scouring cleansers, flammable fluids, cleaning waxes, concentrated detergents, bleaches or cleansers containing petroleum products on plastic parts, interior and door liners or gaskets. Unplug refrigerator or disconnect power. 2. Wash stainless...
...-watt bulb. Remove light bulb and replace with one of the condenser. ■ Replace the base grille when finished. 5. Plug in warm water. 3. Both the refrigerator and freezer sections defrost automatically. Do not use abrasive or harsh cleaners such as window sprays, scouring cleansers, flammable fluids, cleaning waxes, concentrated detergents, bleaches or cleansers containing petroleum products on plastic parts, interior and door liners or gaskets. Unplug refrigerator or disconnect power. 2. Wash stainless...
User Instructions
Page 11
... notice from the ice maker mold. See "Water and Ice Dispensers." 11 flow of refrigerant, water line, or from door. ■ Bin or shelf in the socket or burned out? water dripping on continuously, set to the NIGHT LIGHT or AUTO mode, be heard when water melts during the defrost cycle and runs into the drain pan Electrical Shock Hazard Plug into a grounded 3 prong outlet. ■ Is outlet working . ■ Door blocked open WARNING ■ Household...
... notice from the ice maker mold. See "Water and Ice Dispensers." 11 flow of refrigerant, water line, or from door. ■ Bin or shelf in the socket or burned out? water dripping on continuously, set to the NIGHT LIGHT or AUTO mode, be heard when water melts during the defrost cycle and runs into the drain pan Electrical Shock Hazard Plug into a grounded 3 prong outlet. ■ Is outlet working . ■ Door blocked open WARNING ■ Household...
User Instructions
Page 12
... the button for ice maker to begin dispensing again. ■ Has the dispenser arm been held in position. ■ New installation? Check temperature in the water source line? See "Using the Controls." Straighten the water source line. ■ Ice maker turned on model) is an indication of ice recently removed? Straighten the water source line. ■ Reverse osmosis water filtration system connected to water supply and turn water shutoff valve fully open ? Allows humid air to enter refrigerator. Connect refrigerator to your cold water supply? Make sure wire shutoff...
... the button for ice maker to begin dispensing again. ■ Has the dispenser arm been held in position. ■ New installation? Check temperature in the water source line? See "Using the Controls." Straighten the water source line. ■ Ice maker turned on model) is an indication of ice recently removed? Straighten the water source line. ■ Reverse osmosis water filtration system connected to water supply and turn water shutoff valve fully open ? Allows humid air to enter refrigerator. Connect refrigerator to your cold water supply? Make sure wire shutoff...

User Instructions
Page 13
... water system. See "Water Supply Requirements" in the home water source line? Connect refrigerator to cool completely. ■ Water not been recently dispensed? Discard the first glass of water after dispensing is connected to your authorized KitchenAid dealer. Close the door firmly. See "Water Supply Requirements." ■ Kink in either the Installation Instructions or the Use & Care Guide. The water pressure to a cold water pipe? See "Prepare the Water System" or "Water and Ice Dispensers." Straighten the water source line. ■ New installation? The filter...
... water system. See "Water Supply Requirements" in the home water source line? Connect refrigerator to cool completely. ■ Water not been recently dispensed? Discard the first glass of water after dispensing is connected to your authorized KitchenAid dealer. Close the door firmly. See "Water Supply Requirements." ■ Kink in either the Installation Instructions or the Use & Care Guide. The water pressure to a cold water pipe? See "Prepare the Water System" or "Water and Ice Dispensers." Straighten the water source line. ■ New installation? The filter...
User Instructions
Page 14
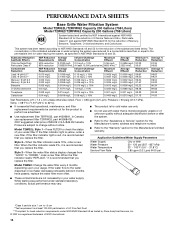
... of the substances listed below. Temp. = 68°F to 71.6°F (20°C to NSF/ANSI Standards 42 and 53 for the reduction of your water filter. Model T2WG2L: Style 1 - When the water filter status display changes from "GOOD" to perform as specified in your water supply. When the filter indicator reads "REPLACE," it is for cold water use only. ■ Do not use replacement filter T2RFWG2, part #4396841B. 2007 suggested...
... of the substances listed below. Temp. = 68°F to 71.6°F (20°C to NSF/ANSI Standards 42 and 53 for the reduction of your water filter. Model T2WG2L: Style 1 - When the water filter status display changes from "GOOD" to perform as specified in your water supply. When the filter indicator reads "REPLACE," it is for cold water use only. ■ Do not use replacement filter T2RFWG2, part #4396841B. 2007 suggested...

User Instructions
Page 15
The concentration of $39.99 U.S.A./$49.99 Canada. If the filter indicator light is for cold water use only. ■ Do not use replacement filter T2RFWG2, part #4396841B. 2007 suggested retail price of the indicated substances in your water supply. When the filter indicator reads 0%, it is recommended that operational, maintenance, and filter replacement requirements be carried out for the product to 22°C). ■ It is microbiologically unsafe...
The concentration of $39.99 U.S.A./$49.99 Canada. If the filter indicator light is for cold water use only. ■ Do not use replacement filter T2RFWG2, part #4396841B. 2007 suggested retail price of the indicated substances in your water supply. When the filter indicator reads 0%, it is recommended that operational, maintenance, and filter replacement requirements be carried out for the product to 22°C). ■ It is microbiologically unsafe...
User Instructions
Page 16
... THESE EXCLUSIONS OR LIMITATIONS MAY NOT APPLY TO YOU. Service must be provided by a KitchenAid designated service company. Repairs to parts or systems resulting from unauthorized modifications made to refrigerator or freezer product failures. 6. Have your authorized KitchenAid dealer to repair or replace appliance light bulbs, air filters or water filters. 3. Pickup and delivery. THIS WARRANTY GIVES YOU SPECIFIC LEGAL RIGHTS AND YOU MAY ALSO HAVE OTHER RIGHTS...
... THESE EXCLUSIONS OR LIMITATIONS MAY NOT APPLY TO YOU. Service must be provided by a KitchenAid designated service company. Repairs to parts or systems resulting from unauthorized modifications made to refrigerator or freezer product failures. 6. Have your authorized KitchenAid dealer to repair or replace appliance light bulbs, air filters or water filters. 3. Pickup and delivery. THIS WARRANTY GIVES YOU SPECIFIC LEGAL RIGHTS AND YOU MAY ALSO HAVE OTHER RIGHTS...

Parts Diagram
Page 2
Part No. Part No. No. DESCRIPTION 1 Literature Parts W10162432 Use & Care Guide W10142174 Service & Wiring Sheet W10196290 Energy Guide 2220407 Modular Icemaker Service Sheet 2 2174748 Front Roller (2) 3 3400517 Screw 4 2196236 Roller (Rear) (2) 5 489427 Screw 6 2155013 Clip, Grille 7 488500 Screw 9 2203771 Hinge Top, RC 10 3400858 Screw 11 Hinge Cover, FC 2203407W White 2203407B Black 2203407T Biscuit 2203407AP Apollo Gray 12 W10138965 Hinge Bottom 13 Filler, Wrapper 2304846 White 2304848...
Part No. Part No. No. DESCRIPTION 1 Literature Parts W10162432 Use & Care Guide W10142174 Service & Wiring Sheet W10196290 Energy Guide 2220407 Modular Icemaker Service Sheet 2 2174748 Front Roller (2) 3 3400517 Screw 4 2196236 Roller (Rear) (2) 5 489427 Screw 6 2155013 Clip, Grille 7 488500 Screw 9 2203771 Hinge Top, RC 10 3400858 Screw 11 Hinge Cover, FC 2203407W White 2203407B Black 2203407T Biscuit 2203407AP Apollo Gray 12 W10138965 Hinge Bottom 13 Filler, Wrapper 2304846 White 2304848...

Parts Diagram
Page 10
...(2) 4 Handle 2319727W White 2319727B Black 2319727T Biscuit 2319727S Stainless Steel 5 Door Gasket, Magnetic 2221302 Mist Beige 2221313 Black 6 2219698 Stud 7 Set Screw W10010140 Chrome W10010150 Black 8 Nameplate W10046670 White W10046640 Black W10046700 Biscuit W10046610 Gray 9 488208 Screw 10 2182178 Door Closer, Upper Cam 11 2159124 Gasket 12 489420 Screw 13 Bracket, Door Stop 2206629 Chrome 2206629B Black 14 W10169669 Door Bin...
...(2) 4 Handle 2319727W White 2319727B Black 2319727T Biscuit 2319727S Stainless Steel 5 Door Gasket, Magnetic 2221302 Mist Beige 2221313 Black 6 2219698 Stud 7 Set Screw W10010140 Chrome W10010150 Black 8 Nameplate W10046670 White W10046640 Black W10046700 Biscuit W10046610 Gray 9 488208 Screw 10 2182178 Door Closer, Upper Cam 11 2159124 Gasket 12 489420 Screw 13 Bracket, Door Stop 2206629 Chrome 2206629B Black 14 W10169669 Door Bin...

Parts Diagram
Page 12
FREEZER DOOR PARTS For Models: KSRP25FTWH02, KSRP25FTBL02, KSRP25FTBT02, KSRP25FTSS02, KSRP25FTMS02 (White) (Black) (Biscuit) (Stainless Steel) (Monochromatic Stainless) Illus. DESCRIPTION 1 Freezer Door (Includes #8 And Dispenser Front Parts) 2327659W White 2327659B Black 2327659T Biscuit 2327660SB Stainless Steel 2327660SAP Monochromatic Satina 2 Handle 2319727W White 2319727B Black 2319727T Biscuit 2319727S Stainless Steel 3 2219698 Stud 4 Screw W10010140 Chrome W10010150 Black 5 3400012 Screw 6 488208 Screw 7 2171070K Shelf Bin (3) 8 Door Gasket, ...
FREEZER DOOR PARTS For Models: KSRP25FTWH02, KSRP25FTBL02, KSRP25FTBT02, KSRP25FTSS02, KSRP25FTMS02 (White) (Black) (Biscuit) (Stainless Steel) (Monochromatic Stainless) Illus. DESCRIPTION 1 Freezer Door (Includes #8 And Dispenser Front Parts) 2327659W White 2327659B Black 2327659T Biscuit 2327660SB Stainless Steel 2327660SAP Monochromatic Satina 2 Handle 2319727W White 2319727B Black 2319727T Biscuit 2319727S Stainless Steel 3 2219698 Stud 4 Screw W10010140 Chrome W10010150 Black 5 3400012 Screw 6 488208 Screw 7 2171070K Shelf Bin (3) 8 Door Gasket, ...

Parts Diagram
Page 21
... Sealer, Gum (4 Feet) 479502 Tape, Vinyl (3/4 x 108") 505587 Sealer, Mastic (1 Qt.) 503695 Cork, Sealer (1/4 Pound) 542638 Grease, Silicone (1/2 Oz.) 542639 Cement, Alumilastic (1−1/4 Oz.) 799833 Kit, Evaporator Repair (Aluminum Epoxy) 833938 Kit, Terminal Connector TORX SCREW WRENCH 1117510 Torx Key ACCESSORIES Previous Architect Series Handle Kit 8201806 Stainless Steel W10205745 21 Part No. Illus. OPTIONAL PARTS (NOT INCLUDED) For Models: KSRP25FTWH02, KSRP25FTBL02, KSRP25FTBT02...
... Sealer, Gum (4 Feet) 479502 Tape, Vinyl (3/4 x 108") 505587 Sealer, Mastic (1 Qt.) 503695 Cork, Sealer (1/4 Pound) 542638 Grease, Silicone (1/2 Oz.) 542639 Cement, Alumilastic (1−1/4 Oz.) 799833 Kit, Evaporator Repair (Aluminum Epoxy) 833938 Kit, Terminal Connector TORX SCREW WRENCH 1117510 Torx Key ACCESSORIES Previous Architect Series Handle Kit 8201806 Stainless Steel W10205745 21 Part No. Illus. OPTIONAL PARTS (NOT INCLUDED) For Models: KSRP25FTWH02, KSRP25FTBL02, KSRP25FTBT02...


