Use & Care Guide
Page 2
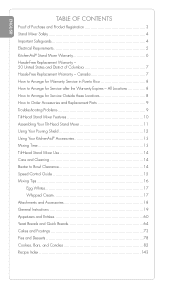
... 4 Electrical Requirements 5 KitchenAid® Stand Mixer Warranty 6 Hassle-Free Replacement Warranty - 50 United States and District of Columbia 7 Hassle-Free Replacement Warranty - All Locations 8 How to Bowl Clearance 14 Speed Control Guide 15 Mixing Tips 16 Egg Whites 17 Whipped Cream 17 Attachments and Accessories 18 General Instructions 19 Appetizers and Entrées 60 Yeast Breads and Quick Breads 64 Cakes and Frostings 73 Pies and Desserts 78 Cookies, Bars, and Candies 82 Recipe...
... 4 Electrical Requirements 5 KitchenAid® Stand Mixer Warranty 6 Hassle-Free Replacement Warranty - 50 United States and District of Columbia 7 Hassle-Free Replacement Warranty - All Locations 8 How to Bowl Clearance 14 Speed Control Guide 15 Mixing Tips 16 Egg Whites 17 Whipped Cream 17 Attachments and Accessories 18 General Instructions 19 Appetizers and Entrées 60 Yeast Breads and Quick Breads 64 Cakes and Frostings 73 Pies and Desserts 78 Cookies, Bars, and Candies 82 Recipe...
Use & Care Guide
Page 6
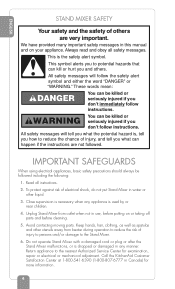
... Stand Mixer from beater during operation to the Stand Mixer. 6. This is used by or near children. 4. IMPORTANT SAFEGUARDS When using electrical appliances, basic safety precautions should always be killed or seriously injured if you what the potential hazard is dropped or damaged in Canada) for examination, repair or electrical or mechanical adjustment. Do not operate Stand Mixer with a damaged cord or plug or after the Stand Mixer...
... Stand Mixer from beater during operation to the Stand Mixer. 6. This is used by or near children. 4. IMPORTANT SAFEGUARDS When using electrical appliances, basic safety precautions should always be killed or seriously injured if you what the potential hazard is dropped or damaged in Canada) for examination, repair or electrical or mechanical adjustment. Do not operate Stand Mixer with a damaged cord or plug or after the Stand Mixer...
Use & Care Guide
Page 7
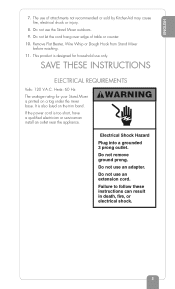
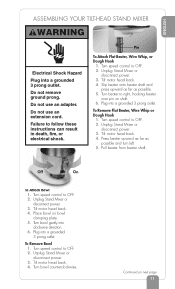
... or counter. 10. ENGLISH 7. Remove Flat Beater, Wire Whip or Dough Hook from Stand Mixer before washing. 11. Hertz: 60 Hz The wattage rating for household use only. Do not remove ground prong. Do not use the Stand Mixer outdoors. 9. WARNING Electrical Shock Hazard Plug into a grounded 3 prong outlet. Do not let the cord hang over edge of attachments not recommended or sold by KitchenAid may cause fire...
... or counter. 10. ENGLISH 7. Remove Flat Beater, Wire Whip or Dough Hook from Stand Mixer before washing. 11. Hertz: 60 Hz The wattage rating for household use only. Do not remove ground prong. Do not use the Stand Mixer outdoors. 9. WARNING Electrical Shock Hazard Plug into a grounded 3 prong outlet. Do not let the cord hang over edge of attachments not recommended or sold by KitchenAid may cause fire...
Use & Care Guide
Page 8
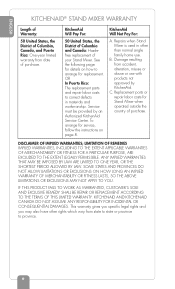
Repairs when Stand Mixer is used in materials and workmanship. Replacement parts or repair labor costs for service, follow the instructions on how to arrange for replacement. SOME STATES AND PROVINCES DO NOT ALLOW LIMITATIONS OR EXCLUSIONS ON HOW LONG AN IMPLIED WARRANTY OF MERCHANTABILITY OR FITNESS LASTS, SO THE ABOVE LIMITATIONS OR EXCLUSIONS MAY NOT APPLY TO YOU. To arrange for Stand Mixer when operated outside...
Repairs when Stand Mixer is used in materials and workmanship. Replacement parts or repair labor costs for service, follow the instructions on how to arrange for replacement. SOME STATES AND PROVINCES DO NOT ALLOW LIMITATIONS OR EXCLUSIONS ON HOW LONG AN IMPLIED WARRANTY OF MERCHANTABILITY OR FITNESS LASTS, SO THE ABOVE LIMITATIONS OR EXCLUSIONS MAY NOT APPLY TO YOU. To arrange for Stand Mixer when operated outside...
Use & Care Guide
Page 9
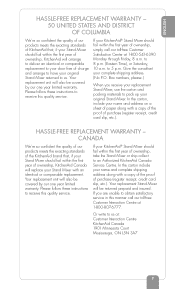
... our toll-free Customer Interaction Centre at : Customer Interaction Centre KitchenAid Canada 1901 Minnesota Court Mississauga, ON L5N 3A7 7 Your replacement Stand Mixer will be covered by our one year limited warranty. If your name and complete shipping address along with an identical or comparable replacement. Box numbers, please.) When you are unable to obtain satisfactory service in this quality service. ENGLISH HASSLE-FREE REPLACEMENT WARRANTY - 50 UNITED...
... our toll-free Customer Interaction Centre at : Customer Interaction Centre KitchenAid Canada 1901 Minnesota Court Mississauga, ON L5N 3A7 7 Your replacement Stand Mixer will be covered by our one year limited warranty. If your name and complete shipping address along with an identical or comparable replacement. Box numbers, please.) When you are unable to obtain satisfactory service in this quality service. ENGLISH HASSLE-FREE REPLACEMENT WARRANTY - 50 UNITED...
Use & Care Guide
Page 11
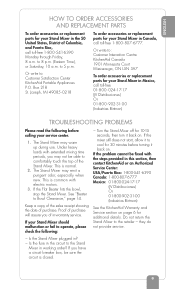
...- 00 (Industrias Birtman) TROUBLESHOOTING PROBLEMS Please read the following : - If the Flat Beater hits the bowl, stop the Stand Mixer. Is the Stand Mixer plugged in working order? Or write to cool for 10-15 seconds, then turn it back on . Or write to: Customer Interaction Centre KitchenAid Canada 1901 Minnesota Court Mississauga, ON L5N 3A7 To order accessories or replacement parts for your Stand Mixer should malfunction or fail...
...- 00 (Industrias Birtman) TROUBLESHOOTING PROBLEMS Please read the following : - If the Flat Beater hits the bowl, stop the Stand Mixer. Is the Stand Mixer plugged in working order? Or write to cool for 10-15 seconds, then turn it back on . Or write to: Customer Interaction Centre KitchenAid Canada 1901 Minnesota Court Mississauga, ON L5N 3A7 To order accessories or replacement parts for your Stand Mixer should malfunction or fail...
Use & Care Guide
Page 12
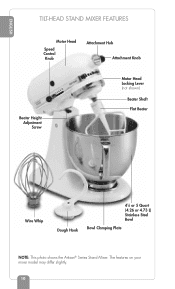
The features on your mixer model may differ slightly. 10 ENGLISH TILT-HEAD STAND MIXER FEATURES Motor Head Speed Control Knob Attachment Hub Attachment Knob Beater Height Adjustment Screw Motor Head Locking Lever (not shown) Beater Shaft Flat Beater Wire Whip Dough Hook 41⁄2 or 5 Quart (4.26 or 4.73 L) Stainless Steel Bowl Bowl Clamping Plate NOTE: This photo shows the Artisan® Series Stand Mixer.
The features on your mixer model may differ slightly. 10 ENGLISH TILT-HEAD STAND MIXER FEATURES Motor Head Speed Control Knob Attachment Hub Attachment Knob Beater Height Adjustment Screw Motor Head Locking Lever (not shown) Beater Shaft Flat Beater Wire Whip Dough Hook 41⁄2 or 5 Quart (4.26 or 4.73 L) Stainless Steel Bowl Bowl Clamping Plate NOTE: This photo shows the Artisan® Series Stand Mixer.
Use & Care Guide
Page 13
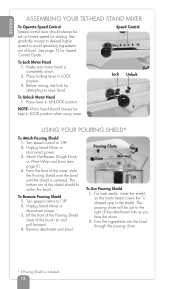
... Remove Bowl 1. Tilt motor head back. 4. Pin To Attach Flat Beater, Wire Whip, or Dough Hook 1. Tilt motor head back. 4. Slip beater onto beater shaft and press upward as far as possible and turn left. 5. Pull beater from beater shaft. Plug into a grounded 3 prong outlet. Turn bowl counterclockwise. Unplug Stand Mixer or disconnect power. 3. Unplug Stand Mixer or disconnect power. 3. ENGLISH ASSEMBLING YOUR TILT-HEAD STAND MIXER WARNING Electrical Shock Hazard Plug into clockwise direction. 6. Do not remove ground prong. Do not use an adapter. Turn speed control...
... Remove Bowl 1. Tilt motor head back. 4. Pin To Attach Flat Beater, Wire Whip, or Dough Hook 1. Tilt motor head back. 4. Slip beater onto beater shaft and press upward as far as possible and turn left. 5. Pull beater from beater shaft. Plug into a grounded 3 prong outlet. Turn bowl counterclockwise. Unplug Stand Mixer or disconnect power. 3. Unplug Stand Mixer or disconnect power. 3. ENGLISH ASSEMBLING YOUR TILT-HEAD STAND MIXER WARNING Electrical Shock Hazard Plug into clockwise direction. 6. Do not remove ground prong. Do not use an adapter. Turn speed control...
Use & Care Guide
Page 14
... Unplug Stand Mixer or disconnect power. 3. Lift the front of the Pouring Shield clear of the mixer, slide the Pouring Shield over the bowl until the shield is centered. The pouring chute will be just to OFF. 2. Place locking lever in the shield. Attach Flat Beater, Dough Hook, or Wire Whip and bowl (see page 11). 4. Pouring Chute To Use Pouring Shield 1. For best results, rotate the shield so the motor head covers the "u" shaped gap in LOCK position. 3. Speed Control To Lock Motor Head 1. Turn speed control to the...
... Unplug Stand Mixer or disconnect power. 3. Lift the front of the Pouring Shield clear of the mixer, slide the Pouring Shield over the bowl until the shield is centered. The pouring chute will be just to OFF. 2. Place locking lever in the shield. Attach Flat Beater, Dough Hook, or Wire Whip and bowl (see page 11). 4. Pouring Chute To Use Pouring Shield 1. For best results, rotate the shield so the motor head covers the "u" shaped gap in LOCK position. 3. Speed Control To Lock Motor Head 1. Turn speed control to the...
Use & Care Guide
Page 15
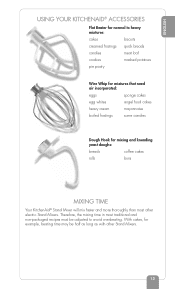
... pie pastry Wire Whip for mixtures that need air incorporated: eggs sponge cakes egg whites angel food cakes heavy cream mayonnaise boiled frostings some candies Dough Hook for mixing and kneading yeast doughs: breads coffee cakes rolls buns MIXING TIME Your KitchenAid® Stand Mixer will mix faster and more thoroughly than most traditional and non-packaged recipes must be half as long as with other electric Stand Mixers. ENGLISH USING YOUR KITCHENAID® ACCESSORIES Flat Beater for...
... pie pastry Wire Whip for mixtures that need air incorporated: eggs sponge cakes egg whites angel food cakes heavy cream mayonnaise boiled frostings some candies Dough Hook for mixing and kneading yeast doughs: breads coffee cakes rolls buns MIXING TIME Your KitchenAid® Stand Mixer will mix faster and more thoroughly than most traditional and non-packaged recipes must be half as long as with other electric Stand Mixers. ENGLISH USING YOUR KITCHENAID® ACCESSORIES Flat Beater for...
Use & Care Guide
Page 16
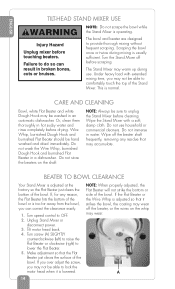
... Stand Mixer before touching beaters. Unplug Stand Mixer or disconnect power. 3. Do not use . Wipe off the beater shaft frequently, removing any reason, the Flat Beater hits the bottom of the bowl or is adjusted so that may accumulate. If you over adjust the screw, you may not be able to do so can correct the clearance easily. 1. Under heavy load with a soft, damp cloth. Tilt motor head back. 4. Failure to lock the motor head...
... Stand Mixer before touching beaters. Unplug Stand Mixer or disconnect power. 3. Do not use . Wipe off the beater shaft frequently, removing any reason, the Flat Beater hits the bottom of the bowl or is adjusted so that may accumulate. If you over adjust the screw, you may not be able to do so can correct the clearance easily. 1. Under heavy load with a soft, damp cloth. Tilt motor head back. 4. Failure to lock the motor head...
Use & Care Guide
Page 18
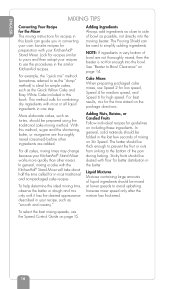
... most or all cakes, mixing times may change because your KitchenAid® Stand Mixer. In general, mixing a cake with the KitchenAid® Stand Mixer will take about half the time called for recipes similar to yours and then adapt your recipes to use the Speed Control Guide on including these ingredients. ENGLISH MIXING TIPS Converting Your Recipe for the Mixer The mixing instructions for recipes in this book can be used to simplify adding...
... most or all cakes, mixing times may change because your KitchenAid® Stand Mixer. In general, mixing a cake with the KitchenAid® Stand Mixer will take about half the time called for recipes similar to yours and then adapt your recipes to use the Speed Control Guide on including these ingredients. ENGLISH MIXING TIPS Converting Your Recipe for the Mixer The mixing instructions for recipes in this book can be used to simplify adding...
Use & Care Guide
Page 19
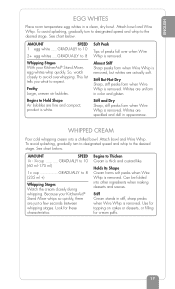
... . Whites are uniform in appearance. WHIPPED CREAM Pour cold whipping cream into other ingredients when making desserts and sauces. product is removed. Stiff But Not Dry Sharp, stiff peaks form when Wire Whip is removed. To avoid splashing, gradually turn to designated speed and whip to 8 Whipping Stages With your KitchenAid® Stand Mixer whips so quickly, there are fine and compact; So, watch closely to Thicken Cream is removed. Attach bowl...
... . Whites are uniform in appearance. WHIPPED CREAM Pour cold whipping cream into other ingredients when making desserts and sauces. product is removed. Stiff But Not Dry Sharp, stiff peaks form when Wire Whip is removed. To avoid splashing, gradually turn to designated speed and whip to 8 Whipping Stages With your KitchenAid® Stand Mixer whips so quickly, there are fine and compact; So, watch closely to Thicken Cream is removed. Attach bowl...
Use & Care Guide
Page 65
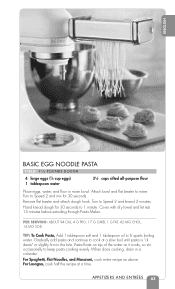
Hand knead dough for 30 seconds. For Lasagna, cook half the recipe at beater and attach dough hook. Attach bowl and flat a slow boil until pasta is "al dente" or slightly firm to Speed 2 and mix for 30 seconds to mixer. Turn to the bite. Gradually add pasta and continue to cook at beater to 1 minute. Pasta floats on top of the water as above...
Hand knead dough for 30 seconds. For Lasagna, cook half the recipe at beater and attach dough hook. Attach bowl and flat a slow boil until pasta is "al dente" or slightly firm to Speed 2 and mix for 30 seconds to mixer. Turn to the bite. Gradually add pasta and continue to cook at beater to 1 minute. Pasta floats on top of the water as above...
Use & Care Guide
Page 67
... the KitchenAid way. • Start with a 5-quart mixer. • NEVER use recipes calling for more than making dough with the new process. Cut 12 equal strips about 15 minutes. Form each ball in greased bowl, turning to 12ϫ9-inch rectangle. For your convenience, we offer these tips to help you are completely comfortable with a 6-quart mixer. • Use a candy thermometer or other kitchen thermometer...
... the KitchenAid way. • Start with a 5-quart mixer. • NEVER use recipes calling for more than making dough with the new process. Cut 12 equal strips about 15 minutes. Form each ball in greased bowl, turning to 12ϫ9-inch rectangle. For your convenience, we offer these tips to help you are completely comfortable with a 6-quart mixer. • Use a candy thermometer or other kitchen thermometer...
Use & Care Guide
Page 81
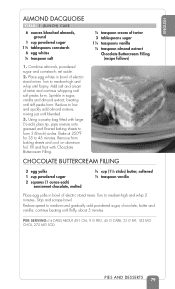
...: (1⁄8 CAKE) ABOUT 491 CAL, 9 G PRO, 45 G CARB, 33 G FAT, 102 MG CHOL, 272 MG SOD PIES AND DESSERTS 79 set aside. 2. Place egg whites in bowl of electric stand mixer. Sprinkle in bowl of electric stand mixer. Bake at 250°F for 35 to form 3 (8-inch) circles. Reduce speed to medium-high and whip 2 minutes. Turn to medium and gradually add powdered sugar, chocolate, butter...
...: (1⁄8 CAKE) ABOUT 491 CAL, 9 G PRO, 45 G CARB, 33 G FAT, 102 MG CHOL, 272 MG SOD PIES AND DESSERTS 79 set aside. 2. Place egg whites in bowl of electric stand mixer. Sprinkle in bowl of electric stand mixer. Bake at 250°F for 35 to form 3 (8-inch) circles. Reduce speed to medium-high and whip 2 minutes. Turn to medium and gradually add powdered sugar, chocolate, butter...
Use & Care Guide
Page 142
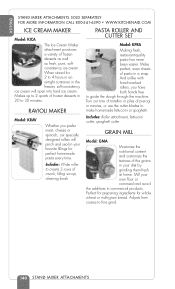
... ice cream. Turn out tons of tortellini or piles of the grains in your own flour or cornmeal and avoid the additives in commercial products. Includes: Roller attachment, fettuccini cutter, spaghetti cutter GRAIN MILL Model: GMA Maximize the nutritional content and customize the textures of pierogi in minutes, or use the cutter blades to guide the dough through the machine. Adjusts...
... ice cream. Turn out tons of tortellini or piles of the grains in your own flour or cornmeal and avoid the additives in commercial products. Includes: Roller attachment, fettuccini cutter, spaghetti cutter GRAIN MILL Model: GMA Maximize the nutritional content and customize the textures of pierogi in minutes, or use the cutter blades to guide the dough through the machine. Adjusts...

Parts List
Page 3
... 240494−2 Latch 11 3400020 Screw, 10−24 x 1/2 12 110679 Screw, Pivot 13 116241 Washer, Spring 14 9706619 Bowl (5 QT) 15 9707944 Beater, Flat 16 9706619 Bowl & Base (5 QT) 17 9707671 Dough Hook 18 9704329 Wire Whip 19 9706633 Pouring Shield 3 8204547 No. BASE AND PEDESTAL UNIT For Model: KSM152 Illus. DESCRIPTION 1 Literature Parts LIT9707917 Use And Care Guide LIT8204547 Repair Parts List 2 4162529 Screw Cap Kit 3 4176024 Lever, Latch 4 24450 Link, Latch 5 115792...
... 240494−2 Latch 11 3400020 Screw, 10−24 x 1/2 12 110679 Screw, Pivot 13 116241 Washer, Spring 14 9706619 Bowl (5 QT) 15 9707944 Beater, Flat 16 9706619 Bowl & Base (5 QT) 17 9707671 Dough Hook 18 9704329 Wire Whip 19 9706633 Pouring Shield 3 8204547 No. BASE AND PEDESTAL UNIT For Model: KSM152 Illus. DESCRIPTION 1 Literature Parts LIT9707917 Use And Care Guide LIT8204547 Repair Parts List 2 4162529 Screw Cap Kit 3 4176024 Lever, Latch 4 24450 Link, Latch 5 115792...

Parts List
Page 5
CASE, GEARING AND PLANETARY UNIT For Model: KSM152 Illus. Part No. DESCRIPTION 1 Gearcase Motor Housing (Includes Illus 2) 2 16897 Ring, Attachment Hub 3 242765−2 Cap, Attachment Hub 4 240374 Thumb Screw 5 Band, Trim 10 4159479 Lock Washer, #10 Light 11 3180161 Washer, Fiber Black, Gray 12 4162897 Worm Gear (23T) 14 240308 Worm Gear Bracket And Bearing 15 3400022 Screw And L.W. Type F 55 Cover, End 56 4162914 Screw, 6−32 X 3/8 Phil. Illus. 19...
CASE, GEARING AND PLANETARY UNIT For Model: KSM152 Illus. Part No. DESCRIPTION 1 Gearcase Motor Housing (Includes Illus 2) 2 16897 Ring, Attachment Hub 3 242765−2 Cap, Attachment Hub 4 240374 Thumb Screw 5 Band, Trim 10 4159479 Lock Washer, #10 Light 11 3180161 Washer, Fiber Black, Gray 12 4162897 Worm Gear (23T) 14 240308 Worm Gear Bracket And Bearing 15 3400022 Screw And L.W. Type F 55 Cover, End 56 4162914 Screw, 6−32 X 3/8 Phil. Illus. 19...

Parts List
Page 7
... (RVS−A) 9704568 Pouring Shield (KPS2CL) 4164824 Pasta Maker Plates (SNP−A) 4164774 Fruit/Vegetable Strainer And Food Grinder (FVS/FG−A) 3180617 Cover, Decorative (Cotton Polyester) 4162838 Food Tray (FT) 4164748 Juicer (JE) 4164747 Can Opener (CO) 4164803 Sausage Stuffer Kit (SSA) 3177924 Bowl Cover, Plastic Non−Sealing 4163337 Bowl, Stainless With Handle 3180262 Bowl, 3 Qt. 4162160 Bowl, Satin Stainless 7 8204547 Pan Hd. MOTOR AND CONTROL PARTS For Model: KSM152 Illus. Part No.
... (RVS−A) 9704568 Pouring Shield (KPS2CL) 4164824 Pasta Maker Plates (SNP−A) 4164774 Fruit/Vegetable Strainer And Food Grinder (FVS/FG−A) 3180617 Cover, Decorative (Cotton Polyester) 4162838 Food Tray (FT) 4164748 Juicer (JE) 4164747 Can Opener (CO) 4164803 Sausage Stuffer Kit (SSA) 3177924 Bowl Cover, Plastic Non−Sealing 4163337 Bowl, Stainless With Handle 3180262 Bowl, 3 Qt. 4162160 Bowl, Satin Stainless 7 8204547 Pan Hd. MOTOR AND CONTROL PARTS For Model: KSM152 Illus. Part No.


