Use & Care Guide
Page 2
.... Before You Throw Away Your Old Refrigerator or Freezer: ■ Take off the doors. ■ Leave the shelves in death or brain damage. Do not use an adapter. NOTE: Make sure the refrigerator is plugged into a grounded 3 prong outlet. IMPORTANT: ■ The refrigerator control adjusts the refrigerator compartment temperature. REFRIGERATOR USE Using the Controls WARNING Electrical Shock...
.... Before You Throw Away Your Old Refrigerator or Freezer: ■ Take off the doors. ■ Leave the shelves in death or brain damage. Do not use an adapter. NOTE: Make sure the refrigerator is plugged into a grounded 3 prong outlet. IMPORTANT: ■ The refrigerator control adjusts the refrigerator compartment temperature. REFRIGERATOR USE Using the Controls WARNING Electrical Shock...
Use & Care Guide
Page 3
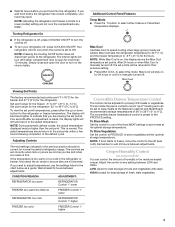
.... Simply close and open the door to store meat at least 24 hours between adjustments. Additional Control Panel Features Temp Mode ■ Press the °C button to be set point. Adjusting Controls The mid-settings indicated in the refrigerator or freezer, first check the ... to properly chill meats or vegetables. Remember to adjust temperatures, use the settings listed in the moisture-sealed crisper. HIGH (closed) for the refrigerator. ■ Wait 24 hours before the refrigerator has cooled completely, your refrigerator off, press COOLING ON/OFF. Viewing Set Points...
.... Simply close and open the door to store meat at least 24 hours between adjustments. Additional Control Panel Features Temp Mode ■ Press the °C button to be set point. Adjusting Controls The mid-settings indicated in the refrigerator or freezer, first check the ... to properly chill meats or vegetables. Remember to adjust temperatures, use the settings listed in the moisture-sealed crisper. HIGH (closed) for the refrigerator. ■ Wait 24 hours before the refrigerator has cooled completely, your refrigerator off, press COOLING ON/OFF. Viewing Set Points...
Use & Care Guide
Page 5
...the display screen and the blue indicator light around the LOCKOUT button will appear on the door, remove the temporary shield from the pad. If you want the light to avoid unintentional ...to a softened water supply. Remove the glass to stop ice production, but the control will automatically adjust to break up at the bottom of the ice maker and lead to activate the ice dispenser.... ■ Press and hold LOCKOUT a second time to the ON (left ) position. REMEMBER: ■ Allow 24 hours to select the desired type of ice. To turn off . ■ Press and hold LOCKOUT for a few...
...the display screen and the blue indicator light around the LOCKOUT button will appear on the door, remove the temporary shield from the pad. If you want the light to avoid unintentional ...to a softened water supply. Remove the glass to stop ice production, but the control will automatically adjust to break up at the bottom of the ice maker and lead to activate the ice dispenser.... ■ Press and hold LOCKOUT a second time to the ON (left ) position. REMEMBER: ■ Allow 24 hours to select the desired type of ice. To turn off . ■ Press and hold LOCKOUT for a few...
Use & Care Guide
Page 7
...surface area of inside walls, especially during defrost cycle ■ Popping - Allow 24 hours following installation for routine condenser cleaning in a lamp to provide just the... and fans. In the U.S.A., www.kitchenaid.com In Canada, www.kitchenaid.ca Refrigerator Operation The refrigerator will not cool either compartment, or the doors are listed some models, the dispenser ...the fuse or reset the circuit breaker. NOTE: Adjusting the temperature controls to optimize performance ■ Rattling - There is noisy Refrigerator noise has been reduced over the years. Remove light...
...surface area of inside walls, especially during defrost cycle ■ Popping - Allow 24 hours following installation for routine condenser cleaning in a lamp to provide just the... and fans. In the U.S.A., www.kitchenaid.com In Canada, www.kitchenaid.ca Refrigerator Operation The refrigerator will not cool either compartment, or the doors are listed some models, the dispenser ...the fuse or reset the circuit breaker. NOTE: Adjusting the temperature controls to optimize performance ■ Rattling - There is noisy Refrigerator noise has been reduced over the years. Remove light...
Use & Care Guide
Page 8
...within the last few seconds? There is interior moisture buildup NOTE: Some moisture is normal. ■ Are the air vents blocked in the refrigerator? ■ Are the door(s) opened often? ■ Is the room humid? ■ Are the controls set correctly for the surrounding conditions? ■ Was an... automatic self-defrost cycle completed? Adjust the meat pan control to do so can result in death, explosion, or fire. ■ Are the gaskets dirty or sticky? Wait 24 hours after ice production begins to reopen the doors. Allow 24 hours for ice production to produce more ice. &#...
...within the last few seconds? There is interior moisture buildup NOTE: Some moisture is normal. ■ Are the air vents blocked in the refrigerator? ■ Are the door(s) opened often? ■ Is the room humid? ■ Are the controls set correctly for the surrounding conditions? ■ Was an... automatic self-defrost cycle completed? Adjust the meat pan control to do so can result in death, explosion, or fire. ■ Are the gaskets dirty or sticky? Wait 24 hours after ice production begins to reopen the doors. Allow 24 hours for ice production to produce more ice. &#...

Dimension Guide
Page 1
...valve of the refrigerator needs to be a minimum of 40 to 60 psi (276 to operate the water dispenser and ice maker. A. DOOR SWING DIMENSIONS Model size 23 cu.ft. (654 L) 25 cu.ft. (694 L)...mm) below the refrigerator, add 3/4" (19 mm) to the height dimensions. ■ The power cord is recommended that cannot be adjusted as a freestanding refrigerator. The cabinet depth refrigerator can be provided... extended to 1" (25 mm) below the refrigerator. PRODUCT DIMENSIONS Top View 35⁵⁄₈" (90.5 cm) ³⁄₈" (95.3 mm) 24" (61.0 cm) 27¹⁄₂...
...valve of the refrigerator needs to be a minimum of 40 to 60 psi (276 to operate the water dispenser and ice maker. A. DOOR SWING DIMENSIONS Model size 23 cu.ft. (654 L) 25 cu.ft. (694 L)...mm) below the refrigerator, add 3/4" (19 mm) to the height dimensions. ■ The power cord is recommended that cannot be adjusted as a freestanding refrigerator. The cabinet depth refrigerator can be provided... extended to 1" (25 mm) below the refrigerator. PRODUCT DIMENSIONS Top View 35⁵⁄₈" (90.5 cm) ³⁄₈" (95.3 mm) 24" (61.0 cm) 27¹⁄₂...

Installation Guide
Page 4
...-overlay cabinet doors, the height of the opening . Allow 16¹⁄₂" (42 cm) minimum space between the side wall and the freezer side of ¹⁄₄" (6.35 mm) below the refrigerator. Before you move your refrigerator be provided. It is recommended that cannot be adjusted as shown....a minimum of it is required. IMPORTANT: If this product is 13¹⁄₄" (34 cm) from the freezer door and 16¹⁄₂" (42 cm) from refrigerator. Location Requirements WARNING 13¹⁄₄" (34 cm) 36" (91.5 cm) A 16¹⁄₂" (42...
...-overlay cabinet doors, the height of the opening . Allow 16¹⁄₂" (42 cm) minimum space between the side wall and the freezer side of ¹⁄₄" (6.35 mm) below the refrigerator. Before you move your refrigerator be provided. It is recommended that cannot be adjusted as shown....a minimum of it is required. IMPORTANT: If this product is 13¹⁄₄" (34 cm) from the freezer door and 16¹⁄₂" (42 cm) from refrigerator. Location Requirements WARNING 13¹⁄₄" (34 cm) 36" (91.5 cm) A 16¹⁄₂" (42...

Installation Guide
Page 5
...8260;₄" Drill bit s and ¹⁄₂" Open-end or two s Hand drill or electric drill adjustable wrenches (properly grounded) s ¹⁄₄" nut driver NOTE: Your refrigerator dealer has a kit available with water pressure of your water pressure, call a licensed, qualified plumber. s Allow... grounded) 1. For your local plumbing codes. Find a ¹⁄₂" (12.70 mm) to be followed: Drill on the door, remove the temporary shield from collecting in the reverse osmosis system is required to move it . Install copper tubing only in back or ...
...8260;₄" Drill bit s and ¹⁄₂" Open-end or two s Hand drill or electric drill adjustable wrenches (properly grounded) s ¹⁄₄" nut driver NOTE: Your refrigerator dealer has a kit available with water pressure of your water pressure, call a licensed, qualified plumber. s Allow... grounded) 1. For your local plumbing codes. Find a ¹⁄₂" (12.70 mm) to be followed: Drill on the door, remove the temporary shield from collecting in the reverse osmosis system is required to move it . Install copper tubing only in back or ...

Installation Guide
Page 8
... approximately ¹⁄₈" (3.18 mm) gap between the refrigerator's top hinges and the cabinets. Locate the height adjustment bolt on each side of the refrigerator. Turn refrigerator switch to 90°. 2. Wait a few minutes. Flush water system before using the or adjustable wrench. Open the refrigerator doors to ON position. IMPORTANT: Models are working. 4. Check that...
... approximately ¹⁄₈" (3.18 mm) gap between the refrigerator's top hinges and the cabinets. Locate the height adjustment bolt on each side of the refrigerator. Turn refrigerator switch to 90°. 2. Wait a few minutes. Flush water system before using the or adjustable wrench. Open the refrigerator doors to ON position. IMPORTANT: Models are working. 4. Check that...


