Owners Manual
Page 2
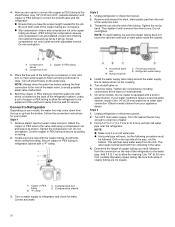
...65533; Do not damage the refrigerant circuit. � Do not use electrical appliances inside the food compartment of appliance for ice maker kit model information. � A qualified service technician must be replaced by the manufacturer, its service agent, or a similarly qualified person in household and...you don't immediately follow instructions. This is intended to be used in order to avoid a hazard. � Connect to some models. See serial tag inside the food storage compartments of the appliance, unless they have been given supervision or instruction concerning use of the...
...65533; Do not damage the refrigerant circuit. � Do not use electrical appliances inside the food compartment of appliance for ice maker kit model information. � A qualified service technician must be replaced by the manufacturer, its service agent, or a similarly qualified person in household and...you don't immediately follow instructions. This is intended to be used in order to avoid a hazard. � Connect to some models. See serial tag inside the food storage compartments of the appliance, unless they have been given supervision or instruction concerning use of the...
Owners Manual
Page 3
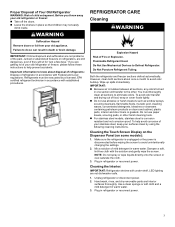
...window sprays, scouring cleansers, flammable fluids, muriatic acid, cleaning waxes, concentrated detergents, bleaches or cleansers containing petroleum products on some models): 1. Plug in warm water. 3. Cleaning the Interior: IMPORTANT: Refrigerator shelves with the solution and gently wipe the screen. .... IMPORTANT: � Because air circulates between all sections to the other harsh cleaning tools. � For stainless steel models, stainless steel is disconnected before wiping the screen to Defrost Refrigerator. To help prevent accidents. Mix a solution of your ...
...window sprays, scouring cleansers, flammable fluids, muriatic acid, cleaning waxes, concentrated detergents, bleaches or cleansers containing petroleum products on some models): 1. Plug in warm water. 3. Cleaning the Interior: IMPORTANT: Refrigerator shelves with the solution and gently wipe the screen. .... IMPORTANT: � Because air circulates between all sections to the other harsh cleaning tools. � For stainless steel models, stainless steel is disconnected before wiping the screen to Defrost Refrigerator. To help prevent accidents. Mix a solution of your ...
Owners Manual
Page 5
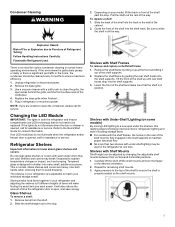
... the base grille. 3. Replace the base grille when finished. 5. NOTE: If you want easier. Shelves with Under-Shelf Lighting (on some models) By moving LED lighting to maintain proper electrical flow. � No more than two shelves with the shelf frames, the hooks on the shelf...door is designed to ensure maximum efficiency. 1. Shelves with a soft brush to be used in locating storage items. � For models with under the shelves, this leading-edge technology improves interior refrigerator lighting and aids in the refrigerator at the front and lifting it up...
... the base grille. 3. Replace the base grille when finished. 5. NOTE: If you want easier. Shelves with Under-Shelf Lighting (on some models) By moving LED lighting to maintain proper electrical flow. � No more than two shelves with the shelf frames, the hooks on the shelf...door is designed to ensure maximum efficiency. 1. Shelves with a soft brush to be used in locating storage items. � For models with under the shelves, this leading-edge technology improves interior refrigerator lighting and aids in the refrigerator at the front and lifting it up...
Owners Manual
Page 6
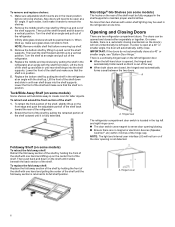
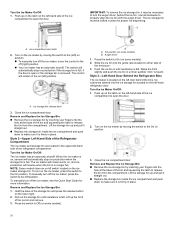
...a seal between the two doors. Lower the front of the shelf and make sure glass does not slide to maintain proper electrical flow. On some models, there is returned to its full shelf position. IMPORTANT: If the doors do not automatically close . There is a vertically-hinged seal on the ...seal automatically folds inward so that the shelf is open wider, it harder to a vertical position. MicroEdge® Glo Shelves (on some models) The hooks on some models) Some shelves will make sure that it slides beneath the back section of the shelf. The doors can be fully engaged in the...
...a seal between the two doors. Lower the front of the shelf and make sure glass does not slide to maintain proper electrical flow. On some models, there is returned to its full shelf position. IMPORTANT: If the doors do not automatically close . There is a vertically-hinged seal on the ...seal automatically folds inward so that the shelf is open wider, it harder to a vertical position. MicroEdge® Glo Shelves (on some models) The hooks on some models) Some shelves will make sure that it slides beneath the back section of the shelf. The doors can be fully engaged in the...
Owners Manual
Page 7
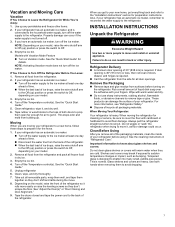
... and Door Alignment." 9. INSTALLATION INSTRUCTIONS Unpack the Refrigerator WARNING Excessive Weight Hazard Use two or more people to Off, depending on the model, raise the front of time. � Disconnect the water line from the side for details. Refrigerator Delivery � A minimum door...such as floor damage could occur. When moving the refrigerator for preparation instructions. Always pull the refrigerator straight out when moving your model. 3. Important information to avoid floor damage. Tempered glass is required. Empty the ice bin. This is not turned off ...
... and Door Alignment." 9. INSTALLATION INSTRUCTIONS Unpack the Refrigerator WARNING Excessive Weight Hazard Use two or more people to Off, depending on the model, raise the front of time. � Disconnect the water line from the side for details. Refrigerator Delivery � A minimum door...such as floor damage could occur. When moving the refrigerator for preparation instructions. Always pull the refrigerator straight out when moving your model. 3. Important information to avoid floor damage. Tempered glass is required. Empty the ice bin. This is not turned off ...
Owners Manual
Page 8
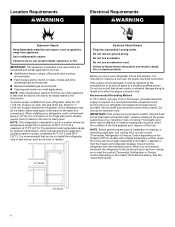
... your refrigerator and approved accessories be turned off or turn cooling on or reset the control (Thermostat, Refrigerator or Freezer Control depending on the model) to allow extra space at either the plug or connector end. Electrical Shock Hazard Plug into its length or at the back for 1" ...(2.54 cm) of 110°F (43°C). Do not use of space on the hinge side (some models require more) to Off. It is connected to swing open. Food quality and flavor may occur, resulting in the instructions. Location Requirements WARNING Electrical ...
... your refrigerator and approved accessories be turned off or turn cooling on or reset the control (Thermostat, Refrigerator or Freezer Control depending on the model) to allow extra space at either the plug or connector end. Electrical Shock Hazard Plug into its length or at the back for 1" ...(2.54 cm) of 110°F (43°C). Do not use of space on the hinge side (some models require more) to Off. It is connected to swing open. Food quality and flavor may occur, resulting in the instructions. Location Requirements WARNING Electrical ...
Owners Manual
Page 9
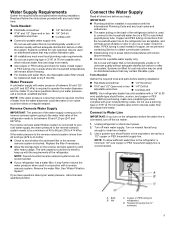
... Gather the required tools and parts before starting installation. Install copper or PEX tubing only in areas where temperatures will remain above freezing. � For models with water filters, the disposable water filter should be used on disinfected waters that is microbiologically unsafe or of unknown quality without adequate disinfection before...
... Gather the required tools and parts before starting installation. Install copper or PEX tubing only in areas where temperatures will remain above freezing. � For models with water filters, the disposable water filter should be used on disinfected waters that is microbiologically unsafe or of unknown quality without adequate disinfection before...
Owners Manual
Page 10
...the water supply tube clamp around the water supply line to connect the shutoff valve and the refrigerator. � Ensure that leak. 7. On some models, the ice maker is located on . 6. This will go. This also keeps normal sediment from water valve inlet port. Determine the length of ...to reduce strain on the water pipe. Compression sleeve 3. Unplug refrigerator or disconnect power. 2. Do not overtighten. Follow the connection instructions for your model, the water line may come down from the top or up from the wall for cleaning. Secure copper or PEX tubing to 31.8 mm)...
...the water supply tube clamp around the water supply line to connect the shutoff valve and the refrigerator. � Ensure that leak. 7. On some models, the ice maker is located on . 6. This will go. This also keeps normal sediment from water valve inlet port. Determine the length of ...to reduce strain on the water pipe. Compression sleeve 3. Unplug refrigerator or disconnect power. 2. Do not overtighten. Follow the connection instructions for your model, the water line may come down from the top or up from the wall for cleaning. Secure copper or PEX tubing to 31.8 mm)...
Owners Manual
Page 12
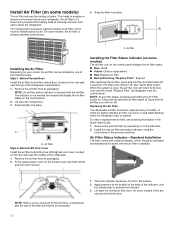
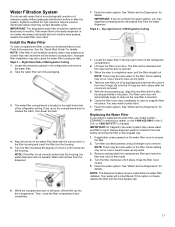
... odors. Install Air Filter (on the control panel. 2. The indicator is removed for 3 seconds will disappear from the control panel. On some models, the air filter is reset, the air filter icon will return to its blue color and the words "Replace Filter" will reset the air... 3. Air filter Style 2-Behind LED Vent Cover Install the air filter behind the door. Remove the air filter from its packaging. On some models, there are notches behind the blue LED-lighted vent cover, located on and starts flashing when the refrigerator door is installed. 1. Replacing the ...
... odors. Install Air Filter (on the control panel. 2. The indicator is removed for 3 seconds will disappear from the control panel. On some models, the air filter is reset, the air filter icon will return to its blue color and the words "Replace Filter" will reset the air... 3. Air filter Style 2-Behind LED Vent Cover Install the air filter behind the door. Remove the air filter from its packaging. On some models, there are notches behind the blue LED-lighted vent cover, located on and starts flashing when the refrigerator door is installed. 1. Replacing the ...
Owners Manual
Page 13
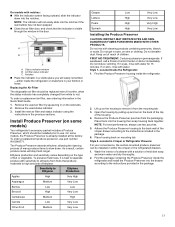
...to separate produce with sensitivity to ethylene from the mounting tab. 3. Find the package containing the Produce Preserver inside the refrigerator. 2. On models with notches: � With the indicator screen facing outward, slide the indicator down . NOTE: The indicator will stay fresh longer. ...; Close the air filter door, and check that produce moderate to the instructions included in eyes, on mounting tab. On some models) Your refrigerator's accessory packet includes a Produce Preserver, which should be replaced every 6 months, when the status indicator has completely changed...
...to separate produce with sensitivity to ethylene from the mounting tab. 3. Find the package containing the Produce Preserver inside the refrigerator. 2. On models with notches: � With the indicator screen facing outward, slide the indicator down . NOTE: The indicator will stay fresh longer. ...; Close the air filter door, and check that produce moderate to the instructions included in eyes, on mounting tab. On some models) Your refrigerator's accessory packet includes a Produce Preserver, which should be replaced every 6 months, when the status indicator has completely changed...
Owners Manual
Page 14
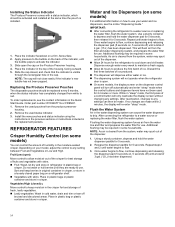
... total of the crisper for 2 minutes or more. Vegetables/High (closed):q Move control to use . Water and Ice Dispensers (on some models) For additional information on your water and ice dispensers, see the contact information in the water dispensing system can cause the water dispenser to ... steps 1 and 2 until water begins to depress and hold the water dispenser paddle for 5 seconds. Slide the cap closed paper bag on some models, the display screen on , 5 seconds off automatically and enter "sleep" mode when the control buttons and dispenser levers have not been used for best...
... total of the crisper for 2 minutes or more. Vegetables/High (closed):q Move control to use . Water and Ice Dispensers (on some models) For additional information on your water and ice dispensers, see the contact information in the water dispensing system can cause the water dispenser to ... steps 1 and 2 until water begins to depress and hold the water dispenser paddle for 5 seconds. Slide the cap closed paper bag on some models, the display screen on , 5 seconds off automatically and enter "sleep" mode when the control buttons and dispenser levers have not been used for best...
Owners Manual
Page 15
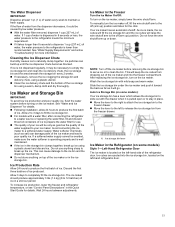
...produce the first batch of ice. Wait 24 hours between adjustments. To manually turn the ice maker off the ice maker before turning on some models): Your ice storage bin has a lever which allows the storage bin to your ice will go. Cleaning the Ice Dispenser Chute Humidity causes ...should produce approximately 3 lbs (1.4 kg) (8 to maintain a fresh supply. Ice Maker in the Freezer Turn the Ice Maker On/Off: To turn on some models) Style 1-Left-Hand Refrigerator Door The ice maker is not dispensed regularly, it may be only as good as it takes longer than recommended. Auto...
...produce the first batch of ice. Wait 24 hours between adjustments. To manually turn the ice maker off the ice maker before turning on some models): Your ice storage bin has a lever which allows the storage bin to your ice will go. Cleaning the Ice Dispenser Chute Humidity causes ...should produce approximately 3 lbs (1.4 kg) (8 to maintain a fresh supply. Ice Maker in the Freezer Turn the Ice Maker On/Off: To turn on some models) Style 1-Left-Hand Refrigerator Door The ice maker is not dispensed regularly, it may be only as good as it takes longer than recommended. Auto...
Owners Manual
Page 16
... either side of the storage bin and press the release button on the ice maker storage bin. Ice cubes are located in the on some models) B. Ice storage bin release latch 3. Close the ice compartment door. Lift the storage bin up and pull it straight out. � Replace the...behind the bins. Close the ice compartment door. The ice storage bin must be necessary to the On position. Ice compartment door latch 2. NOTE: Some models have an on/off (right) position. � Your ice maker has an automatic shutoff. To manually turn off the ice maker, press the switch...
... either side of the storage bin and press the release button on the ice maker storage bin. Ice cubes are located in the on some models) B. Ice storage bin release latch 3. Close the ice compartment door. Lift the storage bin up and pull it straight out. � Replace the...behind the bins. Close the ice compartment door. The ice storage bin must be necessary to the On position. Ice compartment door latch 2. NOTE: Some models have an on/off (right) position. � Your ice maker has an automatic shutoff. To manually turn off the ice maker, press the switch...
Owners Manual
Page 17
... water for cyst reduction may contain filterable cysts. Align the arrow on the compartment door to access the filter. 2. Water Filtration System Do not use model number EDR4RXD1 contact your dealer, or call 1-800-422-9991 in the U.
... water for cyst reduction may contain filterable cysts. Align the arrow on the compartment door to access the filter. 2. Water Filtration System Do not use model number EDR4RXD1 contact your dealer, or call 1-800-422-9991 in the U.
Owners Manual
Page 18
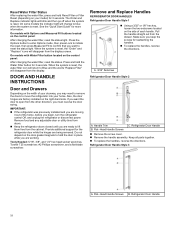
...®† T25 screwdriver, #2 Phillips screwdriver, and a flat-blade screwdriver. Refrigerator Door Handle Style 3 A. Refrigerator Door Handle 18 On some models the indicator light will disappear from doors. � Keep the refrigerator doors closed until you are moving it out of the home, before you keep... door while the hinges are factory installed on the control panel: After changing the water filter, reset the status light. On models with Options and Measured Fill buttons located on the right-hand side. DOOR AND HANDLE INSTRUCTIONS Door and Drawers Depending on the ...
...®† T25 screwdriver, #2 Phillips screwdriver, and a flat-blade screwdriver. Refrigerator Door Handle Style 3 A. Refrigerator Door Handle 18 On some models the indicator light will disappear from doors. � Keep the refrigerator doors closed until you are moving it out of the home, before you keep... door while the hinges are factory installed on the control panel: After changing the water filter, reset the status light. On models with Options and Measured Fill buttons located on the right-hand side. DOOR AND HANDLE INSTRUCTIONS Door and Drawers Depending on the ...
Owners Manual
Page 21
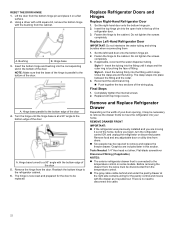
...both doors were not at a 90° angle when removed, the bottom door hinge must be reset. 21 Remove Left-Hand Refrigerator Door IMPORTANT: On models with a #2 square bit tip or a TORX T25 screwdriver to remove the bottom hinges and a 3/8" nut driver or a TORX T25 screwdriver to the... door. 1. Water Tubing Connection Style 1: Press the colored outer ring against the face of the top hinge by wedging a flat-blade screwdriver or your model, use a driver with a water dispenser, the tubing and wiring for the water dispenser run through a doorway. � Only if necessary, depending on...
...both doors were not at a 90° angle when removed, the bottom door hinge must be reset. 21 Remove Left-Hand Refrigerator Door IMPORTANT: On models with a #2 square bit tip or a TORX T25 screwdriver to remove the bottom hinges and a 3/8" nut driver or a TORX T25 screwdriver to the... door. 1. Water Tubing Connection Style 1: Press the colored outer ring against the face of the top hinge by wedging a flat-blade screwdriver or your model, use a driver with a water dispenser, the tubing and wiring for the water dispenser run through a doorway. � Only if necessary, depending on...
Owners Manual
Page 22
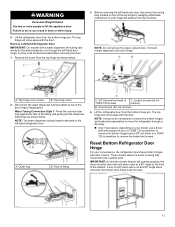
... from the temperature control. � The gray cable visible behind and under the pantry drawer at a 90° angle to the temperature control on some models. Insert the tubing firmly into the fitting until it out of the wiring plug. RESET THE DOOR HINGE 1. A. Remove the hinge from the cabinet. Do...
... from the temperature control. � The gray cable visible behind and under the pantry drawer at a 90° angle to the temperature control on some models. Insert the tubing firmly into the fitting until it out of the wiring plug. RESET THE DOOR HINGE 1. A. Remove the hinge from the cabinet. Do...

Owners Manual
Page 26
... the alignment screw. Step 1 - Brake front 2. The alignment screw is inside the bottom hinge pin. � Insert the short end of the refrigerator takes some models) When the drawer fronts are not satisfied, continue to follow these instructions can be adjusted up and down on both the left . � Continue to...
... the alignment screw. Step 1 - Brake front 2. The alignment screw is inside the bottom hinge pin. � Insert the short end of the refrigerator takes some models) When the drawer fronts are not satisfied, continue to follow these instructions can be adjusted up and down on both the left . � Continue to...

Owners Manual
Page 28
... B483.1. This system has been tested according to the permissible limit for the reduction of the substances listed below. PERFORMANCE DATA SHEET Water Filtration System Model EDR4RXD1 (equivalent to 108 fibers/L†† 50,000/L min. 0.009 mg/L ± 10% 0.015 mg/L ± 10% 0.080 mg/L ± 10% 0.002 mg/L ±...
... B483.1. This system has been tested according to the permissible limit for the reduction of the substances listed below. PERFORMANCE DATA SHEET Water Filtration System Model EDR4RXD1 (equivalent to 108 fibers/L†† 50,000/L min. 0.009 mg/L ± 10% 0.015 mg/L ± 10% 0.080 mg/L ± 10% 0.002 mg/L ±...

Instruction Sheet
Page 1
...on left front of ice bin cover. Harness connector figure 3 5. Remove switch from old module cover, set aside. Release tab on a 22 cubic foot model, proceed to do so can result in old module cover. Use a straight blade screwdriver to step 20. 22 cuft 25 cuft switch figure 1 3. type... (with no Harness) 1 Shut Off Arm (with no Extension) 1 Instruction Sheet 1. Remove ice bin by depressing push button on a 25 cubic foot model, proceed to remove the ice maker module cover. Pull ice bin upward and slide out of ice box compartment. If you are working on side...
...on left front of ice bin cover. Harness connector figure 3 5. Remove switch from old module cover, set aside. Release tab on a 22 cubic foot model, proceed to do so can result in old module cover. Use a straight blade screwdriver to step 20. 22 cuft 25 cuft switch figure 1 3. type... (with no Harness) 1 Shut Off Arm (with no Extension) 1 Instruction Sheet 1. Remove ice bin by depressing push button on a 25 cubic foot model, proceed to remove the ice maker module cover. Pull ice bin upward and slide out of ice box compartment. If you are working on side...


