Use & Care Guide
Page 2
... complete the following for service outside the United States, see the Warranty section. Give the consultant your personal records: Model Number Serial Number Date Purchased Store Name 2 Hassle-Free Replacement Warranty We're so confident the quality of our products meets the exacting standards of KitchenAid that, if your stand mixer should fail within the first year of ownership, KitchenAid will assure you reside...
... complete the following for service outside the United States, see the Warranty section. Give the consultant your personal records: Model Number Serial Number Date Purchased Store Name 2 Hassle-Free Replacement Warranty We're so confident the quality of our products meets the exacting standards of KitchenAid that, if your stand mixer should fail within the first year of ownership, KitchenAid will assure you reside...
Use & Care Guide
Page 3
... Cakes and Frostings 27 Cookies, Bars, and Candies 40 Pies and Desserts 50 Yeast Breads and Quick Breads 55 General Instructions for Service Outside the 50 United States and Puerto Rico .....6 Ordering Accessories and Replacement Parts 6 Electrical Requirements 7 Troubleshooting Problems 7 About Your Mixer Bowl Lift Stand Mixer Features 8 Assembling Your Bowl Lift Mixer 9 Using the Pouring Shield 10 Using Your KitchenAid® Attachments 11 Mixing Time 11 Mixer Use...11 Care and Cleaning 12 Beater to Bowl Clearance 12 Speed Control Guide - 10 Speed Mixers 13 Mixing...
... Cakes and Frostings 27 Cookies, Bars, and Candies 40 Pies and Desserts 50 Yeast Breads and Quick Breads 55 General Instructions for Service Outside the 50 United States and Puerto Rico .....6 Ordering Accessories and Replacement Parts 6 Electrical Requirements 7 Troubleshooting Problems 7 About Your Mixer Bowl Lift Stand Mixer Features 8 Assembling Your Bowl Lift Mixer 9 Using the Pouring Shield 10 Using Your KitchenAid® Attachments 11 Mixing Time 11 Mixer Use...11 Care and Cleaning 12 Beater to Bowl Clearance 12 Speed Control Guide - 10 Speed Mixers 13 Mixing...
Use & Care Guide
Page 4
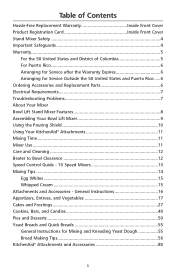
... follow instructions. Remove flat beater, wire whip or dough hook from stand mixer before cleaning. 5. Always read and obey all instructions. 2. Avoid contacting moving parts. Keep hands, hair, clothing, as well as spatulas and other liquid. 3. Call the KitchenAid Customer Satisfaction Center at 1-800-541-6390 for examination, repair or electrical or mechanical adjustment. All safety messages will tell you what the potential hazard is used by KitchenAid may...
... follow instructions. Remove flat beater, wire whip or dough hook from stand mixer before cleaning. 5. Always read and obey all instructions. 2. Avoid contacting moving parts. Keep hands, hair, clothing, as well as spatulas and other liquid. 3. Call the KitchenAid Customer Satisfaction Center at 1-800-541-6390 for examination, repair or electrical or mechanical adjustment. All safety messages will tell you what the potential hazard is used by KitchenAid may...
Use & Care Guide
Page 5
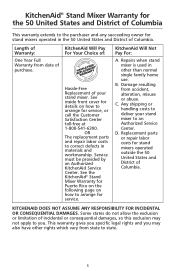
...-6390. Any shipping or handling costs to deliver your stand mixer. This warranty gives you specific legal rights and you . KitchenAid Will Not Pay For: A. Replacement parts or repair labor costs for details on how to an Authorized Service Center. KitchenAid® Stand Mixer Warranty for the 50 United States and District of Columbia This warranty extends to state. 5 See inside front cover for stand mixers operated outside the 50 United...
...-6390. Any shipping or handling costs to deliver your stand mixer. This warranty gives you specific legal rights and you . KitchenAid Will Not Pay For: A. Replacement parts or repair labor costs for details on how to an Authorized Service Center. KitchenAid® Stand Mixer Warranty for the 50 United States and District of Columbia This warranty extends to state. 5 See inside front cover for stand mixers operated outside the 50 United...

Use & Care Guide
Page 7
... maximum rating is normal. 2. Troubleshooting Problems Please read the following : - Is the stand mixer plugged in working order? If the problem is closed. - Do not use . Under heavy loads with electric motors. 3. This is common with extended mixing time periods, you have a qualified electrician or serviceman install an outlet near the appliance. If the flat beater hits the bowl, stop the stand mixer. Do not return the stand mixer to Bowl Clearance" section. The stand mixer...
... maximum rating is normal. 2. Troubleshooting Problems Please read the following : - Is the stand mixer plugged in working order? If the problem is closed. - Do not use . Under heavy loads with electric motors. 3. This is common with extended mixing time periods, you have a qualified electrician or serviceman install an outlet near the appliance. If the flat beater hits the bowl, stop the stand mixer. Do not return the stand mixer to Bowl Clearance" section. The stand mixer...
Use & Care Guide
Page 8
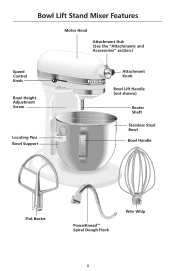
Bowl Lift Stand Mixer Features Motor Head Attachment Hub (See the "Attachments and Accessories" section.) Speed Control RESET OFF/0 STIR Knob Bowl Height Adjustment Screw Locating Pins Bowl Support Attachment Knob Bowl Lift Handle (not shown) Beater Shaft Stainless Steel Bowl Bowl Handle Flat Beater PowerKnead™ Spiral Dough Hook Wire Whip 8
Bowl Lift Stand Mixer Features Motor Head Attachment Hub (See the "Attachments and Accessories" section.) Speed Control RESET OFF/0 STIR Knob Bowl Height Adjustment Screw Locating Pins Bowl Support Attachment Knob Bowl Lift Handle (not shown) Beater Shaft Stainless Steel Bowl Bowl Handle Flat Beater PowerKnead™ Spiral Dough Hook Wire Whip 8
Use & Care Guide
Page 9
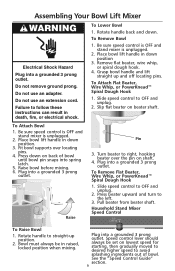
... beater from beater shaft. Household Stand Mixer Speed Control RESET OFF/0STIR To Raise Bowl 1. Do not use an extension cord. Rotate handle back and down on beater shaft. Place bowl lift handle in down position 3. Place bowl lift handle in down position. 3. To Remove Flat Beater, Wire Whip, or PowerKnead™ Spiral Dough Hook 1. Speed control lever should always be in death, fire, or electrical shock. Assembling Your Bowl Lift Mixer Electrical Shock Hazard Plug into a grounded 3 prong outlet. Slip flat beater on back of bowl. Raise bowl before mixing. 6. Turn...
... beater from beater shaft. Household Stand Mixer Speed Control RESET OFF/0STIR To Raise Bowl 1. Do not use an extension cord. Rotate handle back and down on beater shaft. Place bowl lift handle in down position 3. Place bowl lift handle in down position. 3. To Remove Flat Beater, Wire Whip, or PowerKnead™ Spiral Dough Hook 1. Speed control lever should always be in death, fire, or electrical shock. Assembling Your Bowl Lift Mixer Electrical Shock Hazard Plug into a grounded 3 prong outlet. Slip flat beater on back of bowl. Raise bowl before mixing. 6. Turn...
Use & Care Guide
Page 10
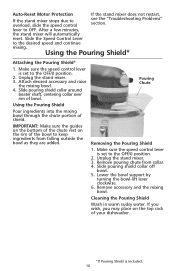
... the speed control lever is set to overload, slide the speed control see the "Troubleshooting Problems" section. Unplug the stand mixer. 3. Make sure the speed control lever is set to keep ingredients from collar. 4. Slide pouring shield collar off bowl. 5. Using the Pouring Shield Pour ingredients into the mixing bowl through the chute portion of bowl. Cleaning the Pouring Shield Wash in warm sudsy water. Slide pouring shield collar around beater shaft, centering collar over rim of shield. Using the Pouring Shield* Attaching the Pouring Shield* 1. Unplug the stand...
... the speed control lever is set to overload, slide the speed control see the "Troubleshooting Problems" section. Unplug the stand mixer. 3. Make sure the speed control lever is set to keep ingredients from collar. 4. Slide pouring shield collar off bowl. 5. Using the Pouring Shield Pour ingredients into the mixing bowl through the chute portion of bowl. Cleaning the Pouring Shield Wash in warm sudsy water. Slide pouring shield collar around beater shaft, centering collar over rim of shield. Using the Pouring Shield* Attaching the Pouring Shield* 1. Unplug the stand...
Use & Care Guide
Page 11
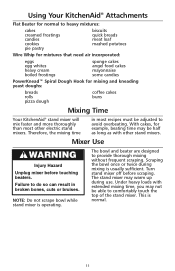
... KitchenAid® stand mixer will mix faster and more thoroughly than most recipes must be able to comfortably touch the top of the stand mixer. The stand mixer may not be adjusted to avoid overbeating. Under heavy loads with other electric stand mixers. Using Your KitchenAid® Attachments Flat Beater for normal to heavy mixtures: cakes creamed frostings candies cookies pie pastry biscuits quick breads meat loaf mashed potatoes Wire Whip for mixtures that need...
... KitchenAid® stand mixer will mix faster and more thoroughly than most recipes must be able to comfortably touch the top of the stand mixer. The stand mixer may not be adjusted to avoid overbeating. Under heavy loads with other electric stand mixers. Using Your KitchenAid® Attachments Flat Beater for normal to heavy mixtures: cakes creamed frostings candies cookies pie pastry biscuits quick breads meat loaf mashed potatoes Wire Whip for mixtures that need...
Use & Care Guide
Page 12
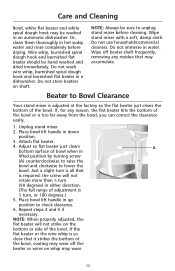
... away from the bowl, you can correct the clearance easily. 1. Do not store beaters on whip may accumulate. Unplug stand mixer. 2. Care and Cleaning Bowl, white flat beater and white spiral dough hook may be washed in a dishwasher. Wire whip, burnished spiral dough hook and burnished flat beater should be hand washed and dried immediately. Place bowl lift handle in water. Adjust so flat beater just clears A bottom surface of the bowl or is required: the screw will not...
... away from the bowl, you can correct the clearance easily. 1. Do not store beaters on whip may accumulate. Unplug stand mixer. 2. Care and Cleaning Bowl, white flat beater and white spiral dough hook may be washed in a dishwasher. Wire whip, burnished spiral dough hook and burnished flat beater should be hand washed and dried immediately. Place bowl lift handle in water. Adjust so flat beater just clears A bottom surface of the bowl or is required: the screw will not...
Use & Care Guide
Page 13
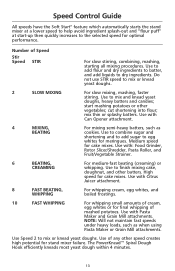
... attachment. 8 FAST BEATING, WHIPPING For whipping cream, egg whites, and boiled frostings. 10 FAST WHIPPING For whipping small amounts of any other speed creates high potential for cake mixes. Use to combine sugar and shortening and to add sugar to egg whites for optimal performance. Use with Can Opener attachment. 4 MIXING, BEATING For mixing semi-heavy batters, such as when using Pasta Maker or Grain Mill attachments. Use Speed 2 to mix and knead yeast doughs, heavy batters and candies; Speed Control Guide...
... attachment. 8 FAST BEATING, WHIPPING For whipping cream, egg whites, and boiled frostings. 10 FAST WHIPPING For whipping small amounts of any other speed creates high potential for cake mixes. Use to combine sugar and shortening and to add sugar to egg whites for optimal performance. Use with Can Opener attachment. 4 MIXING, BEATING For mixing semi-heavy batters, such as when using Pasta Maker or Grain Mill attachments. Use Speed 2 to mix and knead yeast doughs, heavy batters and candies; Speed Control Guide...
Use & Care Guide
Page 14
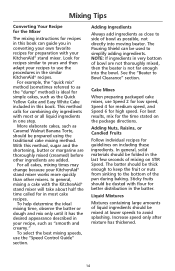
... step. The Pouring Shield can guide you in converting your own favorite recipes for recipes similar to yours and then adapt your recipes to use the procedures in the similar KitchenAid® recipes. Mixing Tips Converting Your Recipe for the Mixer The mixing instructions for recipes in this book can be mixed at lower speeds to avoid splashing. Look for preparation with most cake recipes. In general, mixing a cake with flour for...
... step. The Pouring Shield can guide you in converting your own favorite recipes for recipes similar to yours and then adapt your recipes to use the procedures in the similar KitchenAid® recipes. Mixing Tips Converting Your Recipe for the Mixer The mixing instructions for recipes in this book can be mixed at lower speeds to avoid splashing. Look for preparation with most cake recipes. In general, mixing a cake with flour for...
Use & Care Guide
Page 16
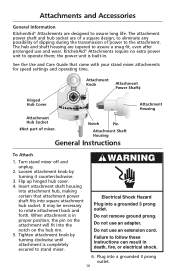
...; Attachment Hub Socket ‡Not part of power to rotate attachment back and forth. Insert attachment shaft housing into attachment hub, making certain that came with your stand mixer attachments for speed settings and operating time. Do not use and wear. Attachments and Accessories General Information KitchenAid® Attachments are designed to stand mixer. the power unit is in proper position, the pin on the attachment will fit into a grounded 3 prong outlet. 16 Electrical Shock Hazard Plug into square attachment hub socket. Turn stand mixer...
...; Attachment Hub Socket ‡Not part of power to rotate attachment back and forth. Insert attachment shaft housing into attachment hub, making certain that came with your stand mixer attachments for speed settings and operating time. Do not use and wear. Attachments and Accessories General Information KitchenAid® Attachments are designed to stand mixer. the power unit is in proper position, the pin on the attachment will fit into a grounded 3 prong outlet. 16 Electrical Shock Hazard Plug into square attachment hub socket. Turn stand mixer...
Use & Care Guide
Page 17
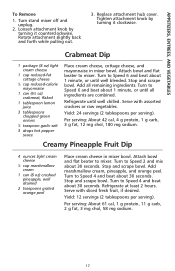
...). Turn stand mixer off and unplug. 2. Crabmeat Dip 1 package (8 oz) light cream cheese 1 cup reduced-fat cottage cheese 1⁄4 cup reduced-calorie mayonnaise 1 can (8 oz) crushed pineapple, well drained 2 teaspoons grated orange peel Place cream cheese in mixer bowl. Attach bowl and flat beater to mixer. APPETIZERS, ENTREES, AND VEGETABLES To Remove 1. Yield: 24 servings (2 tablespoons per serving). Stop and scrape bowl. Turn to Speed 2 and mix about...
...). Turn stand mixer off and unplug. 2. Crabmeat Dip 1 package (8 oz) light cream cheese 1 cup reduced-fat cottage cheese 1⁄4 cup reduced-calorie mayonnaise 1 can (8 oz) crushed pineapple, well drained 2 teaspoons grated orange peel Place cream cheese in mixer bowl. Attach bowl and flat beater to mixer. APPETIZERS, ENTREES, AND VEGETABLES To Remove 1. Yield: 24 servings (2 tablespoons per serving). Stop and scrape bowl. Turn to Speed 2 and mix about...
Use & Care Guide
Page 30
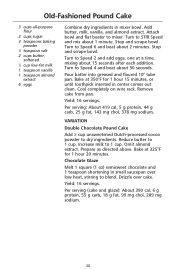
... completely on wire rack. Remove cake from pan. Attach bowl and flat beater to 1 cup. Pour batter into greased and floured 10" tube pan. Old-Fashioned Pound Cake 3 cups all-purpose flour 2 cups sugar 3 teaspoons baking powder 1⁄2 teaspoon salt 2 cups butter, softened 1⁄2 cup low-fat milk 1 teaspoon vanilla 1 teaspoon almond extract 6 eggs Combine dry ingredients in mixer bowl. Turn to blend...
... completely on wire rack. Remove cake from pan. Attach bowl and flat beater to 1 cup. Pour batter into greased and floured 10" tube pan. Old-Fashioned Pound Cake 3 cups all-purpose flour 2 cups sugar 3 teaspoons baking powder 1⁄2 teaspoon salt 2 cups butter, softened 1⁄2 cup low-fat milk 1 teaspoon vanilla 1 teaspoon almond extract 6 eggs Combine dry ingredients in mixer bowl. Turn to blend...
Use & Care Guide
Page 31
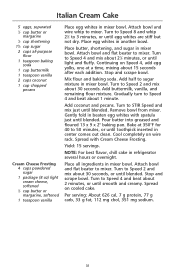
... wire whip to STIR Speed and mix just until blended. Yield: 15 servings. Place butter, shortening, and sugar in refrigerator several hours or overnight. Add buttermilk, vanilla, and remaining flour mixture. Attach bowl and flat beater to Speed 4 and beat about 30 seconds, or until smooth and creamy. Add coconut and pecans. NOTE: For best flavor, chill cake in mixer bowl. Stop and scrape bowl. Remove bowl...
... wire whip to STIR Speed and mix just until blended. Yield: 15 servings. Place butter, shortening, and sugar in refrigerator several hours or overnight. Add buttermilk, vanilla, and remaining flour mixture. Attach bowl and flat beater to Speed 4 and beat about 30 seconds, or until smooth and creamy. Add coconut and pecans. NOTE: For best flavor, chill cake in mixer bowl. Stop and scrape bowl. Remove bowl...
Use & Care Guide
Page 38
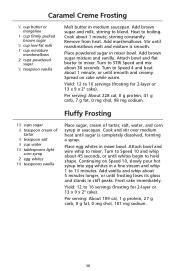
... and stands in mixer bowl. Continuing on cake while warm. Spread on Speed 10, slowly pour hot syrup into egg whites in saucepan. Turn to 11⁄2 minutes. Add vanilla and whip about 5 minutes longer, or until marshmallows melt and mixture is completely dissolved, forming a syrup. Remove from heat. Yield: 12 to blend. Fluffy Frosting 11⁄2 cups sugar 1⁄2 teaspoon cream...
... and stands in mixer bowl. Continuing on cake while warm. Spread on Speed 10, slowly pour hot syrup into egg whites in saucepan. Turn to 11⁄2 minutes. Add vanilla and whip about 5 minutes longer, or until marshmallows melt and mixture is completely dissolved, forming a syrup. Remove from heat. Yield: 12 to blend. Fluffy Frosting 11⁄2 cups sugar 1⁄2 teaspoon cream...
Use & Care Guide
Page 39
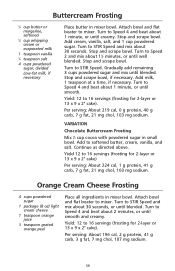
... Frosting Mix 1⁄3 cup cocoa with powdered sugar in mixer bowl. Yield: 12 to mixer. Buttercream Frosting 1⁄3 cup butter or margarine, softened 1⁄4 cup whipping cream or evaporated milk 1 teaspoon vanilla 1⁄4 teaspoon salt 4 cups powdered sugar, divided Low-fat milk, if necessary Place butter in mixer bowl. Attach bowl and flat beater to 16 servings (frosting for 2-layer or 13 x 9 x 2" cake). Stop and scrape bowl...
... Frosting Mix 1⁄3 cup cocoa with powdered sugar in mixer bowl. Yield: 12 to mixer. Buttercream Frosting 1⁄3 cup butter or margarine, softened 1⁄4 cup whipping cream or evaporated milk 1 teaspoon vanilla 1⁄4 teaspoon salt 4 cups powdered sugar, divided Low-fat milk, if necessary Place butter in mixer bowl. Attach bowl and flat beater to 16 servings (frosting for 2-layer or 13 x 9 x 2" cake). Stop and scrape bowl...
Use & Care Guide
Page 51
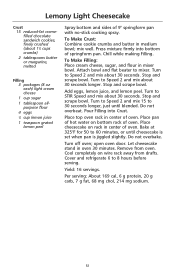
... making Filling. Turn to Speed 2 and mix 15 to 60 minutes, or until blended. open oven door. To Make Filling: Place cream cheese, sugar, and flour in mixer bowl. Do not overbeat. Bake at 325°F for 50 to 30 seconds longer, just until cheesecake is set when pan is jiggled slightly. Turn off oven; Attach bowl and flat beater to Speed 2 and mix about 30 seconds. Turn to mixer. Turn...
... making Filling. Turn to Speed 2 and mix 15 to 60 minutes, or until blended. open oven door. To Make Filling: Place cream cheese, sugar, and flour in mixer bowl. Do not overbeat. Bake at 325°F for 50 to 30 seconds longer, just until cheesecake is set when pan is jiggled slightly. Turn off oven; Attach bowl and flat beater to Speed 2 and mix about 30 seconds. Turn to mixer. Turn...

Parts List
Page 7
.... Part No. DESCRIPTION 1 Literature Parts Use & Care Guide 9708307 U.S. 9708308 Canada 8212278 Repair Parts List 2 9709924 Shield, Pouring 3 W10245251 Bowl, 6 Qt. 4 240185 Pin, Bowl Locating 5 9703474 Latch, Bowl Spring 6 3400018 Screw 7 Bowl Support 8 Base and Foot Assembly 9 9708649 Foot, Rubber 10 9703307 Clip 11 9706787 Rod, Bowl Lift 12 9237 Spring 13 9703439 Washer 14 8533907 Nut 15 Column Assembly 16 9703485 Beater, Flat 17 9703655 Hook, Dough 18 9706885 Arm, Bowl Lift 19 9703491 Whip, Wire 20 9703426 Cam, Adjusting...
.... Part No. DESCRIPTION 1 Literature Parts Use & Care Guide 9708307 U.S. 9708308 Canada 8212278 Repair Parts List 2 9709924 Shield, Pouring 3 W10245251 Bowl, 6 Qt. 4 240185 Pin, Bowl Locating 5 9703474 Latch, Bowl Spring 6 3400018 Screw 7 Bowl Support 8 Base and Foot Assembly 9 9708649 Foot, Rubber 10 9703307 Clip 11 9706787 Rod, Bowl Lift 12 9237 Spring 13 9703439 Washer 14 8533907 Nut 15 Column Assembly 16 9703485 Beater, Flat 17 9703655 Hook, Dough 18 9706885 Arm, Bowl Lift 19 9703491 Whip, Wire 20 9703426 Cam, Adjusting...


