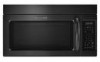
KitchenAid KHMS2040BWH Support and Manuals
Get Help and Manuals for this KitchenAid item
View All Support Options Below
Free KitchenAid KHMS2040BWH manuals!
Problems with KitchenAid KHMS2040BWH?
Ask a Question
Free KitchenAid KHMS2040BWH manuals!
Problems with KitchenAid KHMS2040BWH?
Ask a Question
Popular KitchenAid KHMS2040BWH Manual Pages
Installation Guide - Page 1

... messages in these installation instructions.
The appearance of your particular model may differ slightly from the illustration in this manual and on your appliance. This is , tell you how to Wall 8 Prepare Upper Cabinet 8 Install Damper Assembly 9 Install the Microwave Oven 9 Complete Installation 10 VENTING DESIGN SPECIFICATIONS 11 ASSISTANCE 12 Replacement Parts 12 Accessories...
Installation Guide - Page 2

... cooking.
Power supply cord bushing (1) H. Set the cardboard template to the side and refer to back of microwave oven)
Cardboard template (part of installation. For Roof Venting Installation Only: ■ If you are using a rectangular to round transition piece, the
3" (7.6 cm) clearance needs to Round Transition" illustration in "Venting Design Specifications" section.
2 Toggle nuts...
Installation Guide - Page 6

... the microwave oven.
1. Mounting plate center markers
6 Using a stud finder, locate the edges of the vertical centerline (see "Mark Rear Wall" section), only recirculation or roof venting installation can be done.
Cabinet opening vertical centerline C. Holes for lag screws E. See illustrations in "Possible Wall Stud Configurations." Support tabs F. Locate Wall Stud(s)
NOTE: If...
Installation Guide - Page 7

...(s). With the support tabs facing forward... mark the vertical centerline of the centerline, and mark.
10. Wall Venting Installation Only
Upper cabinet bottom
³⁄₈" (1 cm)
4" (10.2 cm...template is the venting cutout area.
13. Set the mounting plate aside. or if both...End Holes (Figures 1 & 2)
1. Mark Rear Wall
The microwave oven must be 15³⁄₄" (40.0 cm)...
Installation Guide - Page 9

... 1¹⁄₂" (3.8 cm) diameter hole at the top, and the damper blade opens away from the microwave oven.
Support tabs
4. Push microwave oven against mounting plate and hold in the wall cutout. 6. B
A
A.
Failure to be installed around the supply cord hole, as shown. Power supply cord bushing
6. 5. These are for wall venting only...
Installation Guide - Page 10

... microwave oven centered, and with sheet metal screw. Longer or shorter bolts are available at 100% power. To avoid warping, wood filler blocks (installer to the User Instructions for troubleshooting information. Damper assembly (under the raised tabs of 1 minute at most hardware stores.
■ Overtightening bolts may warp the top of mounting plate, and set...
Installation Guide - Page 12

...piece must be installed to round ...microwave oven model number and serial number. To calculate the length of each vent piece used .
Replacement Parts
If any of available replacement parts. ASSISTANCE
Call your authorized dealer or service center for equivalent lengths. If you will need additional assistance, call us at our toll free number listed in the User Instructions...
Use & Care Guide - Page 1

...-422-1230.
are very important. These instructions include a "Troubleshooting" section to us at www.kitchenaid.com.
for Choosing KitchenAid® Appliances. This is important to help you through any problems you don't immediately follow the specific "PRECAUTIONS TO AVOID POSSIBLE EXPOSURE TO EXCESSIVE MICROWAVE ENERGY" found in this manual and on the front facing of...
Use & Care Guide - Page 2

....
(b) Do not place any other than manufacturer's recommended accessories, in this microwave oven outdoors. SAVE THESE INSTRUCTIONS
PRECAUTIONS TO AVOID POSSIBLE EXPOSURE TO EXCESSIVE MICROWAVE ENERGY
(a) Do not attempt to operate this manual. It is no damage to be adjusted or repaired by qualified service personnel. It is particularly important that the oven door close supervision...
Use & Care Guide - Page 3

... A separate circuit serving only this microwave oven.
■ For all cord connected appliances: The microwave oven must be turned off at...models)
Timer can be adjusted. Touch Options or Setup control to reach the "Vent Fan" submenu, and select the setting.
Electrical Requirements
WARNING
GROUNDING INSTRUCTIONS
Electrical Shock Hazard
Plug into an outlet that is properly installed...
Use & Care Guide - Page 4

... steaming, or use the dish in the wall of the microwave oven cavity, behind the metal screen.
Use a microwave-safe, ovenproof dish or pan under the rack to soil buildup, clean rack supports often. Steamer Vessel (on some models) for simmering. Turntable B. Use ovenproof, microwave-safe cookware for 2-level cooking. Program 1 minute of water beside it...
Use & Care Guide - Page 5

... touching the Start control.
Installing/Replacing Filters and Light Bulbs
NOTE: A filter status indicator (on some models) appears in the microwave oven. To reinstall, place end of the filter into its slotted area - Open bulb cover and replace bulb.
Microwave Oven Use
For list of preset programs, see the Quick Reference Guide provided with screws.
5
For optimal...
Use & Care Guide - Page 6

... the microwave oven. Troubleshooting
First try the steps in the microwave oven
Check the following :
■ Household fuse or circuit breaker
If a household fuse has blown or a circuit breaker has tripped, replace the fuse or reset the circuit breaker. This occurs to the cover for assistance. Make sure Demo Mode (on some models) is an error...
Use & Care Guide - Page 7

...days from your authorized KitchenAid dealer to repair or replace appliance light bulbs, air filters or water filters. If outside the 50 United States and Canada, contact your major appliance. Service calls to published user or operator instructions and/or installation instructions.
4. This major appliance is not installed in accordance with
published installation instructions. 10. This...
Warranty Information - Page 1
... from your major appliance, to instruct you on how to parts or systems resulting from accident, alteration, misuse, abuse, fire, flood, acts of consumables or cleaning products not approved by a KitchenAid designated service company. Repairs when your major appliance is used in accordance with
published installation instructions. 10. THIS WARRANTY GIVES YOU SPECIFIC LEGAL RIGHTS, AND...
KitchenAid KHMS2040BWH Reviews
We have not received any reviews for KitchenAid yet.