Instructions and Recipes
Page 1
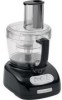
12 CUP FOOD PROCESSOR INSTRUCTIONS AND RECIPES MODEL KFP750 1-800-541-6390 Details Inside ® FOR THE WA1Y IT'S MADE.™
12 CUP FOOD PROCESSOR INSTRUCTIONS AND RECIPES MODEL KFP750 1-800-541-6390 Details Inside ® FOR THE WA1Y IT'S MADE.™

Instructions and Recipes
Page 2
... follow these instructions to 8 p.m. (Eastern Time), or Saturday, 10 a.m. If You Reside In The 50 United States and your KitchenAid® Food Processor should fail within the first year of purchase (register receipt, credit card charge slip, etc.). Proof of Purchase & Product Registration Always... Replacement Warranty We're so confident the quality of our products meets the exacting standards of KitchenAid that, if your Food Processor should fail within the first year of ownership, KitchenAid will assure you of in complying with the provisions of the Consumer Product Safety Act.
... follow these instructions to 8 p.m. (Eastern Time), or Saturday, 10 a.m. If You Reside In The 50 United States and your KitchenAid® Food Processor should fail within the first year of purchase (register receipt, credit card charge slip, etc.). Proof of Purchase & Product Registration Always... Replacement Warranty We're so confident the quality of our products meets the exacting standards of KitchenAid that, if your Food Processor should fail within the first year of ownership, KitchenAid will assure you of in complying with the provisions of the Consumer Product Safety Act.
Instructions and Recipes
Page 3
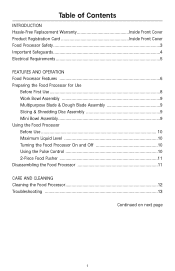
... Product Registration Card Inside Front Cover Food Processor Safety 3 Important Safeguards 4 Electrical Requirements 5 FEATURES AND OPERATION Food Processor Features 6 Preparing the Food Processor for Use Before First Use 8 Work Bowl Assembly 9 Multipurpose Blade & Dough Blade Assembly 9 Slicing & Shredding Disc Assembly 9 Mini Bowl Assembly 9 Using the Food Processor Before Use 10 Maximum Liquid Level 10 Turning the Food Processor On and Off 10 Using...
... Product Registration Card Inside Front Cover Food Processor Safety 3 Important Safeguards 4 Electrical Requirements 5 FEATURES AND OPERATION Food Processor Features 6 Preparing the Food Processor for Use Before First Use 8 Work Bowl Assembly 9 Multipurpose Blade & Dough Blade Assembly 9 Slicing & Shredding Disc Assembly 9 Mini Bowl Assembly 9 Using the Food Processor Before Use 10 Maximum Liquid Level 10 Turning the Food Processor On and Off 10 Using...

Instructions and Recipes
Page 5
... mean: DANGER You can be killed or seriously injured if you don't immediately follow the safety alert symbol and either the word "DANGER" or "WARNING." Food Processor Safety Your safety and the safety of injury, and tell you what the potential hazard is the safety alert symbol. All safety messages will tell...
... mean: DANGER You can be killed or seriously injured if you don't immediately follow the safety alert symbol and either the word "DANGER" or "WARNING." Food Processor Safety Your safety and the safety of injury, and tell you what the potential hazard is the safety alert symbol. All safety messages will tell...
Instructions and Recipes
Page 6
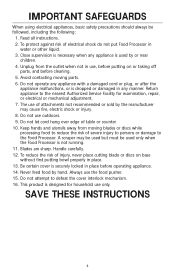
...hands and utensils away from the outlet when not in use, before putting on base without first putting bowl properly in water or other liquid. 3. Never feed food by the manufacturer may be used but must be followed, including the following: 1. Do not attempt ... attachments not recommended or sold by hand. IMPORTANT SAFEGUARDS When using electrical appliances, basic safety precautions should always be used only when the Food Processor is designed for examination, repair, or electrical or mechanical adjustment. 7. Unplug from moving parts. 6. SAVE THESE INSTRUCTIONS 4 Do not ...
...hands and utensils away from the outlet when not in use, before putting on base without first putting bowl properly in water or other liquid. 3. Never feed food by the manufacturer may be used but must be followed, including the following: 1. Do not attempt ... attachments not recommended or sold by hand. IMPORTANT SAFEGUARDS When using electrical appliances, basic safety precautions should always be used only when the Food Processor is designed for examination, repair, or electrical or mechanical adjustment. 7. Unplug from moving parts. 6. SAVE THESE INSTRUCTIONS 4 Do not ...
Instructions and Recipes
Page 7
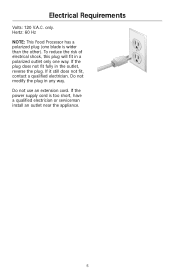
If the plug does not fit fully in any way. To reduce the risk of electrical shock, this plug will fit in a polarized outlet only one blade is too short, have a qualified electrician or serviceman install an outlet near the appliance. 5 If the power supply cord is wider than the other). Do not use an extension cord. Hertz: 60 Hz NOTE: This Food Processor has a polarized plug (one way. Do not modify the plug in the outlet, reverse the plug. If it still does not fit, contact a qualified electrician. only. Electrical Requirements Volts: 120 V.A.C.
If the plug does not fit fully in any way. To reduce the risk of electrical shock, this plug will fit in a polarized outlet only one blade is too short, have a qualified electrician or serviceman install an outlet near the appliance. 5 If the power supply cord is wider than the other). Do not use an extension cord. Hertz: 60 Hz NOTE: This Food Processor has a polarized plug (one way. Do not modify the plug in the outlet, reverse the plug. If it still does not fit, contact a qualified electrician. only. Electrical Requirements Volts: 120 V.A.C.
Instructions and Recipes
Page 8
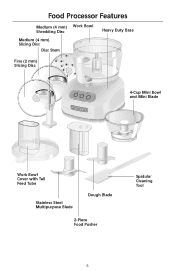
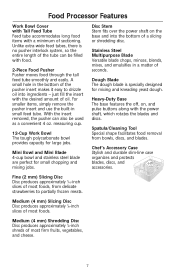
Food Processor Features Medium (4 mm) Work Bowl Shredding Disc Medium (4 mm) Slicing Disc Disc Stem Heavy Duty Base Fine (2 mm) Slicing Disc Off On Pulse 4-Cup Mini Bowl and Mini Blade Work Bowl Cover with Tall Feed Tube Stainless Steel Multipurpose Blade Dough Blade 2-Piece Food Pusher Spatula/ Cleaning Tool 6
Food Processor Features Medium (4 mm) Work Bowl Shredding Disc Medium (4 mm) Slicing Disc Disc Stem Heavy Duty Base Fine (2 mm) Slicing Disc Off On Pulse 4-Cup Mini Bowl and Mini Blade Work Bowl Cover with Tall Feed Tube Stainless Steel Multipurpose Blade Dough Blade 2-Piece Food Pusher Spatula/ Cleaning Tool 6
Instructions and Recipes
Page 9
... power shaft on , and pulse buttons along with a minimum of most foods, from bowls, discs, and blades. Fine (2 mm) Slicing Disc Disc produces approximately 1⁄16-inch slices of sectioning. Food Processor Features Work Bowl Cover with Tall Feed Tube Feed tube accommodates long food items with the power shaft, which rotates the blades and discs. For...
... power shaft on , and pulse buttons along with a minimum of most foods, from bowls, discs, and blades. Fine (2 mm) Slicing Disc Disc produces approximately 1⁄16-inch slices of sectioning. Food Processor Features Work Bowl Cover with Tall Feed Tube Feed tube accommodates long food items with the power shaft, which rotates the blades and discs. For...

Instructions and Recipes
Page 10
... the base without first removing the work bowl may result. 8 Work Bowl Assembly 1. Place the Food Processor base on the base. Grasp the feed tube and turn the bowl to the work bowl cover. NOTE: Your Food Processor will not operate unless the work bowl and work bowl cover on page 12). Preparing the Food Processor for accessory instructions. 5. Place the work bowl cover are properly locked on a dry...
... the base without first removing the work bowl may result. 8 Work Bowl Assembly 1. Place the Food Processor base on the base. Grasp the feed tube and turn the bowl to the work bowl cover. NOTE: Your Food Processor will not operate unless the work bowl and work bowl cover on page 12). Preparing the Food Processor for accessory instructions. 5. Place the work bowl cover are properly locked on a dry...
Instructions and Recipes
Page 11
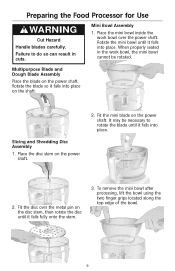
... remove the mini bowl after processing, lift the bowl using the two finger grips located along the top edge of the bowl. 9 Place the disc stem on the shaft. Fit the disc over the power shaft. Preparing the Food Processor for Use WARNING ...Cut Hazard Handle blades carefully. Multipurpose Blade and Dough Blade Assembly Place the blade on the power shaft. Slicing and Shredding Disc Assembly 1. Fit the mini blade on the power shaft. When properly seated in cuts. Mini Bowl Assembly 1. Place the mini bowl inside the work bowl, the mini bowl...
... remove the mini bowl after processing, lift the bowl using the two finger grips located along the top edge of the bowl. 9 Place the disc stem on the shaft. Fit the disc over the power shaft. Preparing the Food Processor for Use WARNING ...Cut Hazard Handle blades carefully. Multipurpose Blade and Dough Blade Assembly Place the blade on the power shaft. Slicing and Shredding Disc Assembly 1. Fit the mini blade on the power shaft. When properly seated in cuts. Mini Bowl Assembly 1. Place the mini bowl inside the work bowl, the mini bowl...
Instructions and Recipes
Page 12
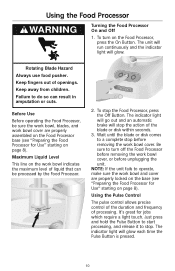
... The unit will run continuously and the indicator light will stop before removing the work bowl and cover are properly assembled on the Food Processor base (see "Preparing the Food Processor for Use" starting on the Food Processor, press the On Button. To stop . The indicator light will go out and...or disk comes to do so can be sure the work bowl, blades, and work bowl cover are properly locked on the work bowl cover. Keep away from children. Maximum Liquid Level This line on the base (see "Preparing the Food Processor for jobs which require a light touch. Off On Pulse...
... The unit will run continuously and the indicator light will stop before removing the work bowl and cover are properly assembled on the Food Processor base (see "Preparing the Food Processor for Use" starting on the Food Processor, press the On Button. To stop . The indicator light will go out and...or disk comes to do so can be sure the work bowl, blades, and work bowl cover are properly locked on the work bowl cover. Keep away from children. Maximum Liquid Level This line on the base (see "Preparing the Food Processor for jobs which require a light touch. Off On Pulse...

Instructions and Recipes
Page 13
... and pusher to remove. 2. Disassembling the Food Processor WARNING Cut Hazard Handle blades carefully. Lift to process small or slender items, like single carrots or celery stalks. Place two fingers under each side of the disc and lift it before removing the bowl. A small hole in cuts. 3. Failure...Remove the disc stem. Turn the work bowl cover to the left or right to unlock the small pusher, and lift to lock the small pusher into place. Using the Food Processor The 2-Piece Food Pusher To slice or shred small items, insert the 2-piece food pusher into the feed tube, turn ...
... and pusher to remove. 2. Disassembling the Food Processor WARNING Cut Hazard Handle blades carefully. Lift to process small or slender items, like single carrots or celery stalks. Place two fingers under each side of the disc and lift it before removing the bowl. A small hole in cuts. 3. Failure...Remove the disc stem. Turn the work bowl cover to the left or right to unlock the small pusher, and lift to lock the small pusher into place. Using the Food Processor The 2-Piece Food Pusher To slice or shred small items, insert the 2-piece food pusher into the feed tube, turn ...

Instructions and Recipes
Page 14
... Cut Hazard Handle blades carefully. Do not use . 1. Thoroughly dry all parts after washing. Wrap the power cord around the work bowl and cover. Press the Off Button and unplug the Food Processor before the contents are dishwasher safe. All the other parts of abrasive cleansers or scouring pads. Disassembled discs, shafts, and blades...
... Cut Hazard Handle blades carefully. Do not use . 1. Thoroughly dry all parts after washing. Wrap the power cord around the work bowl and cover. Press the Off Button and unplug the Food Processor before the contents are dishwasher safe. All the other parts of abrasive cleansers or scouring pads. Disassembled discs, shafts, and blades...
Instructions and Recipes
Page 15
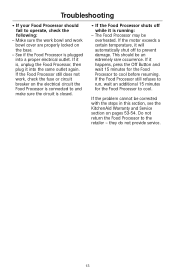
...Food Processor still does not work bowl cover are properly locked on the base. - Do not return the Food Processor to cool. If it is plugged into the same outlet again. The Food Processor may be corrected with the steps in this section, see the KitchenAid Warranty and Service section on the electrical circuit the Food Processor...15 minutes for the Food Processor to cool before resuming. they do not provide service. 13 Make sure the work bowl and work , check the fuse or circuit breaker on pages 53-54. See if the Food Processor is , unplug the Food Processor, then plug it ...
...Food Processor still does not work bowl cover are properly locked on the base. - Do not return the Food Processor to cool. If it is plugged into the same outlet again. The Food Processor may be corrected with the steps in this section, see the KitchenAid Warranty and Service section on the electrical circuit the Food Processor...15 minutes for the Food Processor to cool before resuming. they do not provide service. 13 Make sure the work bowl and work , check the fuse or circuit breaker on pages 53-54. See if the Food Processor is , unplug the Food Processor, then plug it ...
Instructions and Recipes
Page 16
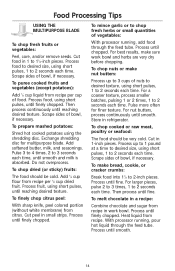
...fruits and vegetables (except potatoes): Add 1⁄4 cup liquid from recipe per 1⁄2 cup dried fruit. Process food, using the shredding disc. For best results, make sure work bowl. Pulse more often for multipurpose blade. Cut in small strips. Process until reaching desired texture. For larger pieces, ... up to 1 pound at a time to chop fresh herbs or small quantities of food. To melt chocolate in a recipe: Combine chocolate and sugar from recipe per cup of vegetables: With processor running , pour hot liquid through the feed tube. Process until smooth. 14 With...
...fruits and vegetables (except potatoes): Add 1⁄4 cup liquid from recipe per 1⁄2 cup dried fruit. Process food, using the shredding disc. For best results, make sure work bowl. Pulse more often for multipurpose blade. Cut in small strips. Process until reaching desired texture. For larger pieces, ... up to 1 pound at a time to chop fresh herbs or small quantities of food. To melt chocolate in a recipe: Combine chocolate and sugar from recipe per cup of vegetables: With processor running , pour hot liquid through the feed tube. Process until smooth. 14 With...
Instructions and Recipes
Page 17
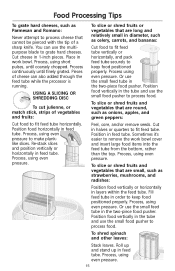
... using even pressure. 15 Position food vertically in the tube and use the small food pusher to process food. Position food horizontally in feed tube. Sometimes it's easier to remove the work bowl. Position food vertically in the tube and use the small food pusher to process food. Roll up and stand up... and Romano: Never attempt to process cheese that are round, such as onions, apples, and green peppers: Cut food to fit feed tube horizontally. You can also added through the feed tube while the processor is running. Pieces of a sharp knife. Process, using even pressure.
... using even pressure. 15 Position food vertically in the tube and use the small food pusher to process food. Position food horizontally in feed tube. Sometimes it's easier to remove the work bowl. Position food vertically in the tube and use the small food pusher to process food. Roll up and stand up... and Romano: Never attempt to process cheese that are round, such as onions, apples, and green peppers: Cut food to fit feed tube horizontally. You can also added through the feed tube while the processor is running. Pieces of a sharp knife. Process, using even pressure.
Instructions and Recipes
Page 20
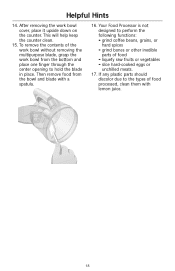
Your Food Processor is not designed to the types of food processed, clean them with a spatula. 16. Then remove food from the bottom and place one finger through the center opening to hold the blade in place. If any plastic parts should discolor due to ... hard spices • grind bones or other inedible parts of the work bowl without removing the multipurpose blade, grasp the work bowl cover, place it upside down on the counter. This will help keep the counter clean. 15. To remove the contents of food • liquefy raw fruits or vegetables • slice hard-cooked eggs...
Your Food Processor is not designed to the types of food processed, clean them with a spatula. 16. Then remove food from the bottom and place one finger through the center opening to hold the blade in place. If any plastic parts should discolor due to ... hard spices • grind bones or other inedible parts of the work bowl without removing the multipurpose blade, grasp the work bowl cover, place it upside down on the counter. This will help keep the counter clean. 15. To remove the contents of food • liquefy raw fruits or vegetables • slice hard-cooked eggs...
Instructions and Recipes
Page 55
... consequential damages, so this exclusion may also have other than normal single family home use. See inside front cover for details on page 54. KitchenAid® Food Processor Warranty for the 50 United States and District of Columbia This warranty extends to an Authorized Service Center. Length of Warranty: One Year Full Warranty...
... consequential damages, so this exclusion may also have other than normal single family home use. See inside front cover for details on page 54. KitchenAid® Food Processor Warranty for the 50 United States and District of Columbia This warranty extends to an Authorized Service Center. Length of Warranty: One Year Full Warranty...
Instructions and Recipes
Page 56
... Service Outside the 50 United States and Puerto Rico Consult your local KitchenAid dealer Food Processor for Service After the Warranty Expires WARNING Electrical Shock Hazard Unplug before servicing. Please bring the Food Processor, or ship it prepaid and insured, to : Customer Satisfaction Center KitchenAid Portable Appliances P.O. Call toll-free 1-800-541-6390, 8 a.m. During the warranty...
... Service Outside the 50 United States and Puerto Rico Consult your local KitchenAid dealer Food Processor for Service After the Warranty Expires WARNING Electrical Shock Hazard Unplug before servicing. Please bring the Food Processor, or ship it prepaid and insured, to : Customer Satisfaction Center KitchenAid Portable Appliances P.O. Call toll-free 1-800-541-6390, 8 a.m. During the warranty...
Instructions and Recipes
Page 57
...Center KitchenAid Portable Appliances P.O. Joseph, MI 49085-0218 Accessories for Model KFP750: Blades and Discs 12-cup Multipurpose Blade KFP72BL 12-cup Dough Blade KFP72DB Mini Blade (for Mini Bowl) ...Bowls and Covers Work Bowl Cover with Standard Tall Feed Tube KFP7WC Work Bowl Cover with Ultra Wide Mouth™ Feed Tube KFP7WWC 12-cup Work Bowl KFP72WB Mini Bowl with Storage Lid KFP7MB Chef's Bowl KFP72CB Other Accessories 12-cup Egg Whip Citrus Press Juice Extractor 2-Piece Food Pusher for Standard Tall Feed Tube 2-Piece Food Pusher for your Food Processor, visit KitchenAid...
...Center KitchenAid Portable Appliances P.O. Joseph, MI 49085-0218 Accessories for Model KFP750: Blades and Discs 12-cup Multipurpose Blade KFP72BL 12-cup Dough Blade KFP72DB Mini Blade (for Mini Bowl) ...Bowls and Covers Work Bowl Cover with Standard Tall Feed Tube KFP7WC Work Bowl Cover with Ultra Wide Mouth™ Feed Tube KFP7WWC 12-cup Work Bowl KFP72WB Mini Bowl with Storage Lid KFP7MB Chef's Bowl KFP72CB Other Accessories 12-cup Egg Whip Citrus Press Juice Extractor 2-Piece Food Pusher for Standard Tall Feed Tube 2-Piece Food Pusher for your Food Processor, visit KitchenAid...


