Instructions and Recipes
Page 2
... be covered by our one year full warranty. Box Numbers, please.) When you use the carton and packing materials to your KitchenAid® Food Processor should fail within the first year of ownership, simply call our toll-free Customer Satisfaction Center at 1-800-541-6390 Monday through Friday, 8 a.m. This card does not verify your complete shipping address. (No P.O. Your replacement...
... be covered by our one year full warranty. Box Numbers, please.) When you use the carton and packing materials to your KitchenAid® Food Processor should fail within the first year of ownership, simply call our toll-free Customer Satisfaction Center at 1-800-541-6390 Monday through Friday, 8 a.m. This card does not verify your complete shipping address. (No P.O. Your replacement...
Instructions and Recipes
Page 3
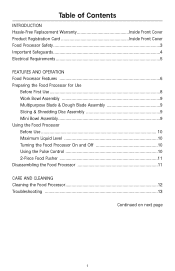
... Front Cover Food Processor Safety 3 Important Safeguards 4 Electrical Requirements 5 FEATURES AND OPERATION Food Processor Features 6 Preparing the Food Processor for Use Before First Use 8 Work Bowl Assembly 9 Multipurpose Blade & Dough Blade Assembly 9 Slicing & Shredding Disc Assembly 9 Mini Bowl Assembly 9 Using the Food Processor Before Use 10 Maximum Liquid Level 10 Turning the Food Processor On and Off 10 Using the Pulse Control 10 2-Piece Food Pusher 11 Disassembling the Food Processor 11 CARE AND CLEANING Cleaning the Food Processor 12 Troubleshooting 13 Continued...
... Front Cover Food Processor Safety 3 Important Safeguards 4 Electrical Requirements 5 FEATURES AND OPERATION Food Processor Features 6 Preparing the Food Processor for Use Before First Use 8 Work Bowl Assembly 9 Multipurpose Blade & Dough Blade Assembly 9 Slicing & Shredding Disc Assembly 9 Mini Bowl Assembly 9 Using the Food Processor Before Use 10 Maximum Liquid Level 10 Turning the Food Processor On and Off 10 Using the Pulse Control 10 2-Piece Food Pusher 11 Disassembling the Food Processor 11 CARE AND CLEANING Cleaning the Food Processor 12 Troubleshooting 13 Continued...
Instructions and Recipes
Page 6
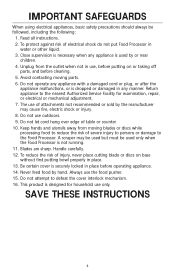
... or injury. 8. SAVE THESE INSTRUCTIONS 4 Unplug from moving parts. 6. Never feed food by or near children. 4. Blades are sharp. Be certain cover is securely locked in place before cleaning. 5. Do not attempt to the Food Processor. Keep hands and utensils away from the outlet when not in water or other liquid. 3. Handle carefully. 12. Do not use the food pusher. 15. Do not let cord...
... or injury. 8. SAVE THESE INSTRUCTIONS 4 Unplug from moving parts. 6. Never feed food by or near children. 4. Blades are sharp. Be certain cover is securely locked in place before cleaning. 5. Do not attempt to the Food Processor. Keep hands and utensils away from the outlet when not in water or other liquid. 3. Handle carefully. 12. Do not use the food pusher. 15. Do not let cord...
Instructions and Recipes
Page 8
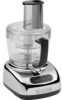
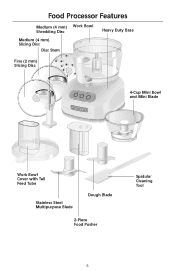
Food Processor Features Medium (4 mm) Work Bowl Shredding Disc Medium (4 mm) Slicing Disc Disc Stem Heavy Duty Base Fine (2 mm) Slicing Disc Off On Pulse 4-Cup Mini Bowl and Mini Blade Work Bowl Cover with Tall Feed Tube Stainless Steel Multipurpose Blade Dough Blade 2-Piece Food Pusher Spatula/ Cleaning Tool 6
Food Processor Features Medium (4 mm) Work Bowl Shredding Disc Medium (4 mm) Slicing Disc Disc Stem Heavy Duty Base Fine (2 mm) Slicing Disc Off On Pulse 4-Cup Mini Bowl and Mini Blade Work Bowl Cover with Tall Feed Tube Stainless Steel Multipurpose Blade Dough Blade 2-Piece Food Pusher Spatula/ Cleaning Tool 6
Instructions and Recipes
Page 9
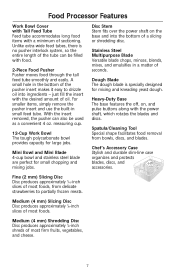
... foods, from bowls, discs, and blades. Disc Stem Stem fits over the power shaft on , and pulse buttons along with food. 2-Piece Food Pusher Pusher moves food through the tall feed tube smoothly and easily. measuring cup. 12-Cup Work Bowl The tough polycarbonate bowl provides capacity for small chopping and mixing jobs. Medium (4 mm) Shredding Disc Disc produces approximately 1⁄8-inch shreds of most foods. Food Processor Features Work Bowl Cover with Tall Feed Tube Feed tube accommodates long food items with the desired amount of oil. Spatula/Cleaning...
... foods, from bowls, discs, and blades. Disc Stem Stem fits over the power shaft on , and pulse buttons along with food. 2-Piece Food Pusher Pusher moves food through the tall feed tube smoothly and easily. measuring cup. 12-Cup Work Bowl The tough polycarbonate bowl provides capacity for small chopping and mixing jobs. Medium (4 mm) Shredding Disc Disc produces approximately 1⁄8-inch shreds of most foods. Food Processor Features Work Bowl Cover with Tall Feed Tube Feed tube accommodates long food items with the desired amount of oil. Spatula/Cleaning...

Instructions and Recipes
Page 10
... using your Food Processor for the first time, wash the work bowl, work bowl with the controls facing forward. Insert the desired accessory into position. 4. Place the work bowl cover on the work bowl cover, mini bowl, feed tube pusher, discs, and blades either by hand or in the dishwasher (see "Cleaning the Food Processor" on the base. Grasp the feed tube and turn the bowl to do so can result in the unit until it is locked on page 12). Work Bowl Assembly...
... using your Food Processor for the first time, wash the work bowl, work bowl with the controls facing forward. Insert the desired accessory into position. 4. Place the work bowl cover on the work bowl cover, mini bowl, feed tube pusher, discs, and blades either by hand or in the dishwasher (see "Cleaning the Food Processor" on the base. Grasp the feed tube and turn the bowl to do so can result in the unit until it is locked on page 12). Work Bowl Assembly...
Instructions and Recipes
Page 11
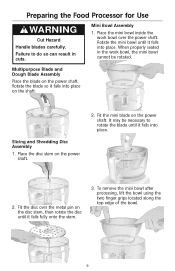
... place. 2. Fit the disc over the power shaft. To remove the mini bowl after processing, lift the bowl using the two finger grips located along the top edge of the bowl. 9 Place the disc stem on the power shaft. Fit the mini blade on the power shaft. 2. Mini Bowl Assembly 1. Preparing the Food Processor for Use WARNING Cut Hazard Handle blades carefully. Multipurpose Blade and Dough Blade Assembly Place the blade on the shaft. Slicing and Shredding Disc Assembly 1. Place the mini bowl inside the work bowl, the mini bowl cannot be necessary...
... place. 2. Fit the disc over the power shaft. To remove the mini bowl after processing, lift the bowl using the two finger grips located along the top edge of the bowl. 9 Place the disc stem on the power shaft. Fit the mini blade on the power shaft. 2. Mini Bowl Assembly 1. Preparing the Food Processor for Use WARNING Cut Hazard Handle blades carefully. Multipurpose Blade and Dough Blade Assembly Place the blade on the shaft. Slicing and Shredding Disc Assembly 1. Place the mini bowl inside the work bowl, the mini bowl cannot be necessary...
Instructions and Recipes
Page 12
... This line on the work bowl cover are properly locked on the base (see "Preparing the Food Processor for Use" starting on page 8). To stop . The indicator light will stop before removing the work bowl cover, or before removing the work bowl cover. The unit will run continuously and the indicator light will glow. Rotating Blade Hazard Always use food pusher. Off On Pulse 2. Wait until the blade or disk comes to a complete stop the action of liquid...
... This line on the work bowl cover are properly locked on the base (see "Preparing the Food Processor for Use" starting on page 8). To stop . The indicator light will stop before removing the work bowl cover, or before removing the work bowl cover. The unit will run continuously and the indicator light will glow. Rotating Blade Hazard Always use food pusher. Off On Pulse 2. Wait until the blade or disk comes to a complete stop the action of liquid...

Instructions and Recipes
Page 13
... drizzle the oil at a constant rate. Remove the disc stem. Using the Food Processor The 2-Piece Food Pusher To slice or shred small items, insert the 2-piece food pusher into the feed tube, turn the top of the pusher left and remove. 4. Turn the work bowl cover to the left or right to unlock the small pusher, and lift to unlock it from the base. If using the mini bowl, grasp and remove the bowl using the finger grips located along the top edge...
... drizzle the oil at a constant rate. Remove the disc stem. Using the Food Processor The 2-Piece Food Pusher To slice or shred small items, insert the 2-piece food pusher into the feed tube, turn the top of the pusher left and remove. 4. Turn the work bowl cover to the left or right to unlock the small pusher, and lift to unlock it from the base. If using the mini bowl, grasp and remove the bowl using the finger grips located along the top edge...

Instructions and Recipes
Page 14
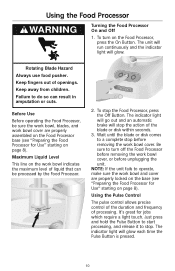
... the work bowl before cleaning. 2. Then remove food from the bowl and blade with a soft cloth. The multipurpose blade can also be stored in the provided storage case, and in use. 1. Press the Off Button and unplug the Food Processor before the contents are dishwasher safe. Dry with a spatula. 5. If washing the Food Processor parts by clipping it to grip the blade shaft. Wrap the power cord around the work bowl cover...
... the work bowl before cleaning. 2. Then remove food from the bowl and blade with a soft cloth. The multipurpose blade can also be stored in the provided storage case, and in use. 1. Press the Off Button and unplug the Food Processor before the contents are dishwasher safe. Dry with a spatula. 5. If washing the Food Processor parts by clipping it to grip the blade shaft. Wrap the power cord around the work bowl cover...
Instructions and Recipes
Page 15
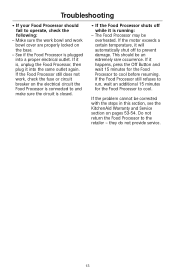
... the Food Processor still does not work bowl cover are properly locked on pages 53-54. If the Food Processor still refuses to run, wait an additional 15 minutes for the Food Processor to operate, check the following: - Do not return the Food Processor to cool. If it is plugged into the same outlet again. If the problem cannot be overheated. If the motor exceeds...
... the Food Processor still does not work bowl cover are properly locked on pages 53-54. If the Food Processor still refuses to run, wait an additional 15 minutes for the Food Processor to operate, check the following: - Do not return the Food Processor to cool. If it is plugged into the same outlet again. If the problem cannot be overheated. If the motor exceeds...
Instructions and Recipes
Page 16
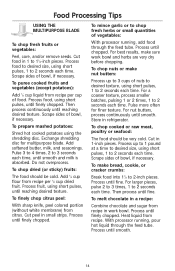
... 2 seconds each time. To make sure work bowl. Then process until chopped. To melt chocolate in a recipe: Combine chocolate and sugar from recipe in work bowl and herbs are very dry before chopping. With processor running , add food through the feed tube. Cut food in 1-inch pieces. Process food, using short pulses, 1 to desired texture, using the shredding disc. Exchange shredding disc for finer texture. Do not overprocess. To chop dried (or sticky) fruits: The...
... 2 seconds each time. To make sure work bowl. Then process until chopped. To melt chocolate in a recipe: Combine chocolate and sugar from recipe in work bowl and herbs are very dry before chopping. With processor running , add food through the feed tube. Cut food in 1-inch pieces. Process food, using short pulses, 1 to desired texture, using the shredding disc. Exchange shredding disc for finer texture. Do not overprocess. To chop dried (or sticky) fruits: The...
Instructions and Recipes
Page 17
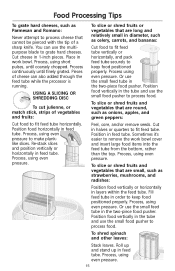
... feed tube horizontally. Re-stack slices and position vertically or horizontally in work bowl cover and insert large food items into the feed tube from the bottom, rather than the top. Position in the tube and use the small food pusher to process food. Position food vertically in feed tube. Or use the small feed tube in the tube and use the small food pusher to process food. Sometimes it's easier to grate hard cheeses. Process, using even pressure. Process, using even pressure. Process continuously until coarsely chopped. Pieces...
... feed tube horizontally. Re-stack slices and position vertically or horizontally in work bowl cover and insert large food items into the feed tube from the bottom, rather than the top. Position in the tube and use the small food pusher to process food. Position food vertically in feed tube. Or use the small feed tube in the tube and use the small food pusher to process food. Sometimes it's easier to grate hard cheeses. Process, using even pressure. Process, using even pressure. Process continuously until coarsely chopped. Pieces...
Instructions and Recipes
Page 19
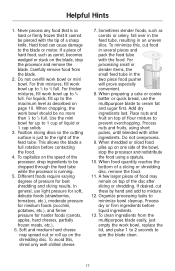
... best shredding and slicing results. Do not overprocess. 9. A few larger pieces of liquid or 1⁄2 cup solids. 3. Carefully remove food from the multipurpose blade easily, just empty the work bowl up on the blade, stop the processor and redistribute the food using short pulses, until blended with other ingredients. For liquids, fill up on top of the bowl, stop the processor and remove the blade. For processing small or slender items, the small feed tube...
... best shredding and slicing results. Do not overprocess. 9. A few larger pieces of liquid or 1⁄2 cup solids. 3. Carefully remove food from the multipurpose blade easily, just empty the work bowl up on the blade, stop the processor and redistribute the food using short pulses, until blended with other ingredients. For liquids, fill up on top of the bowl, stop the processor and remove the blade. For processing small or slender items, the small feed tube...
Instructions and Recipes
Page 20
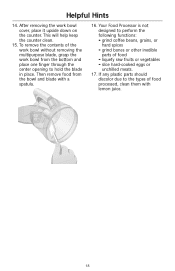
... of the work bowl without removing the multipurpose blade, grasp the work bowl cover, place it upside down on the counter. Your Food Processor is not designed to hold the blade in place. If any plastic parts should discolor due to the types of food • liquefy raw fruits or vegetables • slice hard-cooked eggs or unchilled meats. 17. Helpful Hints 14. Then remove food from...
... of the work bowl without removing the multipurpose blade, grasp the work bowl cover, place it upside down on the counter. Your Food Processor is not designed to hold the blade in place. If any plastic parts should discolor due to the types of food • liquefy raw fruits or vegetables • slice hard-cooked eggs or unchilled meats. 17. Helpful Hints 14. Then remove food from...

Instructions and Recipes
Page 22
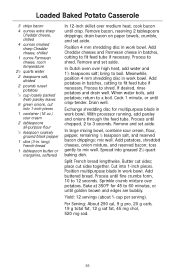
....) walnut pieces 1 cup all -purpose and whole wheat flours, sugar, salt, and baking soda. Add Cheddar and Parmesan cheeses. Process to brown first. Remove and set aside. Process until mixed. Add shortening and butter. Pulse 4 to lightly floured work bowl. Add cheeses. Pulse 2 to 10 seconds. divide into a 12 x 12-inch square. Cover 1 portion; Roll evenly into 2 portions. Sprinkle with remaining dough, egg mixture...
....) walnut pieces 1 cup all -purpose and whole wheat flours, sugar, salt, and baking soda. Add Cheddar and Parmesan cheeses. Process to brown first. Remove and set aside. Process until mixed. Add shortening and butter. Pulse 4 to lightly floured work bowl. Add cheeses. Pulse 2 to 10 seconds. divide into a 12 x 12-inch square. Cover 1 portion; Roll evenly into 2 portions. Sprinkle with remaining dough, egg mixture...
Instructions and Recipes
Page 37
... Parmesan cheese in work bowl. Remove and set aside. Meanwhile, position 4 mm shredding disc in batches, cutting to 12 seconds. Process to a boil. With processor running, add parsley and onions through the feed tube. mix well. Process until crisp. Process to mix well. When water boils, add potatoes; Remove and set aside. toss gently to shred. Spread into 1-inch pieces. Split French bread lengthwise. Butter cut sides together...
... Parmesan cheese in work bowl. Remove and set aside. Meanwhile, position 4 mm shredding disc in batches, cutting to 12 seconds. Process to a boil. With processor running, add parsley and onions through the feed tube. mix well. Process until crisp. Process to mix well. When water boils, add potatoes; Remove and set aside. toss gently to shred. Spread into 1-inch pieces. Split French bread lengthwise. Butter cut sides together...
Instructions and Recipes
Page 55
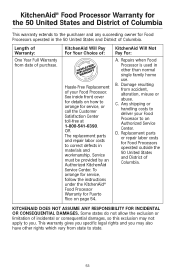
OR The replacement parts and repair labor costs to state. 53 C. Replacement parts or repair labor costs for Food Processors operated outside the 50 United States and District of purchase. This warranty gives you specific legal rights and you . Any shipping or handling costs to deliver your Food Processor. KITCHENAID DOES NOT ASSUME ANY RESPONSIBILITY FOR INCIDENTAL OR CONSEQUENTIAL DAMAGES. KitchenAid® Food Processor Warranty for the 50...
OR The replacement parts and repair labor costs to state. 53 C. Replacement parts or repair labor costs for Food Processors operated outside the 50 United States and District of purchase. This warranty gives you specific legal rights and you . Any shipping or handling costs to deliver your Food Processor. KITCHENAID DOES NOT ASSUME ANY RESPONSIBILITY FOR INCIDENTAL OR CONSEQUENTIAL DAMAGES. KitchenAid® Food Processor Warranty for the 50...
Instructions and Recipes
Page 56
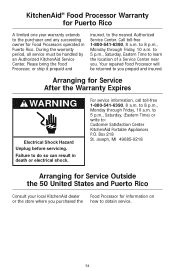
Call toll-free 1-800-541-6390, 8 a.m. Box 218 St. Your repaired Food Processor will be handled by an Authorized KitchenAid Service Center. to 8 p.m., Monday through Friday, 10 a.m. Please bring the Food Processor, or ship it prepaid and insured, to learn the location of a Service Center near you. to 5 p.m., Saturday, Eastern Time to the nearest Authorized Service Center. For service information, call toll-free 1-800-541...
Call toll-free 1-800-541-6390, 8 a.m. Box 218 St. Your repaired Food Processor will be handled by an Authorized KitchenAid Service Center. to 8 p.m., Monday through Friday, 10 a.m. Please bring the Food Processor, or ship it prepaid and insured, to learn the location of a Service Center near you. to 5 p.m., Saturday, Eastern Time to the nearest Authorized Service Center. For service information, call toll-free 1-800-541...
Instructions and Recipes
Page 57
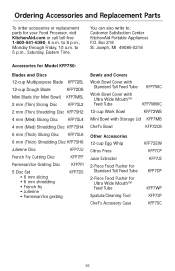
... KFP7FF Parmesan/Ice Grating Disc KFP7PI 5 Disc Set • 6 mm slicing • 6 mm shredding • French fry • Julienne • Parmesan/Ice grating KFP7DS Bowls and Covers Work Bowl Cover with Standard Tall Feed Tube KFP7WC Work Bowl Cover with Ultra Wide Mouth™ Feed Tube KFP7WWC 12-cup Work Bowl KFP72WB Mini Bowl with Storage Lid KFP7MB Chef's Bowl KFP72CB Other Accessories 12-cup Egg Whip Citrus Press Juice Extractor 2-Piece Food Pusher for Standard Tall Feed Tube 2-Piece Food Pusher for your Food Processor, visit KitchenAid.com or call toll-free 1-800-541...
... KFP7FF Parmesan/Ice Grating Disc KFP7PI 5 Disc Set • 6 mm slicing • 6 mm shredding • French fry • Julienne • Parmesan/Ice grating KFP7DS Bowls and Covers Work Bowl Cover with Standard Tall Feed Tube KFP7WC Work Bowl Cover with Ultra Wide Mouth™ Feed Tube KFP7WWC 12-cup Work Bowl KFP72WB Mini Bowl with Storage Lid KFP7MB Chef's Bowl KFP72CB Other Accessories 12-cup Egg Whip Citrus Press Juice Extractor 2-Piece Food Pusher for Standard Tall Feed Tube 2-Piece Food Pusher for your Food Processor, visit KitchenAid.com or call toll-free 1-800-541...


