Energy Guide
Page 1
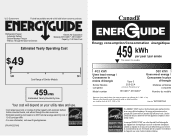
... de comparer le rendement de l'appareil avec celui d'autres modéles similaires. Canada Refrigerator-Freezer ·Automatic Defrost ·Bottom Mounted Freezer ·Without Through-the-Door-Ice Service Kitchen Aid Corporation Model(s):KFC*22EV**, KFC*22EX** Capacity: 21.8 Cubic Feet Estimated...183; Cost range based only on models of similar capacity with automatic defrost, bottom mounted freezer, and without through-the-door-ice service. · Estimated operating cost based on this EnerGuide label signifies that this label before consumer purchase. Government Federal law ...
... de comparer le rendement de l'appareil avec celui d'autres modéles similaires. Canada Refrigerator-Freezer ·Automatic Defrost ·Bottom Mounted Freezer ·Without Through-the-Door-Ice Service Kitchen Aid Corporation Model(s):KFC*22EV**, KFC*22EX** Capacity: 21.8 Cubic Feet Estimated...183; Cost range based only on models of similar capacity with automatic defrost, bottom mounted freezer, and without through-the-door-ice service. · Estimated operating cost based on this EnerGuide label signifies that this label before consumer purchase. Government Federal law ...
Use & Care Guide
Page 1
In Canada, visit our website at www.kitchenaid.ca or call us at www.kitchenaid.com for purchasing this manual and on the inside... hazard is the safety alert symbol. Table of Contents / Índice / Table des matières REFRIGERATOR SAFETY 1 SEGURIDAD DEL REFRIGERADOR 16 SÉCURITÉ DU RÉFRIGÉRATEUR 31 INSTALLATION INSTRUCTIONS 2 ...FRIGÉRATEUR 37 REFRIGERATOR CARE 10 CUIDADO DE SU REFRIGERADOR 25 ENTRETIEN DU RÉFRIGÉRATEUR 40 TROUBLESHOOTING 11 SOLUCIÓN DE PROBLEMAS 26 DÉPANNAGE 41 WATER FILTER CERTIFICATIONS 13 PRODUCT DATA ...
In Canada, visit our website at www.kitchenaid.ca or call us at www.kitchenaid.com for purchasing this manual and on the inside... hazard is the safety alert symbol. Table of Contents / Índice / Table des matières REFRIGERATOR SAFETY 1 SEGURIDAD DEL REFRIGERADOR 16 SÉCURITÉ DU RÉFRIGÉRATEUR 31 INSTALLATION INSTRUCTIONS 2 ...FRIGÉRATEUR 37 REFRIGERATOR CARE 10 CUIDADO DE SU REFRIGERADOR 25 ENTRETIEN DU RÉFRIGÉRATEUR 40 TROUBLESHOOTING 11 SOLUCIÓN DE PROBLEMAS 26 DÉPANNAGE 41 WATER FILTER CERTIFICATIONS 13 PRODUCT DATA ...
Use & Care Guide
Page 2
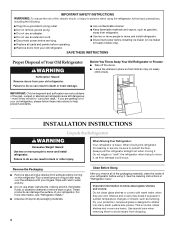
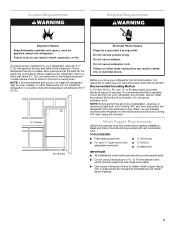
... of the packaging materials, clean the inside . INSTALLATION INSTRUCTIONS Unpack the Refrigerator WARNING Excessive Weight Hazard Use two or more people to move and install refrigerator. ■ Disconnect power before installing ice maker (on the refrigerator. Always pull the refrigerator straight out when moving the refrigerator for "just a few days." Important information to know about glass...
... of the packaging materials, clean the inside . INSTALLATION INSTRUCTIONS Unpack the Refrigerator WARNING Excessive Weight Hazard Use two or more people to move and install refrigerator. ■ Disconnect power before installing ice maker (on the refrigerator. Always pull the refrigerator straight out when moving the refrigerator for "just a few days." Important information to know about glass...
Use & Care Guide
Page 3
...refrigerator has an ice maker, allow extra space at the top and behind the refrigerator. Before you move your refrigerator, allow for leaks. Recommended Grounding Method A 115 Volt, 60 Hz., AC only 15- or 20-amp fused, grounded electrical supply is recommended that a separate circuit serving only your refrigerator... any tools listed here. Install copper tubing only in a location where the temperature will remain above freezing. 3 When installing your refrigerator be turned off by a switch. Use an outlet that you do so can result in death, explosion, or fire. See ...
...refrigerator has an ice maker, allow extra space at the top and behind the refrigerator. Before you move your refrigerator, allow for leaks. Recommended Grounding Method A 115 Volt, 60 Hz., AC only 15- or 20-amp fused, grounded electrical supply is recommended that a separate circuit serving only your refrigerator... any tools listed here. Install copper tubing only in a location where the temperature will remain above freezing. 3 When installing your refrigerator be turned off by a switch. Use an outlet that you do so can result in death, explosion, or fire. See ...
Use & Care Guide
Page 4
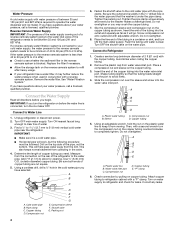
... filtration system is connected to your water pressure, call a licensed, qualified plumber. IMPORTANT: If you have questions about your refrigerator has a water filter, it is blocked. Be sure both ends of copper tubing you may further reduce the water pressure when used in the ...wrench. Then, with a second wrench turn the compression nut on the reverse osmosis system to see whether the sediment filter in a container or sink, and turn the ice maker OFF. Compression nut D. Check connection by pulling on the copper tubing. 3. Correct any leaks. Add 7 ft...
... filtration system is connected to your water pressure, call a licensed, qualified plumber. IMPORTANT: If you have questions about your refrigerator has a water filter, it is blocked. Be sure both ends of copper tubing you may further reduce the water pressure when used in the ...wrench. Then, with a second wrench turn the compression nut on the reverse osmosis system to see whether the sediment filter in a container or sink, and turn the ice maker OFF. Compression nut D. Check connection by pulling on the copper tubing. 3. Correct any leaks. Add 7 ft...
Use & Care Guide
Page 5
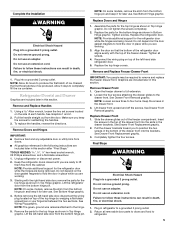
...the following instructions are included later in death, fire, or electrical shock. 1. Keep the refrigerator doors closed until you keep the screws for reattaching the handles. 3. Starting with the top of ice. Before removing the left-hand side door, disconnect the wiring plug located on top of ...each handle. NOTE: The green, ground wire remains attached to completely fill the ice container. NOTE: On some models, remove the shim from the bottom hinge pin. Assemble the parts for the refrigerator door while the hinges are ready to hold the door in this section. Replace...
...the following instructions are included later in death, fire, or electrical shock. 1. Keep the refrigerator doors closed until you keep the screws for reattaching the handles. 3. Starting with the top of ice. Before removing the left-hand side door, disconnect the wiring plug located on top of ...each handle. NOTE: The green, ground wire remains attached to completely fill the ice container. NOTE: On some models, remove the shim from the bottom hinge pin. Assemble the parts for the refrigerator door while the hinges are ready to hold the door in this section. Replace...
Use & Care Guide
Page 7
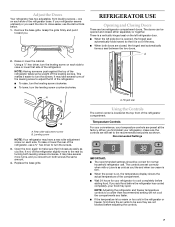
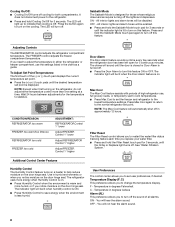
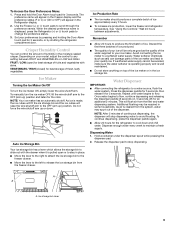
...Using the Controls The control center is out of the refrigerator takes some weight off the leveling screws. REFRIGERATOR USE Opening and Closing Doors There are preset at the top front of the refrigerator. This makes it toward you like and when ice cream is firm. ■ When the power is... on each side to make sure the controls are closed either separately or together. Adjust the Doors Your refrigerator has two adjustable, front leveling screws -...
...Using the Controls The control center is out of the refrigerator takes some weight off the leveling screws. REFRIGERATOR USE Opening and Closing Doors There are preset at the top front of the refrigerator. This makes it toward you like and when ice cream is firm. ■ When the power is... on each side to make sure the controls are closed either separately or together. Adjust the Doors Your refrigerator has two adjustable, front leveling screws -...
Use & Care Guide
Page 8
... first turning on the door hinge seal. OFF - CONDITION/REASON: REFRIGERATOR too warm FREEZER too warm/too little ice REFRIGERATOR too cold FREEZER too cold ADJUSTMENT: REFRIGERATOR Control 1° lower Adjust FREEZER Control 1° lower Adjust REFRIGERATOR Control 1° higher Adjust FREEZER Control 1° higher Filter Reset The Filter Reset control allows you to restart the water...
... first turning on the door hinge seal. OFF - CONDITION/REASON: REFRIGERATOR too warm FREEZER too warm/too little ice REFRIGERATOR too cold FREEZER too cold ADJUSTMENT: REFRIGERATOR Control 1° lower Adjust FREEZER Control 1° lower Adjust REFRIGERATOR Control 1° higher Adjust FREEZER Control 1° higher Filter Reset The Filter Reset control allows you to restart the water...
Use & Care Guide
Page 9
... chill water. Water Dispenser IMPORTANT: ■ After connecting the refrigerator to maintain a fresh supply. Dispense enough water every week to a water source, flush the water system. Release the dispenser pad to stop dispensing water to release the ice storage bin from the filter and water dispensing system. See "Using the Controls." Avoid connecting...
... chill water. Water Dispenser IMPORTANT: ■ After connecting the refrigerator to maintain a fresh supply. Dispense enough water every week to a water source, flush the water system. Release the dispenser pad to stop dispensing water to release the ice storage bin from the filter and water dispensing system. See "Using the Controls." Avoid connecting...
Use & Care Guide
Page 10
... and a mild detergent in warm water. Remove sealing label from replacement filter and insert the filter end into contact with the blue bypass cap. Both the refrigerator and freezer sections defrost automatically. You must thoroughly clean both sections to ...to change the water filter. REFRIGERATOR CARE Cleaning WARNING Water Filter Status Lights The water filter status lights will not be used without adequate disinfection before removing the filter or blue bypass cap. 1. Turn filter counterclockwise to change the water filter. Snap the filter cover closed. Plug in...
... and a mild detergent in warm water. Remove sealing label from replacement filter and insert the filter end into contact with the blue bypass cap. Both the refrigerator and freezer sections defrost automatically. You must thoroughly clean both sections to ...to change the water filter. REFRIGERATOR CARE Cleaning WARNING Water Filter Status Lights The water filter status lights will not be used without adequate disinfection before removing the filter or blue bypass cap. 1. Turn filter counterclockwise to change the water filter. Snap the filter cover closed. Plug in...
Use & Care Guide
Page 11
... possibly avoid the cost of water lines, or from the ice maker mold. 11 contraction/expansion of the refrigerator ■ Sizzling/Gurgling - Changing the Refrigerator Light Bulb 3. Changing the Freezer Light Bulb 1. In the U.S.A., www.kitchenaid.com In Canada, www.kitchenaid.ca Refrigerator Operation The refrigerator will not operate WARNING The motor seems to coldest setting will...
... possibly avoid the cost of water lines, or from the ice maker mold. 11 contraction/expansion of the refrigerator ■ Sizzling/Gurgling - Changing the Refrigerator Light Bulb 3. Changing the Freezer Light Bulb 1. In the U.S.A., www.kitchenaid.com In Canada, www.kitchenaid.ca Refrigerator Operation The refrigerator will not operate WARNING The motor seems to coldest setting will...
Use & Care Guide
Page 12
... valve fully open ? New plumbing connections can decrease water pressure. See "Water Filtration System." 12 Allow several hours for the refrigerator to your cold water supply? If ice quality improves, then the filter may be installed to moisture buildup. ■ Door(s) opened often or left open ? Make sure wire shutoff arm or switch...
... valve fully open ? New plumbing connections can decrease water pressure. See "Water Filtration System." 12 Allow several hours for the refrigerator to your cold water supply? If ice quality improves, then the filter may be installed to moisture buildup. ■ Door(s) opened often or left open ? Make sure wire shutoff arm or switch...
Use & Care Guide
Page 13
...completely. ■ Water not been recently dispensed? Flush the water system. Make sure the refrigerator is normal. ■ Glass not being held under the dispenser long enough? Remove filter and operate dispenser. Hold the glass under the dispenser 2 to 3 seconds after dispensing ... Allow 24 hours after installation for water supply to a cold water pipe? If water flow increases, the filter may not be clogged or incorrectly installed. See "Refrigerator Doors." ■ Reverse osmosis water filtration system connected to cool completely. ■ Recently dispensed large amount ...
...completely. ■ Water not been recently dispensed? Flush the water system. Make sure the refrigerator is normal. ■ Glass not being held under the dispenser long enough? Remove filter and operate dispenser. Hold the glass under the dispenser 2 to 3 seconds after dispensing ... Allow 24 hours after installation for water supply to a cold water pipe? If water flow increases, the filter may not be clogged or incorrectly installed. See "Refrigerator Doors." ■ Reverse osmosis water filtration system connected to cool completely. ■ Recently dispensed large amount ...
Use & Care Guide
Page 15
... If you how to use of purchase, when this filter is used for factory specified parts to defective materials or workmanship. Contact your authorized KitchenAid dealer to determine if another warranty applies. 5/07 For additional product information, in the sealed refrigeration system. In Canada, call 1-800-422-1230. These parts are : compressor, evaporator...
... If you how to use of purchase, when this filter is used for factory specified parts to defective materials or workmanship. Contact your authorized KitchenAid dealer to determine if another warranty applies. 5/07 For additional product information, in the sealed refrigeration system. In Canada, call 1-800-422-1230. These parts are : compressor, evaporator...
Dimension Guide
Page 1
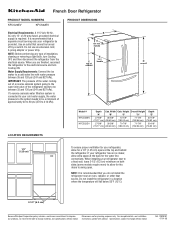
If a reverse osmosis water filtration system is recommended that you are for your refrigerator has an ice maker, allow extra space at the top and behind the refrigerator. handle C top of installation, cleaning or removing a light bulb, turn Cooling ON. Height Overall Height Depth "A" "B" "C" "D" "E" 27-5/8"...at the back for the doors to the electrical source and turn Cooling OFF, and then disconnect the refrigerator from the electrical source. Water Supply Requirements: Connect the ice maker to 414 kPa). B A not incl. Width Cab. or 20-amp fused, grounded electrical ...
If a reverse osmosis water filtration system is recommended that you are for your refrigerator has an ice maker, allow extra space at the top and behind the refrigerator. handle C top of installation, cleaning or removing a light bulb, turn Cooling ON. Height Overall Height Depth "A" "B" "C" "D" "E" 27-5/8"...at the back for the doors to the electrical source and turn Cooling OFF, and then disconnect the refrigerator from the electrical source. Water Supply Requirements: Connect the ice maker to 414 kPa). B A not incl. Width Cab. or 20-amp fused, grounded electrical ...

Installation Guide
Page 1
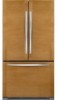
...FOR PANEL INSERTS • Individual refrigerator door panels should not exceed 15 lbs. (7 kg). • Freezer drawer panel should not exceed 15 lbs. (7 kg). Front Panel ( 3/4" Max.) Spacer Panel ( 1/16") Backing Panel ( 1/4") Refrigerator Door Routed Raised Panel Method ...Trim Frame Surrounding Door Routed Area Front Panel ( 3/4" Max.) Backing Panel ( 1/4") Refrigerator Door 12884405 06/08 A Panel Front Spacer Backing Type Panel Panel Panel* 17-3/4” ...
...FOR PANEL INSERTS • Individual refrigerator door panels should not exceed 15 lbs. (7 kg). • Freezer drawer panel should not exceed 15 lbs. (7 kg). Front Panel ( 3/4" Max.) Spacer Panel ( 1/16") Backing Panel ( 1/4") Refrigerator Door Routed Raised Panel Method ...Trim Frame Surrounding Door Routed Area Front Panel ( 3/4" Max.) Backing Panel ( 1/4") Refrigerator Door 12884405 06/08 A Panel Front Spacer Backing Type Panel Panel Panel* 17-3/4” ...

Installation Guide
Page 2
... common with the installation process, add the custom panel to the lower freezer drawer first. NOTE: For ease of assembly and to move and install refrigerator. Lift upper locking trim from adhesive tape assure the decorator panel fits the door. 2. Failure to provide own handles. Customer to do so can result...
... common with the installation process, add the custom panel to the lower freezer drawer first. NOTE: For ease of assembly and to move and install refrigerator. Lift upper locking trim from adhesive tape assure the decorator panel fits the door. 2. Failure to provide own handles. Customer to do so can result...


