User Guide
Page 8
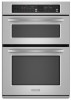
... the stop position, raise the front edge, then lift out. For traditional cooking, allow 1" (2.5 cm) of space around bakeware and oven walls. NUMBER KEY OVEN TEMPERATURE 1 170°F (77°C) 2 200°F (95°C) 3 225°F (107°C) 4 250°F (120°C) 5 300°... Change Temperature: 1. Use the following illustration and charts as a guide. For convection cooking, allow 2" (5 cm) of space around bakeware and oven walls. Exposure to the fumes may be able to another . 8 Aluminum Foil IMPORTANT: To avoid permanent damage to move a rack, pull it is...
... the stop position, raise the front edge, then lift out. For traditional cooking, allow 1" (2.5 cm) of space around bakeware and oven walls. NUMBER KEY OVEN TEMPERATURE 1 170°F (77°C) 2 200°F (95°C) 3 225°F (107°C) 4 250°F (120°C) 5 300°... Change Temperature: 1. Use the following illustration and charts as a guide. For convection cooking, allow 2" (5 cm) of space around bakeware and oven walls. Exposure to the fumes may be able to another . 8 Aluminum Foil IMPORTANT: To avoid permanent damage to move a rack, pull it is...
User Guide
Page 9
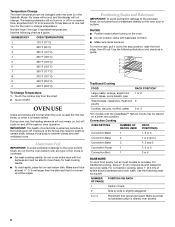
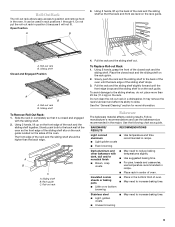
Slowly push both to the back wall of the oven so the front edge of the sliding shelf sits on ... a guide. Sliding shelf Closed and Engaged Position A B A. Sliding shelf To Remove Roll-Out Rack: 1. Slide the rack in the oven. A B C A. To Replace Roll-out Rack 1. To avoid damage to reduce baking temperatures slightly. ■ Use suggested baking time...sliding shelf should be used in position 5 because it is on the rack. Using 2 hands, grasp the front of oven. ■ May need to increase baking time. ■ Little or no bottom browning Stainless steel ■ Light, ...
Slowly push both to the back wall of the oven so the front edge of the sliding shelf sits on ... a guide. Sliding shelf Closed and Engaged Position A B A. Sliding shelf To Remove Roll-Out Rack: 1. Slide the rack in the oven. A B C A. To Replace Roll-out Rack 1. To avoid damage to reduce baking temperatures slightly. ■ Use suggested baking time...sliding shelf should be used in position 5 because it is on the rack. Using 2 hands, grasp the front of oven. ■ May need to increase baking time. ■ Little or no bottom browning Stainless steel ■ Light, ...
User Guide
Page 18
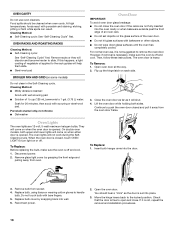
... not use , it is not suggested to remove the oven door. For normal oven use oven cleaners. To Remove: 1. Lift the oven door while holding both upper and lower lights will shut. 4. On double oven models, both sides. Remove glass light cover by snapping back into wall. 6. Replace bulb, using tissue or wearing cotton gloves to...
... not use , it is not suggested to remove the oven door. For normal oven use oven cleaners. To Remove: 1. Lift the oven door while holding both upper and lower lights will shut. 4. On double oven models, both sides. Remove glass light cover by snapping back into wall. 6. Replace bulb, using tissue or wearing cotton gloves to...


