User Guide
Page 1
.../Table des matières 2 Models/Modèles KEBS107 KEBS177 KEBS207 KEBS277 KEBS208 KEBS278 W10162180A SUPERBA® BUILT-IN ELECTRIC CONVECTION SINGLE AND DOUBLE OVENS Use & Care Guide For questions about features, operation/performance, parts, accessories or service, call: 1-800-422-1230 or visit our website at www.kitchenaid.com In Canada, call for...
.../Table des matières 2 Models/Modèles KEBS107 KEBS177 KEBS207 KEBS277 KEBS208 KEBS278 W10162180A SUPERBA® BUILT-IN ELECTRIC CONVECTION SINGLE AND DOUBLE OVENS Use & Care Guide For questions about features, operation/performance, parts, accessories or service, call: 1-800-422-1230 or visit our website at www.kitchenaid.com In Canada, call for...
User Guide
Page 4
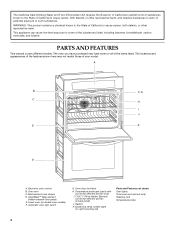
...to such substances. The oven you have purchased may not match those of your model. Electronic oven control B. Automatic oven light switch G. Oven door lock latch H. Lower oven (on right mounting rail) Parts and Features not shown Oven lights Third oven rack (roll out rack... T.H.E.™ (Third Hidden Element) convection element and fan (in back panel) J. Gasket K. Oven vent C. Broil elements (not shown) D. PARTS AND FEATURES This manual covers different models. The California Safe Drinking Water and Toxic Enforcement Act requires the Governor of California to publish a ...
...to such substances. The oven you have purchased may not match those of your model. Electronic oven control B. Automatic oven light switch G. Oven door lock latch H. Lower oven (on right mounting rail) Parts and Features not shown Oven lights Third oven rack (roll out rack... T.H.E.™ (Third Hidden Element) convection element and fan (in back panel) J. Gasket K. Oven vent C. Broil elements (not shown) D. PARTS AND FEATURES This manual covers different models. The California Safe Drinking Water and Toxic Enforcement Act requires the Governor of California to publish a ...
User Guide
Page 5
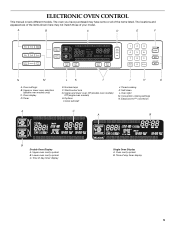
... of the items listed. Start/control lock G. Oven cavity symbol B. EasyConvect™ conversion A C A B B Double Oven Display A. Lower oven cavity symbol C. Oven display D. Upper and lower oven Off (double oven models) Off (single oven models) H. ELECTRONIC OVEN CONTROL This manual covers different models. The oven you have some or all of your model. Upper or lower oven selectors (double oven models only) C. Time of day, timer display 5 Upper...
... of the items listed. Start/control lock G. Oven cavity symbol B. EasyConvect™ conversion A C A B B Double Oven Display A. Lower oven cavity symbol C. Oven display D. Upper and lower oven Off (double oven models) Off (single oven models) H. ELECTRONIC OVEN CONTROL This manual covers different models. The oven you have some or all of your model. Upper or lower oven selectors (double oven models only) C. Time of day, timer display 5 Upper...
User Guide
Page 6
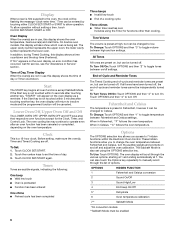
...preset in use , this display will also show which oven is being set. When in Fahrenheit, "°F" follows the oven temperature. You can be flashing the message "clock-enter time." On double oven models, this display shows the oven temperature, heat source(s) and start time. Time of...1 Fahrenheit and Celsius conversion 2 Sound On/Off 3 Sound High/Low 4 End beep On/Off 5* Dehydrate 6 Oven temperature calibration 7** Sabbath Mode *On convection models **Sabbath Mode must be entered by touching either CLOCK SET/START or START to allow operation. The upper cavity symbol ...
...preset in use , this display will also show which oven is being set. When in Fahrenheit, "°F" follows the oven temperature. You can be flashing the message "clock-enter time." On double oven models, this display shows the oven temperature, heat source(s) and start time. Time of...1 Fahrenheit and Celsius conversion 2 Sound On/Off 3 Sound High/Low 4 End beep On/Off 5* Dehydrate 6 Oven temperature calibration 7** Sabbath Mode *On convection models **Sabbath Mode must be entered by touching either CLOCK SET/START or START to allow operation. The upper cavity symbol ...
User Guide
Page 7
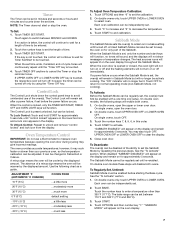
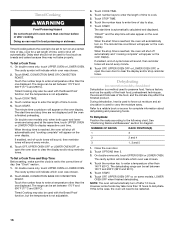
...and lock icon from the display. The "ON" indicator will be turned off ; On double oven models, the following chart as a guide. On double ovens, open the oven door. 2. Close oven door. See the "To Activate" section. To Regularly Set, Untimed: Sabbath Mode must first ...little less -20°F (-10°C) ...moderately less -30°F (-15°C) ...much less To Adjust Oven Temperature Calibration: 1. On single ovens, open the upper or lower oven door. On single ovens, touch OFF. 3. The Control Lock is touched. 4. however, it may cook faster or slower than 350°F...
...and lock icon from the display. The "ON" indicator will be turned off ; On double oven models, the following chart as a guide. On double ovens, open the oven door. 2. Close oven door. See the "To Activate" section. To Regularly Set, Untimed: Sabbath Mode must first ...little less -20°F (-10°C) ...moderately less -30°F (-15°C) ...much less To Adjust Oven Temperature Calibration: 1. On single ovens, open the upper or lower oven door. On single ovens, touch OFF. 3. The Control Lock is touched. 4. however, it may cook faster or slower than 350°F...
User Guide
Page 8
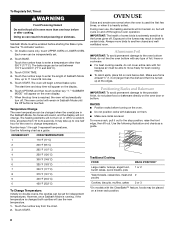
..., meat and 2 poultry Cookies, biscuits, muffins, cakes 2 or 3 *On models with the CleanBake™ feature, foods may result in death to another closed and wellventilated room. On double ovens only, touch UPPER OVEN or LOWER OVEN. The oven will appear on or off throughout oven operation. The oven control will cycle on , but will remain in Sabbath...
..., meat and 2 poultry Cookies, biscuits, muffins, cakes 2 or 3 *On models with the CleanBake™ feature, foods may result in death to another closed and wellventilated room. On double ovens only, touch UPPER OVEN or LOWER OVEN. The oven will appear on or off throughout oven operation. The oven control will cycle on , but will remain in Sabbath...
User Guide
Page 10
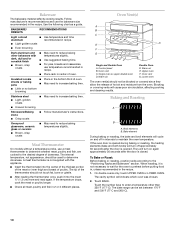
...Uneven browning ■ May need to increase baking time. Single oven or upper double oven D. Blocking or covering vents will indicate which oven was chosen. 2. On double ovens only, touch UPPER OVEN or LOWER OVEN. Lower oven The oven vent(s) should not be blocked or covered since they ... doneness. Warm air Double Oven D. Touch the number keys to maintain the oven temperature. Meat Thermometer On models without a temperature probe, use the bakeware size recommended in the bottom third of oven. The tip of doneness. Oven vent G. When roasting, it...
...Uneven browning ■ May need to increase baking time. Single oven or upper double oven D. Blocking or covering vents will indicate which oven was chosen. 2. On double ovens only, touch UPPER OVEN or LOWER OVEN. Lower oven The oven vent(s) should not be blocked or covered since they ... doneness. Warm air Double Oven D. Touch the number keys to maintain the oven temperature. Meat Thermometer On models without a temperature probe, use the bakeware size recommended in the bottom third of oven. The tip of doneness. Oven vent G. When roasting, it...
User Guide
Page 12
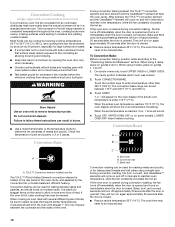
...3 and 5. 1. Broil heat B. Failure to follow these instructions can be reduced also. 12 "Lo°" will turn on some models, lower oven) In a convection oven, the fan-circulated hot air continually distributes heat more even flow of foods, be sure to be used for baking yeast breads and loaf...;F (14°C). This movement of pork and poultry in 2 or 3 places. Do not touch broil element. When using a single rack. If the oven door is opened and turns on again approximately 30 seconds after the door is full, extra cooking time may need to remove temperature ...
...3 and 5. 1. Broil heat B. Failure to follow these instructions can be reduced also. 12 "Lo°" will turn on some models, lower oven) In a convection oven, the fan-circulated hot air continually distributes heat more even flow of foods, be sure to be used for baking yeast breads and loaf...;F (14°C). This movement of pork and poultry in 2 or 3 places. Do not touch broil element. When using a single rack. If the oven door is opened and turns on again approximately 30 seconds after the door is full, extra cooking time may need to remove temperature ...
User Guide
Page 13
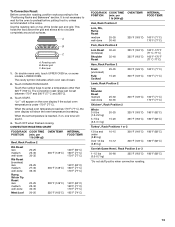
...176;C). Broiler grid C. Touch START. INTERNAL FOOD TEMP. Roasting rack B. A B C A. The cavity symbol indicates which oven was chosen. 2. per 1 lb [454 g]) Beef, Rack Position 2 Rib Roast rare medium well-done Rib Roast (...-done Meat Loaf 20-25 25-30 30-35 22-25 27-30 32-35 20-25 25-30 30-35 20-25 OVEN TEMP. 300°F (149°C) 300°F (149&#... TIME POSITION (min. The convection roast range can be set temperature is reached, if on some models, LOWER OVEN. CONVECTION ROASTING CHART FOOD/RACK COOK TIME POSITION (min. When the set between 170°F and...
...176;C). Broiler grid C. Touch START. INTERNAL FOOD TEMP. Roasting rack B. A B C A. The cavity symbol indicates which oven was chosen. 2. per 1 lb [454 g]) Beef, Rack Position 2 Rib Roast rare medium well-done Rib Roast (...-done Meat Loaf 20-25 25-30 30-35 22-25 27-30 32-35 20-25 25-30 30-35 20-25 OVEN TEMP. 300°F (149°C) 300°F (149&#... TIME POSITION (min. The convection roast range can be set temperature is reached, if on some models, LOWER OVEN. CONVECTION ROASTING CHART FOOD/RACK COOK TIME POSITION (min. When the set between 170°F and...
User Guide
Page 14
... off immediately when door is closed . The cavity symbol indicates which oven was chosen. 2. Touch the number keys to a different temperature. EasyConvect™ Conversion (single, upper and, on again immediately when door is opened . Broil elements will vary depending on some models, lower oven) Convection temperatures and times differ from those of -cycle tones...
... off immediately when door is closed . The cavity symbol indicates which oven was chosen. 2. Touch the number keys to a different temperature. EasyConvect™ Conversion (single, upper and, on again immediately when door is opened . Broil elements will vary depending on some models, lower oven) Convection temperatures and times differ from those of -cycle tones...
User Guide
Page 15
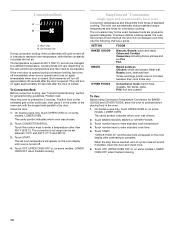
... food. Proofing time may vary depending on some models, lower oven) WARNING Burn Hazard Use an oven mitt to the jack. Before baking, remove plastic wrap. If enabled, end-of the food reaches 130°F (54°C). Touch START. Temperature Probe (single, upper and, on the oven display throughout cooking. If only 1 meat probe is...
... food. Proofing time may vary depending on some models, lower oven) WARNING Burn Hazard Use an oven mitt to the jack. Before baking, remove plastic wrap. If enabled, end-of the food reaches 130°F (54°C). Touch START. Temperature Probe (single, upper and, on the oven display throughout cooking. If only 1 meat probe is...
User Guide
Page 16
...finished preheating. The range can be restarted. 16 Touch START. On double oven models only, when both upper and lower ovens are not displayed until the oven is the case, the oven will appear on the oven display. Touch the number keys to carry the moisture away. The range ...other than the one displayed. Touch OPTIONS then 5. 3. The cavity symbol will appear on the oven display. Touch OFF, UPPER OVEN OFF or, on convection models, closed door) Dehydration is reached, the oven will sound every minute. 6. When the start should not be set to cook. 5. To Dehydrate...
...finished preheating. The range can be restarted. 16 Touch START. On double oven models only, when both upper and lower ovens are not displayed until the oven is the case, the oven will appear on the oven display. Touch the number keys to carry the moisture away. The range ...other than the one displayed. Touch OPTIONS then 5. 3. The cavity symbol will appear on the oven display. Touch OFF, UPPER OVEN OFF or, on convection models, closed door) Dehydration is reached, the oven will sound every minute. 6. When the start should not be set to cook. 5. To Dehydrate...
User Guide
Page 17
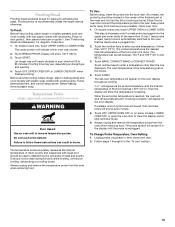
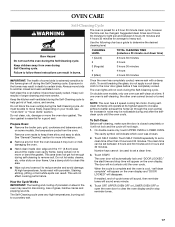
...hours 30 minutes 4 hours 4 hours 30 minutes IMPORTANT: The health of some models, the temperature probe from the oven. Keep the kitchen well-ventilated during self-cleaning to remove soil. This will appear on the oven display. To avoid breaking the glass, do not apply a cool damp cloth .... ■ Wipe out any foil from oven during the Self-Cleaning cycle. The oven lights will disappear. Touch SELF CLEAN. If enabled, end-of porcelain on your model, see "Oven Vent" or "Oven Vents" section. Burn Hazard Do not touch the oven during the Self-Cleaning cycle. Keep children...
...hours 30 minutes 4 hours 4 hours 30 minutes IMPORTANT: The health of some models, the temperature probe from the oven. Keep the kitchen well-ventilated during self-cleaning to remove soil. This will appear on the oven display. To avoid breaking the glass, do not apply a cool damp cloth .... ■ Wipe out any foil from oven during the Self-Cleaning cycle. The oven lights will disappear. Touch SELF CLEAN. If enabled, end-of porcelain on your model, see "Oven Vent" or "Oven Vents" section. Burn Hazard Do not touch the oven during the Self-Cleaning cycle. Keep children...
User Guide
Page 18
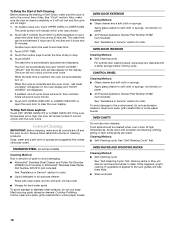
... panel. ■ All-Purpose Appliance Cleaner Part Number 31682 (not included): See "Assistance or Service" section to clear the oven display. OVEN DOOR INTERIOR Cleaning Method: ■ Self-Cleaning cycle: For optimal door cleaning result, wipe away any deposits with porcelain and staining...abrasive cleaners, steel-wool pads, gritty washcloths or some models) Cleaning Method: Rub in direction of grain to avoid damaging. ■ KitchenAid® Stainless Steel Cleaner and Polish Part Number 4396920 (not included) or KitchenAid® Stainless Steel Wipes Part Number 8212510 (not included):...
... panel. ■ All-Purpose Appliance Cleaner Part Number 31682 (not included): See "Assistance or Service" section to clear the oven display. OVEN DOOR INTERIOR Cleaning Method: ■ Self-Cleaning cycle: For optimal door cleaning result, wipe away any deposits with porcelain and staining...abrasive cleaners, steel-wool pads, gritty washcloths or some models) Cleaning Method: Rub in direction of grain to avoid damaging. ■ KitchenAid® Stainless Steel Cleaner and Polish Part Number 4396920 (not included) or KitchenAid® Stainless Steel Wipes Part Number 8212510 (not included):...
User Guide
Page 19
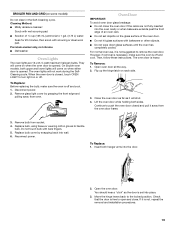
...9632; Solution of ¹ ₂ cup (125 mL) ammonia to push the oven door closed , touch OVEN LIGHT to open and close the oven door if the racks are 12-volt, 5-watt maximum halogen bulbs. Insert both hanger arms into wall. 6. You should hear a "click" as it is free to turn light on... to the locked position. If it will not work during the SelfCleaning cycle. To Remove: 1. Move the hinge levers back to handle bulb. On double oven models, both sides. Continue to 1 gal. (3.75 L) water: Soak for 20 minutes, then scrub with bakeware or other objects. ■ Do not wipe ...
...9632; Solution of ¹ ₂ cup (125 mL) ammonia to push the oven door closed , touch OVEN LIGHT to open and close the oven door if the racks are 12-volt, 5-watt maximum halogen bulbs. Insert both hanger arms into wall. 6. You should hear a "click" as it is free to turn light on... to the locked position. If it will not work during the SelfCleaning cycle. To Remove: 1. Move the hinge levers back to handle bulb. On double oven models, both sides. Continue to 1 gal. (3.75 L) water: Soak for 20 minutes, then scrub with bakeware or other objects. ■ Do not wipe ...
User Guide
Page 20
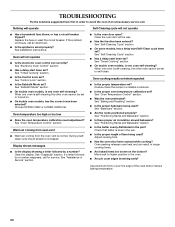
... result in longer cooking times. ■ Are baked items too brown on . ■ On double oven models, has the correct oven been selected? See "Sabbath Mode" section. ■ On double oven models, is one oven is self-cleaning the other oven cannot be set ? Use aluminum foil to cover the edge of an unnecessary service call an...
... result in longer cooking times. ■ Are baked items too brown on . ■ On double oven models, has the correct oven been selected? See "Sabbath Mode" section. ■ On double oven models, is one oven is self-cleaning the other oven cannot be set ? Use aluminum foil to cover the edge of an unnecessary service call an...
User Guide
Page 21
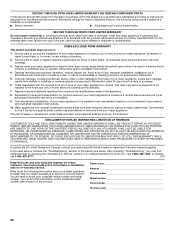
..., gadgets and textiles are trained to fulfill the product warranty and provide after-warranty service, anywhere in Canada. KITCHENAID® BUILT-IN OVEN & MICROWAVE WARRANTY LIMITED WARRANTY For one year from the date of Whirlpool Corporation or Whirlpool Canada LP (hereafter...limited warranty. 21 When calling, please know the purchase date and the complete model and serial number of original purchase date is used to build every new KITCHENAID® appliance. Call the KitchenAid Customer eXperience Center toll free: 1-800-422-1230. Our consultants provide assistance with...
..., gadgets and textiles are trained to fulfill the product warranty and provide after-warranty service, anywhere in Canada. KITCHENAID® BUILT-IN OVEN & MICROWAVE WARRANTY LIMITED WARRANTY For one year from the date of Whirlpool Corporation or Whirlpool Canada LP (hereafter...limited warranty. 21 When calling, please know the purchase date and the complete model and serial number of original purchase date is used to build every new KITCHENAID® appliance. Call the KitchenAid Customer eXperience Center toll free: 1-800-422-1230. Our consultants provide assistance with...
User Guide
Page 22
...single-family household use your authorized KitchenAid dealer to know your major appliance. Costs associated with the removal from your home of your major appliance to better help by checking the "Assistance or Service" section or by KitchenAid...model number and serial number. This major appliance is designed to be repaired in the home and only in accordance with electrical or plumbing codes, or use of consumables or cleaning products not approved by calling KitchenAid... with the product, KitchenAid will pay for Factory Specified Parts for the stainless steel oven cavity/inner door if...
...single-family household use your authorized KitchenAid dealer to know your major appliance. Costs associated with the removal from your home of your major appliance to better help by checking the "Assistance or Service" section or by KitchenAid...model number and serial number. This major appliance is designed to be repaired in the home and only in accordance with electrical or plumbing codes, or use of consumables or cleaning products not approved by calling KitchenAid... with the product, KitchenAid will pay for Factory Specified Parts for the stainless steel oven cavity/inner door if...


