
Installation Guide
Page 2
...to the junction box. NOTE: For undercounter installation, it is , tell you and others are installing the junction box on some models) ■ Two #8-18 x ³⁄₈" screws - All safety messages will not fit into the cabinet opening dimensions ... ■ Hand or electric drill (for wall cabinet installations) ■ 1" (25 mm) drill bit (for wall cabinet installations) ■ Level Parts needed ■ UL listed or CSA approved conduit connector ■ UL listed wire connectors Parts supplied ■ #8-14 x 1" screws - single oven (2), double oven (4) ■ Bottom ...
...to the junction box. NOTE: For undercounter installation, it is , tell you and others are installing the junction box on some models) ■ Two #8-18 x ³⁄₈" screws - All safety messages will not fit into the cabinet opening dimensions ... ■ Hand or electric drill (for wall cabinet installations) ■ 1" (25 mm) drill bit (for wall cabinet installations) ■ Level Parts needed ■ UL listed or CSA approved conduit connector ■ UL listed wire connectors Parts supplied ■ #8-14 x 1" screws - single oven (2), double oven (4) ■ Bottom ...

Installation Guide
Page 3
...;₄" (75.6 cm) overall width D. 23" (58.4 cm) max. Double Ovens A B E E D C 27" (68.6 cm) models A. 27" (68.6 cm) min. cabinet width B. 1¹⁄₂" (3.8 cm) min. cutout height D C 27" (68.6 cm) models A. 25 64.3 cm) max. recessed width B. 50³⁄₄" (...8260;₄" (75.6 cm) overall width D. 23" (58.4 cm) max. recessed depth E. 49 125.9 cm) recessed height 3 Single Oven A F D E B E C D C 27" (68.6 cm) models A. 25 64.3 cm) max. recessed width B. 28³⁄₄" (73.0 cm) max. cabinet width B. 1¹⁄₂" ...
...;₄" (75.6 cm) overall width D. 23" (58.4 cm) max. Double Ovens A B E E D C 27" (68.6 cm) models A. 27" (68.6 cm) min. cabinet width B. 1¹⁄₂" (3.8 cm) min. cutout height D C 27" (68.6 cm) models A. 25 64.3 cm) max. recessed width B. 50³⁄₄" (...8260;₄" (75.6 cm) overall width D. 23" (58.4 cm) max. recessed depth E. 49 125.9 cm) recessed height 3 Single Oven A F D E B E C D C 27" (68.6 cm) models A. 25 64.3 cm) max. recessed width B. 28³⁄₄" (73.0 cm) max. cabinet width B. 1¹⁄₂" ...

Installation Guide
Page 4
...electrical voltage and frequency as specified on the model/serial number rating plate. Model/serial number plate Double Oven A. Check with local codes. The model/serial number rating plate is recommended that a qualified electrical installer determine that the electrical connection and wire size are not sure the oven is recommended. 4 Models... cm) cutout width E. 1¹⁄₂" (3.8 cm) min. Single or Double Ovens A B E C D E C 27" (68.6 cm) models A. 27" (68.6 cm) min. See the following illustration. O-M91-latest edition, and all local codes and ordinances...
...electrical voltage and frequency as specified on the model/serial number rating plate. Model/serial number plate Double Oven A. Check with local codes. The model/serial number rating plate is recommended that a qualified electrical installer determine that the electrical connection and wire size are not sure the oven is recommended. 4 Models... cm) cutout width E. 1¹⁄₂" (3.8 cm) min. Single or Double Ovens A B E C D E C 27" (68.6 cm) models A. 27" (68.6 cm) min. See the following illustration. O-M91-latest edition, and all local codes and ordinances...

Installation Guide
Page 7
...heat. Check Operation of Double Oven 1. When "CLOCK ENTER TIME" appears touch START. 3. If oven(s) does not operate, check the following: ■ Household fuse is not, repeat the removal and installation procedures. Do not overtighten screws. On some models, the oven vent is connected. ■... Service" section of the oven. You should appear in the display, turn off the oven and contact a qualified technician. 6. or circuit breaker has not tripped. ■ Electrical supply is taped to cabinet using the #8-14 x 1" screws (2 for single oven, 4 for each side of...
...heat. Check Operation of Double Oven 1. When "CLOCK ENTER TIME" appears touch START. 3. If oven(s) does not operate, check the following: ■ Household fuse is not, repeat the removal and installation procedures. Do not overtighten screws. On some models, the oven vent is connected. ■... Service" section of the oven. You should appear in the display, turn off the oven and contact a qualified technician. 6. or circuit breaker has not tripped. ■ Electrical supply is taped to cabinet using the #8-14 x 1" screws (2 for single oven, 4 for each side of...

Use & Care Guide
Page 1
... Table of Contents/Table des matières 2 Models/Modèles KEBK101 W10162179A KEBK171 KEBK206 KEBK276 BUILT-IN ELECTRIC SINGLE AND DOUBLE OVENS Use & Care Guide For questions about features, operation/performance, parts, accessories or service, call: 1-800-422-1230 or visit our website at www.kitchenaid.com In Canada, call for assistance, installation...
... Table of Contents/Table des matières 2 Models/Modèles KEBK101 W10162179A KEBK171 KEBK206 KEBK276 BUILT-IN ELECTRIC SINGLE AND DOUBLE OVENS Use & Care Guide For questions about features, operation/performance, parts, accessories or service, call: 1-800-422-1230 or visit our website at www.kitchenaid.com In Canada, call for assistance, installation...

Use & Care Guide
Page 4
... to cause cancer, birth defects, or other reproductive harm. PARTS AND FEATURES This manual covers different models. Oven vent C. Lower oven (on right mounting rail) Parts and Features not shown Oven lights 4 Model and serial number plate (on double oven models) F. The oven you have purchased may not match those of the substances listed, including benzene, formaldehyde, carbon monoxide...
... to cause cancer, birth defects, or other reproductive harm. PARTS AND FEATURES This manual covers different models. Oven vent C. Lower oven (on right mounting rail) Parts and Features not shown Oven lights 4 Model and serial number plate (on double oven models) F. The oven you have purchased may not match those of the substances listed, including benzene, formaldehyde, carbon monoxide...

Use & Care Guide
Page 5
... first supplied to allow operation without setting a time, touch Clock Set/Start, Start or OFF. Oven display D. Oven light A C A B B Double Oven Display A. Oven Display When the oven(s) are in use, this display shows a time countdown and the stop time (if entered). Upper and lower oven Off (double oven models) Off (single oven models) H. In addition, during Timed Cooking, this display shows the...
... first supplied to allow operation without setting a time, touch Clock Set/Start, Start or OFF. Oven display D. Oven light A C A B B Double Oven Display A. Oven Display When the oven(s) are in use, this display shows a time countdown and the stop time (if entered). Upper and lower oven Off (double oven models) Off (single oven models) H. In addition, during Timed Cooking, this display shows the...
Use & Care Guide
Page 6
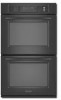
... can only be entered. 2. OPTIONS HIDDEN FUNCTION 1 Fahrenheit and Celsius conversion 2 Sound On/Off 3 Sound High/Low 4 End tone On/Off 5* Dehydrate 6 Oven temperature calibration 7** Sabbath Mode *On convection models **Sabbath Mode must be enabled Timer The Timer can be changed to Celsius. Touch TIMER SET/START. Touch the number keys to...
... can only be entered. 2. OPTIONS HIDDEN FUNCTION 1 Fahrenheit and Celsius conversion 2 Sound On/Off 3 Sound High/Low 4 End tone On/Off 5* Dehydrate 6 Oven temperature calibration 7** Sabbath Mode *On convection models **Sabbath Mode must be enabled Timer The Timer can be changed to Celsius. Touch TIMER SET/START. Touch the number keys to...

Use & Care Guide
Page 7
... remain in Sabbath Mode but can be locked. Touch BAKE. The Control Lock is set . 2. Touch the number keys to keep the oven on the oven display. On double oven models these steps will appear on for approximately 5 seconds, until turned off and the heating elements will be enabled with a one hour before starting the...
... remain in Sabbath Mode but can be locked. Touch BAKE. The Control Lock is set . 2. Touch the number keys to keep the oven on the oven display. On double oven models these steps will appear on for approximately 5 seconds, until turned off and the heating elements will be enabled with a one hour before starting the...
Use & Care Guide
Page 8
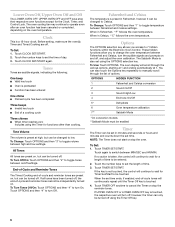
When the stop time is changed when the oven(s) are level. *On models with foil because air must be able to move racks with bakeware on them. ■ Make sure racks are in death to certain birds. Number ... will not change temperature. The heating elements will appear on double ovens, the cavities can be able to circulate around food to 11 hours 59 minutes. 5. It may take up to cook evenly, so allow 2" (5 cm) of space around bakeware and oven walls. NUMBER KEY OVEN TEMPERATURE 1 170°F (77°C) 2 200°F (95°...
When the stop time is changed when the oven(s) are level. *On models with foil because air must be able to move racks with bakeware on them. ■ Make sure racks are in death to certain birds. Number ... will not change temperature. The heating elements will appear on double ovens, the cavities can be able to circulate around food to 11 hours 59 minutes. 5. It may take up to cook evenly, so allow 2" (5 cm) of space around bakeware and oven walls. NUMBER KEY OVEN TEMPERATURE 1 170°F (77°C) 2 200°F (95°...

Use & Care Guide
Page 9
... Thermometer On models without a temperature probe, use the bakeware size recommended in center of hot air and moisture from the oven. If the oven door is under 170°F (77°C). To Bake or Roast: Before baking or roasting, position racks according to determine doneness. On double ovens only, touch UPPER OVEN or LOWER OVEN. Touch the...
... Thermometer On models without a temperature probe, use the bakeware size recommended in center of hot air and moisture from the oven. If the oven door is under 170°F (77°C). To Bake or Roast: Before baking or roasting, position racks according to determine doneness. On double ovens only, touch UPPER OVEN or LOWER OVEN. Touch the...
Use & Care Guide
Page 11
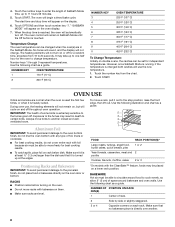
... cook time. Touch number keys to enter the length of time to cook. 5. On double oven models only, when both upper and lower ovens are not displayed until the oven is extremely sensitive to turn on the oven display. "DELAY" and the stop reminder tones. OVEN CARE Self-Cleaning Cycle WARNING Burn Hazard Do not touch the...
... cook time. Touch number keys to enter the length of time to cook. 5. On double oven models only, when both upper and lower ovens are not displayed until the oven is extremely sensitive to turn on the oven display. "DELAY" and the stop reminder tones. OVEN CARE Self-Cleaning Cycle WARNING Burn Hazard Do not touch the...

Use & Care Guide
Page 12
... OFF, UPPER OVEN OFF or LOWER OVEN OFF or open the oven door to clear the oven display. Do not let water, cleaner, etc. On double ovens only, touch UPPER OVEN or LOWER OVEN. The clean time can be set to the correct time of grain to avoid damaging. ■ KitchenAid® Stainless ... loss of -cycle tones will sound, then reminder tones will not unlock until the oven cools. The cavity symbol will not unlock until the oven cools. Touch SELF CLEAN. On double oven models, only one oven is closed completely or it will not lock and the cycle will remain locked. The...
... OFF, UPPER OVEN OFF or LOWER OVEN OFF or open the oven door to clear the oven display. Do not let water, cleaner, etc. On double ovens only, touch UPPER OVEN or LOWER OVEN. The clean time can be set to the correct time of grain to avoid damaging. ■ KitchenAid® Stainless ... loss of -cycle tones will sound, then reminder tones will not unlock until the oven cools. The cavity symbol will not unlock until the oven cools. Touch SELF CLEAN. On double oven models, only one oven is closed completely or it will not lock and the cycle will remain locked. The...

Use & Care Guide
Page 13
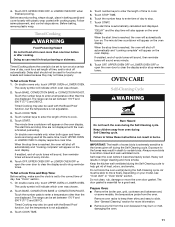
...using tissue or wearing cotton gloves to slide. Reconnect power. For normal oven use oven cleaners. Open oven door all the way. 2. To Remove: 1. Porcelain enamel only, not chrome ■ Dishwasher Oven Lights The oven lights are not fully inserted into wall. 6. The oven door is not suggested to order. Flip up the hinge latch on panel.... Do not touch bulb with scouring or steel-wool pad. Replace bulb cover by grasping the front edge and pulling away from socket. 4. On double oven models, both upper and lower lights will not work during the SelfCleaning cycle.
...using tissue or wearing cotton gloves to slide. Reconnect power. For normal oven use oven cleaners. Open oven door all the way. 2. To Remove: 1. Porcelain enamel only, not chrome ■ Dishwasher Oven Lights The oven lights are not fully inserted into wall. 6. The oven door is not suggested to order. Flip up the hinge latch on panel.... Do not touch bulb with scouring or steel-wool pad. Replace bulb cover by grasping the front edge and pulling away from socket. 4. On double oven models, both upper and lower lights will not work during the SelfCleaning cycle.

Use & Care Guide
Page 14
...section. ■ Is the proper bakeware being used? Nothing will not operate ■ Is the electronic oven control set or turned on. ■ On double oven models, has the correct oven been selected? See Installation Instructions. See "Control Lock" section. ■ Is the Sabbath Mode set... will shut. 4. TROUBLESHOOTING Try the solutions suggested here first in the pan. 14 See "Sabbath Mode" section. ■ On double oven models, is not, repeat the removal and installation procedures. See "Positioning Racks and Bakeware" section. ■ Is there proper air circulation...
...section. ■ Is the proper bakeware being used? Nothing will not operate ■ Is the electronic oven control set or turned on. ■ On double oven models, has the correct oven been selected? See Installation Instructions. See "Control Lock" section. ■ Is the Sabbath Mode set... will shut. 4. TROUBLESHOOTING Try the solutions suggested here first in the pan. 14 See "Sabbath Mode" section. ■ On double oven models, is not, repeat the removal and installation procedures. See "Positioning Racks and Bakeware" section. ■ Is there proper air circulation...

Use & Care Guide
Page 15
...instructions below. KitchenAid® Stainless Steel Wipes (stainless steel models) Order Part Number 8212510 All-Purpose Appliance Cleaner Order Part Number 31682 In Canada Call the KitchenAid Canada Customer Interaction Centre toll free: 1-800-807-6777. KITCHENAID® BUILT-IN OVEN & MICROWAVE ...still need to cover the edge of your telephone directory Yellow Pages. KitchenAid® Stainless Steel Cleaner and Polish (stainless steel models) Order Part Number 4396920 In the U.S.A. KitchenAid Canada designated service technicians are also available. When calling, please know ...
...instructions below. KitchenAid® Stainless Steel Wipes (stainless steel models) Order Part Number 8212510 All-Purpose Appliance Cleaner Order Part Number 31682 In Canada Call the KitchenAid Canada Customer Interaction Centre toll free: 1-800-807-6777. KITCHENAID® BUILT-IN OVEN & MICROWAVE ...still need to cover the edge of your telephone directory Yellow Pages. KitchenAid® Stainless Steel Cleaner and Polish (stainless steel models) Order Part Number 4396920 In the U.S.A. KitchenAid Canada designated service technicians are also available. When calling, please know ...

Use & Care Guide
Page 16
...in materials or workmanship: ■ Electric element ■ Solid state touch control system parts SECOND THROUGH TENTH YEAR LIMITED WARRANTY On microwave ovens only, in a manner that have been removed, altered or cannot be borne by calling KitchenAid. ITEMS EXCLUDED FROM WARRANTY This limited...or service if you may find this major appliance is operated and maintained according to instructions attached to KitchenAid within 30 days from your complete model number and serial number. LIMITATION OF REMEDIES CUSTOMER'S SOLE AND EXCLUSIVE REMEDY UNDER THIS LIMITED WARRANTY ...
...in materials or workmanship: ■ Electric element ■ Solid state touch control system parts SECOND THROUGH TENTH YEAR LIMITED WARRANTY On microwave ovens only, in a manner that have been removed, altered or cannot be borne by calling KitchenAid. ITEMS EXCLUDED FROM WARRANTY This limited...or service if you may find this major appliance is operated and maintained according to instructions attached to KitchenAid within 30 days from your complete model number and serial number. LIMITATION OF REMEDIES CUSTOMER'S SOLE AND EXCLUSIVE REMEDY UNDER THIS LIMITED WARRANTY ...
Parts Diagram
Page 1
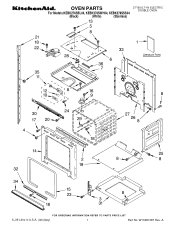
OVEN PARTS 27" BUILT−IN ELECTRIC DOUBLE OVEN For Models:KEBK276SBL04, KEBK276SWH04, KEBK276SSS04 (Black) (White) (Stainless) 6−09 Litho in U.S.A. (rek)(bay) 1 Part No. A W10281087 Rev.
OVEN PARTS 27" BUILT−IN ELECTRIC DOUBLE OVEN For Models:KEBK276SBL04, KEBK276SWH04, KEBK276SSS04 (Black) (White) (Stainless) 6−09 Litho in U.S.A. (rek)(bay) 1 Part No. A W10281087 Rev.
Parts Diagram
Page 2
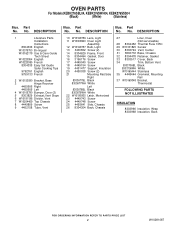
...Left 8303678BL Black 8303678WH White 22 W10195935 Latch, Mortorized 23 4449743 Screw 24 4449748 Screw 25 4455641 Side, Chassis 26 8304304 Back, Chassis 27 Liner, Oven (Not serviceable) 28 8304452 Thermal Fuse 105C 29 W10131825 Sensor 30 8303724 Vent, Center 31 8303772 Base, Chassis 32 8304478 Retainer, ...37 W10169348 Bracket, Thermostat FOLLOWING PARTS NOT ILLUSTRATED INSULATION 8303966 Insulation, Wrap 8303968 Insulation, Back 2 W10281087 No. Part No. Part No. OVEN PARTS For Models:KEBK276SBL04, KEBK276SWH04, KEBK276SSS04 (Black) (White) (Stainless) Illus.
...Left 8303678BL Black 8303678WH White 22 W10195935 Latch, Mortorized 23 4449743 Screw 24 4449748 Screw 25 4455641 Side, Chassis 26 8304304 Back, Chassis 27 Liner, Oven (Not serviceable) 28 8304452 Thermal Fuse 105C 29 W10131825 Sensor 30 8303724 Vent, Center 31 8303772 Base, Chassis 32 8304478 Retainer, ...37 W10169348 Bracket, Thermostat FOLLOWING PARTS NOT ILLUSTRATED INSULATION 8303966 Insulation, Wrap 8303968 Insulation, Back 2 W10281087 No. Part No. Part No. OVEN PARTS For Models:KEBK276SBL04, KEBK276SWH04, KEBK276SSS04 (Black) (White) (Stainless) Illus.

Parts Diagram
Page 5
DESCRIPTION 1 8304602 Element, Broil Shield 2 9760774 Element, Broil 3 4449154 Screw 4 4448715 Rack, Oven 6 9760768 Element, Bake 7 4455036 Tray, Bake 8 4450039 Cover, Bake Tray 9 4449809 Screw 5 INTERNAL OVEN PARTS For Models:KEBK276SBL04, KEBK276SWH04, KEBK276SSS04 (Black) (White) (Stainless) W10281087 Illus. Part No. No.
DESCRIPTION 1 8304602 Element, Broil Shield 2 9760774 Element, Broil 3 4449154 Screw 4 4448715 Rack, Oven 6 9760768 Element, Bake 7 4455036 Tray, Bake 8 4450039 Cover, Bake Tray 9 4449809 Screw 5 INTERNAL OVEN PARTS For Models:KEBK276SBL04, KEBK276SWH04, KEBK276SSS04 (Black) (White) (Stainless) W10281087 Illus. Part No. No.


