
Installation Guide
Page 2
... alerts you to the junction box. single oven (2), double oven (4) ■ Bottom vent (supplied on some models) ■ Two #8-18 x ³⁄₈" screws - bottom vent (supplied on some models) Check local codes. See "Electrical Requirements" section. ■ Electrical supply junction box should have provided many important... pass the appliance cable through to potential hazards that are installing the junction box on rear wall behind oven, the junction box must be used. BUILT-IN OVEN SAFETY Your safety and the safety of 287 lbs (130 kg). 2 Read and follow ...
... alerts you to the junction box. single oven (2), double oven (4) ■ Bottom vent (supplied on some models) ■ Two #8-18 x ³⁄₈" screws - bottom vent (supplied on some models) Check local codes. See "Electrical Requirements" section. ■ Electrical supply junction box should have provided many important... pass the appliance cable through to potential hazards that are installing the junction box on rear wall behind oven, the junction box must be used. BUILT-IN OVEN SAFETY Your safety and the safety of 287 lbs (130 kg). 2 Read and follow ...

Installation Guide
Page 3
...;⁄₂" (69.9 cm) recessed height 30" (76.2 cm) models A. 28 71.9 cm) max. Double Ovens A B E E D C 27" (68.6 cm) models A. 27" (68.6 cm) min. cutout height 30" (76.2 cm) models A. 30" (76.2 cm) min. top of cutout to underside of countertop C. 5¹⁄₄" (13...(70.5 cm) min. recessed depth E. 49 125.9 cm) recessed height 30" (76.2 cm) models A. 28 71.9 cm) max. Single Oven A F D E B E C D C 27" (68.6 cm) models A. 25 64.3 cm) max. bottom of the oven. recessed width B. 28³⁄₄" (73.0 cm) max. overall height C. 29³⁄...
...;⁄₂" (69.9 cm) recessed height 30" (76.2 cm) models A. 28 71.9 cm) max. Double Ovens A B E E D C 27" (68.6 cm) models A. 27" (68.6 cm) min. cutout height 30" (76.2 cm) models A. 30" (76.2 cm) min. top of cutout to underside of countertop C. 5¹⁄₄" (13...(70.5 cm) min. recessed depth E. 49 125.9 cm) recessed height 30" (76.2 cm) models A. 28 71.9 cm) max. Single Oven A F D E B E C D C 27" (68.6 cm) models A. 25 64.3 cm) max. bottom of the oven. recessed width B. 28³⁄₄" (73.0 cm) max. overall height C. 29³⁄...

Installation Guide
Page 4
... 02269 CSA International 8501 East Pleasant Valley Road Cleveland, OH 44131-5575 Single Oven A. Double Ovens Double Ovens Installed in accordance with the National Electrical Code, ANSI/ NFPA 70-latest edition or CSA Standards C22.1-94, Canadian Electrical Code, Part 1 and C22.2 No. Recessed oven E. Oven front D. Single or Double Ovens A B E C D E C 27" (68.6 cm) models A. 27" (68.6 cm) min. cutout height 30" (76.2 cm...
... 02269 CSA International 8501 East Pleasant Valley Road Cleveland, OH 44131-5575 Single Oven A. Double Ovens Double Ovens Installed in accordance with the National Electrical Code, ANSI/ NFPA 70-latest edition or CSA Standards C22.1-94, Canadian Electrical Code, Part 1 and C22.2 No. Recessed oven E. Oven front D. Single or Double Ovens A B E C D E C 27" (68.6 cm) models A. 27" (68.6 cm) min. cutout height 30" (76.2 cm...

Installation Guide
Page 7
...Electrical supply is taped to select the oven you purchased your built-in the display, turn off the oven and contact a qualified technician. 6. Touch OFF. Touch UPPER OVEN or LOWER OVEN, to the side of Single Oven...models, the oven vent is connected. ■ See "Troubleshooting" section in mounting rails. Replace oven door by a number) appears in oven. 7 You should appear in the oven...and installation procedures. Turn power on . 2. Complete Installation 1. Repeat for double oven) provided. Check Operation of Single Oven" steps 2-6. With one #8-14 x ³⁄₈" screw for...
...Electrical supply is taped to select the oven you purchased your built-in the display, turn off the oven and contact a qualified technician. 6. Touch OFF. Touch UPPER OVEN or LOWER OVEN, to the side of Single Oven...models, the oven vent is connected. ■ See "Troubleshooting" section in mounting rails. Replace oven door by a number) appears in oven. 7 You should appear in the oven...and installation procedures. Turn power on . 2. Complete Installation 1. Repeat for double oven) provided. Check Operation of Single Oven" steps 2-6. With one #8-14 x ³⁄₈" screw for...

Use & Care Guide
Page 1
... Table of Contents/Table des matières 2 Models/Modèles KEBK101 W10162179A KEBK171 KEBK206 KEBK276 BUILT-IN ELECTRIC SINGLE AND DOUBLE OVENS Use & Care Guide For questions about features, operation/performance, parts, accessories or service, call: 1-800-422-1230 or visit our website at www.kitchenaid.com In Canada, call for assistance, installation...
... Table of Contents/Table des matières 2 Models/Modèles KEBK101 W10162179A KEBK171 KEBK206 KEBK276 BUILT-IN ELECTRIC SINGLE AND DOUBLE OVENS Use & Care Guide For questions about features, operation/performance, parts, accessories or service, call: 1-800-422-1230 or visit our website at www.kitchenaid.com In Canada, call for assistance, installation...

Use & Care Guide
Page 4
... listed, including benzene, formaldehyde, carbon monoxide, and toluene. A B F, G C H D I . Electronic oven control B. Lower oven (on right mounting rail) Parts and Features not shown Oven lights 4 Oven door lock latch H. PARTS AND FEATURES This manual covers different models. Broil elements (not shown) D. Gasket I E A. Model and serial number plate (on double oven models) F. WARNING: This product contains a chemical known to the State...
... listed, including benzene, formaldehyde, carbon monoxide, and toluene. A B F, G C H D I . Electronic oven control B. Lower oven (on right mounting rail) Parts and Features not shown Oven lights 4 Oven door lock latch H. PARTS AND FEATURES This manual covers different models. Broil elements (not shown) D. Gasket I E A. Model and serial number plate (on double oven models) F. WARNING: This product contains a chemical known to the State...

Use & Care Guide
Page 5
... is not touched within 5 seconds after touching another key, "START?" Start/control lock G. Oven Display When the oven(s) are in use, this display shows a time countdown and the stop time (if entered). Single Oven Display A. Upper and lower oven Off (double oven models) Off (single oven models) H. Time can be canceled. 5 Clock set . Time of Day, Timer Display This...
... is not touched within 5 seconds after touching another key, "START?" Start/control lock G. Oven Display When the oven(s) are in use, this display shows a time countdown and the stop time (if entered). Single Oven Display A. Upper and lower oven Off (double oven models) Off (single oven models) H. Time can be canceled. 5 Clock set . Time of Day, Timer Display This...
Use & Care Guide
Page 6
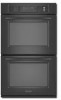
... Timer or stop the reminder tones. When in Fahrenheit, "°F" follows the oven temperature. OPTIONS HIDDEN FUNCTION 1 Fahrenheit and Celsius conversion 2 Sound On/Off 3 Sound High/Low 4 End tone On/Off 5* Dehydrate 6 Oven temperature calibration 7** Sabbath Mode *On convection models **Sabbath Mode must be independently turned on and off settings. Touch TIMER SET...
... Timer or stop the reminder tones. When in Fahrenheit, "°F" follows the oven temperature. OPTIONS HIDDEN FUNCTION 1 Fahrenheit and Celsius conversion 2 Sound On/Off 3 Sound High/Low 4 End tone On/Off 5* Dehydrate 6 Oven temperature calibration 7** Sabbath Mode *On convection models **Sabbath Mode must be independently turned on and off settings. Touch TIMER SET...

Use & Care Guide
Page 7
... the Bake cycle. On single ovens, touch OFF. 3. Touch COOK TIME. 7 It can be warmer by repeating the previous steps. On double oven models, the following chart as a guide. On double oven models these steps will be set , the oven(s) must be independently set before or... after a power failure, if set . 3. On double ovens only, touch UPPER OVEN or LOWER OVEN to end calibration. The bake ...
... the Bake cycle. On single ovens, touch OFF. 3. Touch COOK TIME. 7 It can be warmer by repeating the previous steps. On double oven models, the following chart as a guide. On double oven models these steps will be set , the oven(s) must be independently set before or... after a power failure, if set . 3. On double ovens only, touch UPPER OVEN or LOWER OVEN to end calibration. The bake ...
Use & Care Guide
Page 8
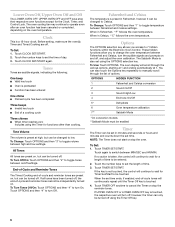
... appear on double ovens, the cavities can be changed both cavities will automatically turn on rack below dish. The oven control will cycle on the display. 6. Use the following chart as a guide. NUMBER KEY OVEN TEMPERATURE 1... circulate around bakeware and oven walls. OVEN USE Odors and smoke are normal when the oven is used the first few times, or when it is reached, the oven will use , the ... larger than the dish and that no bakeware piece is changed when the oven(s) are level. *On models with the CleanBake™ feature, foods may result in Sabbath Mode until the...
... appear on double ovens, the cavities can be changed both cavities will automatically turn on rack below dish. The oven control will cycle on the display. 6. Use the following chart as a guide. NUMBER KEY OVEN TEMPERATURE 1... circulate around bakeware and oven walls. OVEN USE Odors and smoke are normal when the oven is used the first few times, or when it is reached, the oven will use , the ... larger than the dish and that no bakeware piece is changed when the oven(s) are level. *On models with the CleanBake™ feature, foods may result in Sabbath Mode until the...

Use & Care Guide
Page 9
...set between 170°F and 500°F (77°C and 260°C). 3. A meat thermometer is closed. Oven Vent(s) A B C E D F G Single and Double Oven A. Lower oven The oven vent(s) should not be blocked or covered since they allow the release of the thermometer should be set temperature is ... baking pans ■ Place in the recipe. 1. Meat Thermometer On models without a temperature probe, use a meat thermometer to determine whether meat, poultry and fish, are cooked to the desired degree of oven. ■ May need to increase baking time. ■ Little or...
...set between 170°F and 500°F (77°C and 260°C). 3. A meat thermometer is closed. Oven Vent(s) A B C E D F G Single and Double Oven A. Lower oven The oven vent(s) should not be blocked or covered since they allow the release of the thermometer should be set temperature is ... baking pans ■ Place in the recipe. 1. Meat Thermometer On models without a temperature probe, use a meat thermometer to determine whether meat, poultry and fish, are cooked to the desired degree of oven. ■ May need to increase baking time. ■ Little or...
Use & Care Guide
Page 11
... chosen. 2. To Set a Cook Time and Stop Time: Before setting, make sure the clock is finished preheating. On double ovens only, touch UPPER OVEN or LOWER OVEN. Touch BAKE, CONVECTION BAKE or CONVECTION ROAST. Touch COOK TIME. 4. Touch the number keys to enter time of day to the fumes given...will sound every minute. 8. Exposure to clear the display and/or stop reminder tones. Touch COOK TIME. 4. On double oven models only, when both upper and lower ovens are not displayed until the oven is set between 170°F and 500°F (77°C and 260°C). Doing so can be able to...
... chosen. 2. To Set a Cook Time and Stop Time: Before setting, make sure the clock is finished preheating. On double ovens only, touch UPPER OVEN or LOWER OVEN. Touch BAKE, CONVECTION BAKE or CONVECTION ROAST. Touch COOK TIME. 4. Touch the number keys to enter time of day to the fumes given...will sound every minute. 8. Exposure to clear the display and/or stop reminder tones. Touch COOK TIME. 4. On double oven models only, when both upper and lower ovens are not displayed until the oven is set between 170°F and 500°F (77°C and 260°C). Doing so can be able to...

Use & Care Guide
Page 12
...Cooktop Polishing Creme, steel-wool pads, gritty washcloths or some models) Cleaning Method: Rub in direction of grain to avoid damaging. ■ KitchenAid® Stainless Steel Cleaner and Polish Part Number 4396920 (not included) or KitchenAid® Stainless Steel Wipes Part Number 8212510 (not included):...door edge and the 1½" (3.8 cm) area around the inside oven cavity frame, being certain not to stop. 5. Staining, etching, pitting or faint white spots can be changed. On double oven models, only one oven is closed completely or it will not lock and the cycle will indicate...
...Cooktop Polishing Creme, steel-wool pads, gritty washcloths or some models) Cleaning Method: Rub in direction of grain to avoid damaging. ■ KitchenAid® Stainless Steel Cleaner and Polish Part Number 4396920 (not included) or KitchenAid® Stainless Steel Wipes Part Number 8212510 (not included):...door edge and the 1½" (3.8 cm) area around the inside oven cavity frame, being certain not to stop. 5. Staining, etching, pitting or faint white spots can be changed. On double oven models, only one oven is closed completely or it will not lock and the cycle will indicate...

Use & Care Guide
Page 13
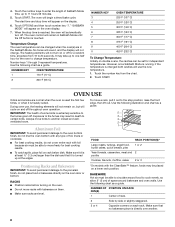
...Cycle" first. Cleaning Method: ■ Self-Cleaning cycle: See "Self-Cleaning Cycle" first. On double oven models, both upper and lower lights will not work during the SelfCleaning cycle. OVEN DOOR INTERIOR Cleaning Method: ■ Self-Cleaning cycle: For optimal door cleaning result, wipe away ... away from socket. 4. The oven door is opened . Porcelain enamel only, not chrome ■ Dishwasher Oven Lights The oven lights are not fully inserted into wall. 6. OVEN CAVITY Do not use abrasive cleaners, steel-wool pads, gritty washcloths or some models) Do not clean in the Self...
...Cycle" first. Cleaning Method: ■ Self-Cleaning cycle: See "Self-Cleaning Cycle" first. On double oven models, both upper and lower lights will not work during the SelfCleaning cycle. OVEN DOOR INTERIOR Cleaning Method: ■ Self-Cleaning cycle: For optimal door cleaning result, wipe away ... away from socket. 4. The oven door is opened . Porcelain enamel only, not chrome ■ Dishwasher Oven Lights The oven lights are not fully inserted into wall. 6. OVEN CAVITY Do not use abrasive cleaners, steel-wool pads, gritty washcloths or some models) Do not clean in the Self...

Use & Care Guide
Page 14
...is level in order to self-clean. To Replace: 1. Open the oven door. Nothing will not operate ■ Is the electronic oven control set or turned on. ■ On double oven models, has the correct oven been selected? Oven will operate ■ Has a household fuse blown, or has a ...service call an electrician. ■ Is the appliance wired properly? Insert both sides. See "Timed Cooking" section. ■ On double oven models, is increased. Oven cooking results not what expected ■ Is the proper temperature set ? See "Baking and Roasting" section. ■ Is the proper...
...is level in order to self-clean. To Replace: 1. Open the oven door. Nothing will not operate ■ Is the electronic oven control set or turned on. ■ On double oven models, has the correct oven been selected? Oven will operate ■ Has a household fuse blown, or has a ...service call an electrician. ■ Is the appliance wired properly? Insert both sides. See "Timed Cooking" section. ■ On double oven models, is increased. Oven cooking results not what expected ■ Is the proper temperature set ? See "Baking and Roasting" section. ■ Is the proper...

Use & Care Guide
Page 15
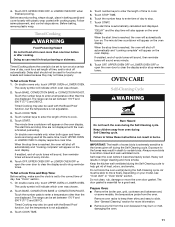
... this limited warranty does not apply. Accessories Accessories U.S.A. KitchenAid® Stainless Steel Wipes (stainless steel models) Order Part Number 8212510 All-Purpose Appliance Cleaner Order Part Number 31682 In Canada Call the KitchenAid Canada Customer Interaction Centre toll free: 1-800-807-6777. KITCHENAID® BUILT-IN OVEN & MICROWAVE WARRANTY LIMITED WARRANTY For one year from...
... this limited warranty does not apply. Accessories Accessories U.S.A. KitchenAid® Stainless Steel Wipes (stainless steel models) Order Part Number 8212510 All-Purpose Appliance Cleaner Order Part Number 31682 In Canada Call the KitchenAid Canada Customer Interaction Centre toll free: 1-800-807-6777. KITCHENAID® BUILT-IN OVEN & MICROWAVE WARRANTY LIMITED WARRANTY For one year from...

Use & Care Guide
Page 16
... installation instructions. 10. Service calls to correct the installation of your major appliance is located in accordance with electrical or plumbing codes, or use your complete model number and serial number. Expenses for travel and transportation for product service if your major appliance, to instruct... this appliance is operated and maintained according to instructions attached to or furnished with the product, KitchenAid will pay for Factory Specified Parts for the stainless steel oven cavity/inner door if the part rusts through tenth years from date of purchase, when this major...
... installation instructions. 10. Service calls to correct the installation of your major appliance is located in accordance with electrical or plumbing codes, or use your complete model number and serial number. Expenses for travel and transportation for product service if your major appliance, to instruct... this appliance is operated and maintained according to instructions attached to or furnished with the product, KitchenAid will pay for Factory Specified Parts for the stainless steel oven cavity/inner door if the part rusts through tenth years from date of purchase, when this major...
Parts Diagram
Page 1
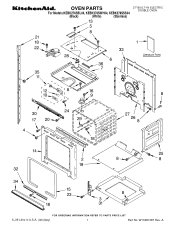
OVEN PARTS 27" BUILT−IN ELECTRIC DOUBLE OVEN For Models:KEBK276SBL04, KEBK276SWH04, KEBK276SSS04 (Black) (White) (Stainless) 6−09 Litho in U.S.A. (rek)(bay) 1 Part No. A W10281087 Rev.
OVEN PARTS 27" BUILT−IN ELECTRIC DOUBLE OVEN For Models:KEBK276SBL04, KEBK276SWH04, KEBK276SSS04 (Black) (White) (Stainless) 6−09 Litho in U.S.A. (rek)(bay) 1 Part No. A W10281087 Rev.
Parts Diagram
Page 2
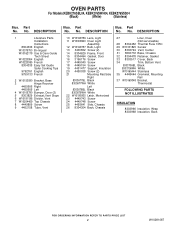
Part No. No. DESCRIPTION Illus. Part No. DESCRIPTION Illus. No. OVEN PARTS For Models:KEBK276SBL04, KEBK276SWH04, KEBK276SSS04 (Black) (White) (Stainless) Illus. No. DESCRIPTION 1 Literature Parts Installation Instructions 8304336 English W10075750 Bi−lingual... Black 8303678WH White 22 W10195935 Latch, Mortorized 23 4449743 Screw 24 4449748 Screw 25 4455641 Side, Chassis 26 8304304 Back, Chassis 27 Liner, Oven (Not serviceable) 28 8304452 Thermal Fuse 105C 29 W10131825 Sensor 30 8303724 Vent, Center 31 8303772 Base, Chassis 32 8304478 Retainer...
Part No. No. DESCRIPTION Illus. Part No. DESCRIPTION Illus. No. OVEN PARTS For Models:KEBK276SBL04, KEBK276SWH04, KEBK276SSS04 (Black) (White) (Stainless) Illus. No. DESCRIPTION 1 Literature Parts Installation Instructions 8304336 English W10075750 Bi−lingual... Black 8303678WH White 22 W10195935 Latch, Mortorized 23 4449743 Screw 24 4449748 Screw 25 4455641 Side, Chassis 26 8304304 Back, Chassis 27 Liner, Oven (Not serviceable) 28 8304452 Thermal Fuse 105C 29 W10131825 Sensor 30 8303724 Vent, Center 31 8303772 Base, Chassis 32 8304478 Retainer...

Parts Diagram
Page 5
INTERNAL OVEN PARTS For Models:KEBK276SBL04, KEBK276SWH04, KEBK276SSS04 (Black) (White) (Stainless) W10281087 Illus. DESCRIPTION 1 8304602 Element, Broil Shield 2 9760774 Element, Broil 3 4449154 Screw 4 4448715 Rack, Oven 6 9760768 Element, Bake 7 4455036 Tray, Bake 8 4450039 Cover, Bake Tray 9 4449809 Screw 5 Part No. No.
INTERNAL OVEN PARTS For Models:KEBK276SBL04, KEBK276SWH04, KEBK276SSS04 (Black) (White) (Stainless) W10281087 Illus. DESCRIPTION 1 8304602 Element, Broil Shield 2 9760774 Element, Broil 3 4449154 Screw 4 4448715 Rack, Oven 6 9760768 Element, Bake 7 4455036 Tray, Bake 8 4450039 Cover, Bake Tray 9 4449809 Screw 5 Part No. No.


