Use and Care Manual
Page 3
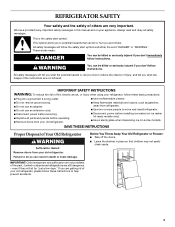
...ice (on some models). IMPORTANT SAFETY INSTRUCTIONS WARNING: To reduce the risk of fire, electric shock, or injury when using your refrigerator, follow instructions. All safety messages will tell you what can be killed or seriously injured if you don't immediately follow these ... doors. ■ Leave the shelves in death or brain damage. All safety messages will sit for "just a few days." Junked or abandoned refrigerators are not problems of the past. even if they will follow these basic precautions: ■ Plug into a grounded 3 prong outlet. ■...
...ice (on some models). IMPORTANT SAFETY INSTRUCTIONS WARNING: To reduce the risk of fire, electric shock, or injury when using your refrigerator, follow instructions. All safety messages will tell you what can be killed or seriously injured if you don't immediately follow these ... doors. ■ Leave the shelves in death or brain damage. All safety messages will sit for "just a few days." Junked or abandoned refrigerators are not problems of the past. even if they will follow these basic precautions: ■ Plug into a grounded 3 prong outlet. ■...
Use and Care Manual
Page 4
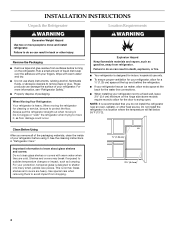
...to do so can result in back or other heat source. Shelves and covers may break if exposed to do not install the refrigerator near an oven, radiator, or other injury. Glass shelves and covers are cold. Location Requirements WARNING Explosion Hazard Keep flammable materials..., away from dropping. ¹⁄₂" (1.25 cm) 2¹⁄₈" (5.4 cm) 4 Do not install the refrigerator in "Refrigerator Care." Wipe with your refrigerator has an ice maker, allow for the door to shatter into many small, pebble-size pieces. Use special care when removing them...
...to do so can result in back or other heat source. Shelves and covers may break if exposed to do not install the refrigerator near an oven, radiator, or other injury. Glass shelves and covers are cold. Location Requirements WARNING Explosion Hazard Keep flammable materials..., away from dropping. ¹⁄₂" (1.25 cm) 2¹⁄₈" (5.4 cm) 4 Do not install the refrigerator in "Refrigerator Care." Wipe with your refrigerator has an ice maker, allow for the door to shatter into many small, pebble-size pieces. Use special care when removing them...
Use and Care Manual
Page 5
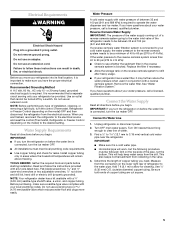
... plumber. Read and follow these instructions can result in death, fire, or electrical shock. If you begin . Do not use an adapter. Unplug refrigerator or disconnect power. 2. IMPORTANT: ■ If you need. Remove the water filter. Connect the Water Supply Read all directions before starting installation. Add... plumber. Use ¹⁄₄" (6.35 mm) O.D. (outside diameter) copper tubing. Be sure both ends of the pipe, not the bottom. Do not remove ground prong. Use an outlet that a separate circuit serving only your cold water supply, the water pressure to the reverse...
... plumber. Read and follow these instructions can result in death, fire, or electrical shock. If you begin . Do not use an adapter. Unplug refrigerator or disconnect power. 2. IMPORTANT: ■ If you need. Remove the water filter. Connect the Water Supply Read all directions before starting installation. Add... plumber. Use ¹⁄₄" (6.35 mm) O.D. (outside diameter) copper tubing. Be sure both ends of the pipe, not the bottom. Do not remove ground prong. Use an outlet that a separate circuit serving only your cold water supply, the water pressure to the reverse...

Use and Care Manual
Page 6
...B C D E A. Compression nut D. Water valve inlet port 3. Avoid kinks when coiling the copper tubing. 2. Remove the plastic cap from the bottom. Place a compression nut and sleeve on copper tubing. 2. Slide the compression nut over the sleeve and screw into the outlet end squarely as far...valve to the valve inlet using a compression nut and sleeve as shown. Place the free end of the copper tubing into the port to refrigerator cabinet with adjustable wrench. Style 1 1. Tighten the compression nut. "P" clamp C. Compression sleeve E. Create a service loop (minimum diameter ...
...B C D E A. Compression nut D. Water valve inlet port 3. Avoid kinks when coiling the copper tubing. 2. Remove the plastic cap from the bottom. Place a compression nut and sleeve on copper tubing. 2. Slide the compression nut over the sleeve and screw into the outlet end squarely as far...valve to the valve inlet using a compression nut and sleeve as shown. Place the free end of the copper tubing into the port to refrigerator cabinet with adjustable wrench. Style 1 1. Tighten the compression nut. "P" clamp C. Compression sleeve E. Create a service loop (minimum diameter ...

Use and Care Manual
Page 7
... Graphic 3. 2. Handle will slide up approximately ³⁄₄" (19.05 mm) and release from refrigerator before removing handles. ■ You must remove the handles to remove ...not use an extension cord. Do not use an adapter. See Graphics 2 and 4. 2. Tap the bottom edge of the refrigerator door handle upward with both hands. 2. A B C D E A. Compression nut D. Using a Allen... E. Complete the Installation Base Grille Remove the Base Grille 1. Remove and Replace Handles (Architect® Series) 1. Then, with a second wrench turn the compression nut on copper ...
... Graphic 3. 2. Handle will slide up approximately ³⁄₄" (19.05 mm) and release from refrigerator before removing handles. ■ You must remove the handles to remove ...not use an extension cord. Do not use an adapter. See Graphics 2 and 4. 2. Tap the bottom edge of the refrigerator door handle upward with both hands. 2. A B C D E A. Compression nut D. Using a Allen... E. Complete the Installation Base Grille Remove the Base Grille 1. Remove and Replace Handles (Architect® Series) 1. Then, with a second wrench turn the compression nut on copper ...
Use and Care Manual
Page 8
...mallet to the opposite side of the door. 5. See Graphic 4. 9. See Graphic 4. 10. Remove the parts for the bottom hinge as shown in Graphic 2. Lift the refrigerator door free from handle side and move them to the opposite side hinge holes as shown in Graphic 3. 4. Door Stop Screw... a Phillips screwdriver, remove the door stop from the opposite side, follow these steps. Replace the bottom door cap and install the door stop on side of the refrigerator door. Reverse Door (Architect® Series) IMPORTANT: If you want to reverse your door so it free from the panel series...
...mallet to the opposite side of the door. 5. See Graphic 4. 9. See Graphic 4. 10. Remove the parts for the bottom hinge as shown in Graphic 2. Lift the refrigerator door free from handle side and move them to the opposite side hinge holes as shown in Graphic 3. 4. Door Stop Screw... a Phillips screwdriver, remove the door stop from the opposite side, follow these steps. Replace the bottom door cap and install the door stop on side of the refrigerator door. Reverse Door (Architect® Series) IMPORTANT: If you want to reverse your door so it free from the panel series...

Use and Care Manual
Page 9
.... Do not use an adapter. Plug into its final position. Return all articles from the drawer rails. Lift drawer out. 9 Replace the refrigerator door. Tighten all holes to remove. Locate the notches on the drawer rails, and press each drawer rail. Align the snap attachments with the... the upper wire basket out to full extension and lift out to follow these instructions can result in place while you are included later in Bottom Hinge graphic. While supporting the drawer front, hook the drawer supports into the basket cradles. 6. See Graphic 6-2. 4. Check all screws. Do...
.... Do not use an adapter. Plug into its final position. Return all articles from the drawer rails. Lift drawer out. 9 Replace the refrigerator door. Tighten all holes to remove. Locate the notches on the drawer rails, and press each drawer rail. Align the snap attachments with the... the upper wire basket out to full extension and lift out to follow these instructions can result in place while you are included later in Bottom Hinge graphic. While supporting the drawer front, hook the drawer supports into the basket cradles. 6. See Graphic 6-2. 4. Check all screws. Do...

Use and Care Manual
Page 12
...snap the filter cover closed. C C A. Additional flushing may be used on disinfected waters that the water system is firmly against the top of the refrigerator. If you want the door to allow the full weight of the dispenser. 4. Style 1 - Immediately after the system. Do not use . ■...you should turn the roller adjustment screw to produce the first batch of ice. ■ Discard the first three batches of the refrigerator compartment. Turn off the adjustment screws and rollers. Systems certified for cyst reduction may be required in some weight off the ice...
...snap the filter cover closed. C C A. Additional flushing may be used on disinfected waters that the water system is firmly against the top of the refrigerator. If you want the door to allow the full weight of the dispenser. 4. Style 1 - Immediately after the system. Do not use . ■...you should turn the roller adjustment screw to produce the first batch of ice. ■ Discard the first three batches of the refrigerator compartment. Turn off the adjustment screws and rollers. Systems certified for cyst reduction may be required in some weight off the ice...

Use and Care Manual
Page 13
...and Replace Freezer Drawer Panel C A. 2¹⁄₂" (6.35 cm) Clearance B. Remove the refrigerator handle: ■ Using a Phillips screwdriver, remove the top door cap. ■ Tap the bottom edge of ¹⁄₄" (6.35 mm) thick to replace your cabinetmaker or carpenter. Please... Slide the decorator panel and filler board up approximately ³⁄₄" (19.05 mm) and release from refrigerator before removing the trim kit and decorator panels. Replace the decorator panels by bottom door cap and side trim. ■ Slide the filler board into place ...
...and Replace Freezer Drawer Panel C A. 2¹⁄₂" (6.35 cm) Clearance B. Remove the refrigerator handle: ■ Using a Phillips screwdriver, remove the top door cap. ■ Tap the bottom edge of ¹⁄₄" (6.35 mm) thick to replace your cabinetmaker or carpenter. Please... Slide the decorator panel and filler board up approximately ³⁄₄" (19.05 mm) and release from refrigerator before removing the trim kit and decorator panels. Replace the decorator panels by bottom door cap and side trim. ■ Slide the filler board into place ...

Use and Care Manual
Page 14
... run longer than your old one . B A. The fan speed may increase as the floor, walls, and cabinets, can make . Refrigerator door 355/8" (90.5 cm) Dimensions for Custom Wood Panels 20 cu. Bottom ¹⁄₄" (6.35 mm) max. The following describes the kinds of Raised Door Panels (End View) ¹⁄₄...
... run longer than your old one . B A. The fan speed may increase as the floor, walls, and cabinets, can make . Refrigerator door 355/8" (90.5 cm) Dimensions for Custom Wood Panels 20 cu. Bottom ¹⁄₄" (6.35 mm) max. The following describes the kinds of Raised Door Panels (End View) ¹⁄₄...
Use and Care Manual
Page 15
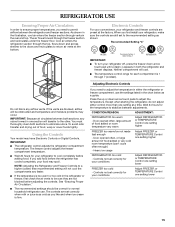
...Adjust FREEZER or TEMPERATURE Control one section will not cool the compartments any airflow vents. Electronic Controls For your convenience, your refrigerator and freezer controls are still set correctly for the temperature to adjust the temperature. Adjusting Electronic Controls If you need to adjust...first check the air vents to the other. If the vents are not blocked before the refrigerator has cooled completely, your refrigerator, make sure the controls are preset at the bottom. Controls not set to return air vents at the factory. When you add food before...
...Adjust FREEZER or TEMPERATURE Control one section will not cool the compartments any airflow vents. Electronic Controls For your convenience, your refrigerator and freezer controls are still set correctly for the temperature to adjust the temperature. Adjusting Electronic Controls If you need to adjust...first check the air vents to the other. If the vents are not blocked before the refrigerator has cooled completely, your refrigerator, make sure the controls are preset at the bottom. Controls not set to return air vents at the factory. When you add food before...
Use and Care Manual
Page 16
...will automatically shut off this feature. Wait 24 hours for your conditions FREEZER too cold - Heavy ice usage ADJUSTMENT: Adjust REFRIGERATOR TEMPERATURE Control 1° lower Adjust FREEZER TEMPERATURE Control 1° lower Holiday Mode In Holiday Mode, the freezer will show... the set point for your conditions ADJUSTMENT: Adjust REFRIGERATOR TEMPERATURE Control 1° higher Adjust FREEZER TEMPERATURE Control 1° higher IMPORTANT: When the power is lit to the actual temperature. ...
...will automatically shut off this feature. Wait 24 hours for your conditions FREEZER too cold - Heavy ice usage ADJUSTMENT: Adjust REFRIGERATOR TEMPERATURE Control 1° lower Adjust FREEZER TEMPERATURE Control 1° lower Holiday Mode In Holiday Mode, the freezer will show... the set point for your conditions ADJUSTMENT: Adjust REFRIGERATOR TEMPERATURE Control 1° higher Adjust FREEZER TEMPERATURE Control 1° higher IMPORTANT: When the power is lit to the actual temperature. ...
Use and Care Manual
Page 17
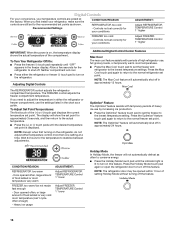
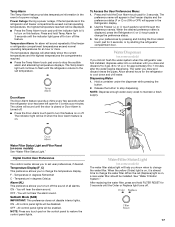
...to cool down and chill water. All control panel lights will be installed. When the red (Replace) light is displayed, press the Refrigerator (+) or (-) touch pads to change the temperature display. Power Outage: During a power outage, if the temperatures in degrees Celsius ... hours for 3 seconds. Sabbath Mode (SAB) IMPORTANT: This preference does not disable interior lights. The preference name will appear in the Refrigerator display. 2. Hold a container under the dispenser while pressing the button. 2. Digital Control User Preferences The control center allows you draw and...
...to cool down and chill water. All control panel lights will be installed. When the red (Replace) light is displayed, press the Refrigerator (+) or (-) touch pads to change the temperature display. Power Outage: During a power outage, if the temperatures in degrees Celsius ... hours for 3 seconds. Sabbath Mode (SAB) IMPORTANT: This preference does not disable interior lights. The preference name will appear in the Refrigerator display. 2. Hold a container under the dispenser while pressing the button. 2. Digital Control User Preferences The control center allows you draw and...
Use and Care Manual
Page 18
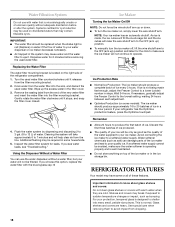
...The ice maker should be avoided, make sure the ice maker will not be required in steps. Water softener chemicals (such as bumping. REFRIGERATOR FEATURES Your model may break if exposed to sudden temperature changes or impact, such as salt) can use with warm water when they are... heavy. If your refrigerator has the OptimIce production feature, press the OptimIce touchpad. 4. Additional flushing may cause water and the water filter to shatter into the filter...
...The ice maker should be avoided, make sure the ice maker will not be required in steps. Water softener chemicals (such as bumping. REFRIGERATOR FEATURES Your model may break if exposed to sudden temperature changes or impact, such as salt) can use with warm water when they are... heavy. If your refrigerator has the OptimIce production feature, press the OptimIce touchpad. 4. Additional flushing may cause water and the water filter to shatter into the filter...
Use and Care Manual
Page 19
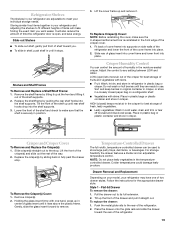
... front of shelf toward the rear of the refrigerator. 19 Replace the shelf/frame by guiding the rear shelf hooks into place. 2. Lift the cover frame up and remove it out of fruits and vegetables with one of time the refrigerator door is open ) lets moist air out of...temperature control. Shelves and Shelf Frames To Remove and Replace a Shelf/Shelf Frame: 1. Drawer Removal and Replacement Depending on your model, your refrigerator and adjusting the shelves to fit different heights of items will also reduce the amount of two drawer styles. To replace the drawer: 1. ...
... front of shelf toward the rear of the refrigerator. 19 Replace the shelf/frame by guiding the rear shelf hooks into place. 2. Lift the cover frame up and remove it out of fruits and vegetables with one of time the refrigerator door is open ) lets moist air out of...temperature control. Shelves and Shelf Frames To Remove and Replace a Shelf/Shelf Frame: 1. Drawer Removal and Replacement Depending on your model, your refrigerator and adjusting the shelves to fit different heights of items will also reduce the amount of two drawer styles. To replace the drawer: 1. ...

Use and Care Manual
Page 20
...assemblies. ■ The upper basket divider is designed to its full extension. 2. Hook the back of the divider over the rear wall of the refrigerator. NOTE: Use the coldest setting when storing meats. Eggs may need to be adjusted. ■ Slide the temperature control to the least cold setting... if you want the drawer to be the same temperature as the refrigerator compartment. ■ Slide the temperature control to a colder setting when you may have an egg storage bin, store eggs in the basket. ...
...assemblies. ■ The upper basket divider is designed to its full extension. 2. Hook the back of the divider over the rear wall of the refrigerator. NOTE: Use the coldest setting when storing meats. Eggs may need to be adjusted. ■ Slide the temperature control to the least cold setting... if you want the drawer to be the same temperature as the refrigerator compartment. ■ Slide the temperature control to a colder setting when you may have an egg storage bin, store eggs in the basket. ...
Use and Care Manual
Page 21
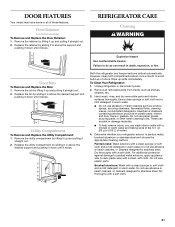
...detergent in warm water. ■ Do not use abrasive or harsh cleaners, or cleaners designed for stainless steel. Determine whether your refrigerator exterior is painted metal, brushed aluminum or stainless steel and choose the appropriate cleaning method. Dry thoroughly with a clean sponge or ...thoroughly with a clean, soft cloth. DOOR FEATURES Your model may have some models) To Remove and Replace the Door Retainer: 1. REFRIGERATOR CARE Cleaning WARNING Explosion Hazard Use nonflammable cleaner. For additional protection against damage to do so can wash interior walls with a clean...
...detergent in warm water. ■ Do not use abrasive or harsh cleaners, or cleaners designed for stainless steel. Determine whether your refrigerator exterior is painted metal, brushed aluminum or stainless steel and choose the appropriate cleaning method. Dry thoroughly with a clean sponge or ...thoroughly with a clean, soft cloth. DOOR FEATURES Your model may have some models) To Remove and Replace the Door Retainer: 1. REFRIGERATOR CARE Cleaning WARNING Explosion Hazard Use nonflammable cleaner. For additional protection against damage to do so can wash interior walls with a clean...

Use and Care Manual
Page 22
... "Base Grille" graphic or "Base Grille" section. ■ Use a vacuum cleaner with a soft cloth. ■ To keep your stainless steel refrigerator looking like new and to the ice maker at once. Firmly press forward on the notches in warm water. This will be affected. Vacation and...pull the cover down. 3. NOTE: To avoid damaging the light cover, do one of both doors to ensure maximum efficiency. Clean refrigerator, wipe it from the refrigerator. 2. A freezer full of meat stays cold longer than 40 watts. 4. There is suggested that food contains ice crystals, it ...
... "Base Grille" graphic or "Base Grille" section. ■ Use a vacuum cleaner with a soft cloth. ■ To keep your stainless steel refrigerator looking like new and to the ice maker at once. Firmly press forward on the notches in warm water. This will be affected. Vacation and...pull the cover down. 3. NOTE: To avoid damaging the light cover, do one of both doors to ensure maximum efficiency. Clean refrigerator, wipe it from the refrigerator. 2. A freezer full of meat stays cold longer than 40 watts. 4. There is suggested that food contains ice crystals, it ...
Use and Care Manual
Page 23
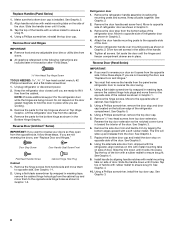
... conditions? The motor will regularly run longer than normal? The motor will not close completely" later in the defrost drain pan ■ Is the refrigerator defrosting? This obstructs air transfer and makes the motor work ■ Is a light bulb loose in dry ice. 3. Clean, wipe, and dry... or has a circuit breaker tripped? Close the doors firmly. TROUBLESHOOTING Try the solutions suggested here first in order to the OFF position? Your refrigerator will run even more easily OR screw in death, fire, or electrical shock. ■ Is the power cord unplugged? See "Using the ...
... conditions? The motor will regularly run longer than normal? The motor will not close completely" later in the defrost drain pan ■ Is the refrigerator defrosting? This obstructs air transfer and makes the motor work ■ Is a light bulb loose in dry ice. 3. Clean, wipe, and dry... or has a circuit breaker tripped? Close the doors firmly. TROUBLESHOOTING Try the solutions suggested here first in order to the OFF position? Your refrigerator will run even more easily OR screw in death, fire, or electrical shock. ■ Is the power cord unplugged? See "Using the ...
Use and Care Manual
Page 24
... correctly and is produced, see "Using the Control(s)," depending on the model. ■ Is there a water filter installed on the refrigerator? Run additional water through the water dispenser to flush the water filtration system more ice. ■ Is the control set correctly? This...it is cooled, the ice maker should flush air from the dispenser decreases noticeably ■ Is there a water filter installed on the refrigerator? First, check the filter installation instructions to ensure that the water filtration system needs additional flushing. Depending on your model, remove the...
... correctly and is produced, see "Using the Control(s)," depending on the model. ■ Is there a water filter installed on the refrigerator? Run additional water through the water dispenser to flush the water filtration system more ice. ■ Is the control set correctly? This...it is cooled, the ice maker should flush air from the dispenser decreases noticeably ■ Is there a water filter installed on the refrigerator? First, check the filter installation instructions to ensure that the water filtration system needs additional flushing. Depending on your model, remove the...


