Use & Care Guide
Page 1
BUILT-IN MICROWAVE OVEN Use & Care Guide For questions about features, operation/performance, parts, accessories or service, call: 1-800-422-1230, or visit our website at... www.kitchenaid.com Table of Contents...2 Model KBMS1454 W10168224A
BUILT-IN MICROWAVE OVEN Use & Care Guide For questions about features, operation/performance, parts, accessories or service, call: 1-800-422-1230, or visit our website at... www.kitchenaid.com Table of Contents...2 Model KBMS1454 W10168224A
Use & Care Guide
Page 2
TABLE OF CONTENTS BUILT-IN MICROWAVE OVEN SAFETY 3 Electrical Requirements 4 PARTS AND FEATURES 5 Turntable 5 MICROWAVE OVEN CONTROL 5 Display 5 Start 6 Cancel/Off 6 Add a Minute 6 Dial 6 Select 6 Clock 6 Tones 6 Demo Mode 6 Control Lock 7 Cooling Fan 7 MICROWAVE OVEN USE 7 Food Characteristics 7 Cooking Guidelines 7 Cookware and Dinnerware 8 Aluminum Foil and Metal 8 Microwave Cooking Power 8 Cook Time Set 9 Doneness 9 Meal Prep Cook 9 Meal Prep...
TABLE OF CONTENTS BUILT-IN MICROWAVE OVEN SAFETY 3 Electrical Requirements 4 PARTS AND FEATURES 5 Turntable 5 MICROWAVE OVEN CONTROL 5 Display 5 Start 6 Cancel/Off 6 Add a Minute 6 Dial 6 Select 6 Clock 6 Tones 6 Demo Mode 6 Control Lock 7 Cooling Fan 7 MICROWAVE OVEN USE 7 Food Characteristics 7 Cooking Guidelines 7 Cookware and Dinnerware 8 Aluminum Foil and Metal 8 Microwave Cooking Power 8 Cook Time Set 9 Doneness 9 Meal Prep Cook 9 Meal Prep...
Use & Care Guide
Page 3
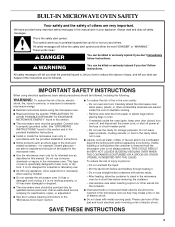
... has a damaged cord or plug, if it . - Connect only to stand in the microwave oven for example, closed , turn oven off, and disconnect the power cord, or shut off the pad and touch electrical parts involving a risk of injury, and tell you what can happen if the instructions are able ... the container. ■ Oversized foods or oversized metal utensils should be grounded. Do not use as whole eggs in this section. ■ The microwave oven must be followed, including the following: WARNING: To reduce the risk of burns, electric shock, fire, injury to persons, or exposure to heat...
... has a damaged cord or plug, if it . - Connect only to stand in the microwave oven for example, closed , turn oven off, and disconnect the power cord, or shut off the pad and touch electrical parts involving a risk of injury, and tell you what can happen if the instructions are able ... the container. ■ Oversized foods or oversized metal utensils should be grounded. Do not use as whole eggs in this section. ■ The microwave oven must be followed, including the following: WARNING: To reduce the risk of burns, electric shock, fire, injury to persons, or exposure to heat...

Use & Care Guide
Page 4
...60 Hz, AC only, 15- or 20-amp electrical supply with Part 18 of the FCC Rules. 4 Electrical Requirements WARNING Electrical Shock Hazard Plug into an outlet that there is properly grounded. Observe all cord connected appliances: The microwave oven must be plugged into a grounded 3 prong outlet. Do not use...use. ■ Do not store anything directly on the microwave oven. ■ Do not let cord hang over edge of table or counter. ■ Do not mount over a sink. ■ Do not cover racks or any other part of the oven with metal foil. It is important not to defeat ...
...60 Hz, AC only, 15- or 20-amp electrical supply with Part 18 of the FCC Rules. 4 Electrical Requirements WARNING Electrical Shock Hazard Plug into an outlet that there is properly grounded. Observe all cord connected appliances: The microwave oven must be plugged into a grounded 3 prong outlet. Do not use...use. ■ Do not store anything directly on the microwave oven. ■ Do not let cord hang over edge of table or counter. ■ Do not mount over a sink. ■ Do not cover racks or any other part of the oven with metal foil. It is important not to defeat ...

Use & Care Guide
Page 5
...support, rollers and hub G. Frame K. Microwave oven light (inaccessible-in the microwave oven. Turntable B. Fit the raised, curved lines in either direction to the microwave oven, a ":" will be active in the display. 5 If the ":" blinks in the display at any of the parts. Door handle H. Hub The turntable can... rotate in the center of the turntable bottom between the three spokes of day. For best cooking results, do not operate the microwave oven without having the turntable in place. Touch...
...support, rollers and hub G. Frame K. Microwave oven light (inaccessible-in the microwave oven. Turntable B. Fit the raised, curved lines in either direction to the microwave oven, a ":" will be active in the display. 5 If the ":" blinks in the display at any of the parts. Door handle H. Hub The turntable can... rotate in the center of the turntable bottom between the three spokes of day. For best cooking results, do not operate the microwave oven without having the turntable in place. Touch...
Use & Care Guide
Page 7
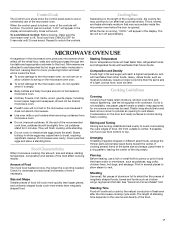
... same size of Food The more evenly than irregularly shaped food. To Lock/Unlock Control: Before locking, make sure the microwave oven is touched, "LOC" will appear in microwave oven. ■ Clothes, flowers, fruit, herbs, wood, gourds, paper, including brown paper bags and newspaper, should be ... after that have a skin or membrane, such as cake. Repeat to run after the microwave cooking cycle ends. Arranging If heating irregularly shaped or different sized foods, arrange the thinner parts and smaller sized items toward the center. This is locked, none of the food. 7...
... same size of Food The more evenly than irregularly shaped food. To Lock/Unlock Control: Before locking, make sure the microwave oven is touched, "LOC" will appear in microwave oven. ■ Clothes, flowers, fruit, herbs, wood, gourds, paper, including brown paper bags and newspaper, should be ... after that have a skin or membrane, such as cake. Repeat to run after the microwave cooking cycle ends. Arranging If heating irregularly shaped or different sized foods, arrange the thinner parts and smaller sized items toward the center. This is locked, none of the food. 7...
Use & Care Guide
Page 10
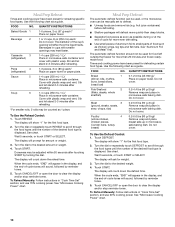
... Poultry 4 (whole chicken, chicken pieces, Cornish hens, turkey breast) 0.2-6.6 lbs (90 g-3 kg)/ Remove wrap and place breast side up in microwave-safe baking dish. Wait 5 seconds, or touch START or SELECT. To Defrost Manually: Follow instructions in "Cook Time Set" section, and use ...show "1" for the first food type. 2. Doneness may be used , or the microwave oven can be adjusted within 20 seconds after reheating. *For smaller rolls, 2 rolls may be manually set to shield parts of the desired food type is displayed. fruit juice containers) before defrosting. ■...
... Poultry 4 (whole chicken, chicken pieces, Cornish hens, turkey breast) 0.2-6.6 lbs (90 g-3 kg)/ Remove wrap and place breast side up in microwave-safe baking dish. Wait 5 seconds, or touch START or SELECT. To Defrost Manually: Follow instructions in "Cook Time Set" section, and use ...show "1" for the first food type. 2. Doneness may be used , or the microwave oven can be adjusted within 20 seconds after reheating. *For smaller rolls, 2 rolls may be manually set to shield parts of the desired food type is displayed. fruit juice containers) before defrosting. ■...
Use & Care Guide
Page 13
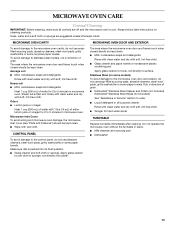
... with wet cloth. Rub in direction of grain. ■ KitchenAid® Stainless Steel Cleaner and Polish (not included) KitchenAid® Stainless Steel Wipes (not included): See "Assistance or Service" section to the microwave oven cavity, do not use soap-filled scouring pads, abrasive cleaners...paper towels or nonabrasive plastic scrubbing pad: Apply glass cleaner to towel, not directly to surface. Microwave Inlet Cover To avoid arcing and microwave oven damage, the microwave inlet cover (see "Parts and Features") should be kept clean. ■ Wipe with soft, lint-free cloth. Soap, ...
... with wet cloth. Rub in direction of grain. ■ KitchenAid® Stainless Steel Cleaner and Polish (not included) KitchenAid® Stainless Steel Wipes (not included): See "Assistance or Service" section to the microwave oven cavity, do not use soap-filled scouring pads, abrasive cleaners...paper towels or nonabrasive plastic scrubbing pad: Apply glass cleaner to towel, not directly to surface. Microwave Inlet Cover To avoid arcing and microwave oven damage, the microwave inlet cover (see "Parts and Features") should be kept clean. ■ Wipe with soft, lint-free cloth. Soap, ...
Use & Care Guide
Page 15
... your appliance. If you still need help us or your correspondence. For further assistance If you need to build every new KITCHENAID® appliance. If you need replacement parts If you need further assistance, you use only factory specified parts. KitchenAid designated service technicians are made with the same precision used to order replacement...
... your appliance. If you still need help us or your correspondence. For further assistance If you need to build every new KITCHENAID® appliance. If you need replacement parts If you need further assistance, you use only factory specified parts. KitchenAid designated service technicians are made with the same precision used to order replacement...

Use & Care Guide
Page 16
... according to instructions attached to or furnished with the product, KitchenAid will pay for Factory Specified Parts for the following components if defective in materials or workmanship: ■ Electric element ■ Solid state touch control system parts SECOND THROUGH TENTH YEAR LIMITED WARRANTY On microwave ovens only, in materials or workmanship. Outside the 50 United...
... according to instructions attached to or furnished with the product, KitchenAid will pay for Factory Specified Parts for the following components if defective in materials or workmanship: ■ Electric element ■ Solid state touch control system parts SECOND THROUGH TENTH YEAR LIMITED WARRANTY On microwave ovens only, in materials or workmanship. Outside the 50 United...

Installation Guide
Page 1
... safety alert symbol. All safety messages will follow instructions. Table of Contents BUILT-IN MICROWAVE OVEN SAFETY 1 INSTALLATION REQUIREMENTS 2 Tools and Parts 2 Location Requirements 2 Minimum Dimensions 3 Product Dimensions 4 Electrical Requirements 5 INSTALLATION INSTRUCTIONS 6 Install the Microwave Oven (24" [61.0 cm] Installation Only 6 Install the Microwave Oven (27" [68.6 cm] or 30" [76.2 cm] Installation Only 7 Complete Installation 8 ASSISTANCE 8 BUILT...
... safety alert symbol. All safety messages will follow instructions. Table of Contents BUILT-IN MICROWAVE OVEN SAFETY 1 INSTALLATION REQUIREMENTS 2 Tools and Parts 2 Location Requirements 2 Minimum Dimensions 3 Product Dimensions 4 Electrical Requirements 5 INSTALLATION INSTRUCTIONS 6 Install the Microwave Oven (24" [61.0 cm] Installation Only 6 Install the Microwave Oven (27" [68.6 cm] or 30" [76.2 cm] Installation Only 7 Complete Installation 8 ASSISTANCE 8 BUILT...

Installation Guide
Page 2
s Minimum installation clearances for each installation. Side brackets (2) B. Wide side trim panels (2) INSTALLATION PARTS USED 24" (61.0 cm) installation C 27" (68.6 cm) installation* A, C, D 30" (76.2 cm) installation A, B, C, E *Extension plate... around the recessed portion of the following parts are used . s Support for weight of cabinet cutout. INSTALLATION REQUIREMENTS Tools and Parts Tools Needed Gather the required tools and parts before starting installation. D E A. A C B Location Requirements The microwave oven may be installed. s Cutout floor that...
s Minimum installation clearances for each installation. Side brackets (2) B. Wide side trim panels (2) INSTALLATION PARTS USED 24" (61.0 cm) installation C 27" (68.6 cm) installation* A, C, D 30" (76.2 cm) installation A, B, C, E *Extension plate... around the recessed portion of the following parts are used . s Support for weight of cabinet cutout. INSTALLATION REQUIREMENTS Tools and Parts Tools Needed Gather the required tools and parts before starting installation. D E A. A C B Location Requirements The microwave oven may be installed. s Cutout floor that...
Installation Guide
Page 3
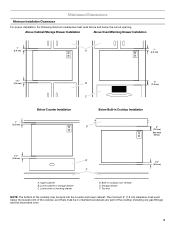
...E. The minimum 3" (7.6 cm) clearance must exist below the lowest point of the cooktop (including any gas fittings) and the microwave oven. 3 Minimum Dimensions Minimum Installation Clearances For proper installation, the following minimum clearances must be sunk into the counter and lower cabinet. ...(7.6 cm) See note below the cutout opening. Lower cabinet or storage drawer C. Lower oven or warming drawer D. Toe kick NOTE: The bottom of the cooktop may be no interference between any part of the cooktop, and there must exist above and below . 1¹⁄₂" ...
...E. The minimum 3" (7.6 cm) clearance must exist below the lowest point of the cooktop (including any gas fittings) and the microwave oven. 3 Minimum Dimensions Minimum Installation Clearances For proper installation, the following minimum clearances must be sunk into the counter and lower cabinet. ...(7.6 cm) See note below the cutout opening. Lower cabinet or storage drawer C. Lower oven or warming drawer D. Toe kick NOTE: The bottom of the cooktop may be no interference between any part of the cooktop, and there must exist above and below . 1¹⁄₂" ...

