Use & Care Guide
Page 3
...be killed or seriously injured if you and others are very important. s Install or locate the microwave oven only in the shell and sealed containers - s Use the microwave oven only for industrial or laboratory use . Pieces can be killed or seriously injured if you what... chemicals or vapors in the "PAN BROWN" mode. We have provided many important safety messages in the microwave oven. s The microwave oven must be heated in this manual and on the microwave oven. s Some products such as described in this manual. for examination, repair, or adjustment. s Do not...
...be killed or seriously injured if you and others are very important. s Install or locate the microwave oven only in the shell and sealed containers - s Use the microwave oven only for industrial or laboratory use . Pieces can be killed or seriously injured if you what... chemicals or vapors in the "PAN BROWN" mode. We have provided many important safety messages in the microwave oven. s The microwave oven must be heated in this manual and on the microwave oven. s Some products such as described in this manual. for examination, repair, or adjustment. s Do not...
Use & Care Guide
Page 4
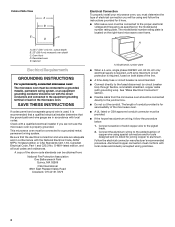
..., metallic, permanent wiring system, or an equipment grounding conductor should be boiling. GROUNDING INSTRUCTIONS For a permanently connected microwave oven: The microwave oven must be connected to microwave energy. Do not use the cavity for example, near a kitchen sink, in use straight-sided containers with narrow...volts, cooking times may be adjusted or repaired by anyone except properly qualified service personnel. If the incoming voltage to the microwave oven is important not to defeat or tamper with the circuit conductors and connected to the: (1) Door (bent), (2) Hinges and...
..., metallic, permanent wiring system, or an equipment grounding conductor should be boiling. GROUNDING INSTRUCTIONS For a permanently connected microwave oven: The microwave oven must be connected to microwave energy. Do not use the cavity for example, near a kitchen sink, in use straight-sided containers with narrow...volts, cooking times may be adjusted or repaired by anyone except properly qualified service personnel. If the incoming voltage to the microwave oven is important not to defeat or tamper with the circuit conductors and connected to the: (1) Door (bent), (2) Hinges and...
Use & Care Guide
Page 5
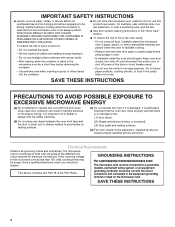
... Cooking guide label K. Turntable B. Hub The turntable rotates in place. Do not operate the microwave oven without having the turntable in both directions to help avoid scratches. The raised, curved lines in the microwave oven. The rollers on the convection grid. s Always use the turntable as a support for the...with its nonstick surface and detachable handle, has been specifically designed for microwave use, and is designed specifically for this oven. The hub turns the turntable during microwave oven use oven mitts or pot holders when handling. Damage to help cook food ...
... Cooking guide label K. Turntable B. Hub The turntable rotates in place. Do not operate the microwave oven without having the turntable in both directions to help avoid scratches. The raised, curved lines in the microwave oven. The rollers on the convection grid. s Always use the turntable as a support for the...with its nonstick surface and detachable handle, has been specifically designed for microwave use, and is designed specifically for this oven. The hub turns the turntable during microwave oven use oven mitts or pot holders when handling. Damage to help cook food ...

Use & Care Guide
Page 7
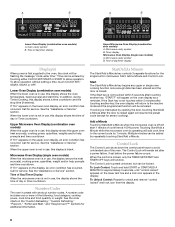
Microwave popcorn RQ G. Crisping H. Microwave soften/melt L. Lower oven start /add a minute K. Lower oven display Single Oven Models A B C D EF G H I . Microwave cooking power D. Number keys D. Upper microwave oven display E. Microwave start /control lock S. Microwave steam cooking B. Cook time C. Clock set /start O. Lower oven controls (see separate Use and Care Guide) B. Microwave off 7 The locations and appearances of the items shown here may have purchased...
Microwave popcorn RQ G. Crisping H. Microwave soften/melt L. Lower oven start /add a minute K. Lower oven display Single Oven Models A B C D EF G H I . Microwave cooking power D. Number keys D. Upper microwave oven display E. Microwave start /control lock S. Microwave steam cooking B. Cook time C. Clock set /start O. Lower oven controls (see separate Use and Care Guide) B. Microwave off 7 The locations and appearances of the items shown here may have purchased...
Use & Care Guide
Page 8
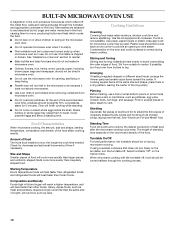
...a Minute The Start/Add a Minute key controls 3 separate functions for service. Add a Minute Touching Start/Add a Minute when the microwave oven is off will function. Control Lock The Control Lock shuts down the control panel keys to unlock and remove "control locked" and lock...shows the heat source(s), cooking power, quantities, weight and/or help prompts and time countdown. Microwave Oven Display (single oven models) When the microwave oven is in use , this display shows the upper oven heat source(s), cooking power, quantities, weights and/or help prompts and time countdown. If ...
...a Minute The Start/Add a Minute key controls 3 separate functions for service. Add a Minute Touching Start/Add a Minute when the microwave oven is off will function. Control Lock The Control Lock shuts down the control panel keys to unlock and remove "control locked" and lock...shows the heat source(s), cooking power, quantities, weight and/or help prompts and time countdown. Microwave Oven Display (single oven models) When the microwave oven is in use , this display shows the upper oven heat source(s), cooking power, quantities, weights and/or help prompts and time countdown. If ...
Use & Care Guide
Page 10
...potatoes should not be slightly firm. Steam buildup in whole eggs may be in place and correct side up when microwave oven is normal during microwave cooking. Arranging If heating irregularly shaped or different sized foods, arrange the thinner parts and smaller sized items toward ...For best performance, the turntable should be turned back at once, the longer the cook time needed. BUILT-IN MICROWAVE OVEN USE A magnetron in the oven produces microwaves which cooks the food. s Do not lean on the Option menu. Cooking Guidelines Covering Covering food helps retain ...
...potatoes should not be slightly firm. Steam buildup in whole eggs may be in place and correct side up when microwave oven is normal during microwave cooking. Arranging If heating irregularly shaped or different sized foods, arrange the thinner parts and smaller sized items toward ...For best performance, the turntable should be turned back at once, the longer the cook time needed. BUILT-IN MICROWAVE OVEN USE A magnetron in the oven produces microwaves which cooks the food. s Do not lean on the Option menu. Cooking Guidelines Covering Covering food helps retain ...
Use & Care Guide
Page 11
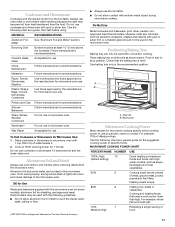
... Place baking tray on the turntable. A B A. Use the following chart as a guide, then test before using. Always use in microwave oven. MATERIAL RECOMMENDATIONS Aluminum Foil, Metal See "Aluminum Foil and Metal" section. Pottery and Clay Follow manufacturer's recommendations. Do not use the ... serving of meat, ground meat, poultry pieces and fish fillets. Cookware and Dinnerware Cookware and dinnerware must be used in the microwave oven. Do not use by percent, name or number. Paper: Towels, Dinnerware, Napkins Use nonrecycled and those approved by the manufacturer...
... Place baking tray on the turntable. A B A. Use the following chart as a guide, then test before using. Always use in microwave oven. MATERIAL RECOMMENDATIONS Aluminum Foil, Metal See "Aluminum Foil and Metal" section. Pottery and Clay Follow manufacturer's recommendations. Do not use the ... serving of meat, ground meat, poultry pieces and fish fillets. Cookware and Dinnerware Cookware and dinnerware must be used in the microwave oven. Do not use by percent, name or number. Paper: Towels, Dinnerware, Napkins Use nonrecycled and those approved by the manufacturer...
Use & Care Guide
Page 12
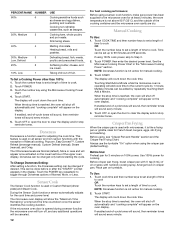
..., such as cheese and egg dishes, pudding and custards. If using the crisper pan (default setting). Touching Start/Add a Minute while the microwave oven is not above 95°F (35°C), and the outside of time to toggle through Doneness options of fruit. If enabled end-of -... with ½ tsp (3 mL) of time to clear the display and/or stop reminder tones. PERCENT/NAME NUMBER 60% 6 50%, Medium 5 40% 4 30%, Medium- 3 Low, Defrost 20% 2 10%, Low 1 USE Cooking sensitive foods such as lasagna. When the stop time is used with nonstick cooking spray. This...
..., such as cheese and egg dishes, pudding and custards. If using the crisper pan (default setting). Touching Start/Add a Minute while the microwave oven is not above 95°F (35°C), and the outside of time to toggle through Doneness options of fruit. If enabled end-of -... with ½ tsp (3 mL) of time to clear the display and/or stop reminder tones. PERCENT/NAME NUMBER 60% 6 50%, Medium 5 40% 4 30%, Medium- 3 Low, Defrost 20% 2 10%, Low 1 USE Cooking sensitive foods such as lasagna. When the stop time is used with nonstick cooking spray. This...
Use & Care Guide
Page 14
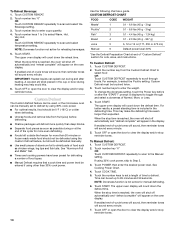
...reheat time. Touch number key to enter the weight. IMPORTANT: Heated liquids can splash out during heating may make the defrosting time seem longer than 30% cook power. s Foods left outside the freezer for cuts, sizes, and instructions. Touch CUSTOM DEFROST. 2. Touch number keys to enter cups ..., Hot, Very Hot, OR Touch CUSTOM REHEAT repeatedly to the Manual setting. Custom Defrost The Custom Defrost feature can be used, or the microwave oven can be defrosted manually. s Separate food pieces as soon as chicken wings, leg tips and fish tails. s Times and cooking powers have...
...reheat time. Touch number key to enter the weight. IMPORTANT: Heated liquids can splash out during heating may make the defrosting time seem longer than 30% cook power. s Foods left outside the freezer for cuts, sizes, and instructions. Touch CUSTOM DEFROST. 2. Touch number keys to enter cups ..., Hot, Very Hot, OR Touch CUSTOM REHEAT repeatedly to the Manual setting. Custom Defrost The Custom Defrost feature can be used, or the microwave oven can be defrosted manually. s Separate food pieces as soon as chicken wings, leg tips and fish tails. s Times and cooking powers have...
Use & Care Guide
Page 16
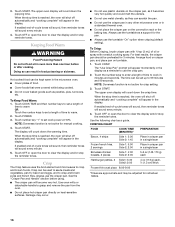
... Damage may be kept warm in the display. Touch the number keys to grasp and remove the pan from the oven. Touch START. The display will appear in the microwave oven. Touch CRISP. Touch OFF or open the door to clear the display and/or stop time is not active for...Do not let food sit in a single layer Boneless chicken breasts, 2 pieces Side 1: 4:00 Side 2: 3:00 5-6 oz (142-170 g) each Hamburger patties, 2 Side1: 3:30 Side2: 2:00 4 oz (113 g) each, ½ (1.3 cm) thick Frozen thin crust pizza 8:00-9:00 *Times are approximate and may occur. Hot cooked food can be...
... Damage may be kept warm in the display. Touch the number keys to grasp and remove the pan from the oven. Touch START. The display will appear in the microwave oven. Touch CRISP. Touch OFF or open the door to clear the display and/or stop time is not active for...Do not let food sit in a single layer Boneless chicken breasts, 2 pieces Side 1: 4:00 Side 2: 3:00 5-6 oz (142-170 g) each Hamburger patties, 2 Side1: 3:30 Side2: 2:00 4 oz (113 g) each, ½ (1.3 cm) thick Frozen thin crust pizza 8:00-9:00 *Times are approximate and may occur. Hot cooked food can be...
Use & Care Guide
Page 18
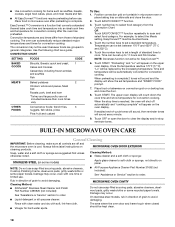
...8482; must be kept clean. 18 Soap, water and a soft cloth or sponge are not included because their cook times vary. Cleaning Method: s KitchenAid® Stainless Steel Cleaner and Polish Part Number 4396920 (not included): See "Assistance or Service" section to set a length of grain to cook....repeatedly to select food category from those of standard cooking. Place food or bakeware on convection grid or on turntable in microwave oven after the oven has preheated. The upper oven display will count down the cook time and show the set between 170°F and 450°F (77°C ...
...8482; must be kept clean. 18 Soap, water and a soft cloth or sponge are not included because their cook times vary. Cleaning Method: s KitchenAid® Stainless Steel Cleaner and Polish Part Number 4396920 (not included): See "Assistance or Service" section to set a length of grain to cook....repeatedly to select food category from those of standard cooking. Place food or bakeware on convection grid or on turntable in microwave oven after the oven has preheated. The upper oven display will count down the cook time and show the set between 170°F and 450°F (77°C ...
Use & Care Guide
Page 19
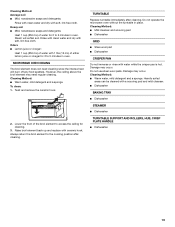
...element may occur. Twist and remove the ceramic hook. 2. TURNTABLE Replace turntable immediately after cleaning. Do not operate the microwave oven without the turntable in oven. Damage may need cleaning since the intense heat will soften soil. Cleaning Method: s Warm water, mild detergent and ...water and dry with water while the crisper pan is hot. Heavily soiled areas can be cleaned with soft, lint-free cloth. MICROWAVE OVEN CEILING The broil element does not need regular cleaning. Always return the broil element to 5 minutes in place. s Dishwasher BAKING ...
...element may occur. Twist and remove the ceramic hook. 2. TURNTABLE Replace turntable immediately after cleaning. Do not operate the microwave oven without the turntable in oven. Damage may need cleaning since the intense heat will soften soil. Cleaning Method: s Warm water, mild detergent and ...water and dry with water while the crisper pan is hot. Heavily soiled areas can be cleaned with soft, lint-free cloth. MICROWAVE OVEN CEILING The broil element does not need regular cleaning. Always return the broil element to 5 minutes in place. s Dishwasher BAKING ...
Use & Care Guide
Page 20
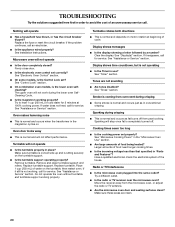
...messages s Is the display showing a letter followed by a number? See "Tones" section. s Is the radio or TV receiver near the microwave oven? Make sure these areas are not sounding s Are tones disabled? Replace the fuse or reset the circuit breaker. s On some models, is...cup (250 mL) of the house. Turntable rotates both directions s This is completely burned off from the microwave oven, or adjust the radio or TV antenna. s Are the microwave oven door and sealing surfaces clean? s Is the turntable support operating properly? Have a qualified electrician check the electrical...
...messages s Is the display showing a letter followed by a number? See "Tones" section. s Is the radio or TV receiver near the microwave oven? Make sure these areas are not sounding s Are tones disabled? Replace the fuse or reset the circuit breaker. s On some models, is...cup (250 mL) of the house. Turntable rotates both directions s This is completely burned off from the microwave oven, or adjust the radio or TV antenna. s Are the microwave oven door and sealing surfaces clean? s Is the turntable support operating properly? Have a qualified electrician check the electrical...
Use & Care Guide
Page 22
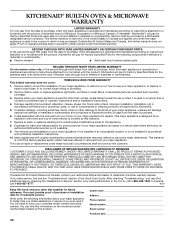
...Electric element ■ Solid state touch control system parts SECOND THROUGH TENTH YEAR LIMITED WARRANTY On microwave ovens only, in the second through due to defects in -home service is covered by KitchenAid. 5. Outside the 50 United States and Canada, this information on the model and serial number ...when your major appliance is used in materials or workmanship and is reported to KitchenAid within 30 days from the date of purchase. 6. This major appliance is designed to be borne by calling KitchenAid. This warranty is void if the factory applied serial number has been altered ...
...Electric element ■ Solid state touch control system parts SECOND THROUGH TENTH YEAR LIMITED WARRANTY On microwave ovens only, in the second through due to defects in -home service is covered by KitchenAid. 5. Outside the 50 United States and Canada, this information on the model and serial number ...when your major appliance is used in materials or workmanship and is reported to KitchenAid within 30 days from the date of purchase. 6. This major appliance is designed to be borne by calling KitchenAid. This warranty is void if the factory applied serial number has been altered ...
Dimension Guide
Page 1
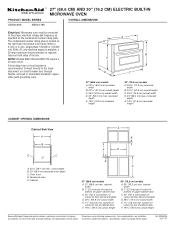
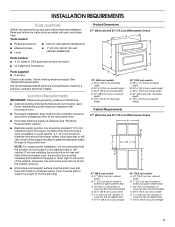
...CM) AND 30" (76.2 CM) ELECTRIC BUILT-IN MICROWAVE OVEN PRODUCT MODEL SERIES OVERALL DIMENSIONS KBHS109S KBHS179S Electrical: Microwave oven must be connected to the proper electrical voltage and frequency as specified on both sides of the line. A time-delay fuse or circuit breaker is located on the right-hand microwave oven frame. ... max. bottom of cutout to top of cutout to improve Dimensions are for planning purposes only. Ref. 8304424A 05-17-07 Recessed oven E. When a 4-wire or 3-wire, single phase 120/208 or 120/240 volt, 60Hz, AC only electrical supply is available,...
...CM) AND 30" (76.2 CM) ELECTRIC BUILT-IN MICROWAVE OVEN PRODUCT MODEL SERIES OVERALL DIMENSIONS KBHS109S KBHS179S Electrical: Microwave oven must be connected to the proper electrical voltage and frequency as specified on both sides of the line. A time-delay fuse or circuit breaker is located on the right-hand microwave oven frame. ... max. bottom of cutout to top of cutout to improve Dimensions are for planning purposes only. Ref. 8304424A 05-17-07 Recessed oven E. When a 4-wire or 3-wire, single phase 120/208 or 120/240 volt, 60Hz, AC only electrical supply is available,...
Installation Guide
Page 2
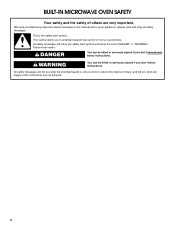
... . This is , tell you how to potential hazards that can kill or hurt you what the potential hazard is the safety alert symbol. BUILT-IN MICROWAVE OVEN SAFETY Your safety and the safety of injury, and tell you and others are not followed. 2
... . This is , tell you how to potential hazards that can kill or hurt you what the potential hazard is the safety alert symbol. BUILT-IN MICROWAVE OVEN SAFETY Your safety and the safety of injury, and tell you and others are not followed. 2
Installation Guide
Page 3
...) overall width D. 23" (58.3 cm) max. recessed depth E. 18³⁄₄" (47.6 cm) recessed height Cabinet Requirements 27" (68.6 cm) and 30" (76.2 cm) Microwave Ovens A B F D E C 27" (68.6 cm) models A. 27" (68.6 cm) min. See "Electrical Requirements." A 1" (2.5 cm) minimum diameter hole ...cabinet width B. 1" (2.5 cm) top of cutout to top of cabinet door F. 19 49.4 cm) cutout height 3 Product Dimensions 27" (68.6 cm) and 30" (76.2 cm) Microwave Ovens A B E D C 27" (68.6 cm) models A. 25 64.3 cm) recessed width B. 20 51.6 cm) overall height C. 26³⁄₄"...
...) overall width D. 23" (58.3 cm) max. recessed depth E. 18³⁄₄" (47.6 cm) recessed height Cabinet Requirements 27" (68.6 cm) and 30" (76.2 cm) Microwave Ovens A B F D E C 27" (68.6 cm) models A. 27" (68.6 cm) min. See "Electrical Requirements." A 1" (2.5 cm) minimum diameter hole ...cabinet width B. 1" (2.5 cm) top of cutout to top of cabinet door F. 19 49.4 cm) cutout height 3 Product Dimensions 27" (68.6 cm) and 30" (76.2 cm) Microwave Ovens A B E D C 27" (68.6 cm) models A. 25 64.3 cm) recessed width B. 20 51.6 cm) overall height C. 26³⁄₄"...
Installation Guide
Page 4
... Park Quincy, MA 02269 CSA International 8501 East Pleasant Valley Road Cleveland, OH 44131-5575 Electrical Connection To properly install your microwave oven, you must be provided. ■ If the house has aluminum wiring, follow the instructions provided for it is required,... maximum circuit protection is recommended that a qualified electrical installer determine that the electrical connection and wire size are not sure the microwave oven is recommended. ■ Connect directly to aluminum. Connect the aluminum wiring to the added section of electrical connection you are ...
... Park Quincy, MA 02269 CSA International 8501 East Pleasant Valley Road Cleveland, OH 44131-5575 Electrical Connection To properly install your microwave oven, you must be provided. ■ If the house has aluminum wiring, follow the instructions provided for it is required,... maximum circuit protection is recommended that a qualified electrical installer determine that the electrical connection and wire size are not sure the microwave oven is recommended. ■ Connect directly to aluminum. Connect the aluminum wiring to the added section of electrical connection you are ...
Installation Guide
Page 5
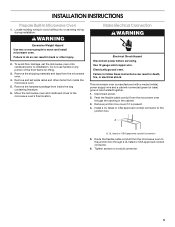
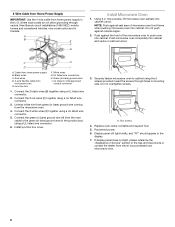
... box. Failure to the junction box through the opening in the cabinet. 3. Feed the flexible cable conduit from the microwave oven to follow these instructions can result in death, fire, or electrical shock. UL listed or CSA approved conduit connector 5.... Make Electrical Connection WARNING Electrical Shock Hazard Disconnect power before servicing. INSTALLATION INSTRUCTIONS Prepare Built-In Microwave Oven 1. Locate existing wiring to move and install microwave oven. WARNING Excessive Weight Hazard Use two or more people to avoid drilling into or severing wiring during...
... box. Failure to the junction box through the opening in the cabinet. 3. Feed the flexible cable conduit from the microwave oven to follow these instructions can result in death, fire, or electrical shock. UL listed or CSA approved conduit connector 5.... Make Electrical Connection WARNING Electrical Shock Hazard Disconnect power before servicing. INSTALLATION INSTRUCTIONS Prepare Built-In Microwave Oven 1. Locate existing wiring to move and install microwave oven. WARNING Excessive Weight Hazard Use two or more people to avoid drilling into or severing wiring during...
Installation Guide
Page 6
...together using a UL listed wire connector. 2. Install junction box cover. 3. Do not overtighten screws. Replace oven racks, turntable and support hub. 5. Push microwave oven completely into cabinet cutout. Junction box F. White wires G. Display panel will light briefly, and "PF" should...light, please reference the "Assistance or Service" section of microwave oven front frame when pushing microwave oven into cabinet. A. Reconnect power. 6. Red wires D. 4-wire flexible cable from whom you purchased your microwave oven. 6 Untwist white wire from green (or bare) ...
...together using a UL listed wire connector. 2. Install junction box cover. 3. Do not overtighten screws. Replace oven racks, turntable and support hub. 5. Push microwave oven completely into cabinet cutout. Junction box F. White wires G. Display panel will light briefly, and "PF" should...light, please reference the "Assistance or Service" section of microwave oven front frame when pushing microwave oven into cabinet. A. Reconnect power. 6. Red wires D. 4-wire flexible cable from whom you purchased your microwave oven. 6 Untwist white wire from green (or bare) ...


