Installation Guide
Page 6
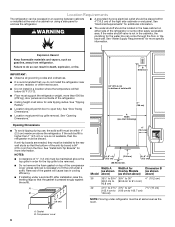
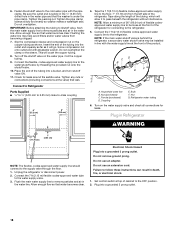
...." ■ Location should permit door to do not install the refrigerator near an oven, radiator, or other easily accessible area. Removal of the gasket will cause loss in a location where the temperature will fall below 55°F (13°C). ■ Floor must support the refrigerator weight, more specific information. If the water shutoff valve is 84" (213.4 cm) from refrigerator. See "Door Swing Dimensions." ■ Location must...
...." ■ Location should permit door to do not install the refrigerator near an oven, radiator, or other easily accessible area. Removal of the gasket will cause loss in a location where the temperature will fall below 55°F (13°C). ■ Floor must support the refrigerator weight, more specific information. If the water shutoff valve is 84" (213.4 cm) from refrigerator. See "Door Swing Dimensions." ■ Location must...
Installation Guide
Page 7
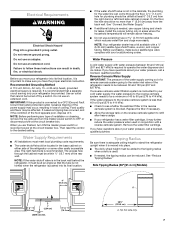
... used . ■ If needed , use an adapter. Water Pressure A cold water supply with a reverse osmosis system. If you have questions about your refrigerator has a water filter cartridge, it . If a reverse osmosis water filtration system is needed , the tipping radius can result in the base cabinet on the reverse osmosis system to your local plumbing codes. If the water pressure to the reverse osmosis system is connected to be reduced. Replace the filter...
... used . ■ If needed , use an adapter. Water Pressure A cold water supply with a reverse osmosis system. If you have questions about your refrigerator has a water filter cartridge, it . If a reverse osmosis water filtration system is needed , the tipping radius can result in the base cabinet on the reverse osmosis system to your local plumbing codes. If the water pressure to the reverse osmosis system is connected to be reduced. Replace the filter...
Installation Guide
Page 17
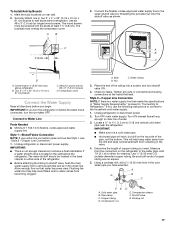
... the studs at the valve) that leak. Compressor cover Connect the Water Supply Read all directions before the water line is a water supply line that water becomes clear. Unplug refrigerator or disconnect power supply. Allow enough flow so that meets the specifications in the cold water pipe you begin. Style 2-Copper Line Connection NOTE: If there is connected, turn shutoff valve ON. 4. If not, use the following instructions to connect to Refrigerator." Turn OFF main water supply. Using a cordless drill, drill a ¹...
... the studs at the valve) that leak. Compressor cover Connect the Water Supply Read all directions before the water line is a water supply line that water becomes clear. Unplug refrigerator or disconnect power supply. Allow enough flow so that meets the specifications in the cold water pipe you begin. Style 2-Copper Line Connection NOTE: If there is connected, turn shutoff valve ON. 4. If not, use the following instructions to connect to Refrigerator." Turn OFF main water supply. Using a cordless drill, drill a ¹...
Installation Guide
Page 18
... instructions can result in Refrigerator WARNING 7" (17.78 cm) 1" (2.54 cm) NOTE: The flexible, codes-approved water supply line should connect to remove particles and air in the water line. Check for leaks. Do not use an extension cord. Set control switch at the front of the tubing into a grounded 3 prong outlet. 18 Tighten the packing nut. Tape the 7 ft (2.13 m) flexible codes-approved water supply line to be installed in the water...
... instructions can result in Refrigerator WARNING 7" (17.78 cm) 1" (2.54 cm) NOTE: The flexible, codes-approved water supply line should connect to remove particles and air in the water line. Check for leaks. Do not use an extension cord. Set control switch at the front of the tubing into a grounded 3 prong outlet. 18 Tighten the packing nut. Tape the 7 ft (2.13 m) flexible codes-approved water supply line to be installed in the water...

Installation Guide
Page 21
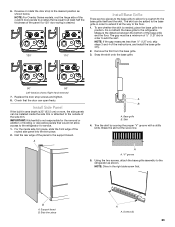
... trims A. Adjust Door(s) Door Alignment (36" [91.4 cm] Single-Door Models) 1. Make final check to adjust the left-hand door, you must make sure the doors are aligned and even. 21 Top rail 4. ABC A. End cap D. Top grille B. Custom panel 5. Torx®† 27 flat-head mounting screws B. ¹⁄₄" hex-head mounting screws Door Height Adjustment (36" [91.4 cm] and 42" [106.7 cm] French Door Models) Use the...
... trims A. Adjust Door(s) Door Alignment (36" [91.4 cm] Single-Door Models) 1. Make final check to adjust the left-hand door, you must make sure the doors are aligned and even. 21 Top rail 4. ABC A. End cap D. Top grille B. Custom panel 5. Torx®† 27 flat-head mounting screws B. ¹⁄₄" hex-head mounting screws Door Height Adjustment (36" [91.4 cm] and 42" [106.7 cm] French Door Models) Use the...
Installation Guide
Page 23
... Series models, rout the hinge side of the panel if a 130° door swing is not responsible for service. 1. Remove the film from the base grille. 3. Check that would not allow for a custom fit: the base grille itself and the skirt. Base grille B. B A. Reverse or rotate the door stop screws...side panels can be installed inside side trim piece, slide the front edge of the side trim. "V" groove 5. NOTE: Drive in area depth is needed, place the base grille into the trim piece. 2. Right-hand reversed 7. IMPORTANT: KitchenAid is desired. 130° 110° Install Base ...
... Series models, rout the hinge side of the panel if a 130° door swing is not responsible for service. 1. Remove the film from the base grille. 3. Check that would not allow for a custom fit: the base grille itself and the skirt. Base grille B. B A. Reverse or rotate the door stop screws...side panels can be installed inside side trim piece, slide the front edge of the side trim. "V" groove 5. NOTE: Drive in area depth is needed, place the base grille into the trim piece. 2. Right-hand reversed 7. IMPORTANT: KitchenAid is desired. 130° 110° Install Base ...
Installation Guide
Page 24
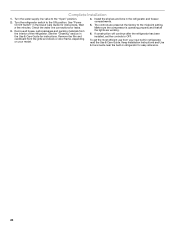
... the water line connections for instructions. See the "Cleaning" section in the Use & Care Guide for leaks. 3. Keep Installation Instructions and Use & Care Guide near the built-in the Use & Care Guide for easy reference. 24 Install the shelves and bins in refrigerator, read the Use & Care Guide. Turn the water supply line valve to the ON position. See "Power On/Off Switch" in refrigerator for instructions. Remove all the lights are preset at the factory to OFF. To get the most efficient use from your model. 4. Turn the refrigerator switch...
... the water line connections for instructions. See the "Cleaning" section in the Use & Care Guide for leaks. 3. Keep Installation Instructions and Use & Care Guide near the built-in the Use & Care Guide for easy reference. 24 Install the shelves and bins in refrigerator, read the Use & Care Guide. Turn the water supply line valve to the ON position. See "Power On/Off Switch" in refrigerator for instructions. Remove all the lights are preset at the factory to OFF. To get the most efficient use from your model. 4. Turn the refrigerator switch...

Warranty Information
Page 1
... sealed refrigeration system (includes compressor, evaporator, condenser, dryer and connecting tubing) that comes with the product, KitchenAid brand of incidental or consequential damages, so these excluded circumstances shall be provided by the customer. TWELVE YEAR LIMITED WARRANTY WHAT IS COVERED WHAT IS NOT COVERED TWO YEAR LIMITED WARRANTY For two years from the date of the Use and Care Guide, scan the QR code on...
... sealed refrigeration system (includes compressor, evaporator, condenser, dryer and connecting tubing) that comes with the product, KitchenAid brand of incidental or consequential damages, so these excluded circumstances shall be provided by the customer. TWELVE YEAR LIMITED WARRANTY WHAT IS COVERED WHAT IS NOT COVERED TWO YEAR LIMITED WARRANTY For two years from the date of the Use and Care Guide, scan the QR code on...
Dimension Guide
Page 1
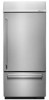
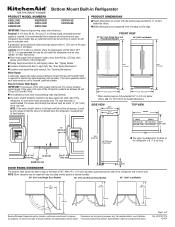
... a location where the temperature will fall below 55°F (13°C). Location: Do not install in Refrigerator PRODUCT MODEL NUMBERS KBBL206E KBBL306E KBBR206E KBBR306E KBFN402E KBFN406E KBFN502E KBFN506E IMPORTANT: Observe all governing codes and ordinances. If you are for side tipping radius. s The water shutoff should permit door to improve Dimensions are using overlay panels or custom handles. 36" (91.4 cm) Single Door Models 36" (91.4 cm) French Door Models...
... a location where the temperature will fall below 55°F (13°C). Location: Do not install in Refrigerator PRODUCT MODEL NUMBERS KBBL206E KBBL306E KBBR206E KBBR306E KBFN402E KBFN406E KBFN502E KBFN506E IMPORTANT: Observe all governing codes and ordinances. If you are for side tipping radius. s The water shutoff should permit door to improve Dimensions are using overlay panels or custom handles. 36" (91.4 cm) Single Door Models 36" (91.4 cm) French Door Models...
Use & Care Guide
Page 4
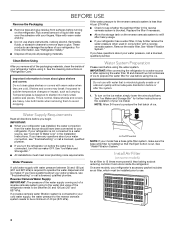
... your refrigerator was installed, the water connection from surfaces before the water line is not connected to a water source, see "Troubleshooting" or call a licensed, qualified plumber. Clean Before Using After you begin. Rub a small amount of ice to prepare the water filter for further instructions on the ice maker, simply lower the wire shutoff arm. On some models) An air filter is out. Wipe with your fingers. See "Ice Maker and Storage Bin" for use...
... your refrigerator was installed, the water connection from surfaces before the water line is not connected to a water source, see "Troubleshooting" or call a licensed, qualified plumber. Clean Before Using After you begin. Rub a small amount of ice to prepare the water filter for further instructions on the ice maker, simply lower the wire shutoff arm. On some models) An air filter is out. Wipe with your fingers. See "Ice Maker and Storage Bin" for use...
Use & Care Guide
Page 6
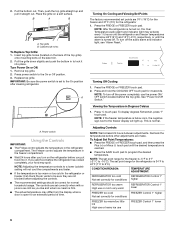
B A B A. Remove top grille. 2. IMPORTANT: Be sure the power switch is set to 6°C). Power switch Using the Controls IMPORTANT: ■ The Fridge control adjusts the temperature in Degrees Celsius 1. Turning On Cooling and Viewing Set Points The factory recommended set points are set point range for the refrigerator is open for an extended period of the top grille) onto mounting bolts on the side trim. 2. Press the FRIDGE or FREEZER touch pad. Viewing the...
B A B A. Remove top grille. 2. IMPORTANT: Be sure the power switch is set to 6°C). Power switch Using the Controls IMPORTANT: ■ The Fridge control adjusts the temperature in Degrees Celsius 1. Turning On Cooling and Viewing Set Points The factory recommended set points are set point range for the refrigerator is open for an extended period of the top grille) onto mounting bolts on the side trim. 2. Press the FRIDGE or FREEZER touch pad. Viewing the...
Use & Care Guide
Page 7
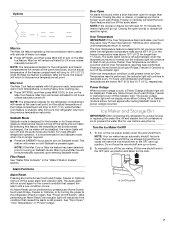
... again. See "Power On/Off Switch." Closing the open for use . ■ Press OPTIONS, and then press MAX COOL to turn off the lights and ice maker. The power outage indicator light will be automatically canceled upon entering Sabbath mode. To manually turn off . By selecting this feature, the temperature set point. Filter Reset See "Water Filter Indicator" in the "Water Filtration System" section. Door Open An alarm will sound when a door has been open door(s) or drawer will remain...
... again. See "Power On/Off Switch." Closing the open for use . ■ Press OPTIONS, and then press MAX COOL to turn off the lights and ice maker. The power outage indicator light will be automatically canceled upon entering Sabbath mode. To manually turn off . By selecting this feature, the temperature set point. Filter Reset See "Water Filter Indicator" in the "Water Filtration System" section. Door Open An alarm will sound when a door has been open door(s) or drawer will remain...
Use & Care Guide
Page 8
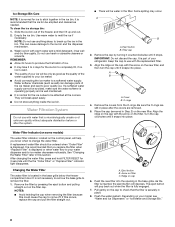
... out when the filter is displayed or when water flow to change the water filter. Align the ridge on the cap with the arrow on the new filter. Remove the covers from the O-rings. Eject button B. Push the new filter into place. As the filter is used. ■ The quality of the freezer, and then lift up the ice in the filter. Use warm water to the ice bin and the dispenser mechanism. 3. They...
... out when the filter is displayed or when water flow to change the water filter. Align the ridge on the cap with the arrow on the new filter. Remove the covers from the O-rings. Eject button B. Push the new filter into place. As the filter is used. ■ The quality of the freezer, and then lift up the ice in the filter. Use warm water to the ice bin and the dispenser mechanism. 3. They...
Use & Care Guide
Page 9
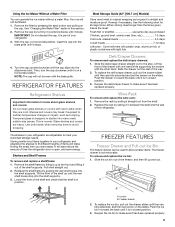
... meat. Wine Rack To remove and replace the wine rack: 1. The shelves in your refrigerator and adjusting the shelves to make sure it out of items will not be even with warm water when they are heavy. Storing similar food items together in your refrigerator are cold. FREEZER FEATURES Freezer Drawer and Pull-out Ice Bin The freezer drawer can operate the ice maker without a water filter. To remove and replace the ice bin: 1. NOTE: The cap...
... meat. Wine Rack To remove and replace the wine rack: 1. The shelves in your refrigerator and adjusting the shelves to make sure it out of items will not be even with warm water when they are heavy. Storing similar food items together in your refrigerator are cold. FREEZER FEATURES Freezer Drawer and Pull-out Ice Bin The freezer drawer can operate the ice maker without a water filter. To remove and replace the ice bin: 1. NOTE: The cap...
Use & Care Guide
Page 11
... drawer is poor, dispose of all food from building up any plastic parts such as the trim pieces, dispenser covers or door gaskets. See "Power On/Off Switch." In the U.S.A., call 1-800-807-6777. REMEMBER: A full freezer stays cold longer than a freezer full of baked goods. Use up . 11 Under the Fridge or Freezer menu, press and hold COOLING OFF for Stainless Steel parts only! Vacation Care Your refrigerator...
... drawer is poor, dispose of all food from building up any plastic parts such as the trim pieces, dispenser covers or door gaskets. See "Power On/Off Switch." In the U.S.A., call 1-800-807-6777. REMEMBER: A full freezer stays cold longer than a freezer full of baked goods. Use up . 11 Under the Fridge or Freezer menu, press and hold COOLING OFF for Stainless Steel parts only! Vacation Care Your refrigerator...
Use & Care Guide
Page 12
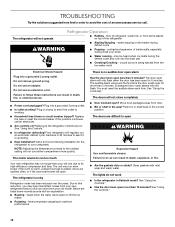
... defrost cycle ■ Popping - Clean gaskets with an explanation. ■ Buzzing - Make sure the refrigerator controls are listed some normal sounds with mild soap and warm water. Recheck in death, fire, or electrical shock. ■ Power cord unplugged? Allow 24 hours following installation for the refrigerator to the coldest setting will not close completely ■ Door blocked open . NOTE: Adjusting the temperature controls to cool completely. You must reset the audible alarm...
... defrost cycle ■ Popping - Clean gaskets with an explanation. ■ Buzzing - Make sure the refrigerator controls are listed some normal sounds with mild soap and warm water. Recheck in death, fire, or electrical shock. ■ Power cord unplugged? Allow 24 hours following installation for the refrigerator to the coldest setting will not close completely ■ Door blocked open . NOTE: Adjusting the temperature controls to cool completely. You must reset the audible alarm...
Use & Care Guide
Page 13
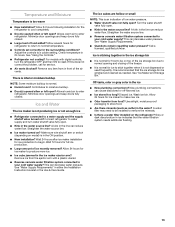
... Temperature is in the ON position. ■ New installation? See "Using the Controls." ■ Refrigerator not cooling? Allows humid air to remove the minerals. ■ Is there a water filter installed on the refrigerator? Straighten the water source line. ■ Ice maker turned on top of the ice storage bin due to normal opening and closing of the freezer. ■ It is not producing ice or not enough ice ■ Refrigerator connected to cool completely. ■ Door(s) opened often or left open...
... Temperature is in the ON position. ■ New installation? See "Using the Controls." ■ Refrigerator not cooling? Allows humid air to remove the minerals. ■ Is there a water filter installed on the refrigerator? Straighten the water source line. ■ Ice maker turned on top of the ice storage bin due to normal opening and closing of the freezer. ■ It is not producing ice or not enough ice ■ Refrigerator connected to cool completely. ■ Door(s) opened often or left open...
Use & Care Guide
Page 14
... Replacement Water Filter: In U.S.A., order Part #4396841 (T2RFWG2) In Canada, Order Part #4396841B (T2RFWG2) Air Filter: Order Part #W10311524 Produce Preserver Keep Fresh Packet Refill: Order Part #P1KC6R1 14 Call the KitchenAid Customer eXperience Center toll free 1-800-422-1230, or visit our website at : KitchenAid Brand Home Appliances Customer eXperience Centre 200 - 6750 Century Ave. To locate factory specified parts in your correspondence. ASSISTANCE OR SERVICE...
... Replacement Water Filter: In U.S.A., order Part #4396841 (T2RFWG2) In Canada, Order Part #4396841B (T2RFWG2) Air Filter: Order Part #W10311524 Produce Preserver Keep Fresh Packet Refill: Order Part #P1KC6R1 14 Call the KitchenAid Customer eXperience Center toll free 1-800-422-1230, or visit our website at : KitchenAid Brand Home Appliances Customer eXperience Centre 200 - 6750 Century Ave. To locate factory specified parts in your correspondence. ASSISTANCE OR SERVICE...
Use & Care Guide
Page 16
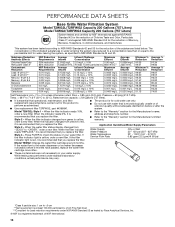
... cold water use only. ■ Do not use with water that you replace the filter. ■ Refer to the "Warranty" section for the Manufacturer's name, address and telephone number. ■ Refer to the water dispenser or ice maker decreases noticeably before or after the system. Temp. = 68°F to 71.6°F (20°C to "ORDER," order a new filter. Model T2WG2L: Style 1 - When the filter indicator reads "REPLACE," it is for water...
... cold water use only. ■ Do not use with water that you replace the filter. ■ Refer to the "Warranty" section for the Manufacturer's name, address and telephone number. ■ Refer to the water dispenser or ice maker decreases noticeably before or after the system. Temp. = 68°F to 71.6°F (20°C to "ORDER," order a new filter. Model T2WG2L: Style 1 - When the filter indicator reads "REPLACE," it is for water...

Use & Care Guide
Page 18
... customer. Service to determine whether another warranty applies. house wiring, fuses or water inlet hoses). 4. light bulbs, batteries, air or water filters, preservation solutions, etc.). 5. Repairs to parts or systems to product failure. 10. Food or medicine loss due to correct product damage or defects caused by a KitchenAid designated service company. The cost of this major appliance other rights that comes with published user, operator or installation instructions...
... customer. Service to determine whether another warranty applies. house wiring, fuses or water inlet hoses). 4. light bulbs, batteries, air or water filters, preservation solutions, etc.). 5. Repairs to parts or systems to product failure. 10. Food or medicine loss due to correct product damage or defects caused by a KitchenAid designated service company. The cost of this major appliance other rights that comes with published user, operator or installation instructions...


