
Quick Start Guide
Page 20
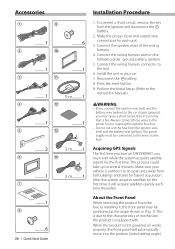
... the ignition wire (red) and the battery wire (yellow) to the wires via the fuse. Make sure your car. 7. This is outdoors in (Fig. 1). Connect the wiring harness connector to several ...minutes. After the system acquires satellites for the first time. This process could take up to the unit. 6. Always connect those wires to the characteristics of the wiring harness. 4. When the product is equipped with. Accessories 1 9 ..........1 ..........6 2 0 ..........1...
... the ignition wire (red) and the battery wire (yellow) to the wires via the fuse. Make sure your car. 7. This is outdoors in (Fig. 1). Connect the wiring harness connector to several ...minutes. After the system acquires satellites for the first time. This process could take up to the unit. 6. Always connect those wires to the characteristics of the wiring harness. 4. When the product is equipped with. Accessories 1 9 ..........1 ..........6 2 0 ..........1...
Quick Start Guide
Page 21
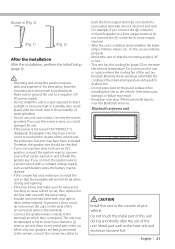
... the brake lamps, blinkers, wipers, etc. connector to a rear output terminal. • After the unit is displayed), the speaker wire may have a shortcircuit or touched the chassis of the unconnected wires or the terminals. • Connect the speaker wires correctly to the terminals to which they correspond.... replace the old fuse with one with the same rating. • Insulate unconnected wires with battery wires, the battery may drop if there are being connected to the system, connect the connectors either to both the front output terminals or to the vehicle. Also avoid places ...
... the brake lamps, blinkers, wipers, etc. connector to a rear output terminal. • After the unit is displayed), the speaker wire may have a shortcircuit or touched the chassis of the unconnected wires or the terminals. • Connect the speaker wires correctly to the terminals to which they correspond.... replace the old fuse with one with the same rating. • Insulate unconnected wires with battery wires, the battery may drop if there are being connected to the system, connect the connectors either to both the front output terminals or to the vehicle. Also avoid places ...
Quick Start Guide
Page 22
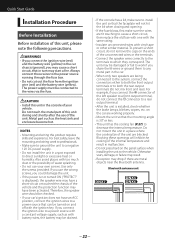
... to both the front output terminals or to both the rear output terminals (do not connect the connector to a rear output terminal. • After the unit is displayed), the speaker wire may have a short-circuit or touched the chassis of the vehicle and the protection function may cause a ...; Install this unit during and shortly after the use the wrong screws, you connect the ignition wire to decrease the internal temperature. For best safety, leave the mounting and wiring work if you connect the connector of the left speaker to which they correspond. on the ends of the unconnected...
... to both the front output terminals or to both the rear output terminals (do not connect the connector to a rear output terminal. • After the unit is displayed), the speaker wire may have a short-circuit or touched the chassis of the vehicle and the protection function may cause a ...; Install this unit during and shortly after the use the wrong screws, you connect the ignition wire to decrease the internal temperature. For best safety, leave the mounting and wiring work if you connect the connector of the left speaker to which they correspond. on the ends of the unconnected...
Quick Start Guide
Page 23
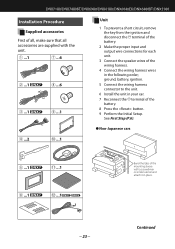
Continued 23 ground, battery, ignition. 5 Connect the wiring harness connector to the unit. 6 Install the unit in your car. 7 Reconnect the terminal of the battery. 8 Press the button. 9 Perform the Initial Setup. See First...ignition and disconnect the terminal of the battery. 2 Make the proper input and output wire connections for each unit. 3 Connect the speaker wires of the wiring harness. 4 Connect the wiring harness wires in the following order; DNX7180/DNX7480BT/DNX6980/DNX6180/DNX6040EX/DNX6480BT/DNX5180 Installation Procedure Supplied accessories First of all, make sure that ...
Continued 23 ground, battery, ignition. 5 Connect the wiring harness connector to the unit. 6 Install the unit in your car. 7 Reconnect the terminal of the battery. 8 Press the button. 9 Perform the Initial Setup. See First...ignition and disconnect the terminal of the battery. 2 Make the proper input and output wire connections for each unit. 3 Connect the speaker wires of the wiring harness. 4 Connect the wiring harness wires in the following order; DNX7180/DNX7480BT/DNX6980/DNX6180/DNX6040EX/DNX6480BT/DNX5180 Installation Procedure Supplied accessories First of all, make sure that ...


