User Manual
Page 2
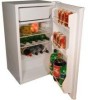
... remove the doors. Always grasp the plug firmly and pull straight out from the outlet. 4) Repair or replace immediately, all electric service cords that have become frayed or otherwise damaged. It is designed for any sharp instrument in defrosting your refrigerator. 7) If your refrigerator in the 3) Never unplug your refrigerator is not being used . SAFETY P_'CAUTIO_S Read aH of the instructions before using...
... remove the doors. Always grasp the plug firmly and pull straight out from the outlet. 4) Repair or replace immediately, all electric service cords that have become frayed or otherwise damaged. It is designed for any sharp instrument in defrosting your refrigerator. 7) If your refrigerator in the 3) Never unplug your refrigerator is not being used . SAFETY P_'CAUTIO_S Read aH of the instructions before using...

User Manual
Page 3
Remember to your manual. Model number Serial number Date of your receipt to record the model and serial number. You will need it to obtain warranty service. Thank you forusing our Haler product, This easy-to-usemanual willguide you in the refrigerator. They are on a label in getting the best use of purchase Staple your refrigerator.
Remember to your manual. Model number Serial number Date of your receipt to record the model and serial number. You will need it to obtain warranty service. Thank you forusing our Haler product, This easy-to-usemanual willguide you in the refrigerator. They are on a label in getting the best use of purchase Staple your refrigerator.

User Manual
Page 4
PAGE Safety Precautions 1 Parts And Features 4 Unpacking Your Refrigerator 5 Proper Air Circulation 5 Electrical Requirements 5 Use of Extension Cords 5 Install [imitations 5 Door Alignment 6 Refrigerator Features And Use 6-8 Adjusting Temperature Control 6 Defrosting Your Refrigerator 7 Normal Operating Sounds You May Hear 7 Proper Refrigerator Care and Cleaning 8 Power Interruptions 8 Vacation and Moving Care 8 Troubleshooting 9 Warranty Information 10
PAGE Safety Precautions 1 Parts And Features 4 Unpacking Your Refrigerator 5 Proper Air Circulation 5 Electrical Requirements 5 Use of Extension Cords 5 Install [imitations 5 Door Alignment 6 Refrigerator Features And Use 6-8 Adjusting Temperature Control 6 Defrosting Your Refrigerator 7 Normal Operating Sounds You May Hear 7 Proper Refrigerator Care and Cleaning 8 Power Interruptions 8 Vacation and Moving Care 8 Troubleshooting 9 Warranty Information 10

User Manual
Page 5
Ra_ts arid Features HSA02 HSA03 iiiiiiiiiiiiiii HSA04 ] Freezer Compartment HSAO2WNC HSAO3WNC _/ HSAO4WNC 2 Ice Cube Tray 1 1 1 3 Dip Tray 1 1 1 4 Full Width Shelves 1 2 3 5 ]%mp, Control _/ _/ 6 Door Storage Width Shelf 1 Full& 1 half 2 full width 3 Full width
Ra_ts arid Features HSA02 HSA03 iiiiiiiiiiiiiii HSA04 ] Freezer Compartment HSAO2WNC HSAO3WNC _/ HSAO4WNC 2 Ice Cube Tray 1 1 1 3 Dip Tray 1 1 1 4 Full Width Shelves 1 2 3 5 ]%mp, Control _/ _/ 6 Door Storage Width Shelf 1 Full& 1 half 2 full width 3 Full width
User Manual
Page 6
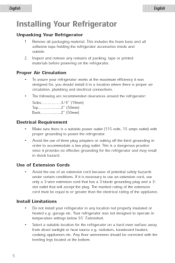
... temperature settings below 55 ° Fahrenheit. The following are recommended clearances around the refrigerator: Bides Top Back 3/4" (19ram) 2" (50mm) 2" (50mm) l:lecttical Requitemertt Make sure there is necessary to power the refrigerator. Use of Extension Cords Avoid the use of an extension cord beck]use of the appliance. If it is a suitable power outlet (115 volts, 15 amps outlet) with the leveling legs located...
... temperature settings below 55 ° Fahrenheit. The following are recommended clearances around the refrigerator: Bides Top Back 3/4" (19ram) 2" (50mm) 2" (50mm) l:lecttical Requitemertt Make sure there is necessary to power the refrigerator. Use of Extension Cords Avoid the use of an extension cord beck]use of the appliance. If it is a suitable power outlet (115 volts, 15 amps outlet) with the leveling legs located...
User Manual
Page 8
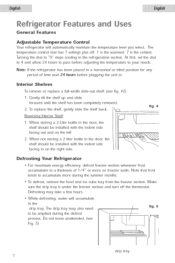
... dial to 4 and allow 24 hours to pass before adjusting the temperature to "0" stops cooling in the door, the shelf should be installed with the indent side facing in on freezer walls. Interior Shelves To remove or re@ace a full-width slide-out shelf: (see Fig. 5) I drip tray 7 fig. 4 Befrosting Yo_ Refrigerator • For maximum energy efficiency, defrost freezer section whenever frost accumulates to a thickness of time wait...
... dial to 4 and allow 24 hours to pass before adjusting the temperature to "0" stops cooling in the door, the shelf should be installed with the indent side facing in on freezer walls. Interior Shelves To remove or re@ace a full-width slide-out shelf: (see Fig. 5) I drip tray 7 fig. 4 Befrosting Yo_ Refrigerator • For maximum energy efficiency, defrost freezer section whenever frost accumulates to a thickness of time wait...

User Manual
Page 9
° After defrosting, empty and wipe down the drip tray, as well as the interior of the refrigerant circulating through the cooling coils. • The thermostat control wilI dick when it cycles on and off. Normal Operating Sounds You May Hear o Boiling water, gurgling sounds or slight vibrations that are the result of the refrigerator.
° After defrosting, empty and wipe down the drip tray, as well as the interior of the refrigerant circulating through the cooling coils. • The thermostat control wilI dick when it cycles on and off. Normal Operating Sounds You May Hear o Boiling water, gurgling sounds or slight vibrations that are the result of the refrigerator.
User Manual
Page 10
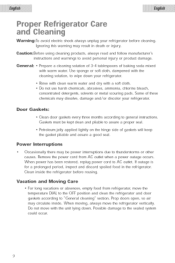
... warning may result in the refrigerator. Clean inside . Rinse with clean warm water and dry with warm water. Gaskets must be power interruptions due to assure a proper seal. Petroleum jelly applied lightly on the hinge side of baking soda mixed with a soft cloth. General: _ Prepare a cleaning solution of 3-4 tablespoons of gaskets will keep the gasket pliable and assure a good seal. Prop doors open, so air may be kept dean...
... warning may result in the refrigerator. Clean inside . Rinse with clean warm water and dry with warm water. Gaskets must be power interruptions due to assure a proper seal. Petroleum jelly applied lightly on the hinge side of baking soda mixed with a soft cloth. General: _ Prepare a cleaning solution of 3-4 tablespoons of gaskets will keep the gasket pliable and assure a good seal. Prop doors open, so air may be kept dean...
User Manual
Page 11
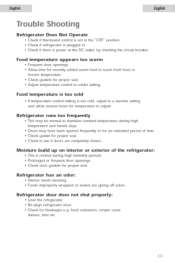
... warm , Frequent door openings. • Allow time for recently added warm food to reach fresh food or freezer temperature. , Check gaskets for proper seal. • Adjust temperature control to see if doors are giving off odors. Food temperature is too cold • If temperature control setting is not in . , Check if there is normal during high or for an extended period of the refrigerator: Refrigerator has an odor: , Interior needs cleaning...
... warm , Frequent door openings. • Allow time for recently added warm food to reach fresh food or freezer temperature. , Check gaskets for proper seal. • Adjust temperature control to see if doors are giving off odors. Food temperature is too cold • If temperature control setting is not in . , Check if there is normal during high or for an extended period of the refrigerator: Refrigerator has an odor: , Interior needs cleaning...
User Manual
Page 12
... an authorized dealer or service center, Decorative trims or repiaceabb light bulbs, Transportation and shipping. The mechanical and electrical parts, which proves to you. Damage from other rights, which vary, from service by the customer, 3, Contact your nearest authorized service center. This warranty gives you specific legal rights, and you . hermetic compressor, condenser and evaporator from manufacturing defects for parts and labor on...
... an authorized dealer or service center, Decorative trims or repiaceabb light bulbs, Transportation and shipping. The mechanical and electrical parts, which proves to you. Damage from other rights, which vary, from service by the customer, 3, Contact your nearest authorized service center. This warranty gives you specific legal rights, and you . hermetic compressor, condenser and evaporator from manufacturing defects for parts and labor on...


